
Glass Plate Flowers – Upcycling Dishes to Make Glass Garden Art!
This post may contain affiliate links and I may be compensated for this post. Please read our disclosure policy here.

How to Make Glass Plate Flowers
If you are looking for some ideas on beautiful glass garden art, these glass plate flowers are some of my favorites. If you love to garden and add art pieces as accents to your garden, you are going to love these glass flowers, made from recycled materials. They are the perfect upcycle project for the summer time, and make beautiful gifts for others too. They also make wonderful gifts and be really affordable or kind of pricey, depending on the glass you use for your flower.
This is the perfect time of the year to start collecting pieces to make these glass flowers too, since garage and estate sales are prevalent this time of the year. Spend a weekend shopping for used dishes, bowls, and more that you love. Look for shapes and colors that will blend well, and nest inside each other.
We will show you how you can make your own here, but if you prefer to buy them already made, Etsy has quite a few options here.

My mom started making these years ago, when very few people where, and we have been making these together now for years (my mom is the real genious behind these, my kids and I get to just have fun with her). We have made hundreds of them over the years. They have become much more popular than when we started, so we have found glass plates and bowls are getting harder to find for great prices, but the deals are still out there if you search. For many years we sold our flowers at local weekend markets, and have been featured in various local magazines and media, as well as a feature in the Flea Market Outdoors national magazine.
They can be pricey to buy (anywhere from around $50 to $200 usually), but we will show you here how you can make them yourself for a fraction of that price. When we make them we do mount ours to a metal stand and often will weld on metal flowers. While that is not something everyone can do, we share lots of tips here for different versions of the flowers that just about anyone should be able to make.

How Do You Make Glass Plate Flowers?
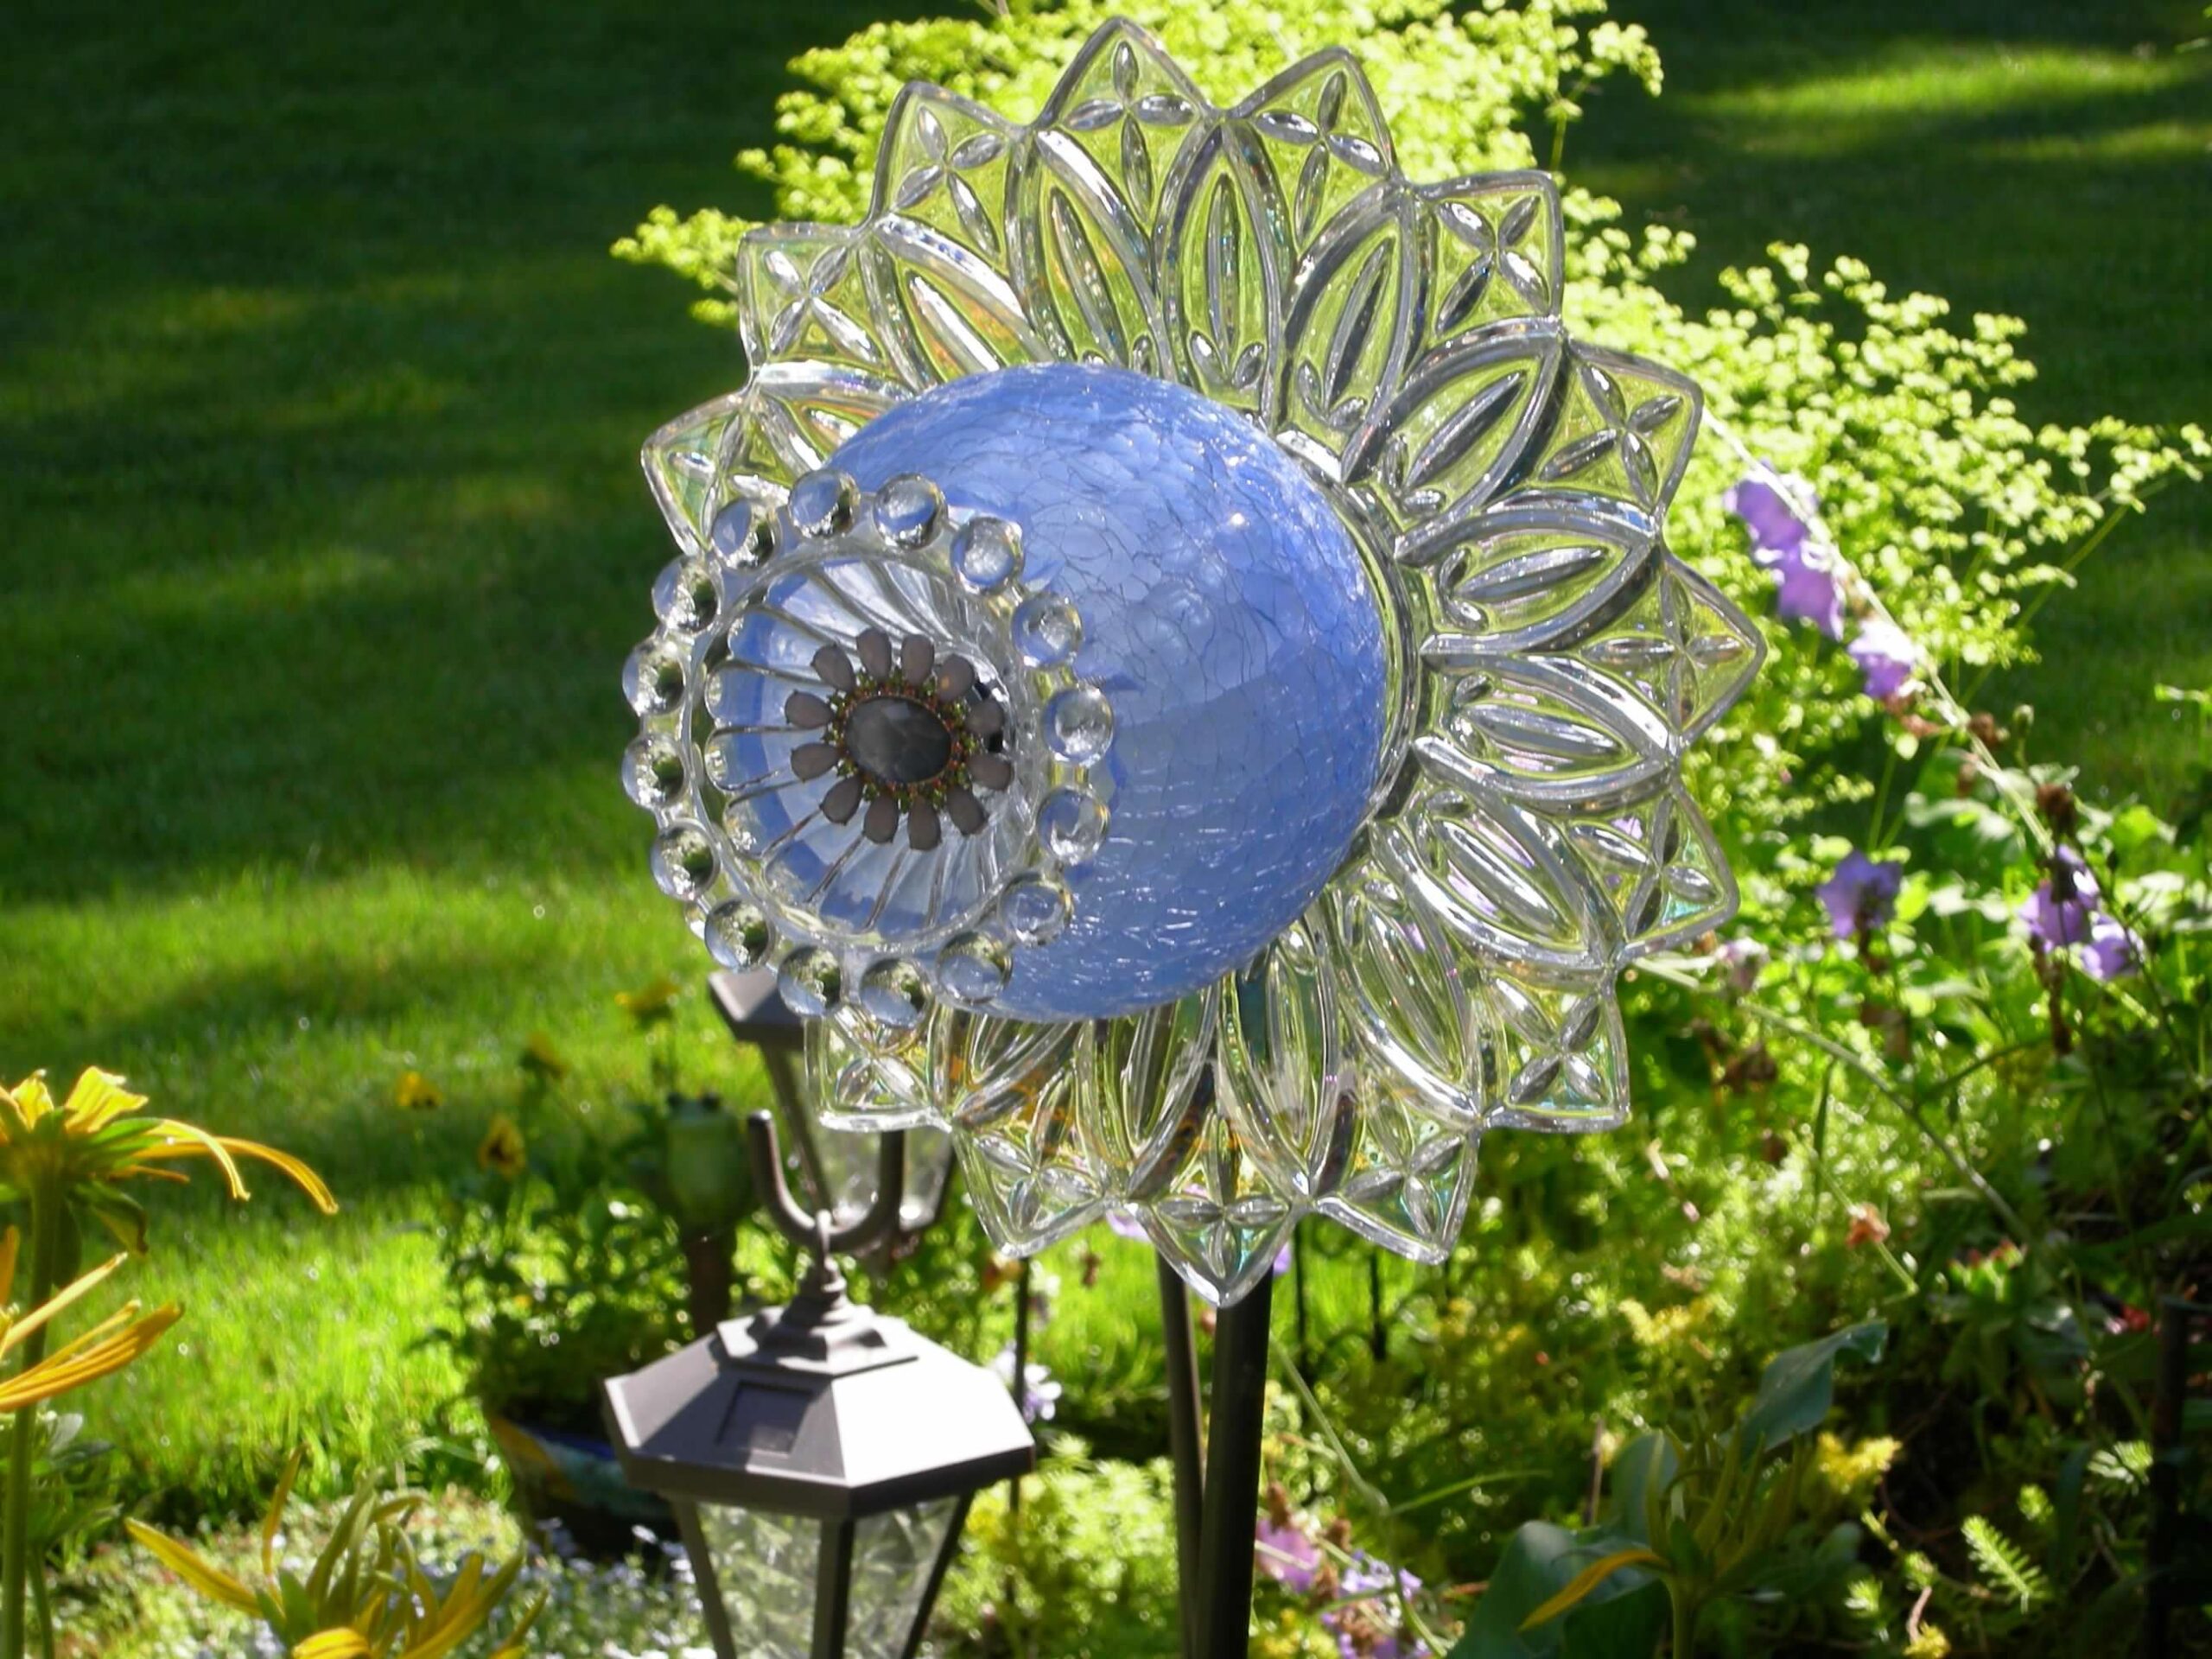
When my flowers are growing but not blooming yet, I love the color and beauty that glass flowers made from recycled dishes, bring to my garden to brighten it up during all seasons. As a result spring is my favorite time of the year to make them, but I like to collect glass year round.
The flowers are all made from recycled glass. They are dishes, bowls, ash trays, chargers and plates that are mostly found at local garage sales and thrift stores. We simply look for pieces that we thing will make a beautiful floral look. Vases can be used if you want a more three dimensional look.
In order to make glass flowers from plates, it requires some great glass dishware. So lets start with how to find the best pieces for these glass garden art pieces.

Tips for shopping for dishes to make Glass Garden Flowers:
Before we shar the steps on how you can make the glass plate flowers for your garden, here are some tips to use while shopping for the glass!
- Start by searching your own cupboards to see what dishes you might already have on hand. It could be a great way to display that special dish you have been holding onto from your great grandma for instance.
- Other great sources for dishes are:
- thrift shops (check out our guide to thrifting in the Puget Sound area here). The Goodwill also holds online auctions that you can keep an eye on for great glass pieces.
- garage sales
- You can even check your local Dollar store for pieces.
- and neighbors and family members (let them know to drop their unwanted dishes off with you.

- Think beyond just your standard dishes. For example large bowls or chargers make great larger flowers. Old glass ash trays make nice centerpieces for the flower s, and bowls and small vases will make a nice funnel looking flower.
- One thing to keep in mind is to think of the big picture. Each of these pieces on their own might be considered a bit tacky, but when you start putting them together they create magic. Think about dimensions, ie things that fit inside each other, and look for pieces that have a more traditional flower look to them. You can use bowls, ashtrays and small vases if you want a more dimensional piece.

- You can use any kind of dishes, but a personal preference for me is to use translucent pieces. They just look so beautiful when the sunlight shines through them.
- If you have storage space, stack all of your plates you are collecting on a shelf. It makes it so fun to mix and match and design flowers that way (and my kids love to get involved and get creative too)!

Another personal favorite of mine, is to look for milk glass. It can be harder to find (and then sometimes more expensive, as some people collect it), but I think milk glass makes gorgeous glass yard art.
Steps Assemble Your Glass Plate Flowers:
Once you have your glass picked out, here are the next steps to make your glass flowers out of the dishes.
There are two methods here, drilling and glueing. Drilling is ideal for outdoors, but if you do not have these tools you can glue them together. We share the steps for making glass flowers by glueing them together, down in the Glass Flowers as Gifts section.
To make the flowers by drilling together and attaching with a nut and bolt system:
- We start by playing around with all of the glass, nesting one piece into the next until we find a look we like.
- Once you have the flower arranged and ready to make you will need to carefully drill through the center of each piece, one at a time.
- Since you are drilling glass you will need to use a diamond bit for this process (and wear protective glasses). You will want to use a diamond drill bit just slightly larger than the bolt you have to put your flower together.
- If you have never used a diamond drill bit to drill glass, you will want to familiarize yourself with the steps to how this works (you can google instructions on that, or here is a guide here to reference).
- The pieces are then held together with a basic nut and bolt system.
- You can make their own iron stems (that is what we do), but that does require special tools, so another option is to use a PVC drop elbow and a piece of copper pipe for the stem (or you could use PVC pipe to save money).
- Make sure that whatever pipe you use it will fit in the PVC drop elbow piece nicely.
- Start by glueing the PVC drop elbow piece to the back of the flower, this will act as your mount for your pipe stem. We discuss what kind of glue to use below, but a silicone, e6000 or good epoxy glue are good options.
- Let it dry overnight.
- Next stake your piece of piping into the ground, as your stem (you can either buy it the length you want to get your flower to the height you want, or get a pipe cutter for that). Make sure it is staked far enough into the ground that it can hold the weight of the flower.
- Then attach your flower to your pipe stem.

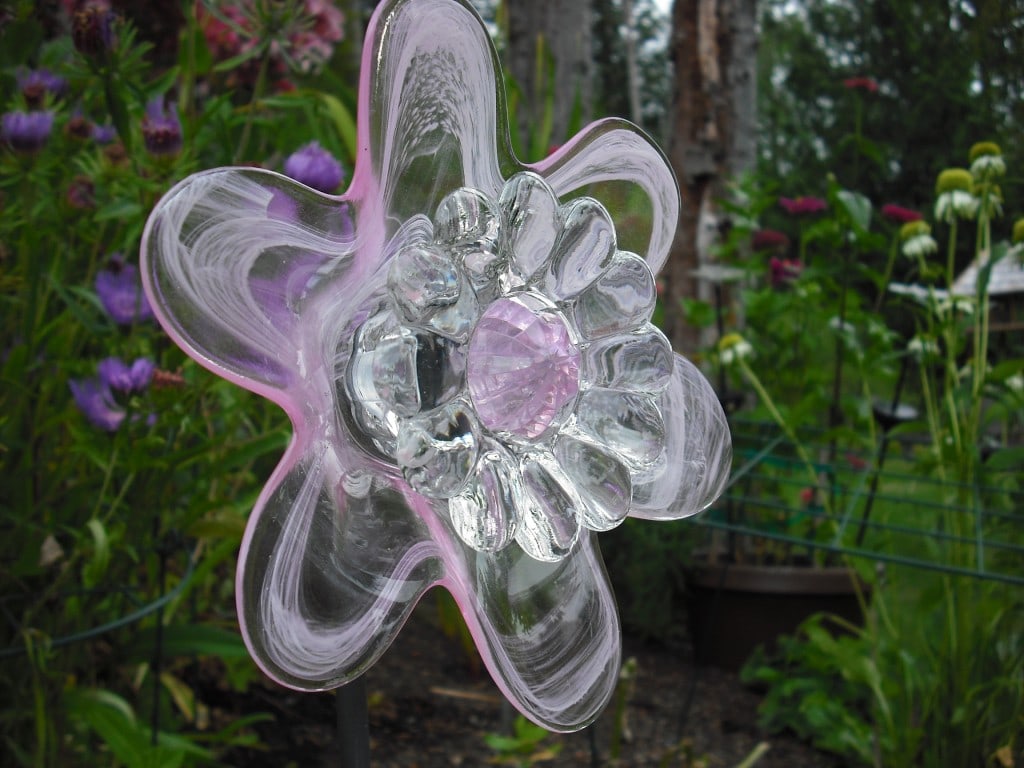
How To Make Small Glass Flowers:
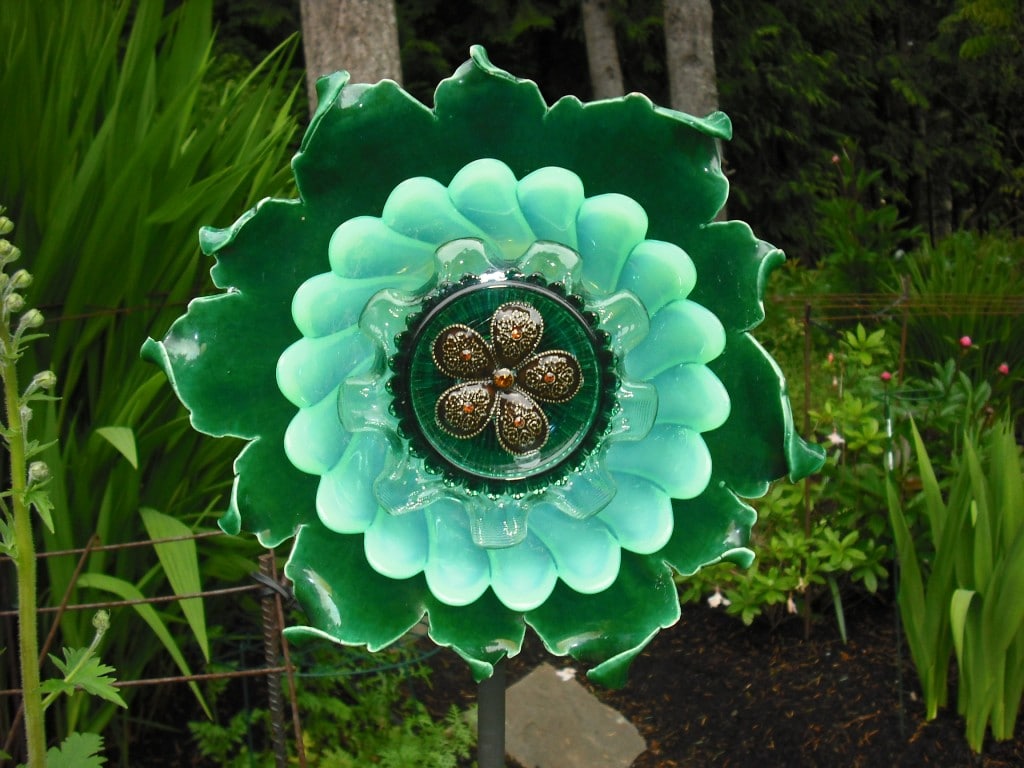
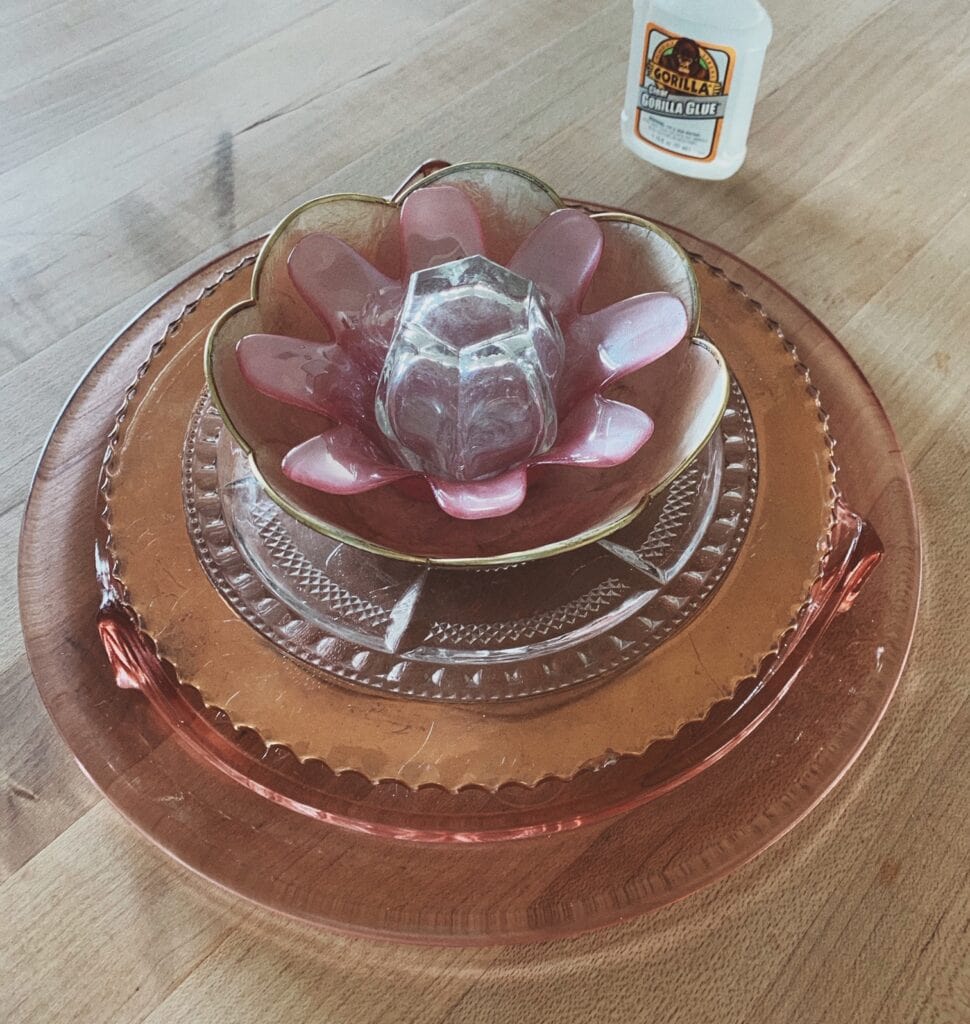
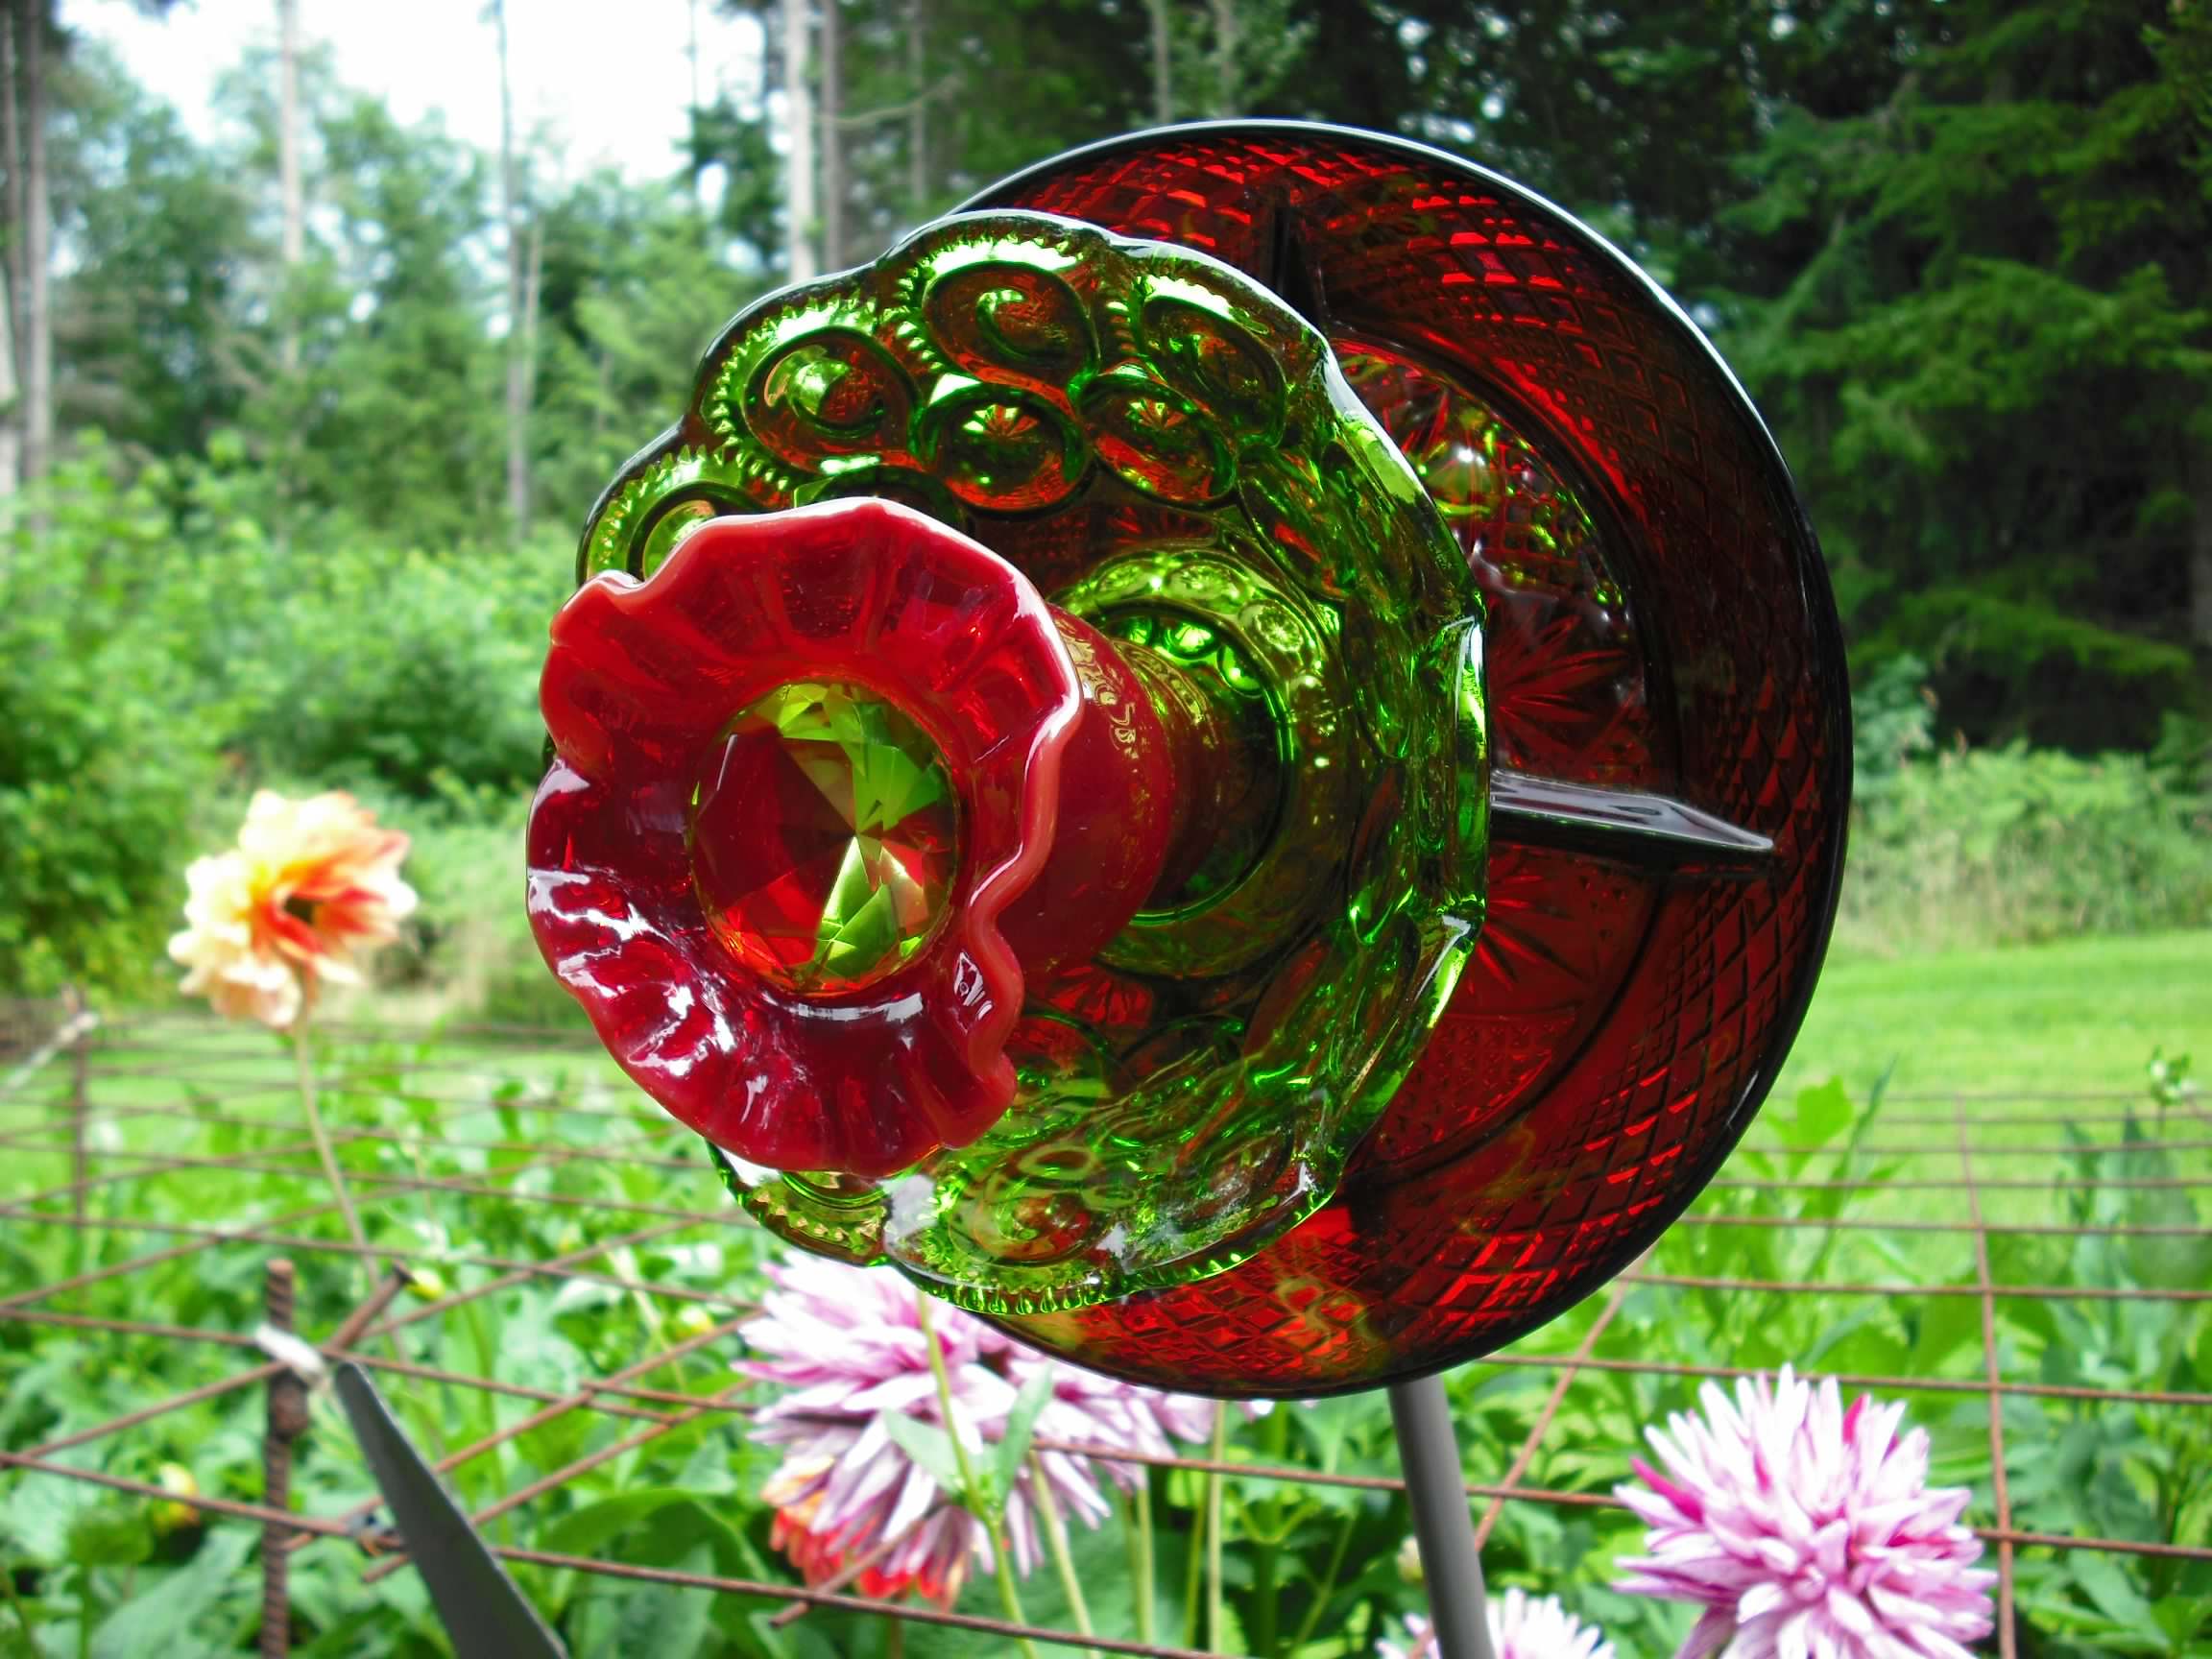
You will notice in many of the pictures that we have made glass flowers of quite a few different sizes. The small glass flowers are the easiest and most affordable to make, and so are a great option to get started. To make small glass flowers, simply use smaller plates. So start with a salad side plate, or dessert plate. Or maybe an old glass ashtray you found or bowl (like the one shown above), and build from there. All of the rest of the steps will be the same.
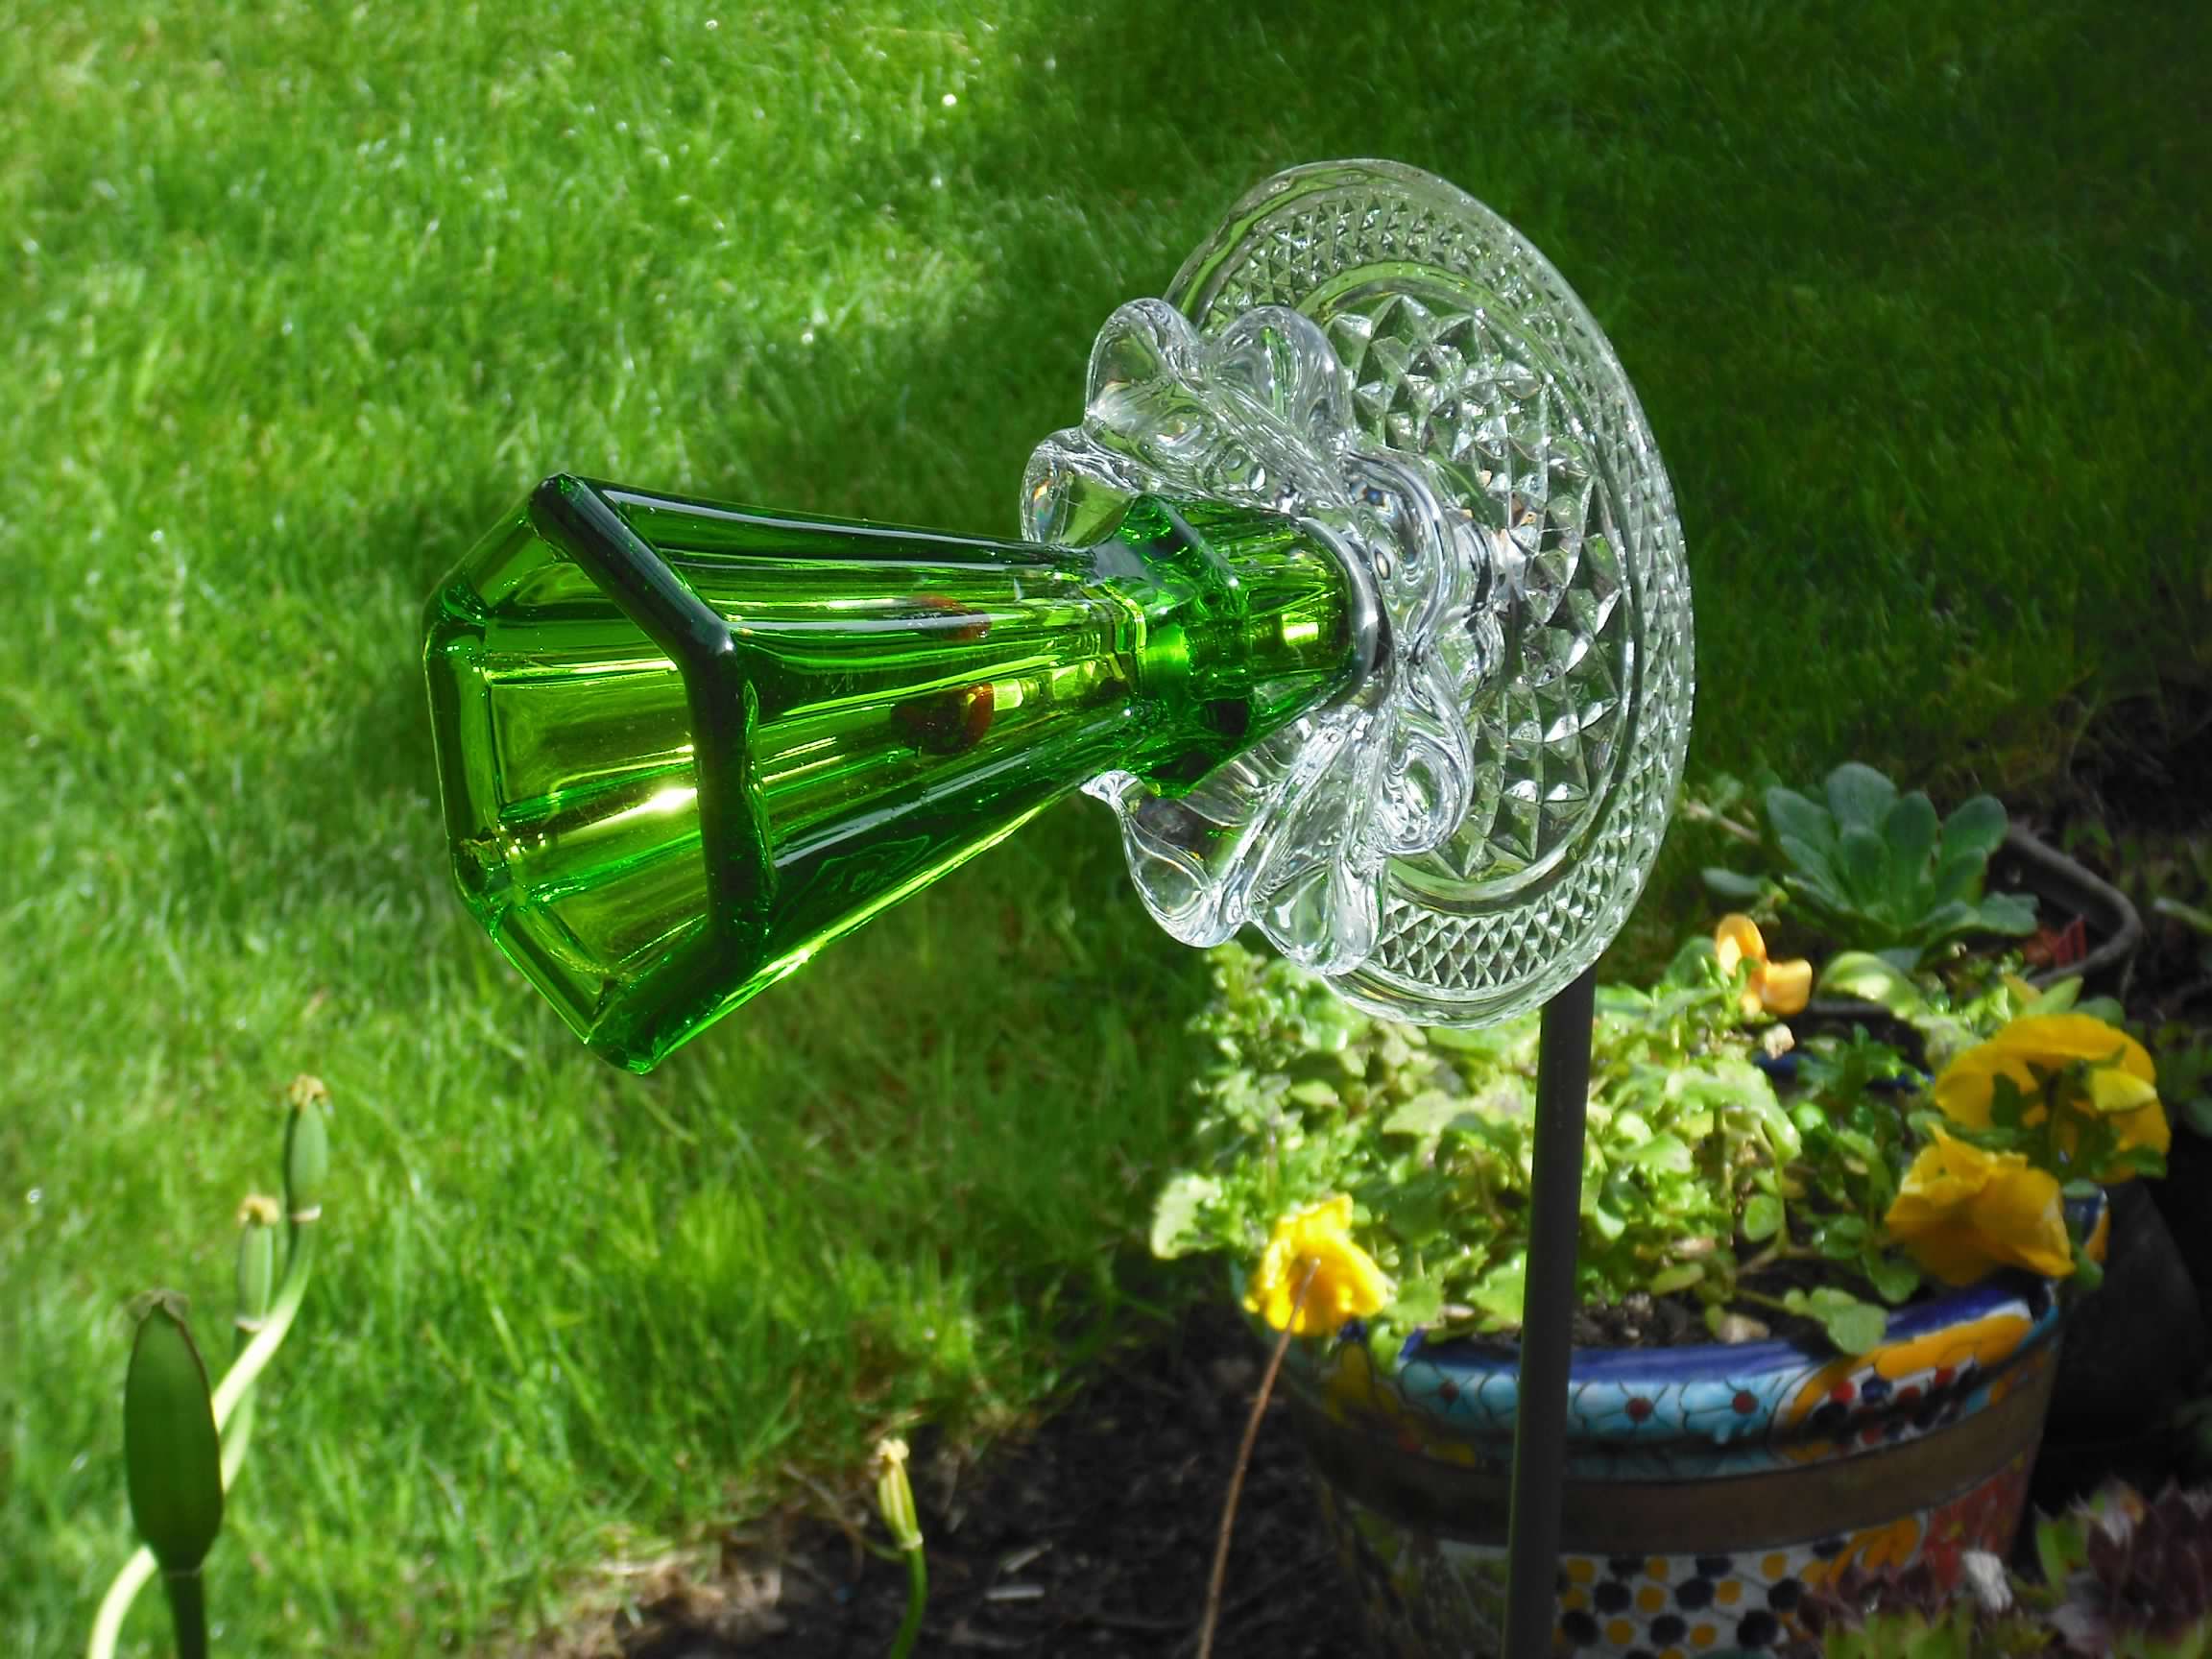
One tip for small glass flowers, is to use more ornate pieces and colors so they really pop. This trumpet style flower is a good example of how to make a small glass plate flower, but have it really be a big show piece.
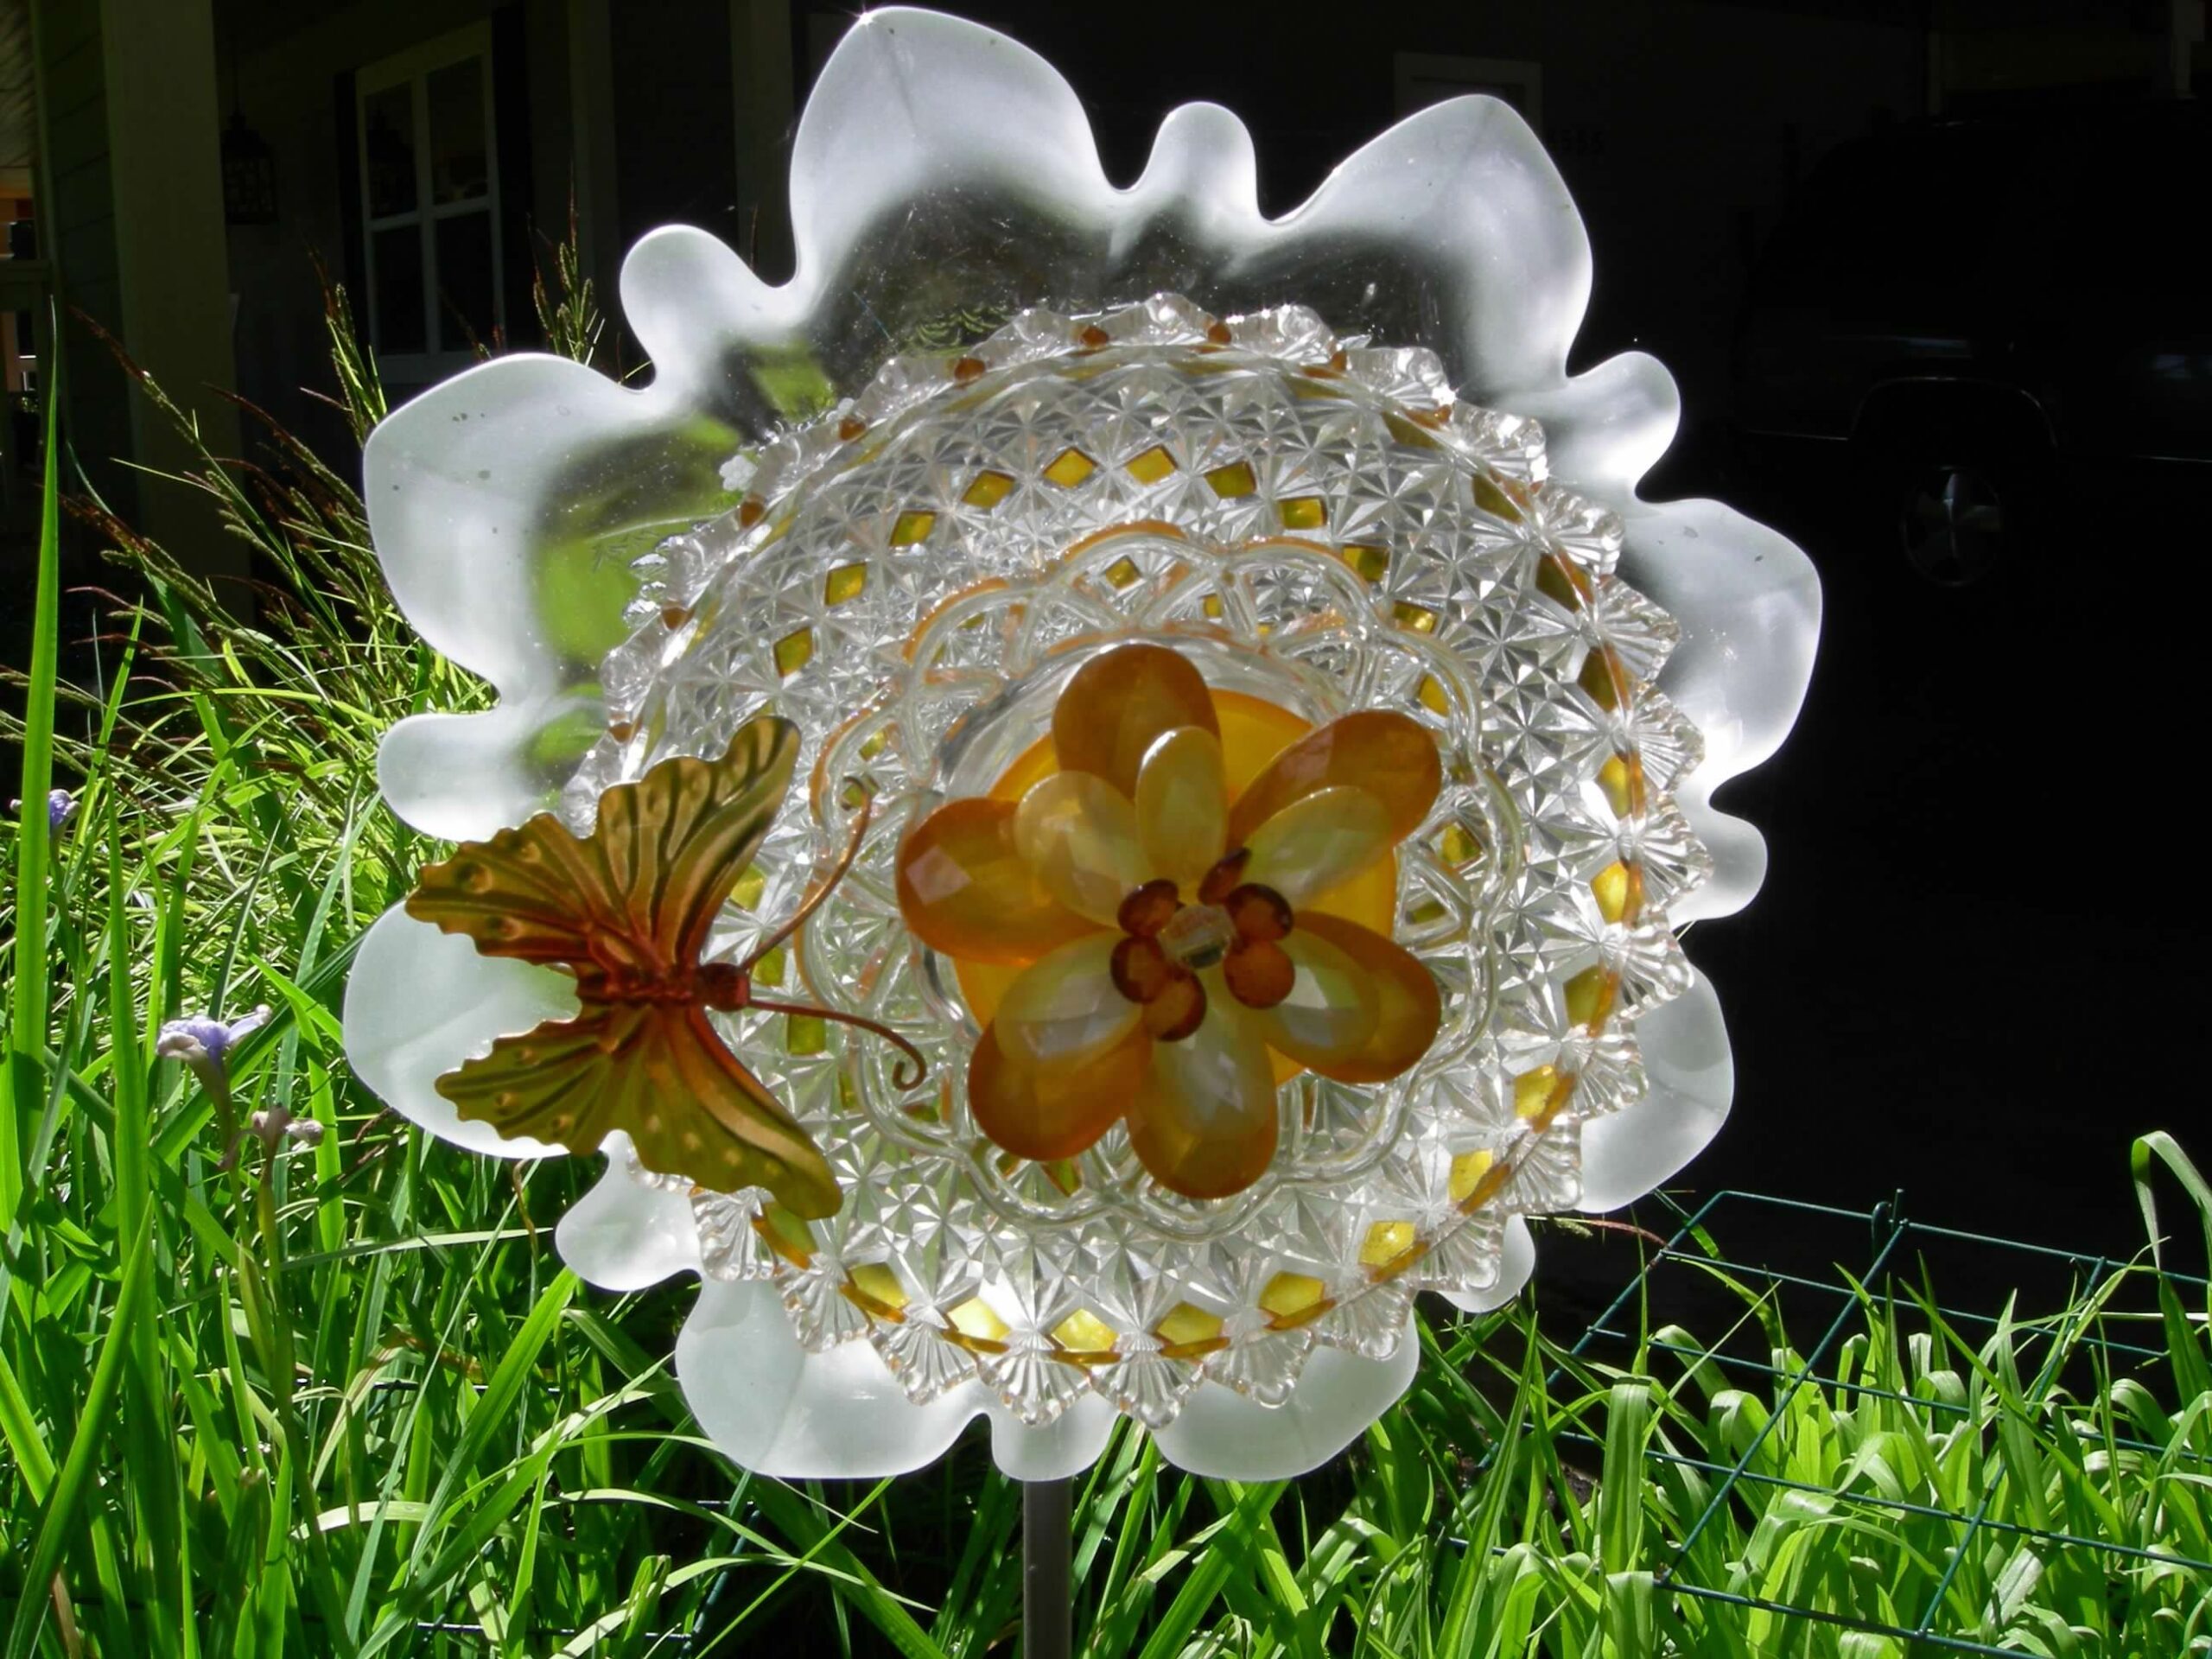
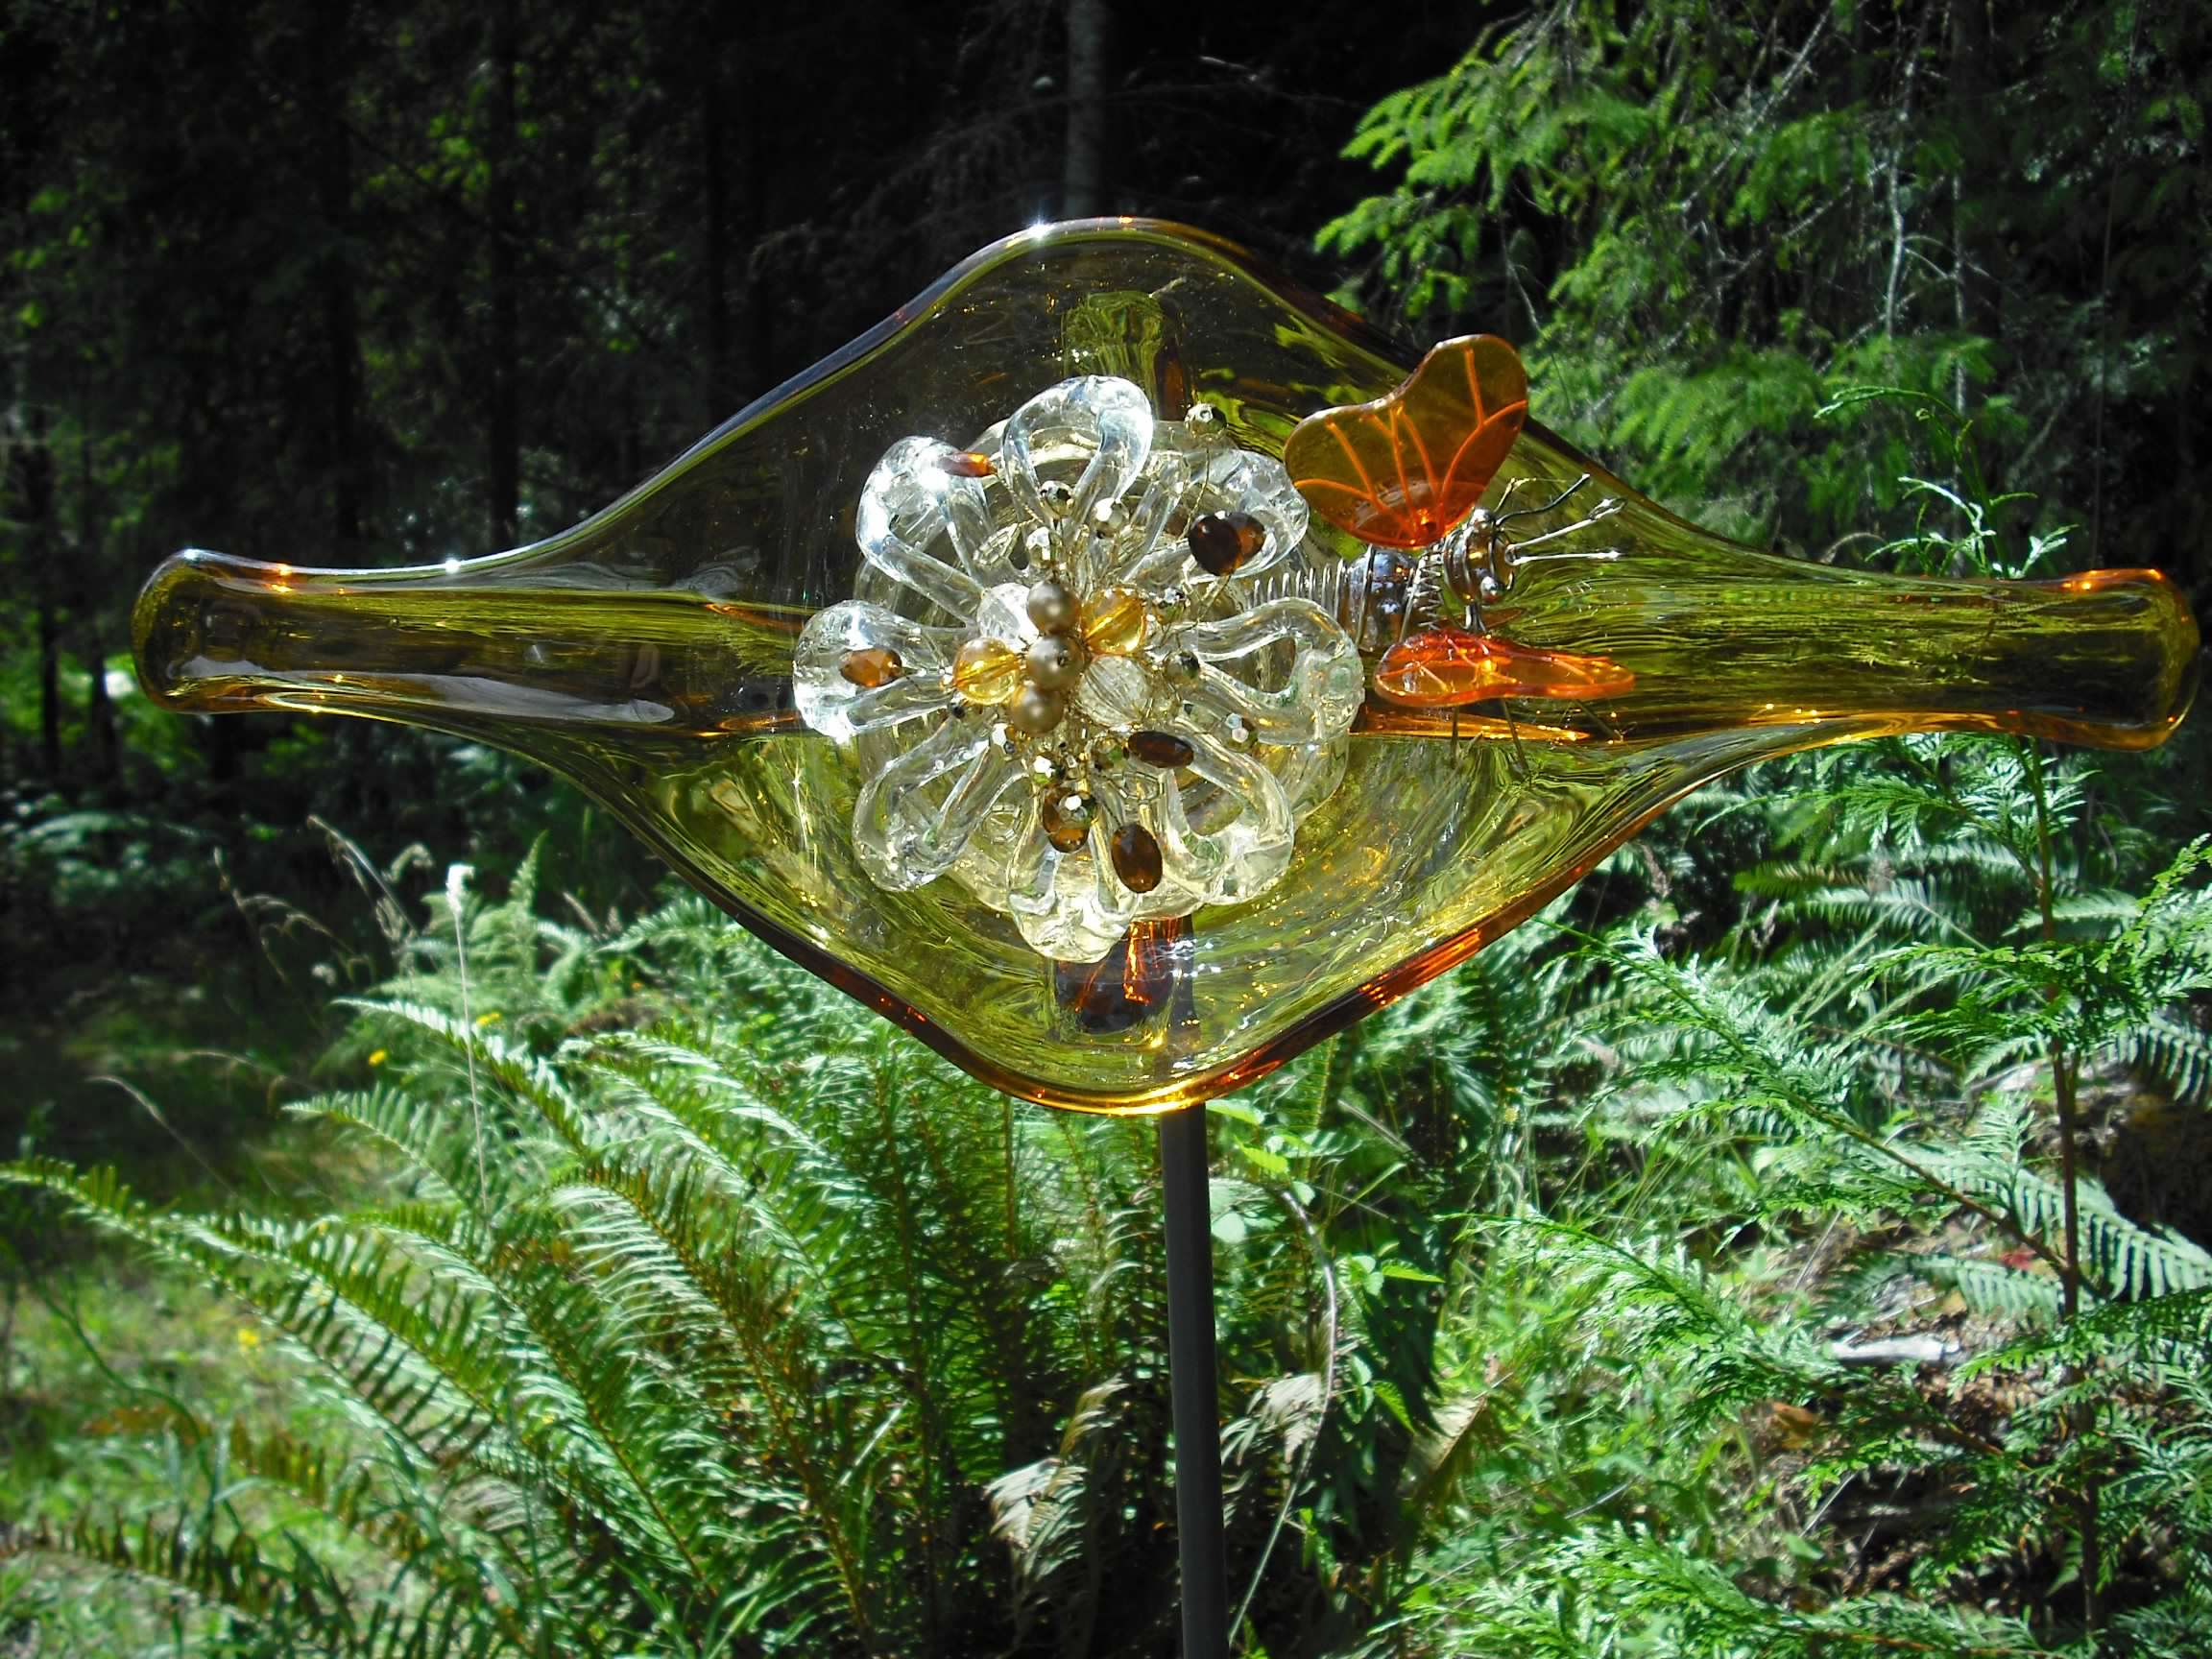
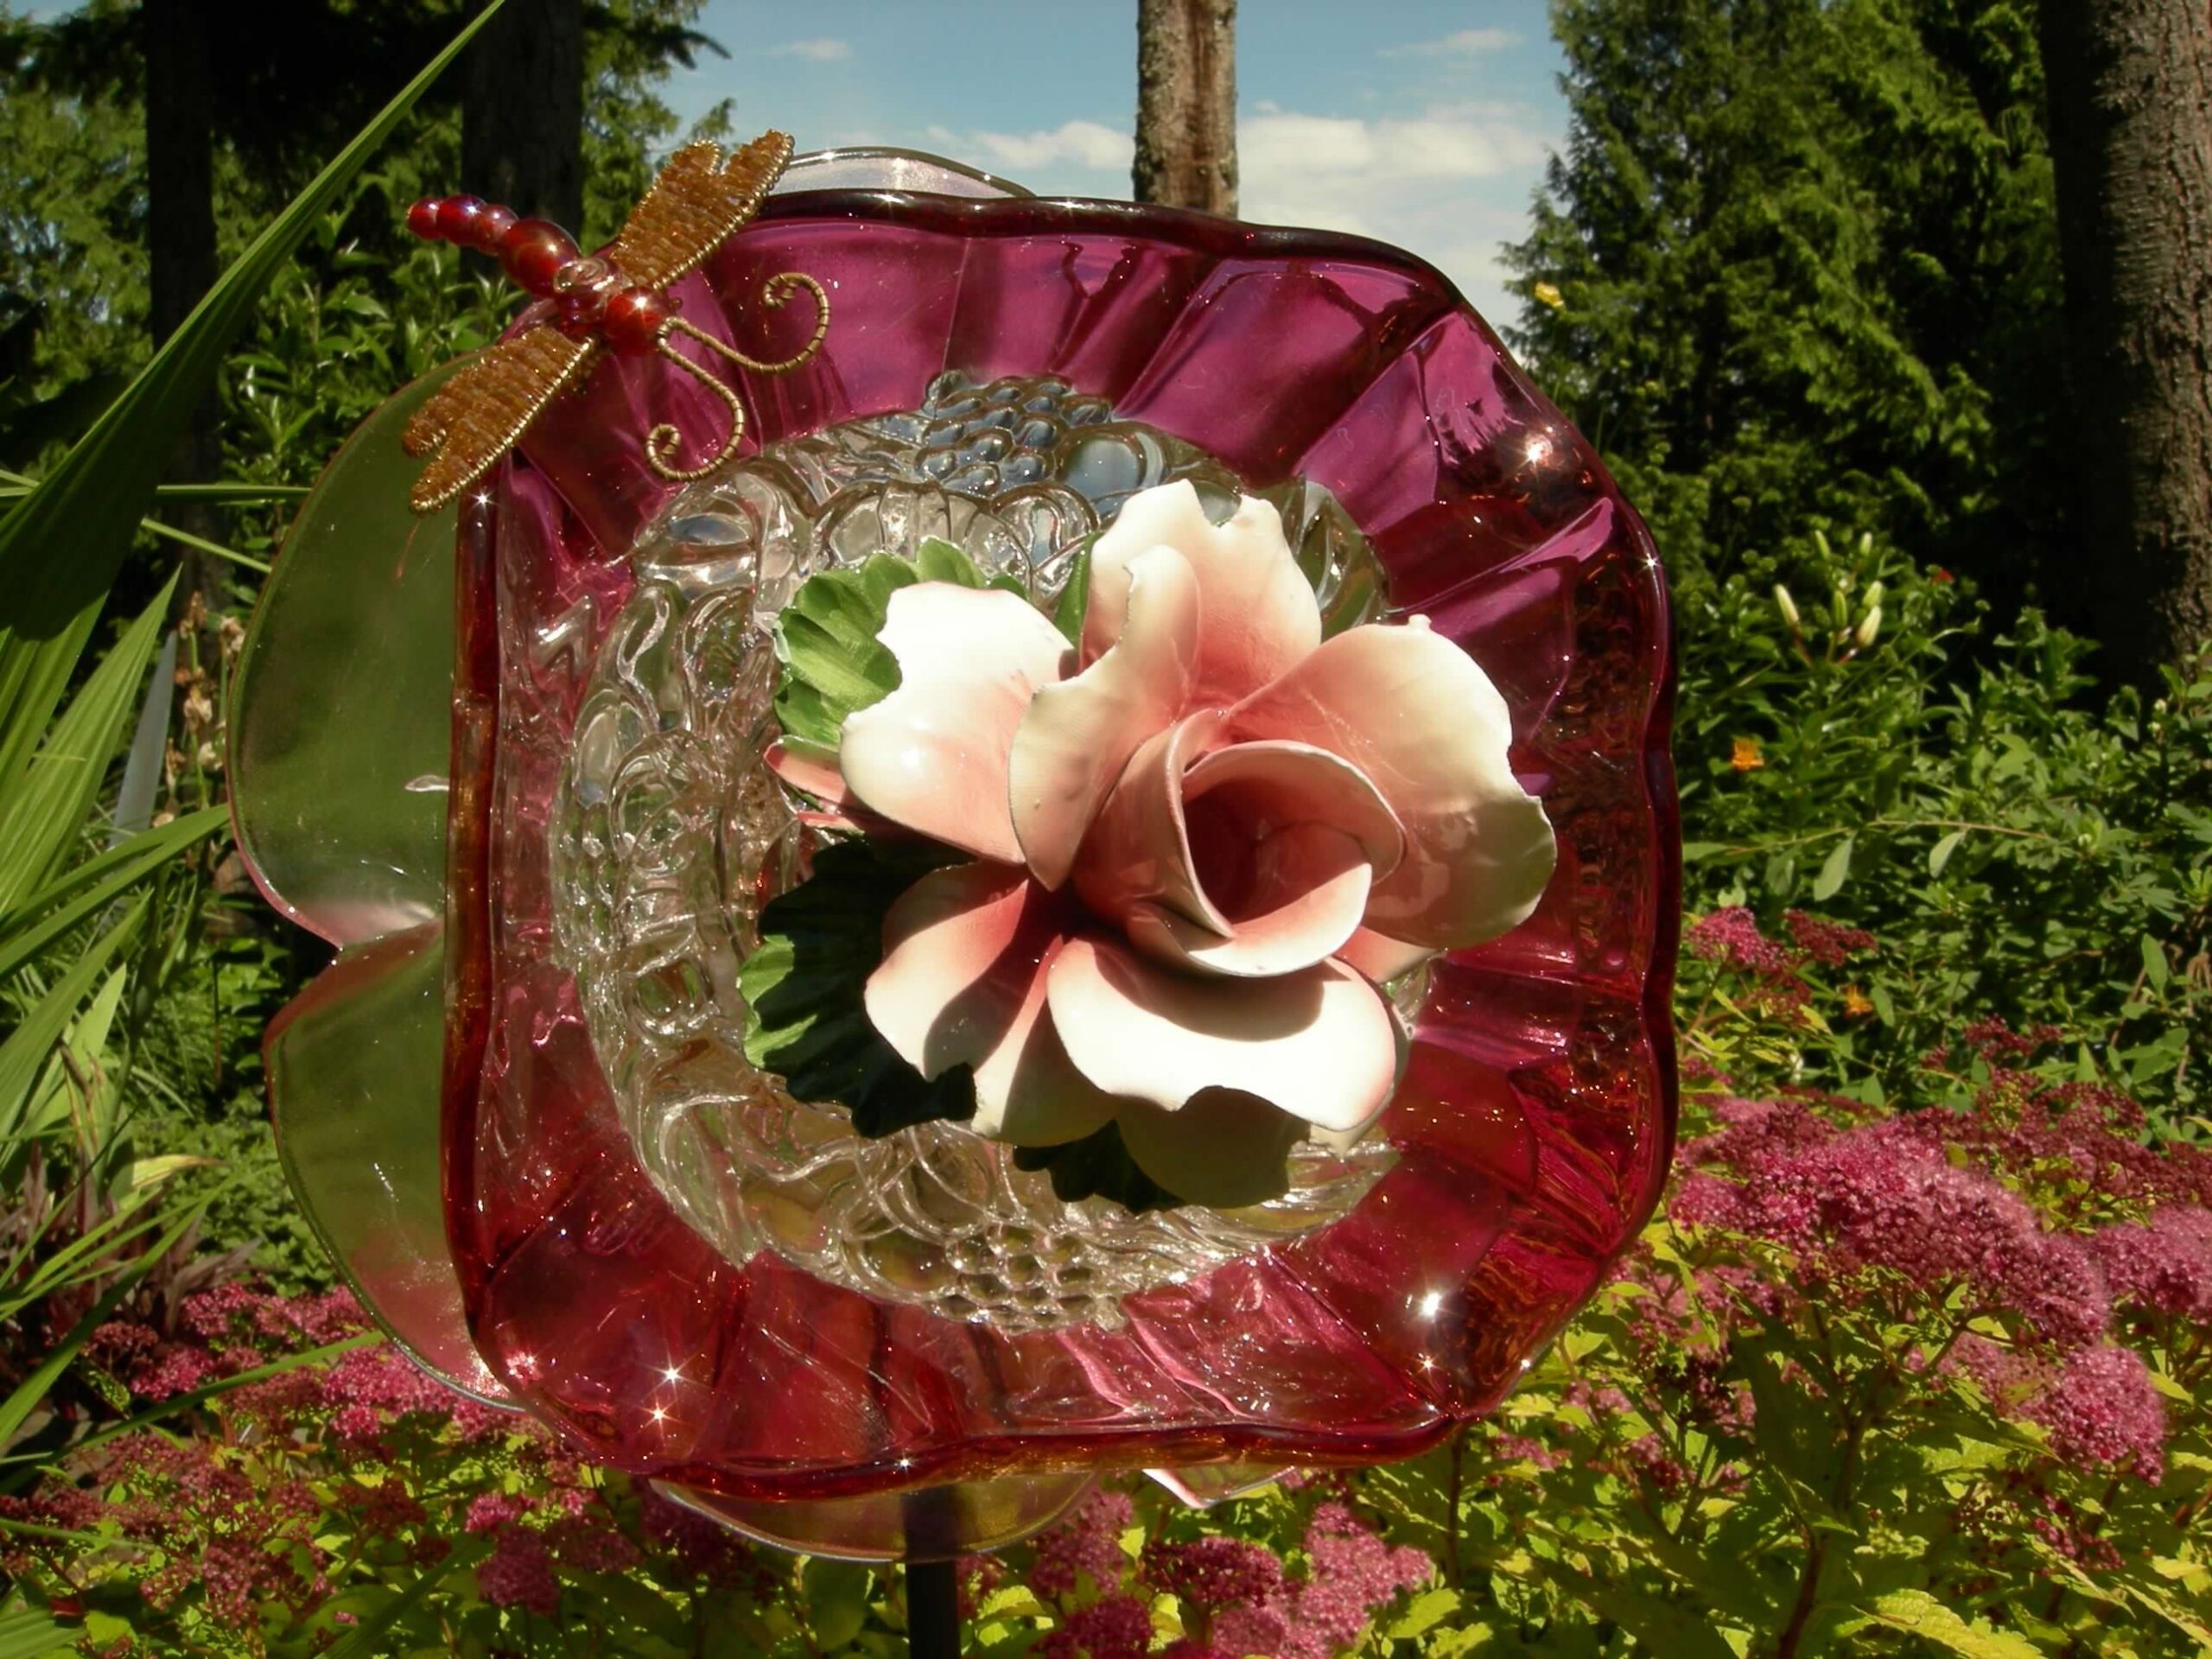
Embellish your glass flowers further by gluing butterfly’s, lady bugs, dragon flies, bead flowers, or whatever other creatures you can find to the side of your plate for extra drama. These are fun pops that will really personalize your pieces.
Making Glass Plate Flower for Gifts:
While you can use any plates to make the gift flowers, one special idea is to see if the recipient has any special dishes they want you to incorporate.
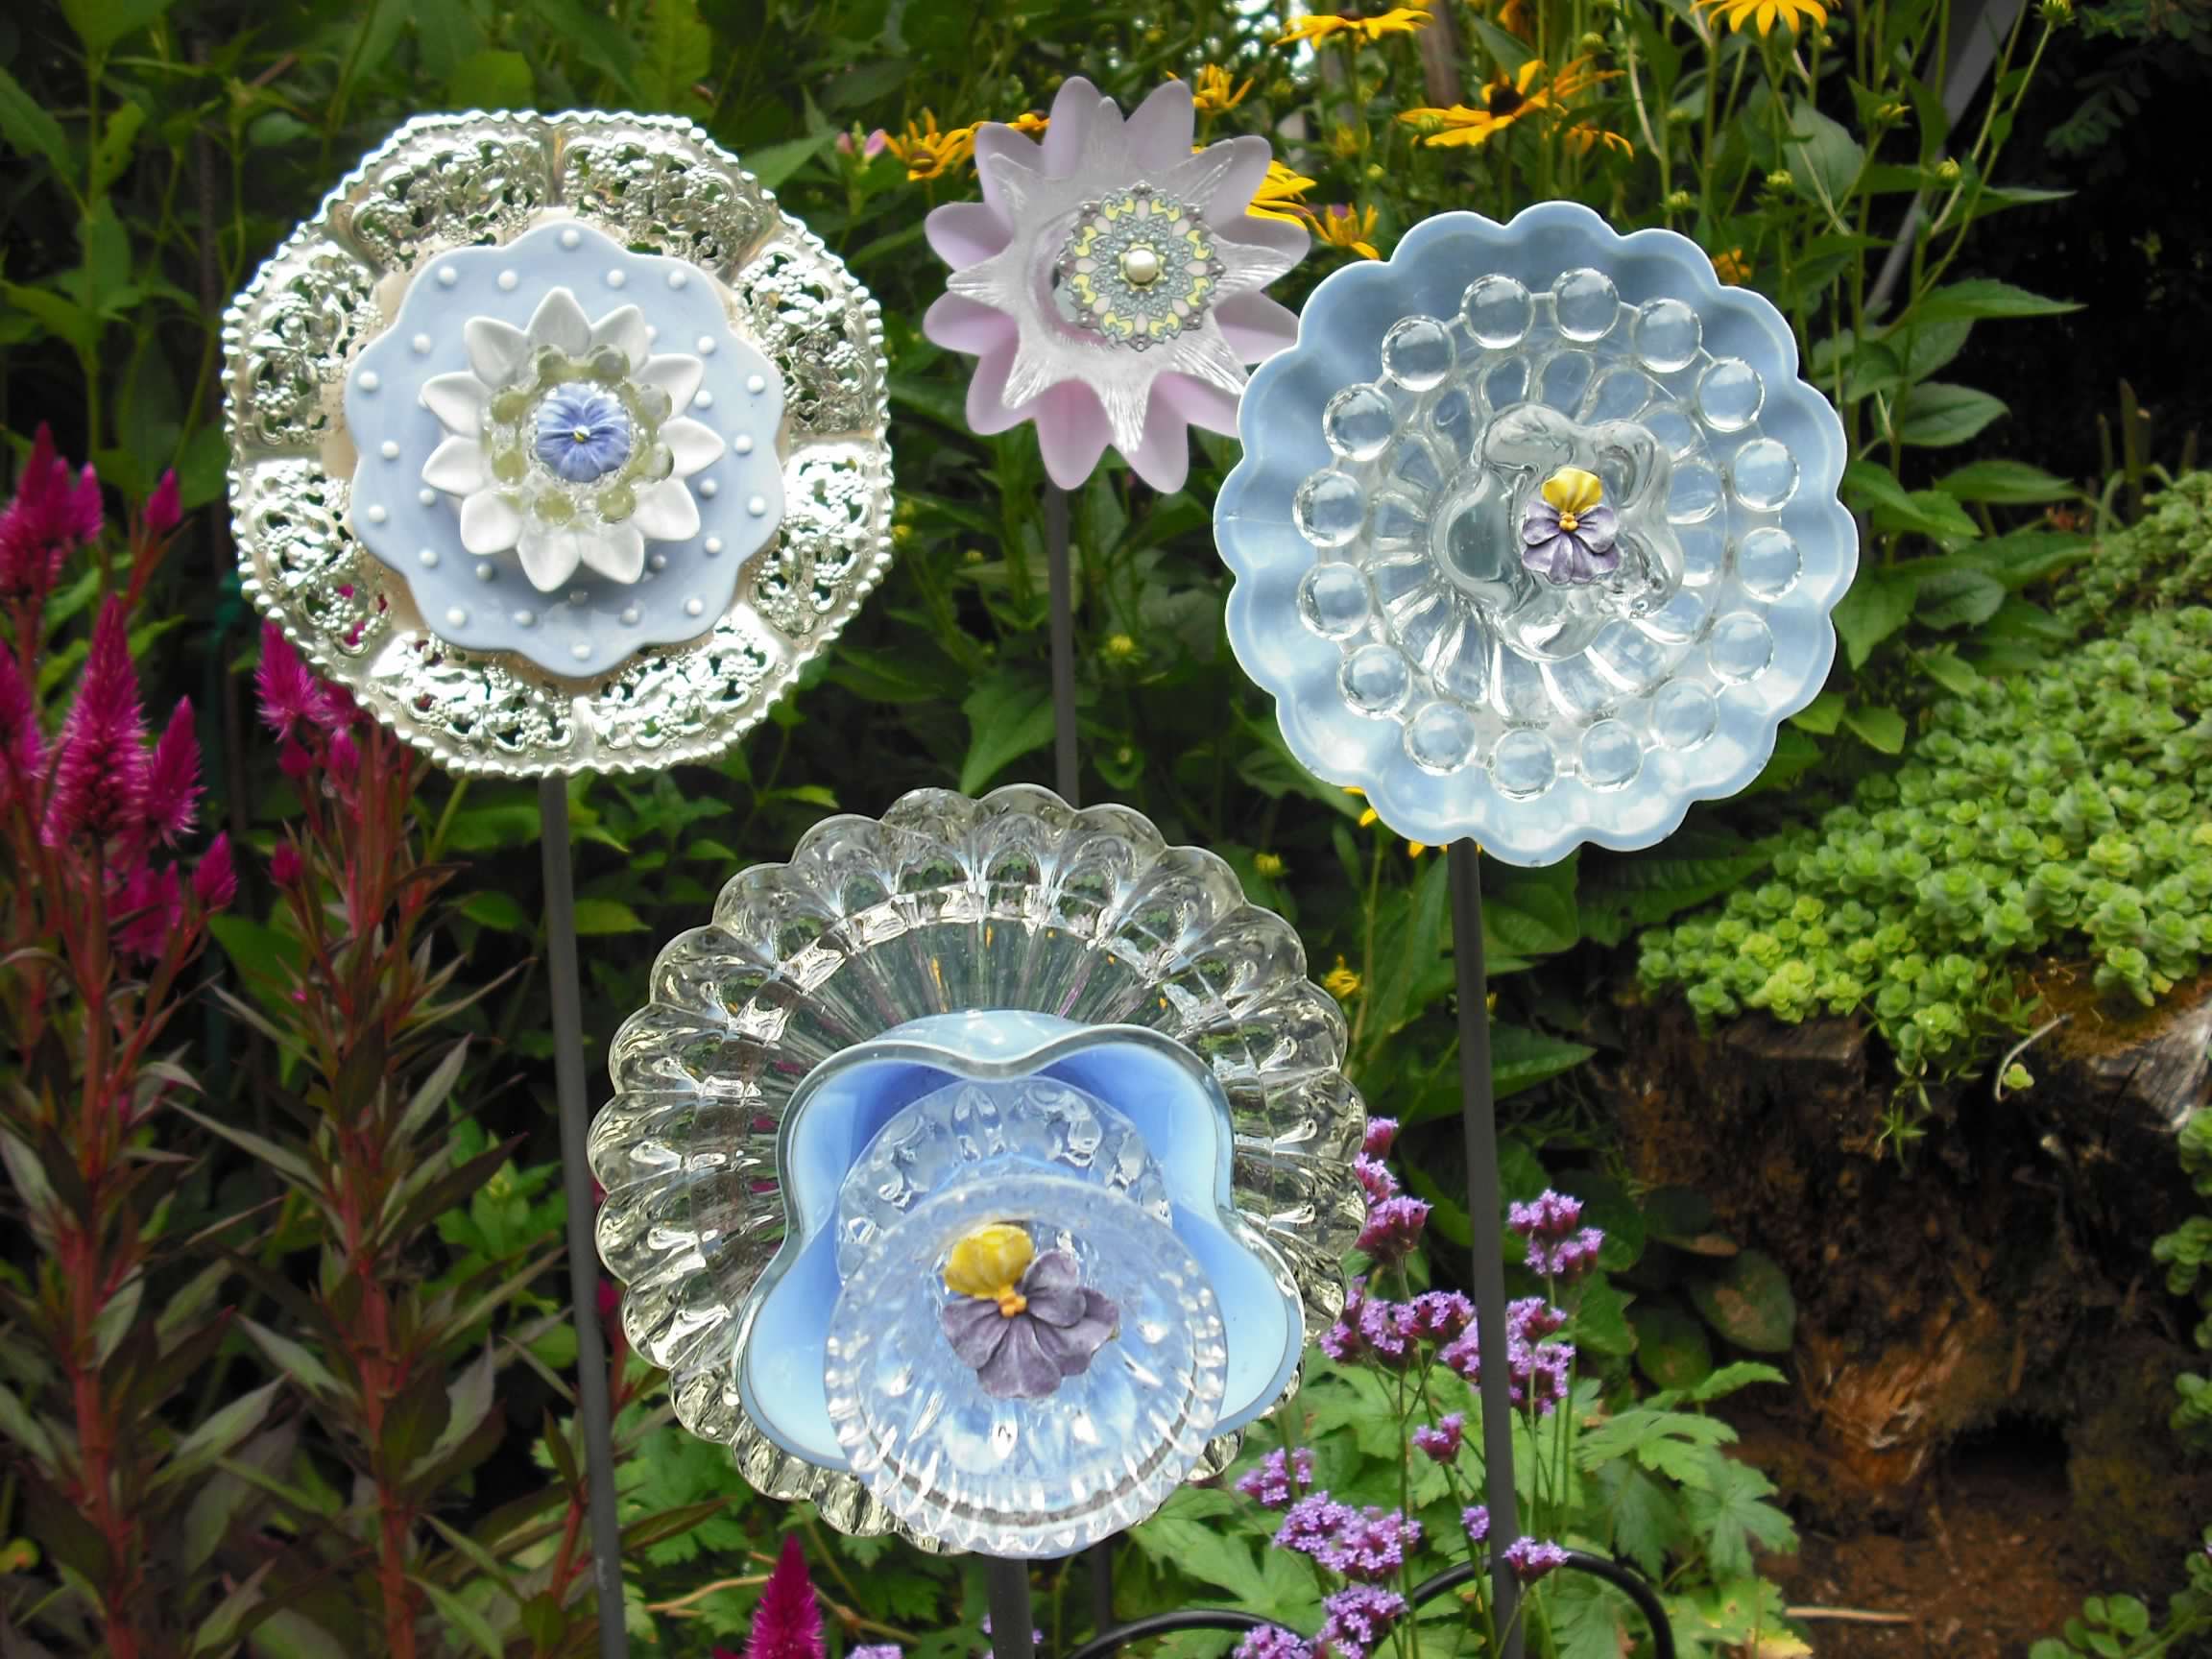
The image above are three flowers that a family friend asked my mom to make for them. They had these 3 beautiful light blue dishes that had been passed down to them, and they wanted to do something really special with them. So my mom came up with this bouquet of glass plate flowers. It has always been one of my favorite sets she did, and I love the story that goes with them.
Making the Glass Plate Flowers Using Glue –
Here is a simple version you can make at your house, that you can use indoors or outdoors. My own kids have made these for me over the years, and this one is an example of one that we did with their friends (I love to invite the kids over to make their mom a special mothers day gift each year).
Here is how you can make your own version of these beautiful glass flowers from items you may have at home, find at a garage or thrift sale, or barter with your friends for. Display them in your house, use them as gifts, or hang them on walls in your garden. However you choose to display them, they are likely to be a big hit with visitors.
To display in a garden, you can either add a picture hanging piece on the back and hang on a fence, or put a nice solid wooden stake in the ground and mount on that.
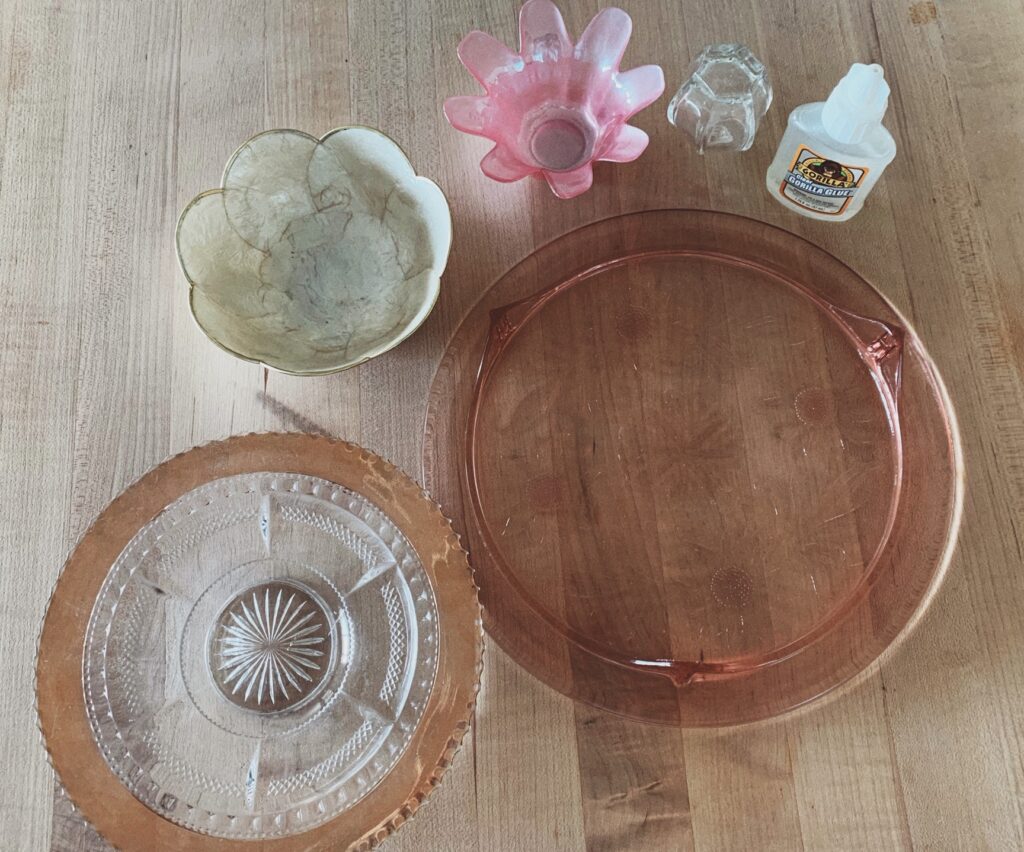
Supply List:
- Glass plates, and bowls
- Glue (epoxy glue, Gorilla glue or E6000 work best in our experience)
- Plate stand or plate hanger
We are often asked what kind of glue to use for glass garden art. We have used an epoxy mix, Gorilla Glue and e6000. We have had pieces break off that have been glued together, after a few years if they are left outdoors year round, so keep that in mind. Our preference is to drill the outdoor flowers and mount together with a screw and nut, and to glue for indoor flowers (like the ones we show below, to gift and use as wall hangings.
Directions:
Get your plates all set out and design your flower before you start glueing. Once you know what you want your finished flower to look like start with the bottom piece and glue them on in layers, working up to the final center of your flower. We used the quick set epoxy glue. You will need to follow the instructions on the back of your glue, but essentially you mix a small amounts of a two part glue in a discardable dish and then you are ready to use it. It dries in about 5 minutes, so you will need to go to work right after mixing. You can also use Gorilla Glue for this, but it dries more yellow.
We started by putting a bead of glue around the bottom of the second largest plate and gluing it to the center of the gold cat plate pictured above. If using the epoxy glue method, allow to dry 5 minutes before starting next layer for best results.
We repeated that step for the rest of the layers as well, allowing to dry between layers, then giving it a good 24 to 48 hours to really dry thoroughly once you have them all glued together.
Once you are finished with your flower you could use the same glue method to attach a plate hanger to the back of your flower, or get a plate stand to use to display it in (we found this one at the Dollar Store). Its that easy, but makes a gift people will be talking about for a very long time. They are great dining room display, you could use pastel colors for a nursery gift, or do something in green and red to use as a host/hostess gift for a Christmas party. I will be putting this one in my office, just for something pretty to look at.
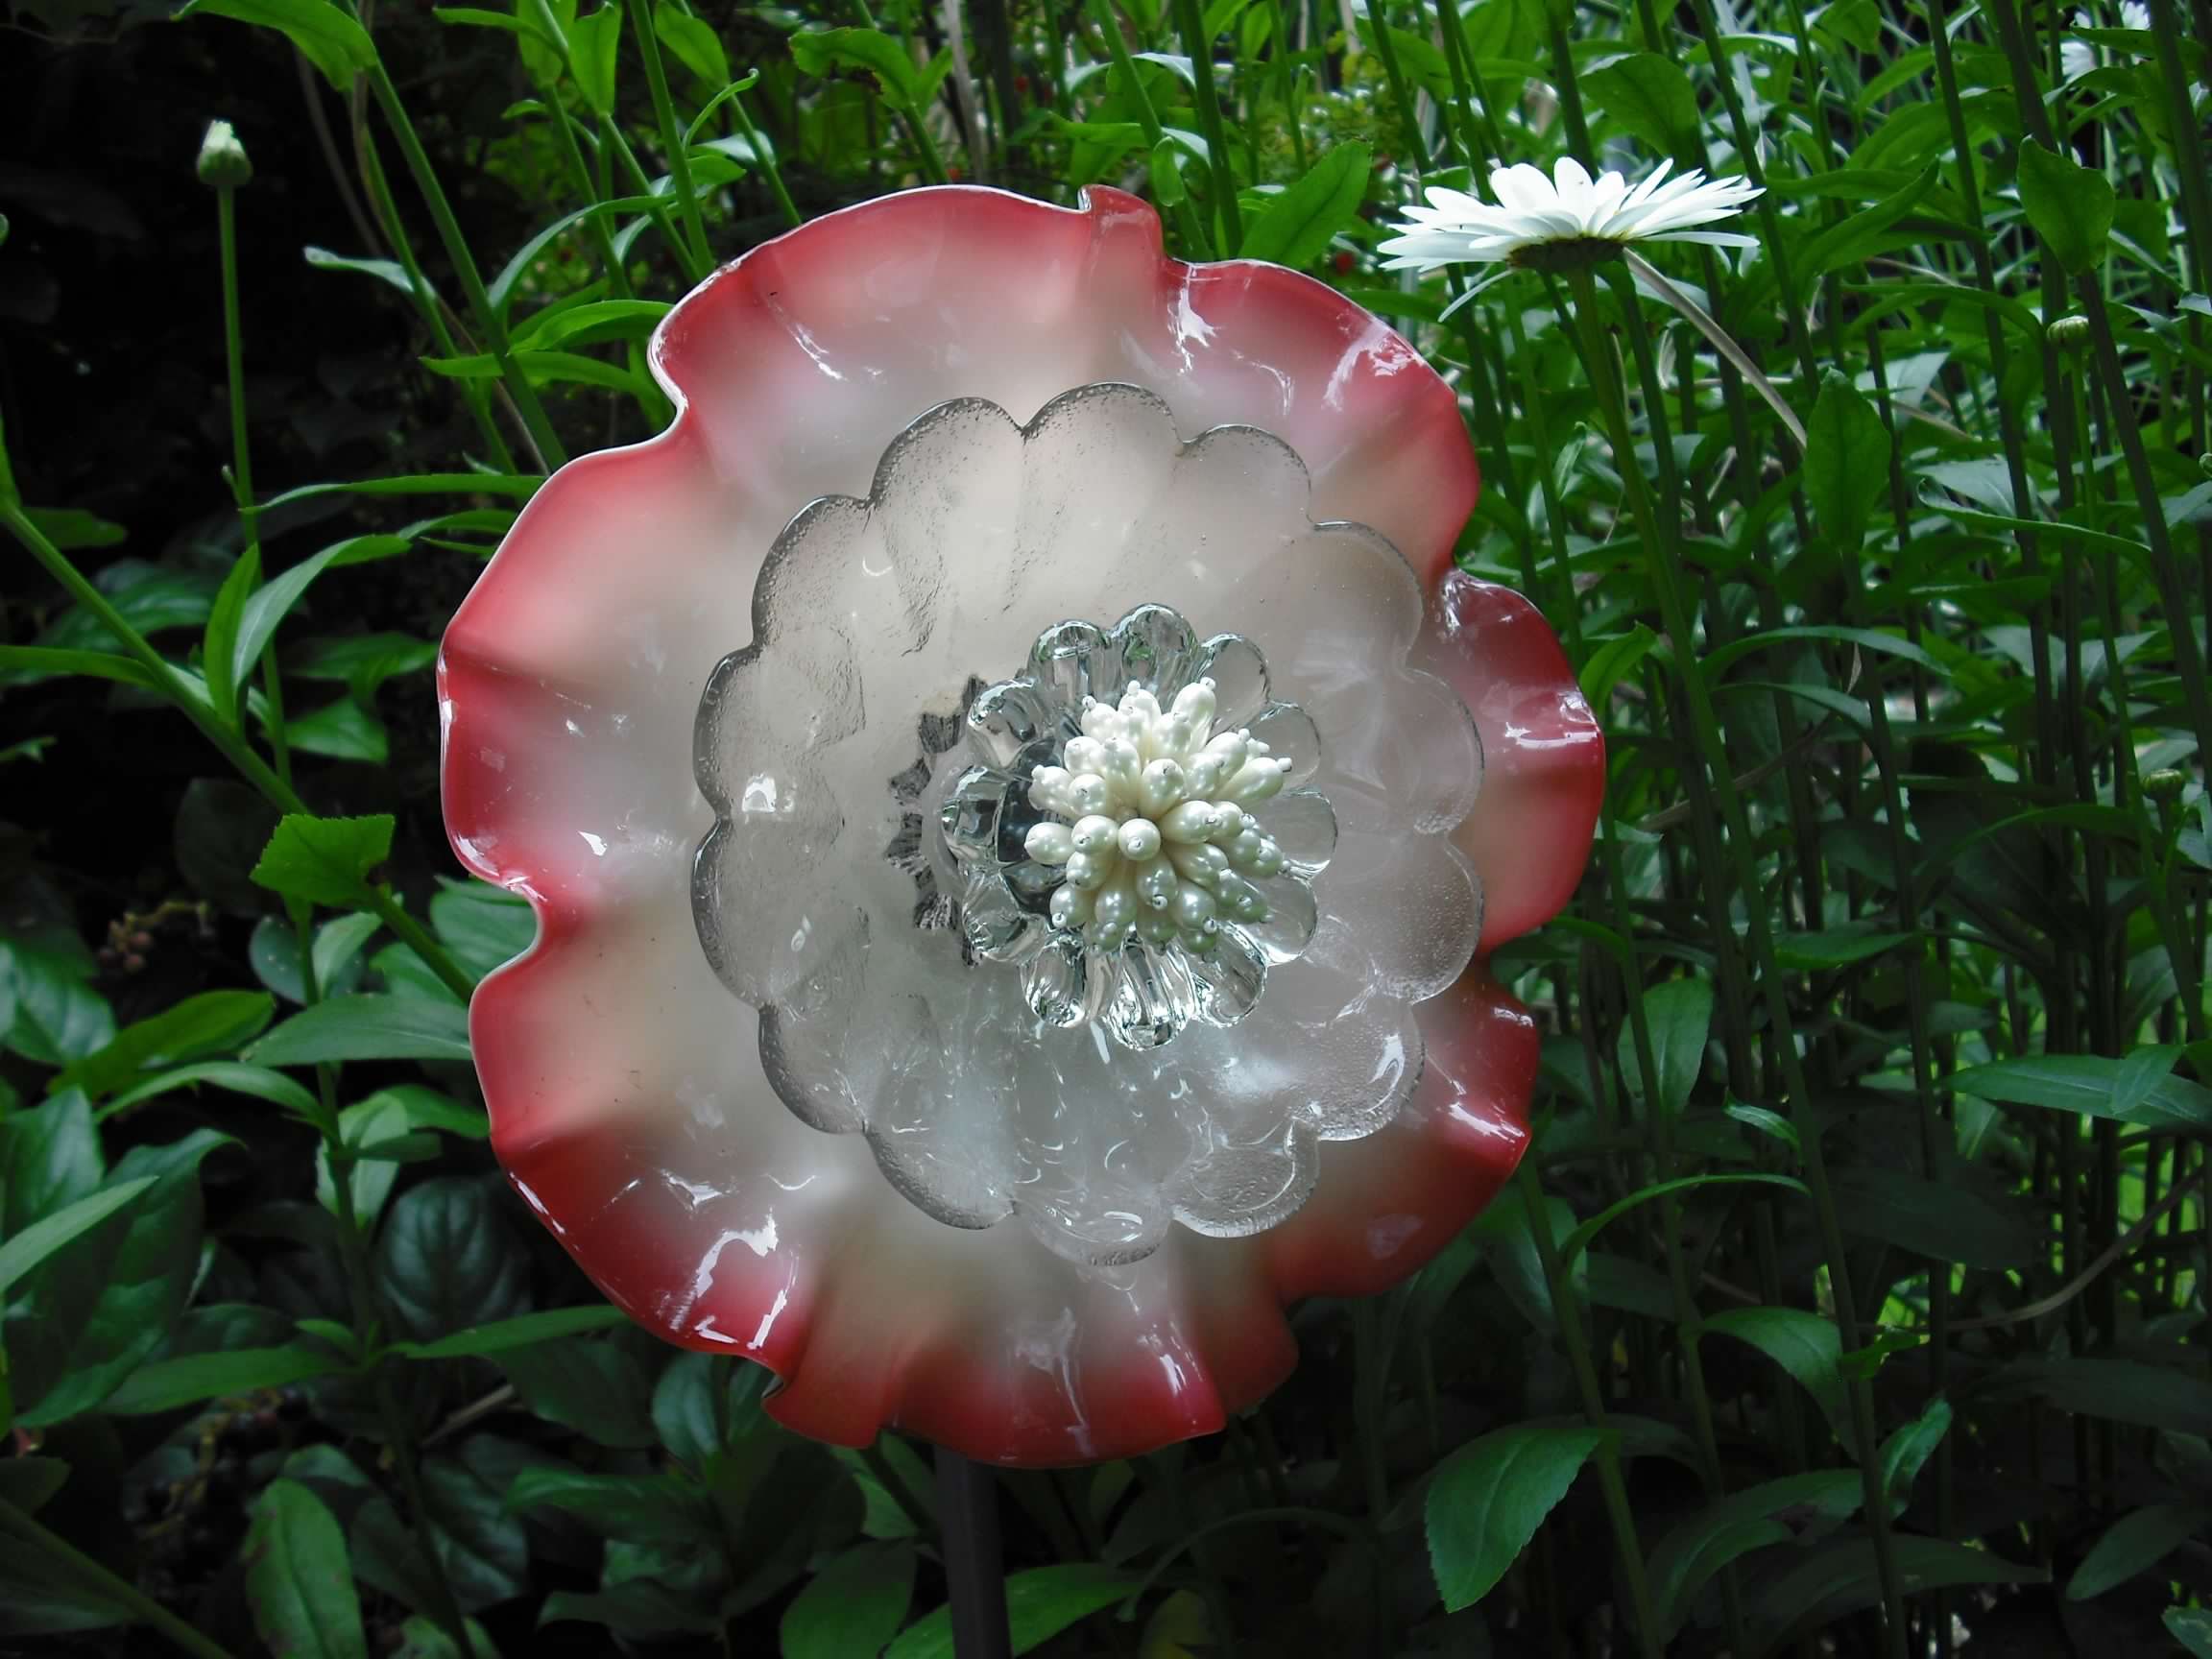
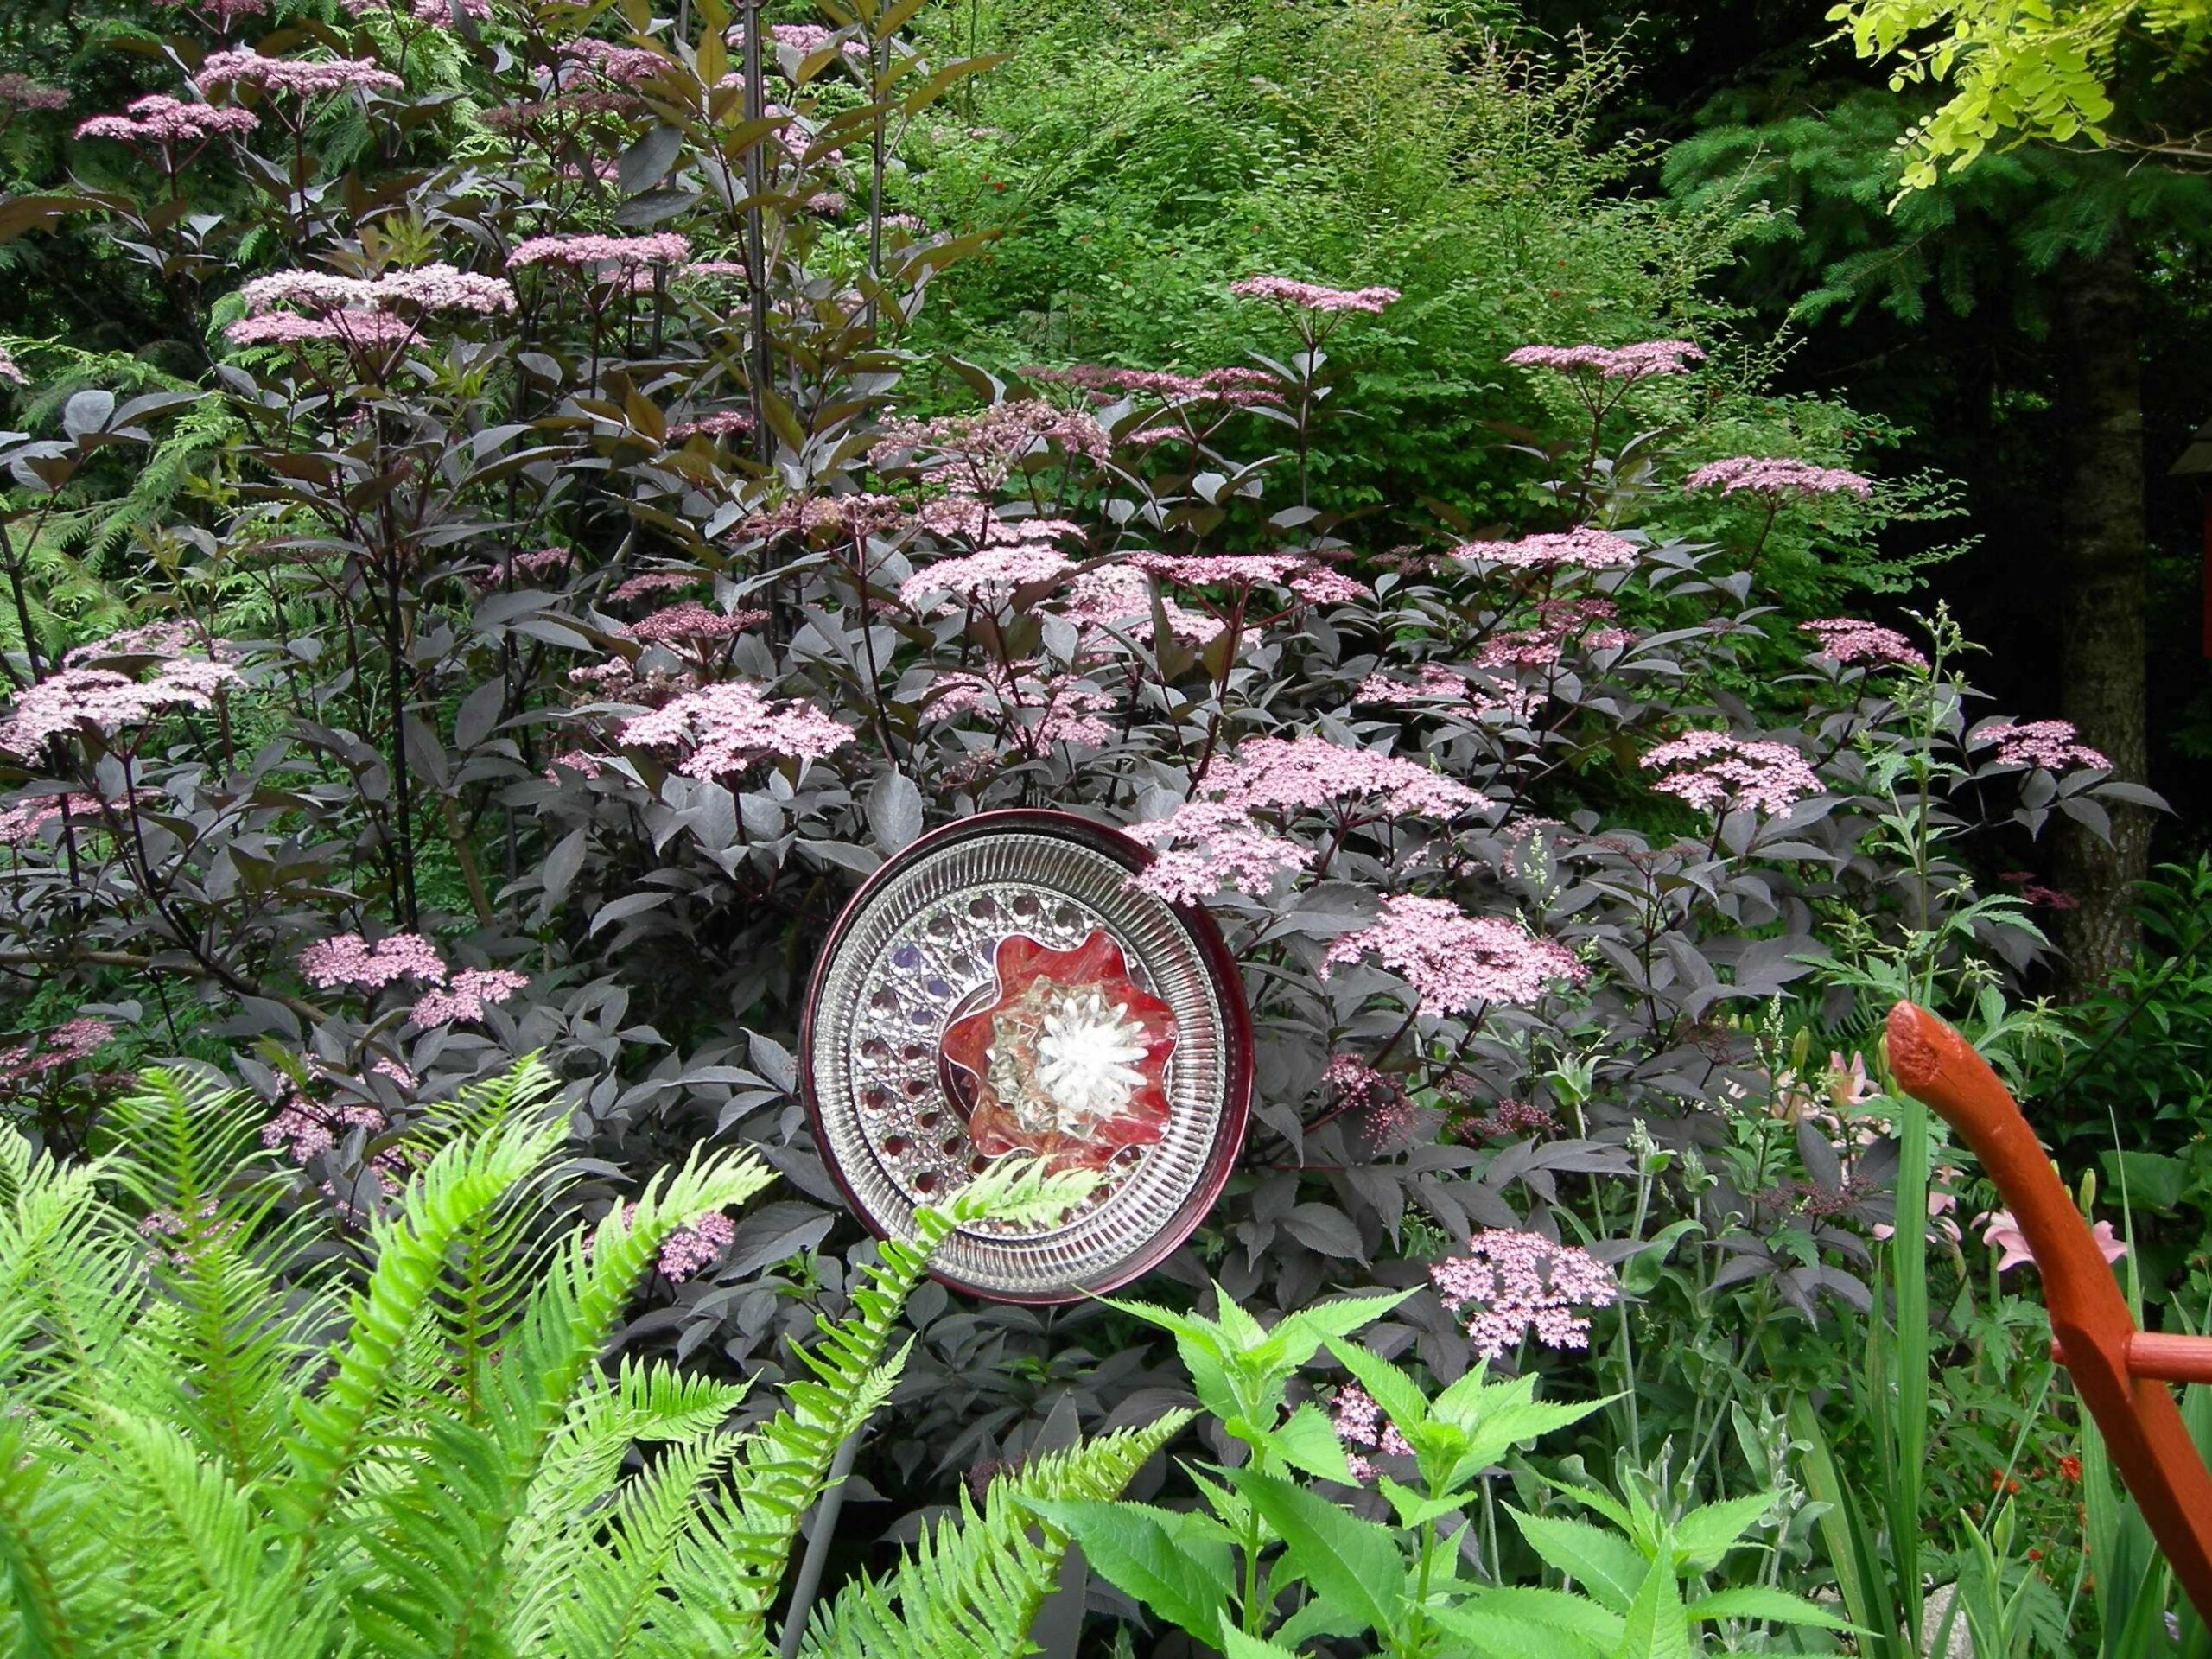
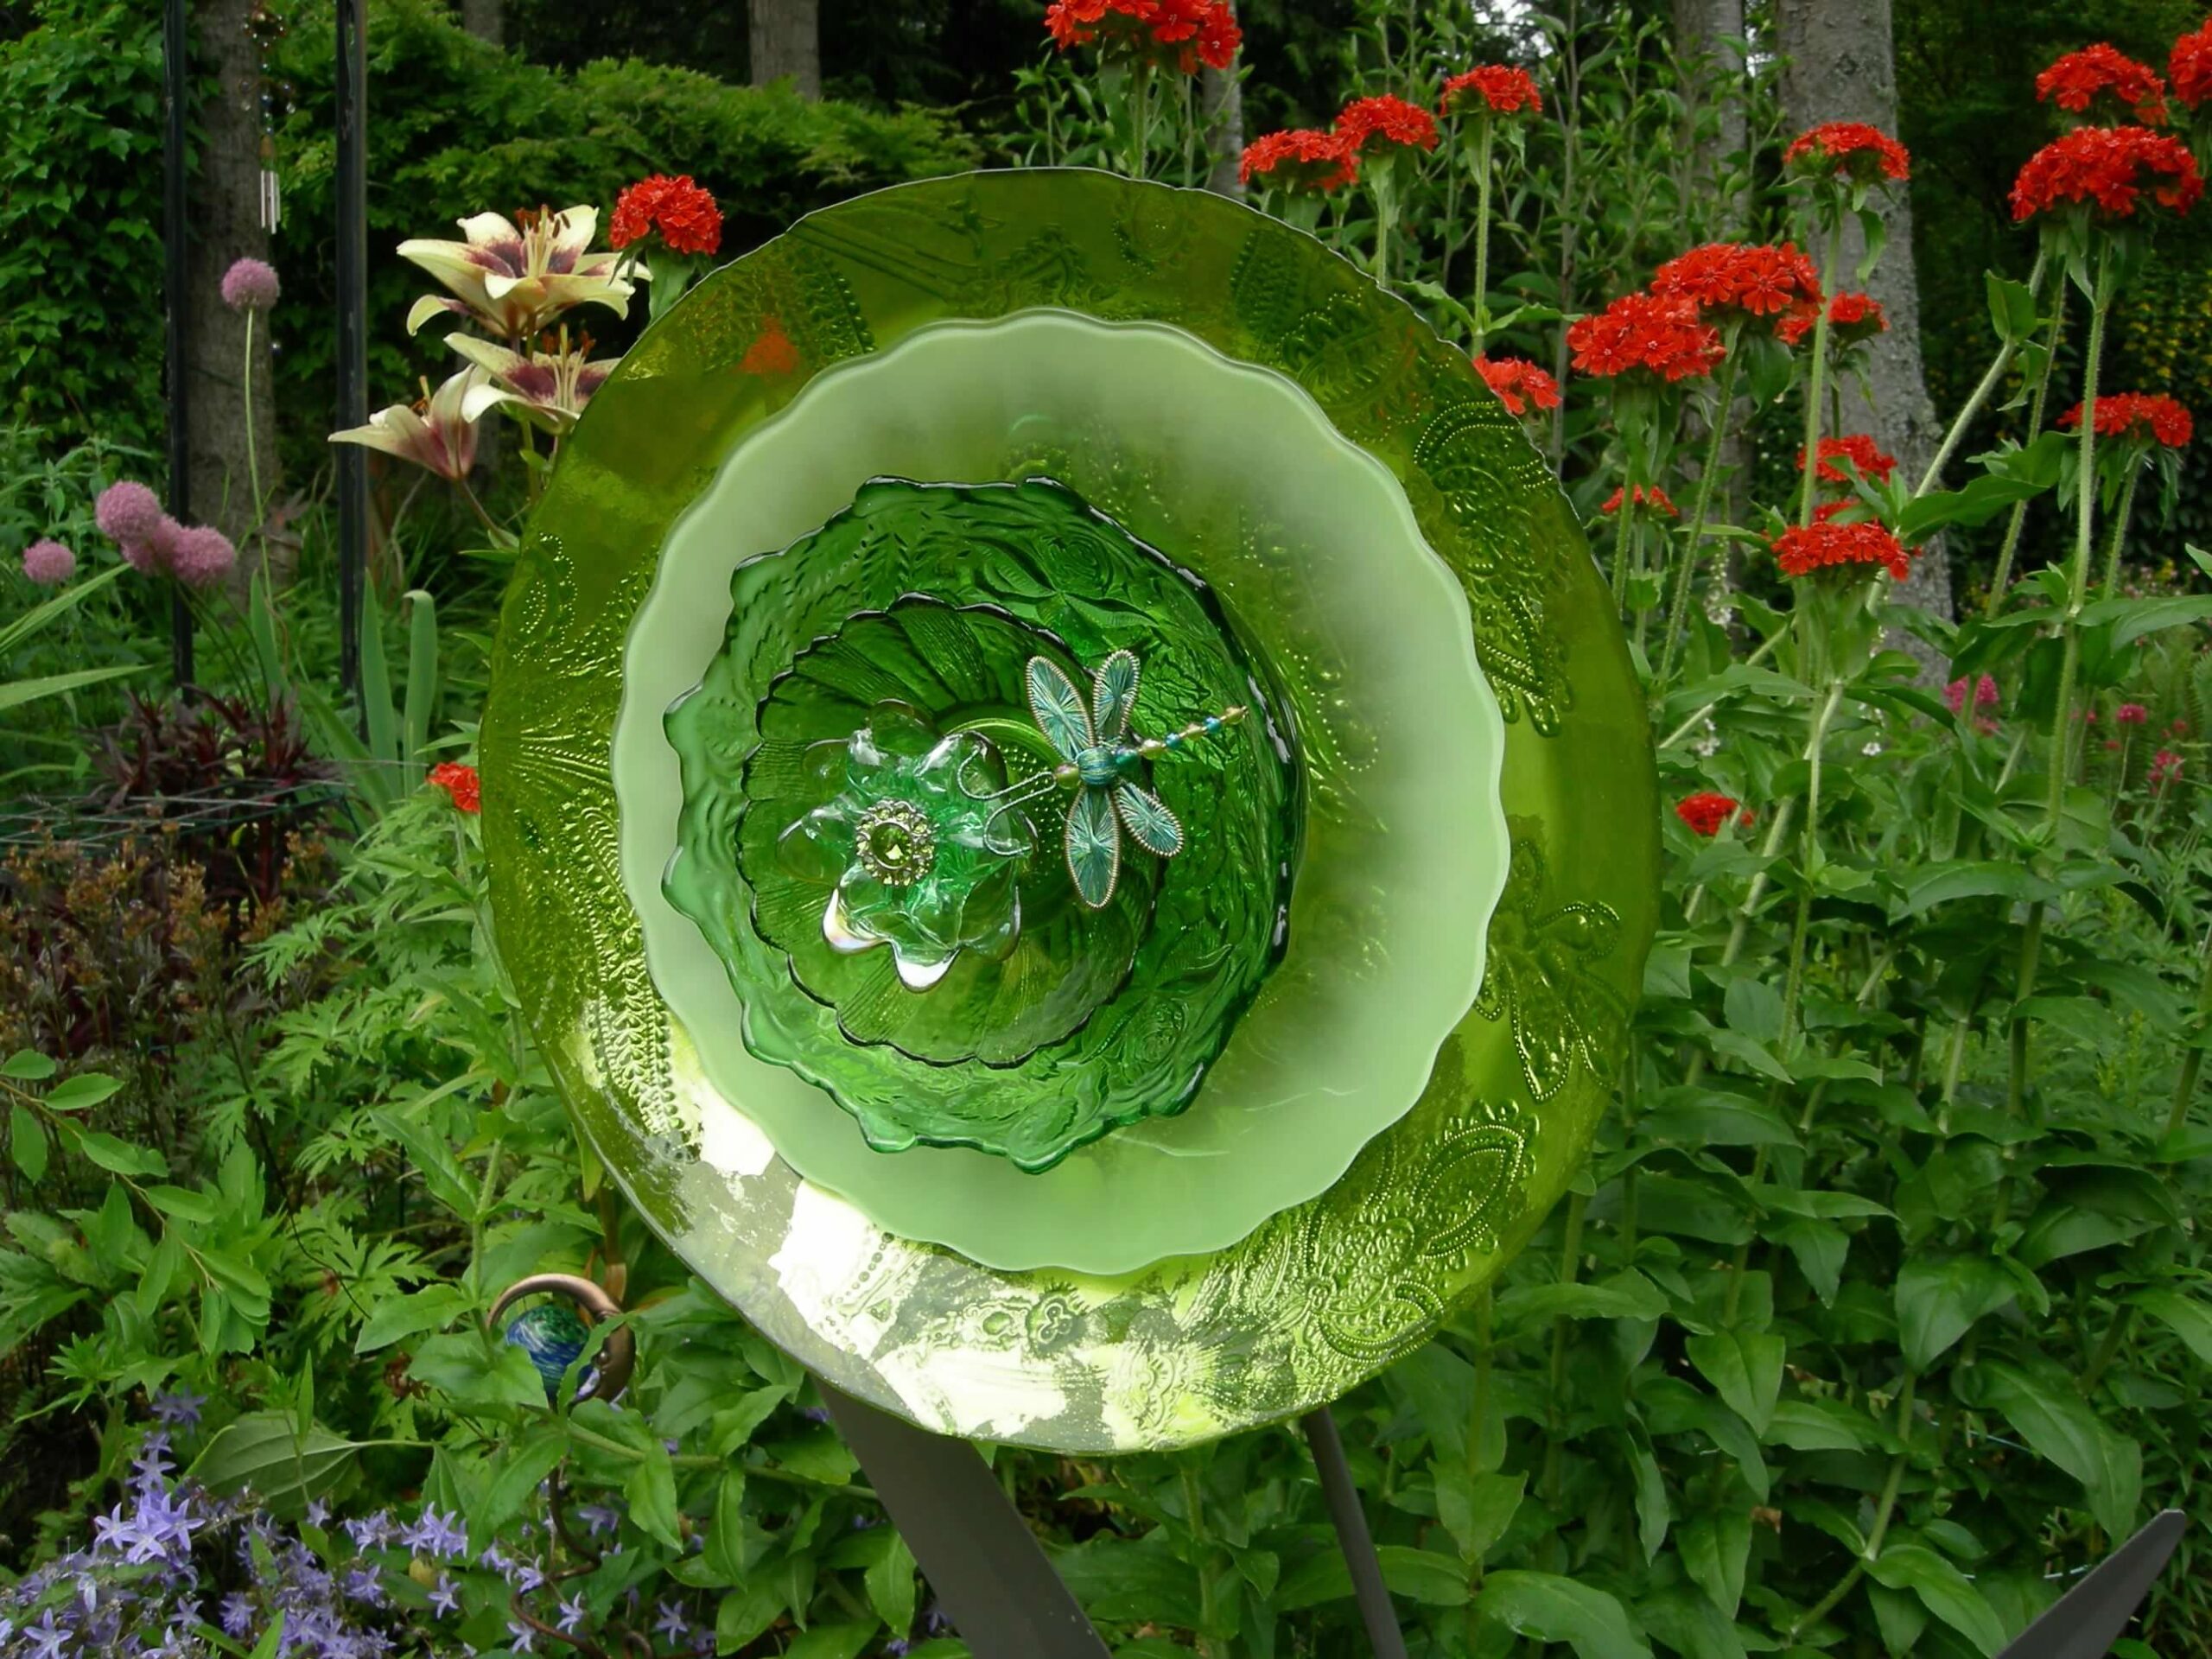
Here are some more examples of glass flowers from plates and more reclaimed dishes!
Here are some more pictures of different flowers we (well mostly my mom!) have made over the years to inspire your creative process.

Other Posts You Might Enjoy:
- DIY Garden Gate using an old bed frame
- Planting a flower in a boot – such a cute keepsake!
- Reuse and Repurpose Items to Create Beautiful Planters on a Budget
- Plant a flower bed in a wagon

How does one attach the ‘flowers’ to the wood or metal stake?
You talk about drilling holes in the items for a nut & bolt. But then you bring up glueing- us it either/or, or both?
Hi Leanne, They are two different methods you can use (you will need a bit made to drill glass if you want to use a nut and bolt), or you can use a strong glue (we have used an epoxy and Gorilla Glue…Gorilla Glue makes an epoxy too). Thanks!
what do you put on the back to display outside. I made one and attached a bottle to the back. the flower does not stand straight up. I have a pvc pipe in the bottle
Hi Bonnie, we drill ours, but many people use an elbow fitting on the back to fit over copper or PVC piping. We link to it in the article. Thanks!
I have bent a spoon and glued to the back. Then it could be placed in a pole or tent pole.
What a clever idea….thank you for sharing!
This is a great article was great, and so helpful. I am down to the wire getting yard ornaments ready for an artisan mkt.
Would you consider sharing how you make the iron stems that you mentioned? I’m not liking the PVC option.
Another question, I’m having some issues with bird feeders that I have made and used upside down vases on rebar. I don’t like this way of displaying them because the vase wobbles on the rebar, and it’s unattractive.
I would greatly appreciate it if you have any ideas. Thank you!
Blessings,
Rhonda
Where can I find a screw long enough to use the nuts and bolts method? I want to use one that will go through all layers and I think I need headless screws. So far I’m not sure where to look for these.
Most hardware stores or big box chains like Home Depot, will have a section of multi-sized options. I would measuer the width of your plates and go in and look there. Since you are nesting them all together and drilling through the middle, it keeps it a little tighter. We have not had any issues finding the sizes needed at Home Depot so I might start there? Thanks!
I made a glass owl am having trouble coming up with a what to glue on back to hang on a wall.