
DIY Hutch Makeover Using Paint & Lighting – Before & After!
This post may contain affiliate links and I may be compensated for this post. Please read our disclosure policy here.
DIY Hutch Makeover Using Paint & Lighting – Before & After!
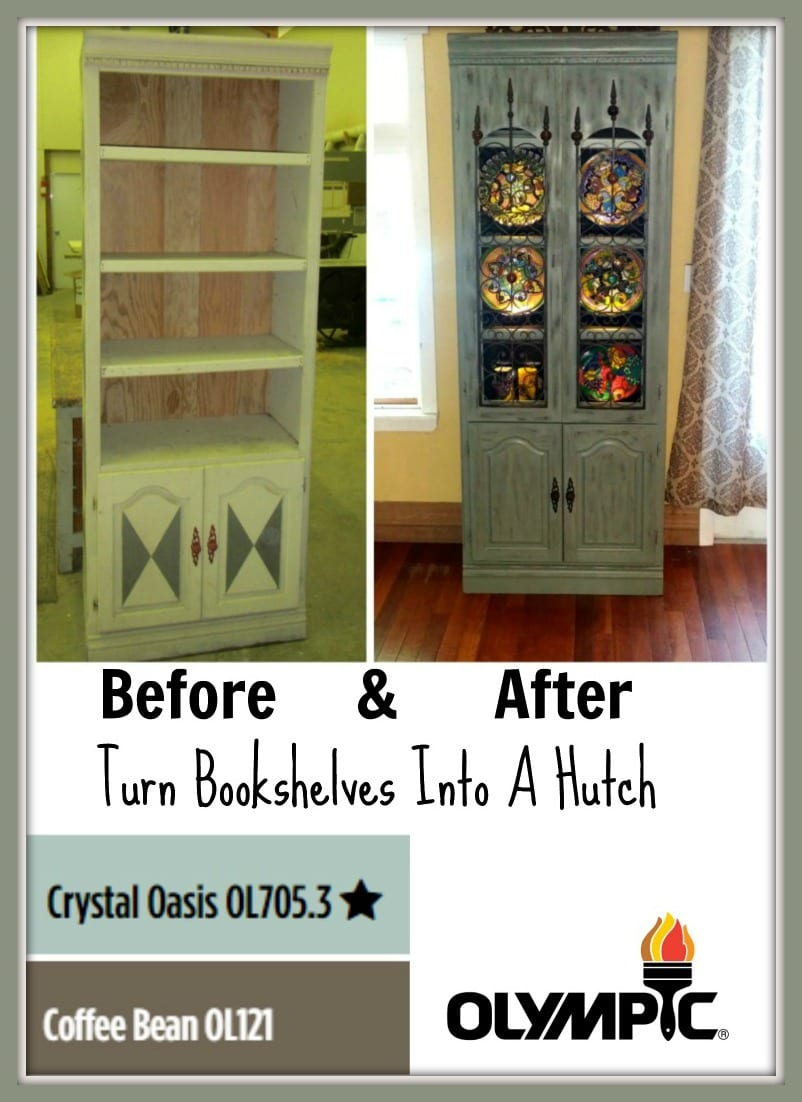
How We Turned a $5 Bookshelf, into this DIY Hutch!
Looking for inspiration on how to do a DIY Hutch Makeover with paint and lightening? We share our process here. We did also use some metal candle abras to make new doors, but get creative and use what you want (you could do a similar thing with chicken wire for example).
Previously I shared with you our ideas on creating a DIY Hutch using candelabras that we have been holding on to from our wedding 11 years ago, and using Olympic Paints from Lowes to complete the project.
The project took a few hours to build out (since we started with an existing book shelf) and then we painted it out over a couple of days (allowing dry time).

Right now there is a high value coupon for $20 off a gallon of paint (for Sherwin Williams). You can print it here, or use the coupon code GALLON20 at checkout online here.
The two pieces that we used (metal candle holders and bookshelf) held special sentimental value to us and we designed the hutch around being able to use these items.
Tips on Doing Your own DIY Hutch Makeover::
A) Pull the piece together so it all looked like one unit that was built together. This was important as we used multiple materials on this project, and it looked very choppy prior to painting it. Paint made it look like a piece of furniture that was originally built as a hutch.
B) Age the furniture, so it looked like a hutch that has been handed down in the family for years. We used a distressed paint technique to make the hutch look much older then it really is.
We started with the following inspiration (we made this original mood board to guide our project).
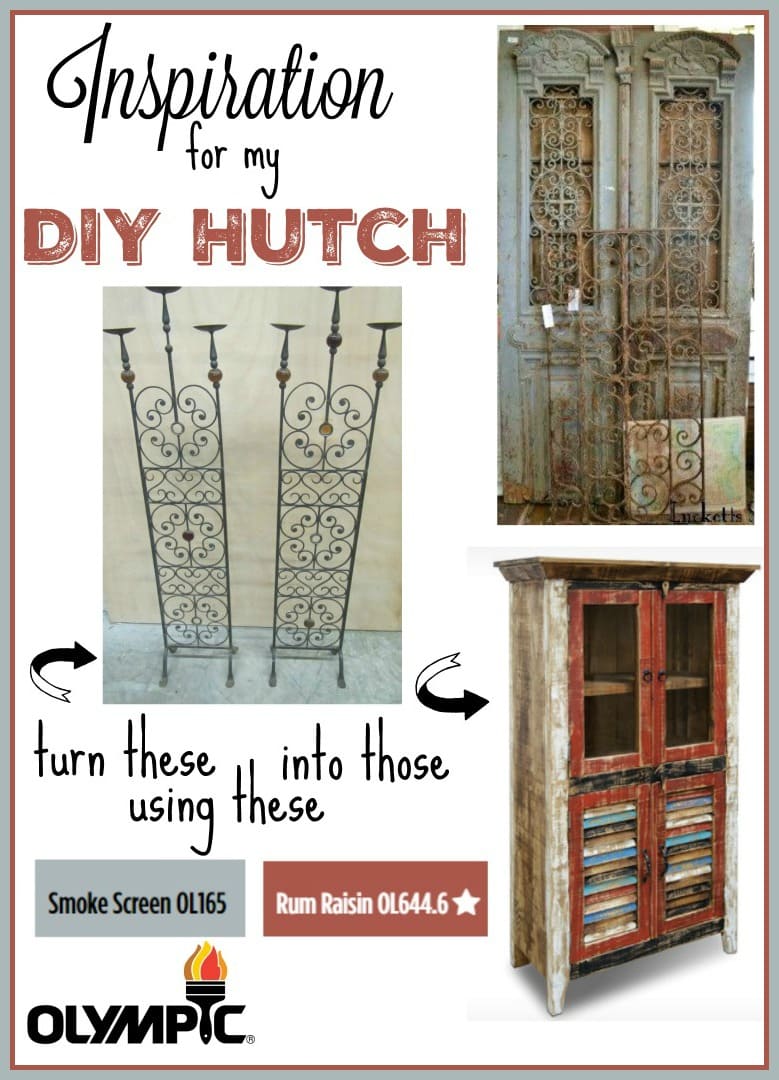
I had the candelabras from our wedding 11 years ago, that I have been waiting to transform into something beautiful. Our initial idea was to build a box around the dimensions of the candelabra and do it all from scrap wood. But then….
***Note – if you do not have access to anyone who can help with the welding part, you can get a similar looks using items that do not need to be welded (just stapled or attached inside the door). Some ideas include:
- Chicken Wire
- Metal Screening
- Metal sheets you can usually pick up at hardware stores

….we remembered that we had this old bookshelf that we had moved out to the potting shed. Years ago (and I am talking like 15 years now), I found this old shelf at a garage sale for $5. It had been a cheap TV stand from the 90’s in its first life. At that time I painted it all this green color and did a diamond pattern on it, but it has sat out in the potting shed for years now, holding garden items. We had already removed the false particle board back, and reinforced the piece with real wood, so half the work was done. When we held the candelabras up to the shelves they fit perfect. By starting with an already assembled bookshelf, it would cut our work time in half at least!
Plus, there was already some molding detail at the top to give it a little extra interest.
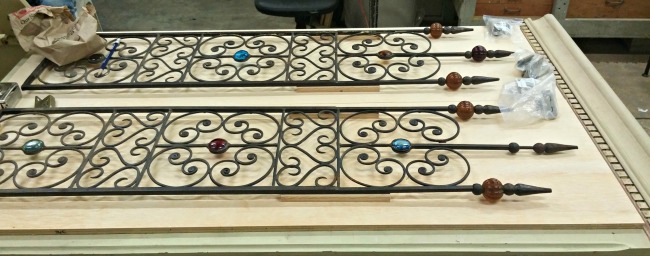
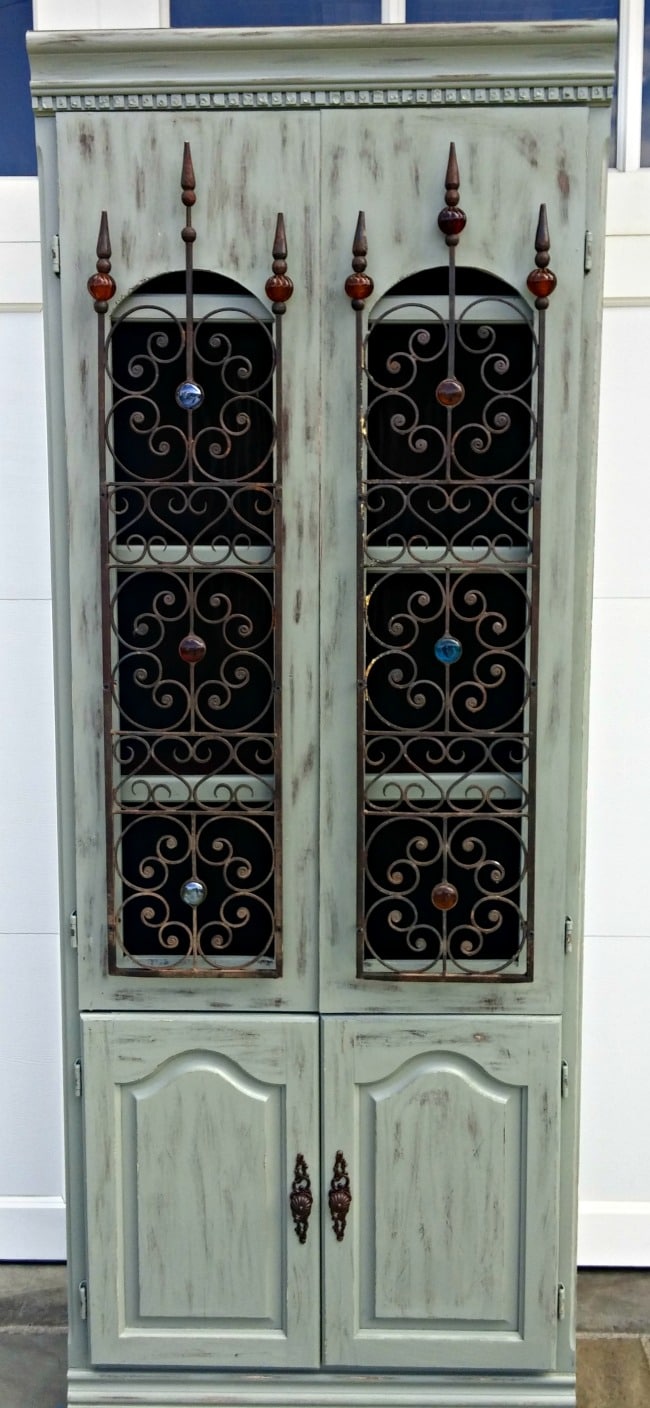
The next step was to build doors that we would use to mount the iron candelabras too. We used a sheet of plywood and some new hinges for this step.
Now that we had all of our materials, it was time to put it together.

To do that, we needed to make the candelabras into something flat that could be mounted on a wood door. That meant heading to the metal grinder to remove the cups that held candles, and the feet of the candelabras, as well as drilling holes through the metal frame so that we could attach it to the doors.
Once we had cut two doors to size, it was time to lay it all out and make sure it was going to work. Since this piece had two doors on the bottom already, I took pictures of the hinges from those doors and headed to the hardware store to get matching hinges for the top doors.

The big question in this step was whether to make it an arch to mimic the arch of the candlesticks, or to cut the candle sticks straight across. To keep it structurally strong we compromised, and left the arch on the candelabras, but cut the opening lower so we had more wood surround.
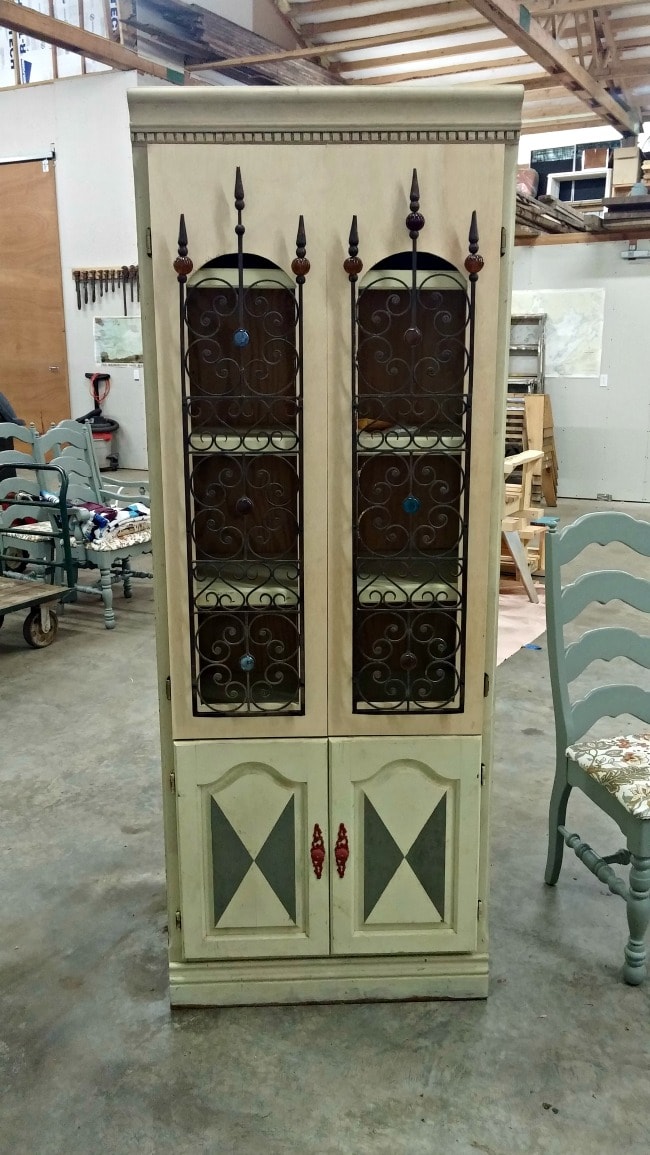
The metal work was attached to the wood doors by drilling holes through the wood to coincide with the holes we previously drilled in the metal frame. We attached with screws.
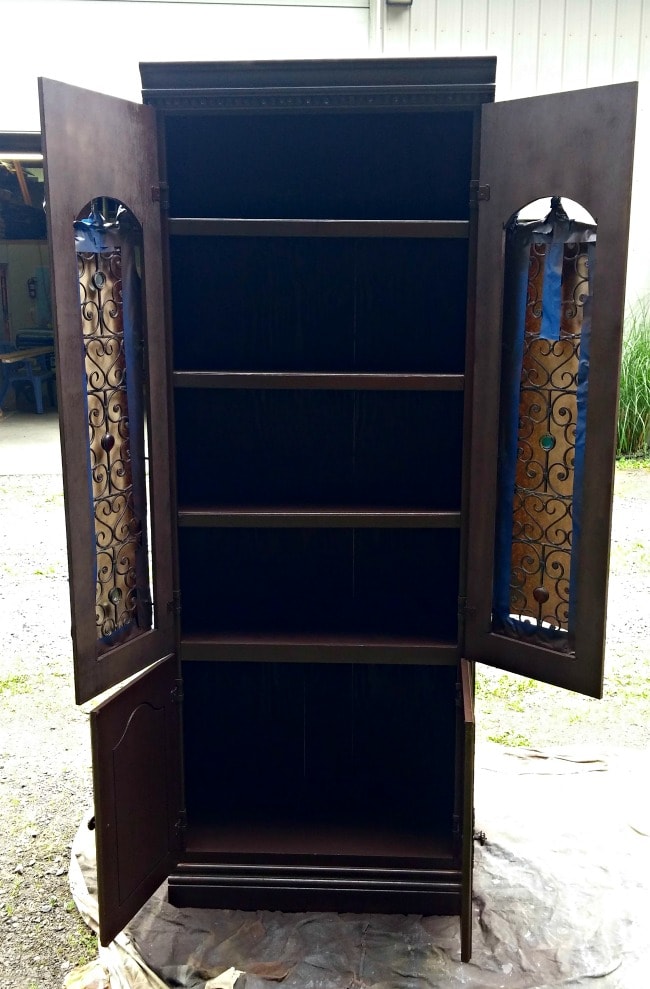
Once it was built out, it was obvious that the key to this project was paint. We had used so many different materials, that we needed something to pull it all together into one cohesive piece, so it would look like it was all built at once. That something was paint!
We started by painting it all a Coffee Bean Brown from Olympic Paints for the base to make it look like one unit. We chose this dark brown for this step as we planned to distress it and wanted the dark color to come through in the final finish.
After the base coat was finished we allowed for dry time (overnight). The next step was to paint it the top coat color. We chose Crystal Oasis from Olympic Paints to blend with some chairs we had painted out for our dining area.
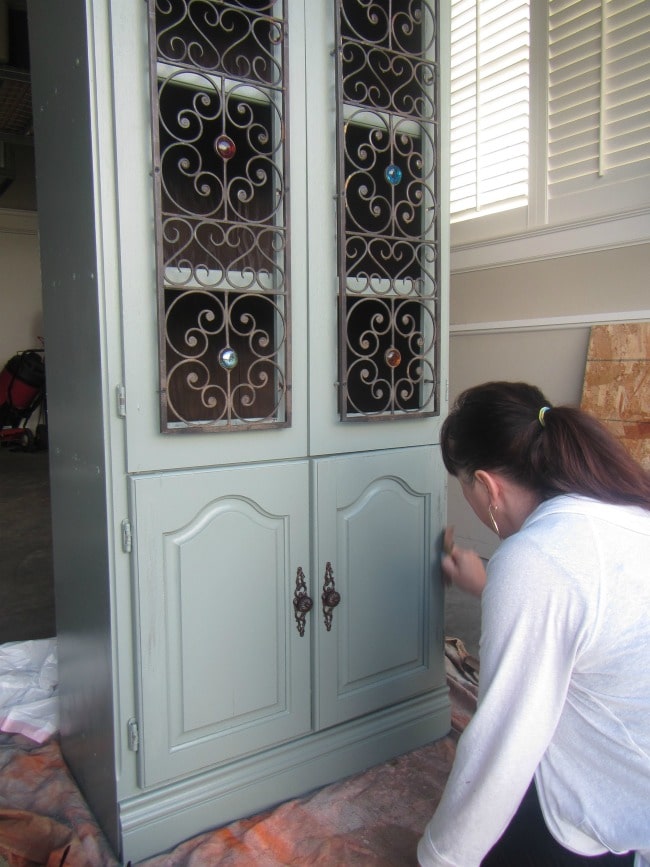
Once we had painted the top coat of Olympic Paints Crystal Oasis, we let that dry overnight. Since we were planning to distress it, we only did two coats. If I had planned to keep it all that color I probably would have added a third coat.
To distress it and give the hutch an aged look we simply used sand paper. There are many techniques you can use for aging or distressing furniture. You could have painted the top coat first and brushed on the brown paint with a dry brush, or added candle wax on the base coat before you paint the top coat and it easily distresses when you sand over that with sandpaper or a metal scour pad. We chose to simply sand the top coat along the edges of the hutch and doors, as well as in other areas we thought it would look good.
One tip about this step is to sand lightly. If you sand too much you will sand through the base coat of paint to the wood. That works in a few spots, but we really wanted that brown color to come through as well.
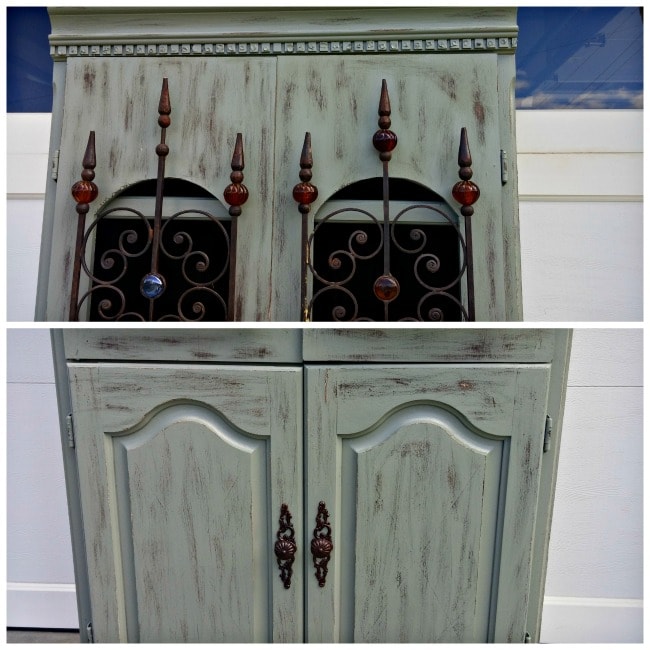
Here are a couple of close ups of what the hutch looked like once we distressed it. This step is really up to your personal preference. We worked on the hutch, sanding and wiping it down, until we got the look we were going for. The best part is that its just paint, so you cannot really ruin it. If you don’t like it you can just paint over it again and start over.
That is the magic of paint. We have redone this piece a few times now, since buying it for $5 around 15 years ago. I imagine the shape will stay the same now, but there is no telling if we may decide to change up the paint color again one day to give it a fresh make-over.
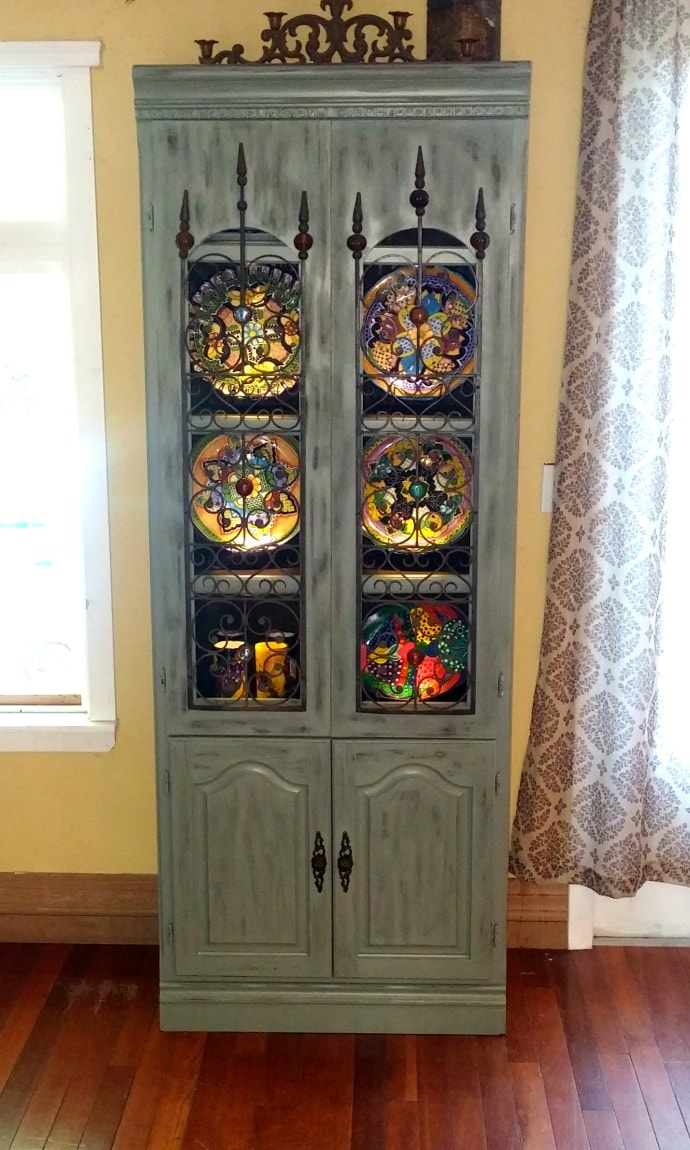
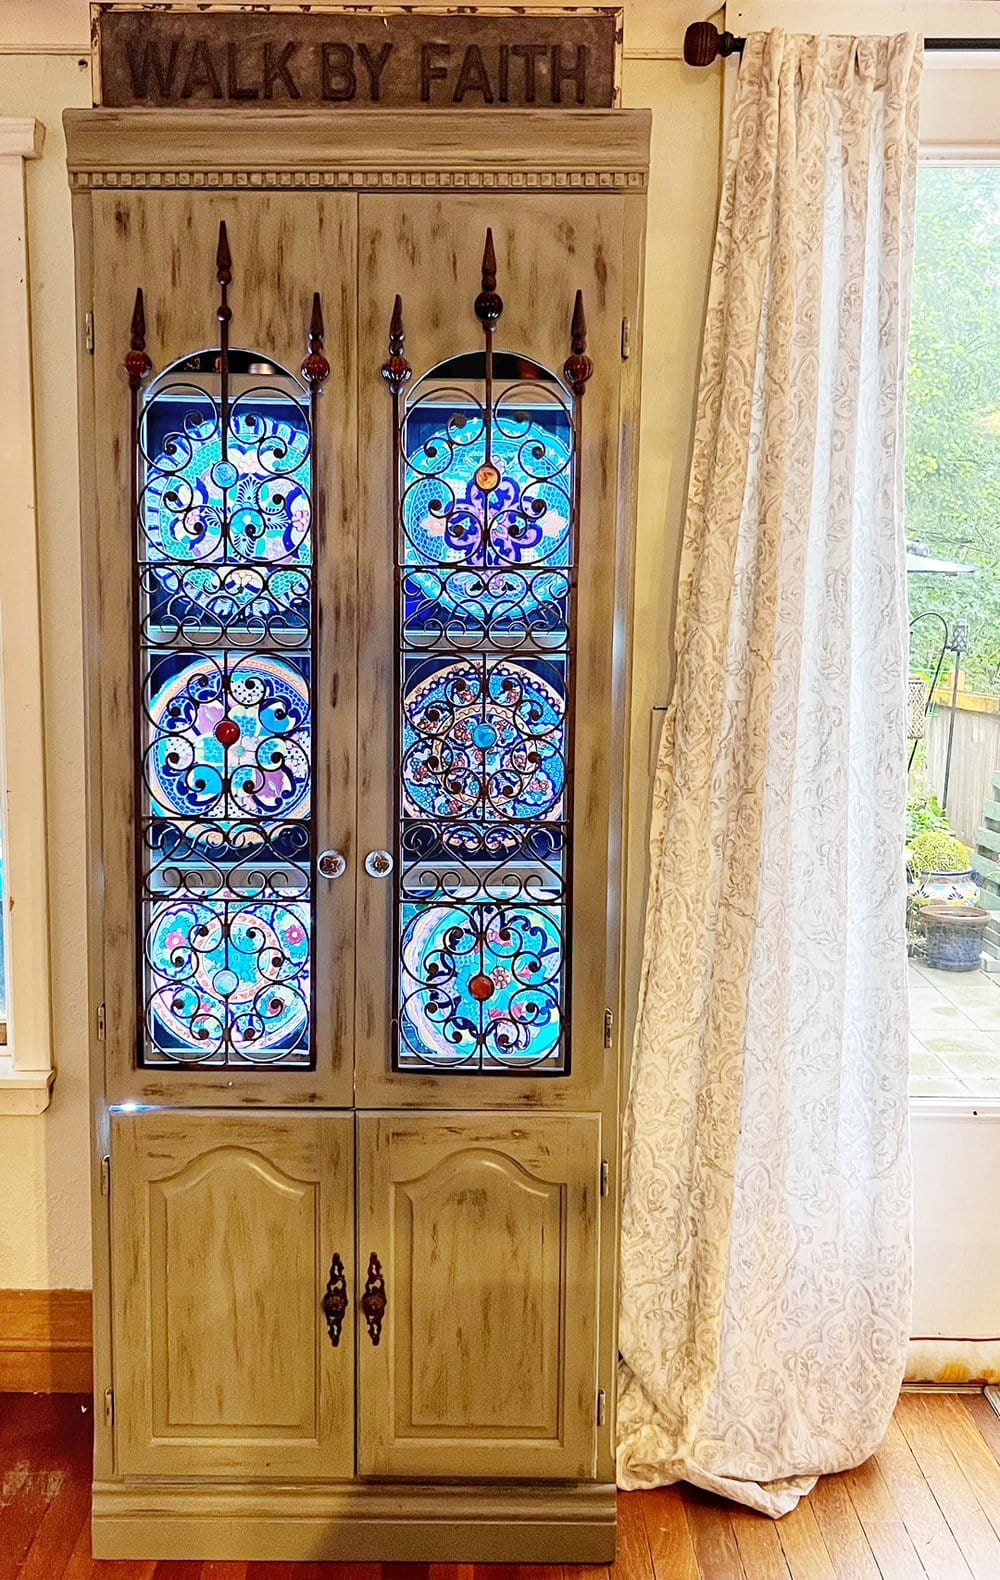
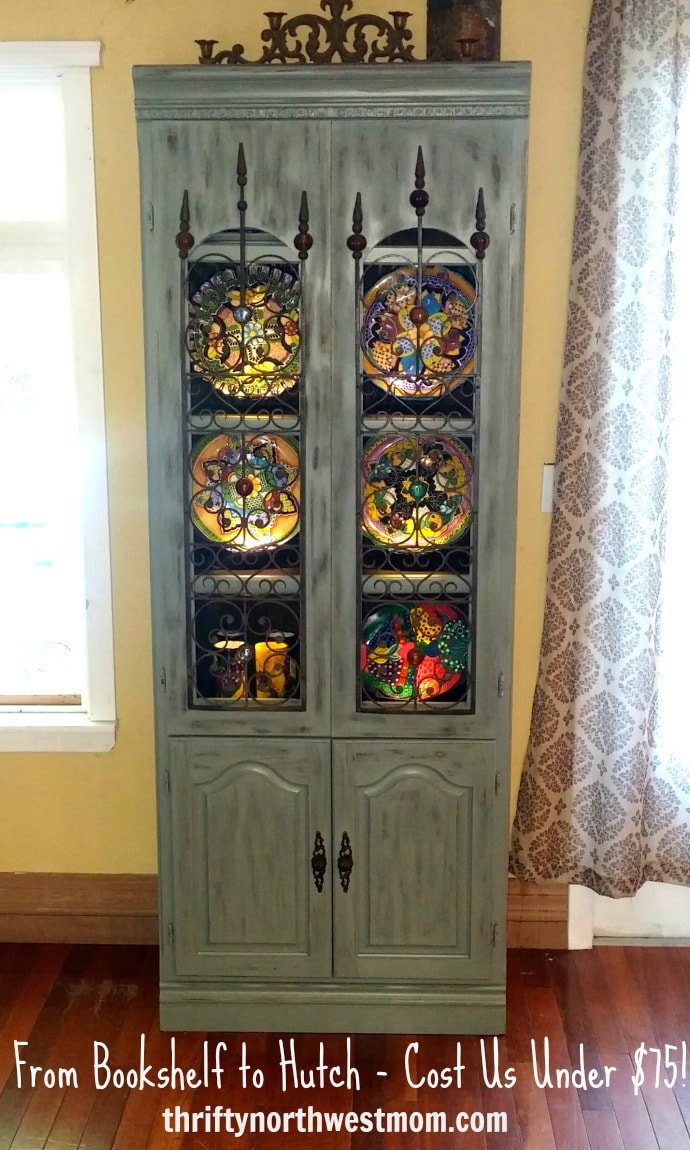
Lastly, we added in a strip of LED lights, and our favorite Mexican Talavera dishes to complete the look, and here is the hutch displayed in my living room. I tried a few different options, and I found the LED strip lights to be my very favorite (they were affordable, easy to install and I love that I can change the color with the seasons too).
These LED Bar Lights are also another great option (we have used these in a different cabinet).
If you want to see how a paint color would look before you head to Lowe’s, you can upload a photo of your room to the Olympic® Paint Visualizer tool. After a few clicks you can give your room a digital makeover with any Olympic Paint color too!
Disclosure: This post is a sponsored conversation by The Motherhood and Olympic Paints. All thoughts are 100% my own.

2 Comments