
Coffee Filter Flowers – Easy Last Minute Valentines!
This post may contain affiliate links and I may be compensated for this post. Please read our disclosure policy here.

How To Coffee Filter Flowers To Use for Valentines at Kids School Parties!
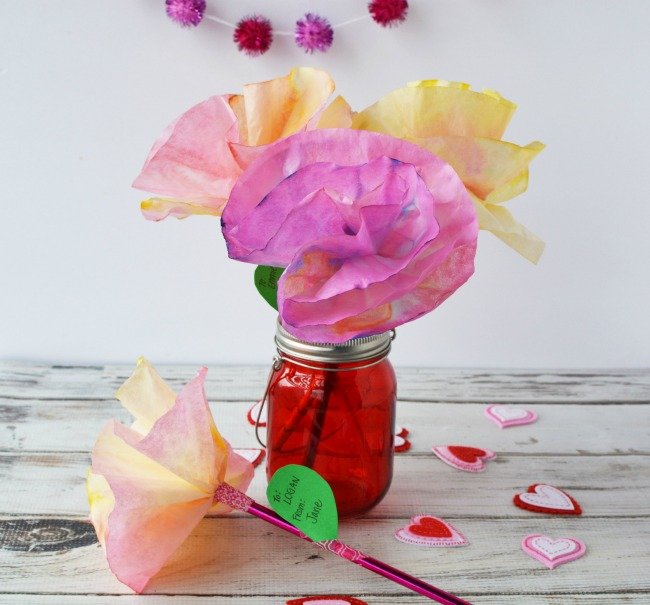
If you’re like me and often end up doing things at the last minute, here is a super easy idea for kids’ Valentines to hand out for school, using some items you may already have in your pantry – coffee filters and food coloring! We show you how to make paper flowers from coffee filters (so easy) and then attach to a pencil, for fun school valentines. You can grab the pencils at the Dollar Store, making this a very affordable Valentine to pass out too.
We made these simple handmade paper flowers, and attached them to a pack of Valentine pencils we got at the Dollar store for the stem. The pencils make it fun, but you could even just make the flower as the valentine if you did not have access to those (or use a small candy for the base).
I made them for my daughters one evening and it took me about 10 – 15 minutes. The kids even helped, so it’s one that you could have the kids do on their own if you prefer. And my daughter loved the result and was excited to hand them out to the class!
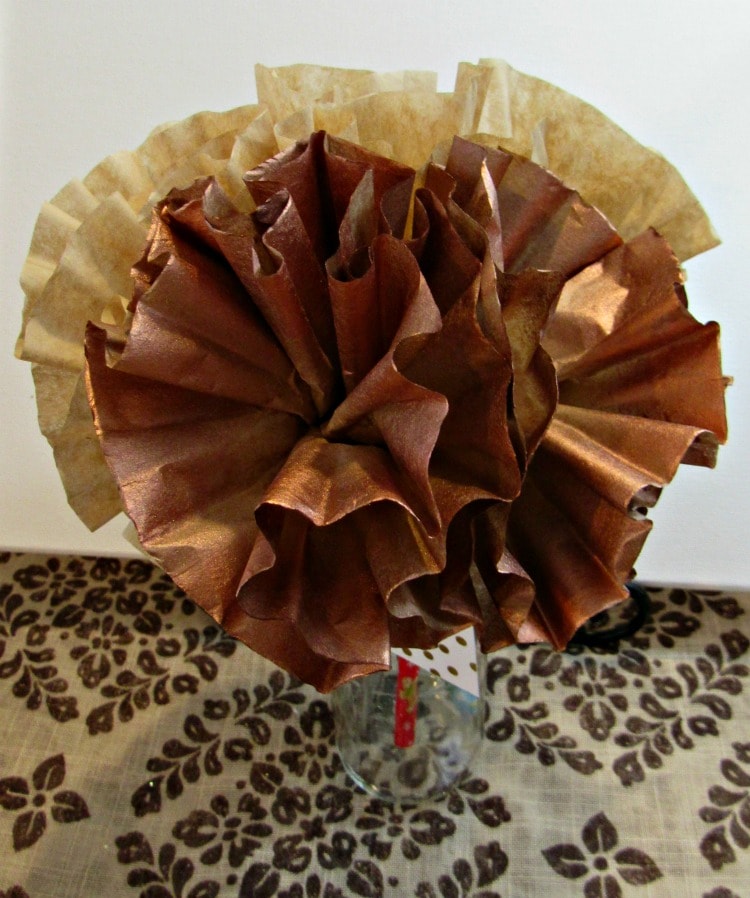
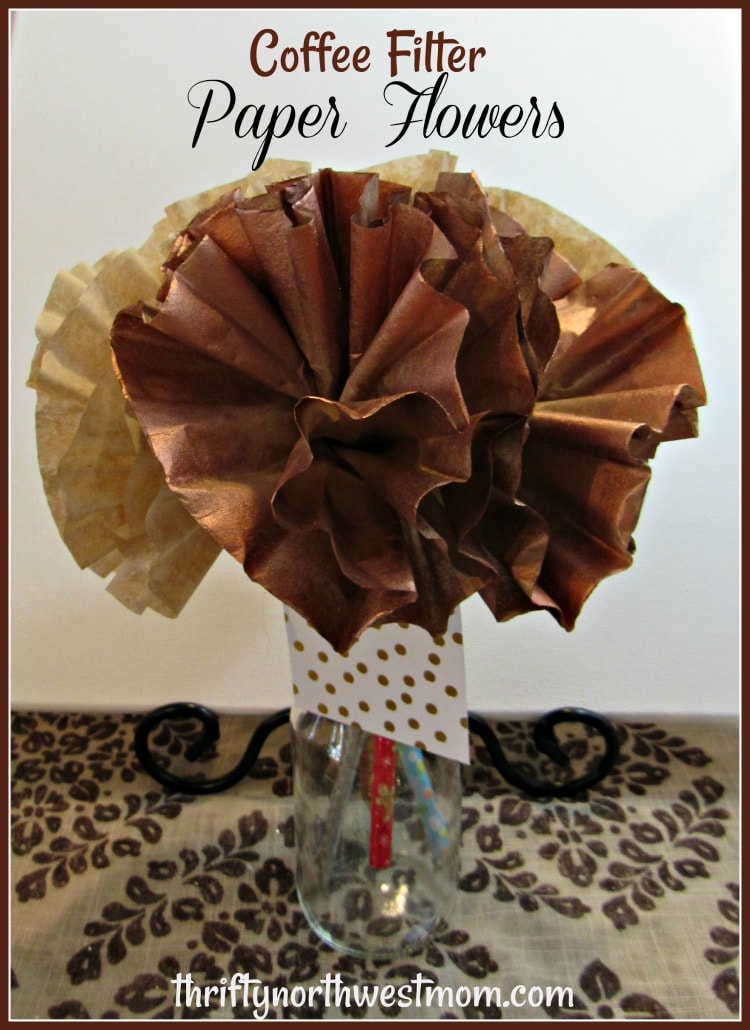
A second option is to spray paint some of the coffee filters. I have one child who loves all things that are “rose gold” right now. We had some left over rose gold spray paint, so I did take a few minutes to just spray the tips of some of the coffee filters with a light coating of the rose gold paint. We used a mix of plain pencils we had on hand that we wrapped with washi tape and made this version that we show above too. This is a good way to make them if you do not have the time to let the coffee filters dry overnight.
Here is how to make the colorful flowers using the white filters and food coloring:
Coffee Filter Paper Flowers Supply List:
- 2 coffee filters per flower
- Tape (we used craft tape as it is easy to take off when the kids want to use the pencils, but regular scotch tape would work fine too)
- Pencils if you choose to use for the base (optional)
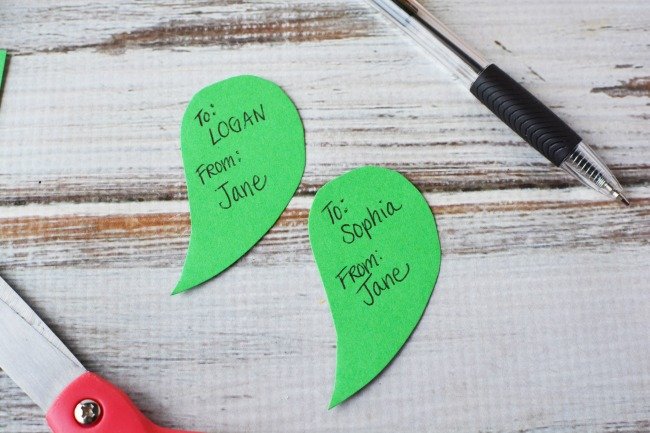
- Construction paper for the leaf (this is where you will write the child’s name who you plan to give the valentine to). In the past, we have gone with the traditional green color here, but any paper color cut into the shape of a leaf would work fine. This year, we added a label with gold dots to glam her flowers up a bit, and then the ” happy valentines” message can be written on the back of this.
How to make your own paper flowers with coffee filters:
Step 1: (Optional) Coloring your filters
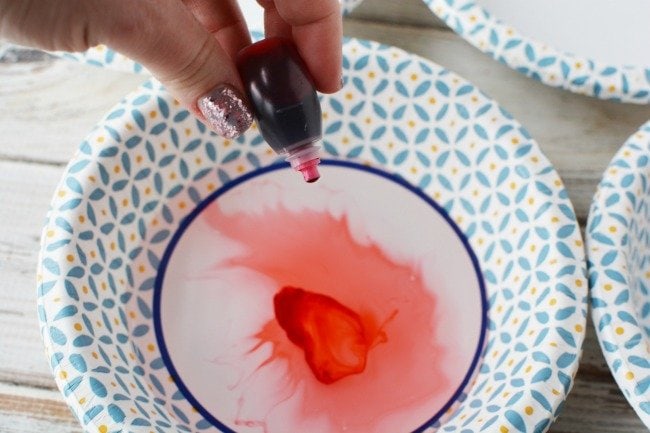
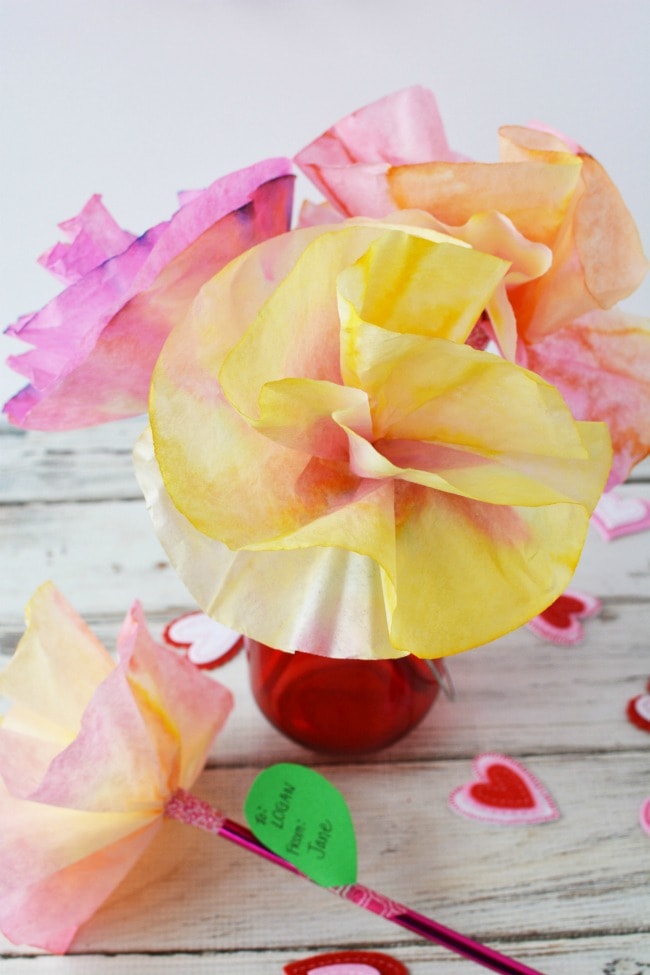
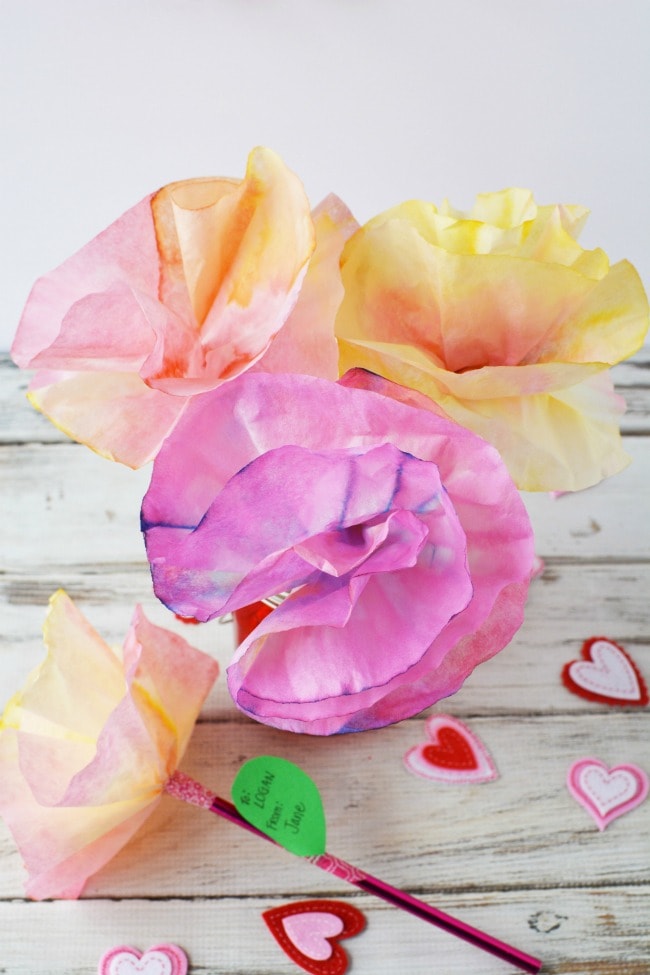
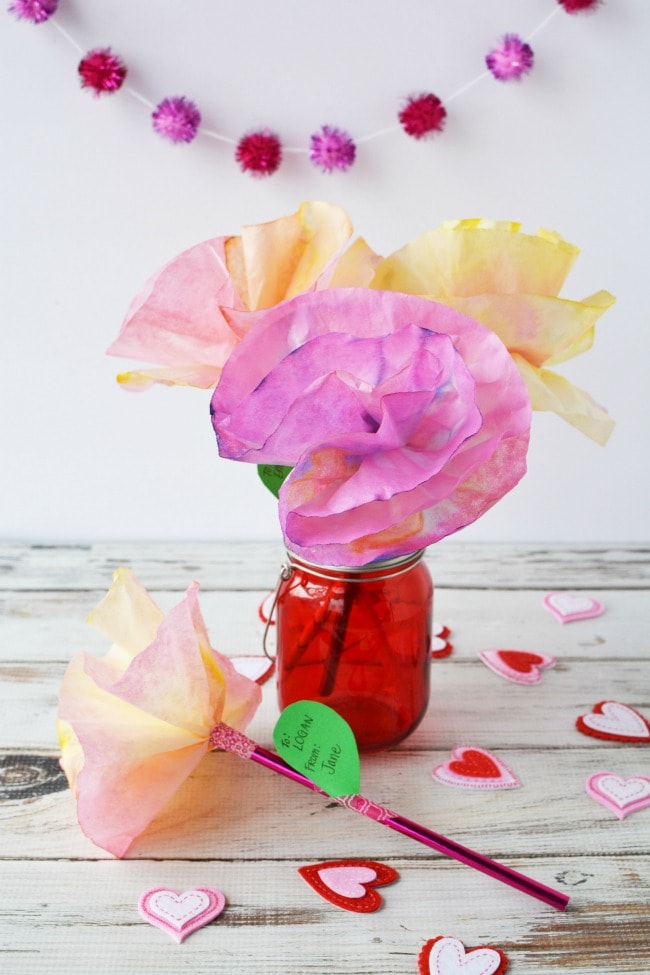
Start by making bowls of the colors you want your flowers to be. We used 1/2 cup of water in each bowl and 10-15 drops of coloring. We used 4 colors making them this time, neon pink, neon purple, red and yellow. You can use any colors that you love or have on hand.

If you want your flowers to be all one color, you can immerse the filter into the colored water and let them dry. You can also just dip the end of the filter in, for a multi-colored technique. I loved them all, so you can certainly skip this step and still end up with pretty white flowers or natural colored flowers too.
If you want just the inside colored, you can fold the filter in half, and then in half again (like shown above) and then dip that center part into the food coloring.
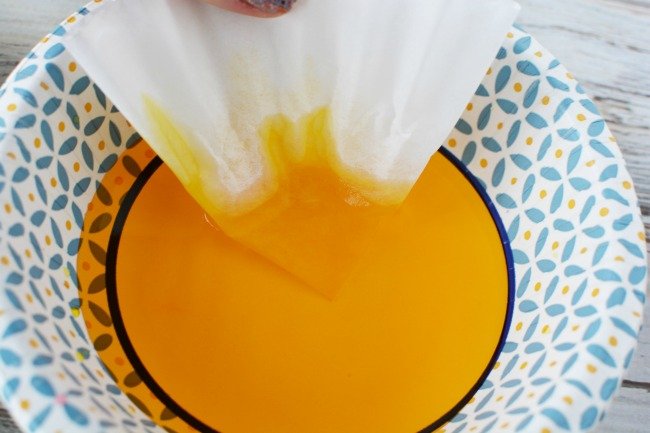
You can also add color on the inside and the outside for multi-colored flowers.

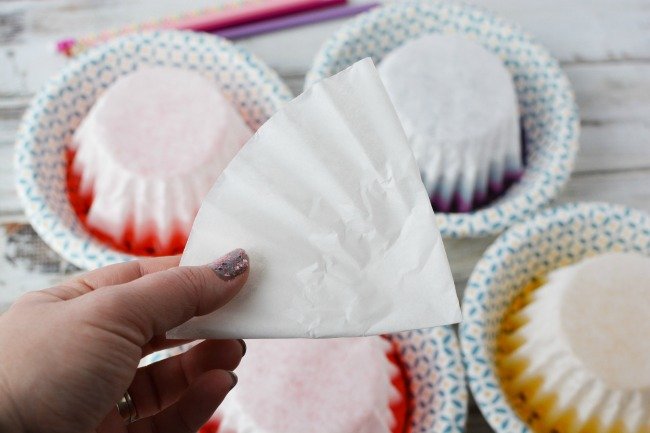
This step will need to be done one day in advance if you choose to color them, so they have time to fully dry. If you choose to paint with spray paint, you will just want to do that 10 to 15 minutes ahead of time. They dry pretty fast.

Next put them on a piece of cardboard to dry overnight. Be careful of the surface you dry them on, so you don’t risk staining anything with the food coloring that drips out. Once they are fully dried, you are ready to turn them into flowers.
Step 2: Making the Flower
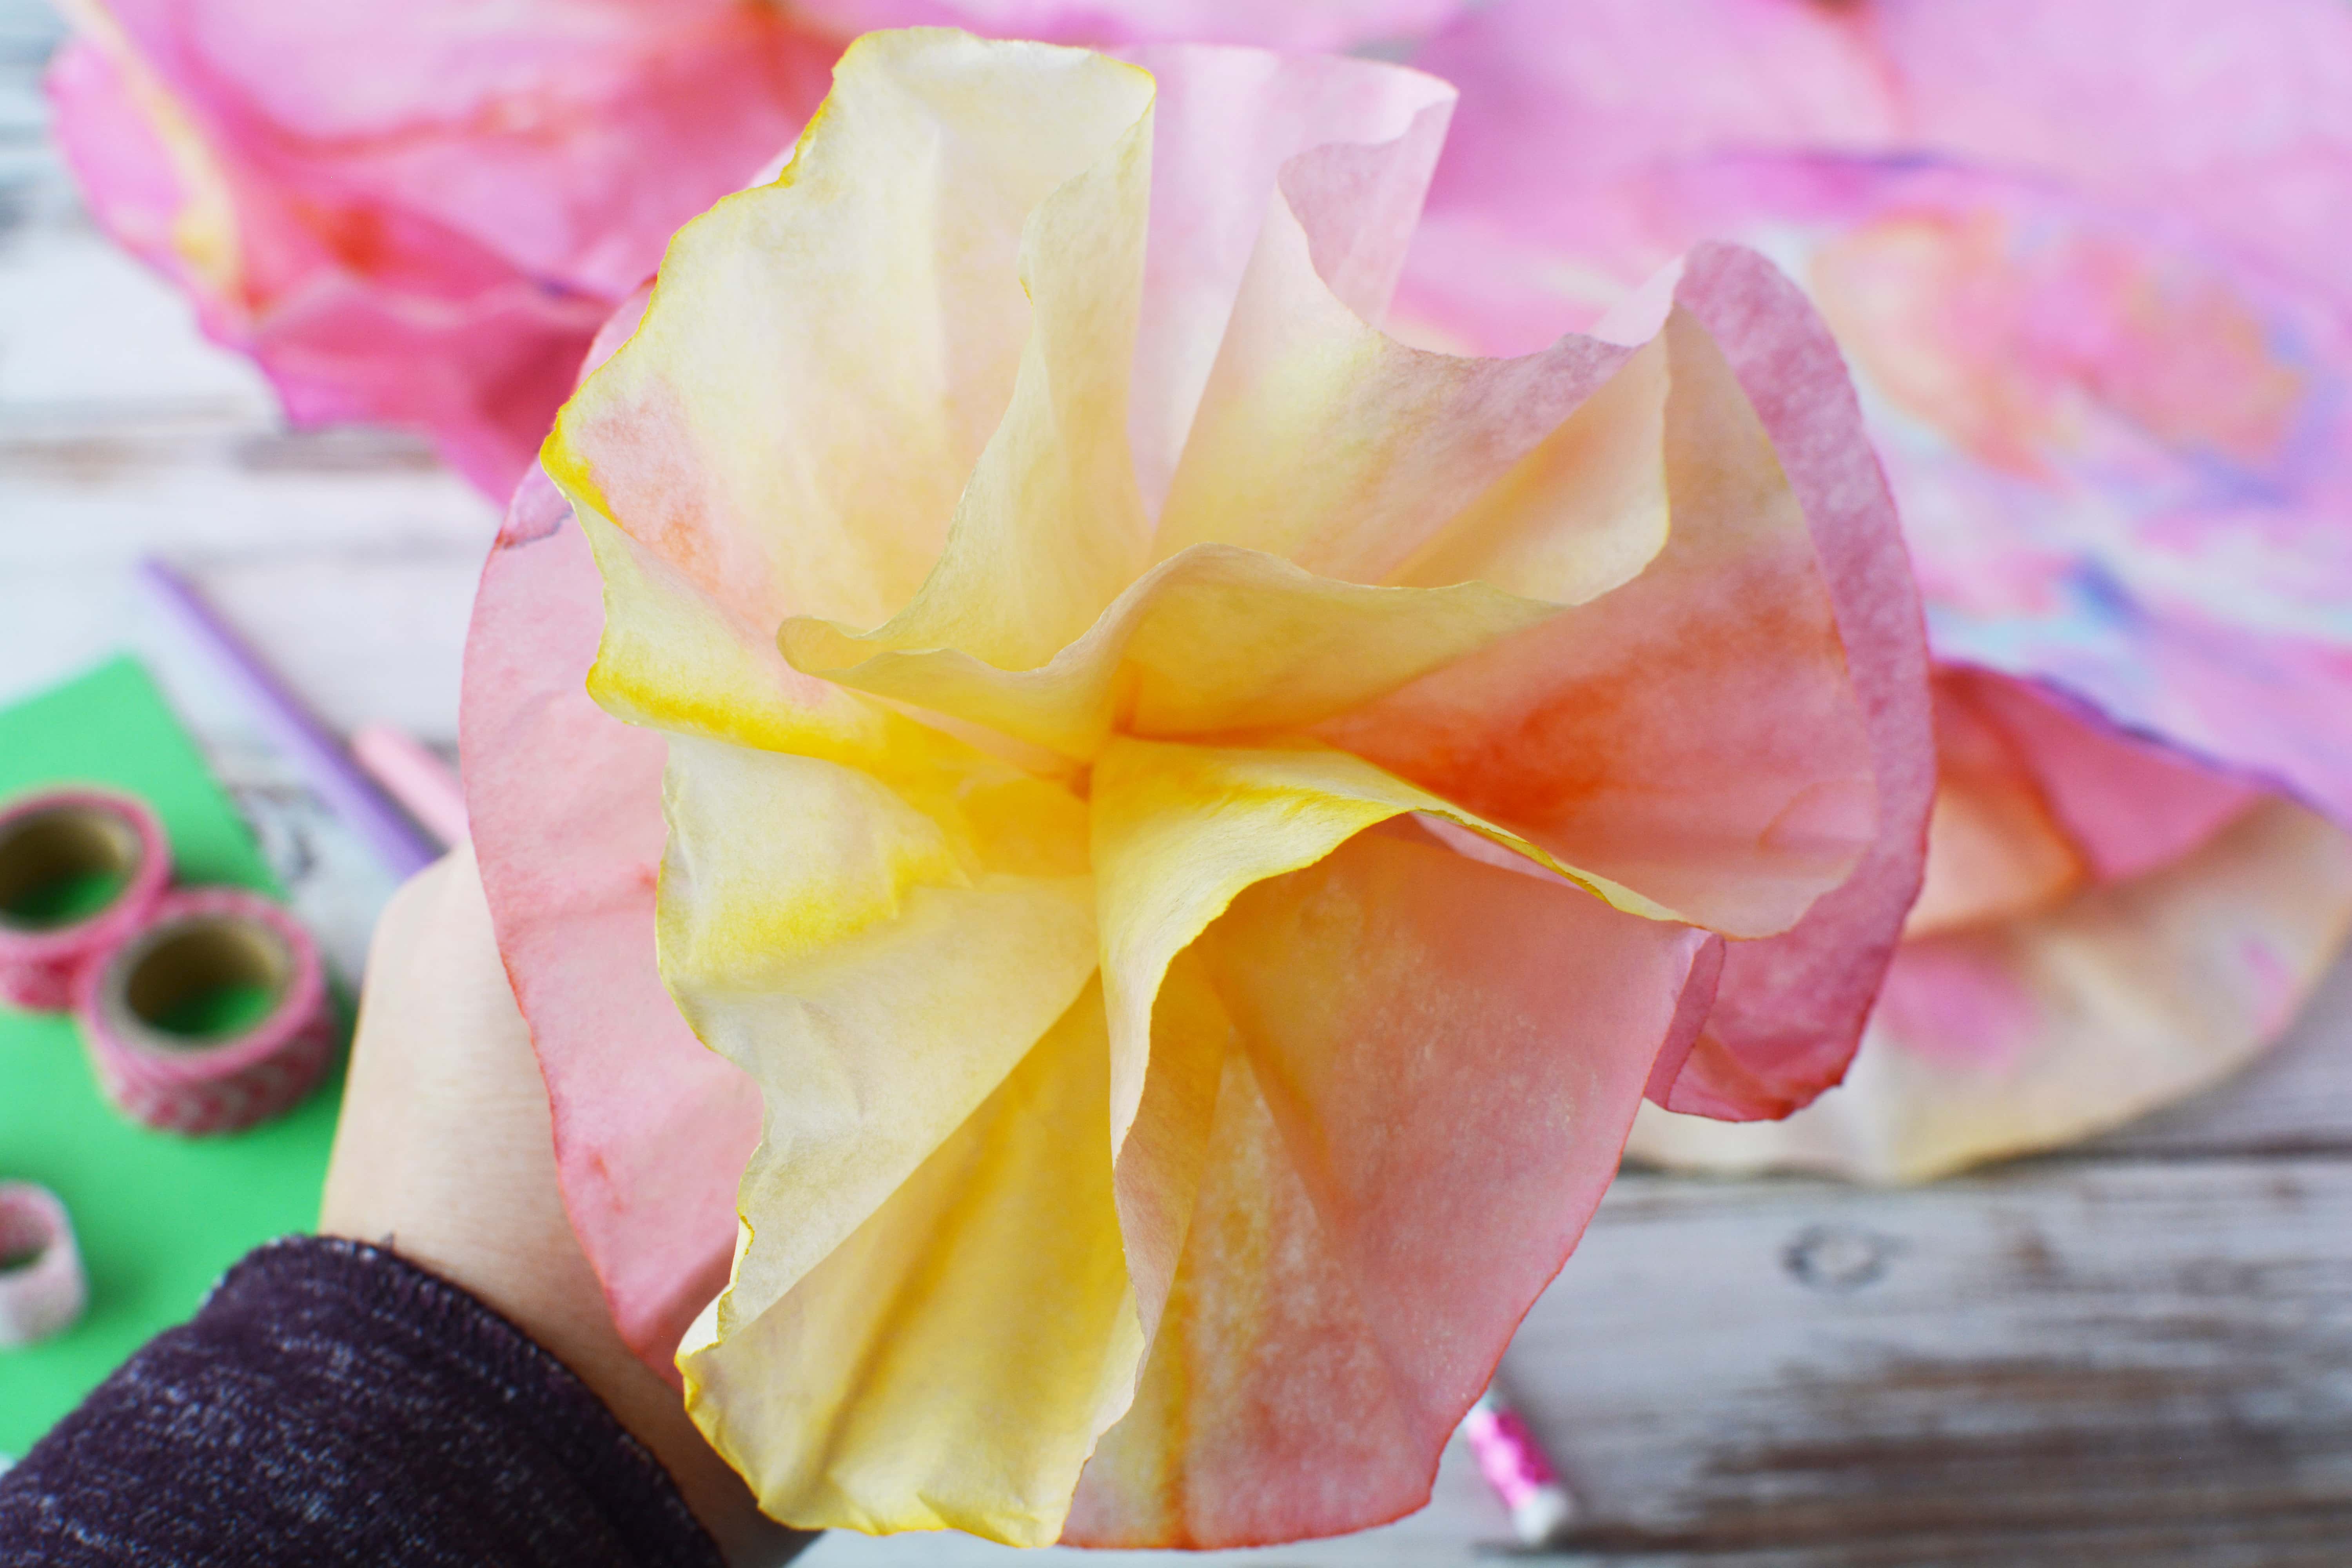
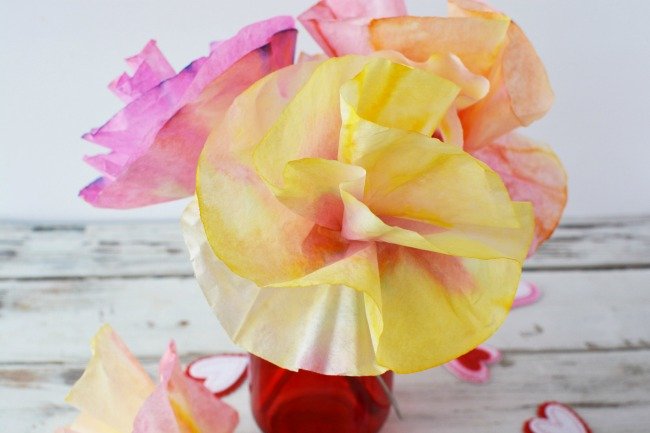
Once your filters are dry, or if you are making all white flowers, simple stack two filters on top of each other.
Folding Paper Flowers: Next fold them in half. You can do this lightly (without creasing it) as you will create the flower shape from here.
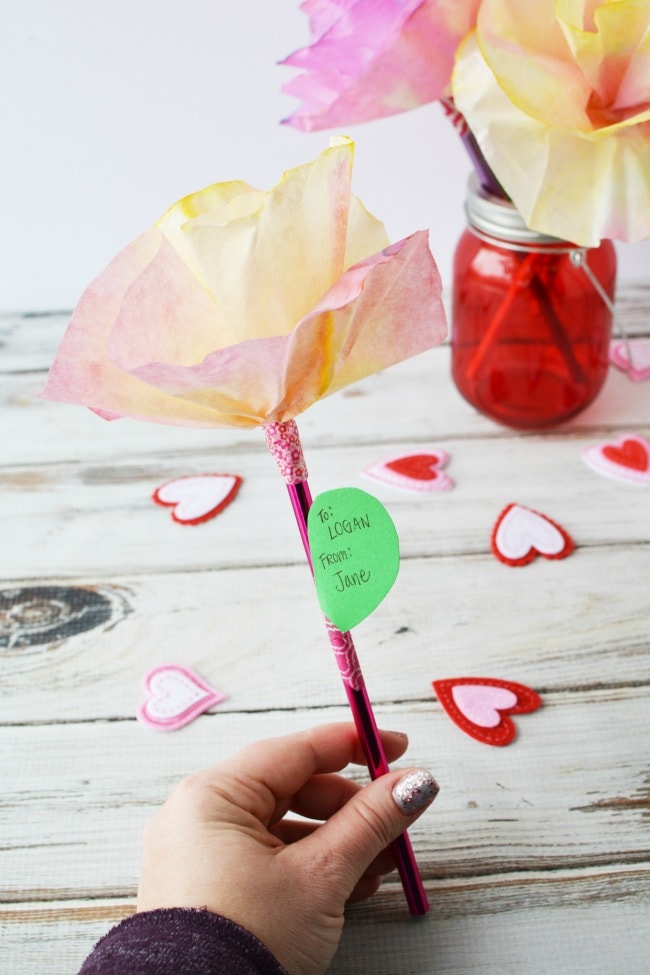
Then wrinkle them up into a flower shape by twisting a base at the bottom and adjusting the filters until you get the look you like. Then place the top of the pencil, at the bottom of the filter, and wrap around pencil.
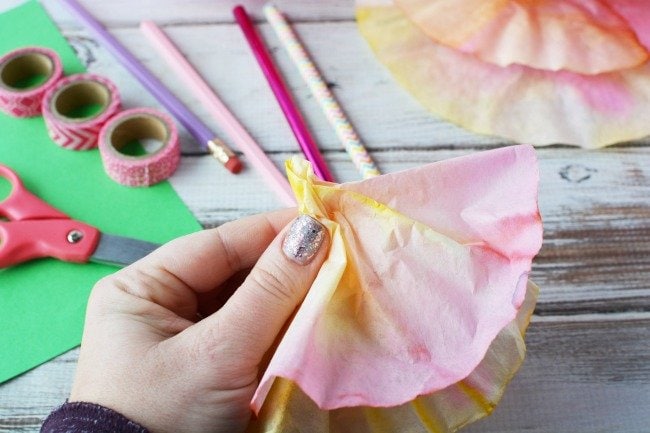
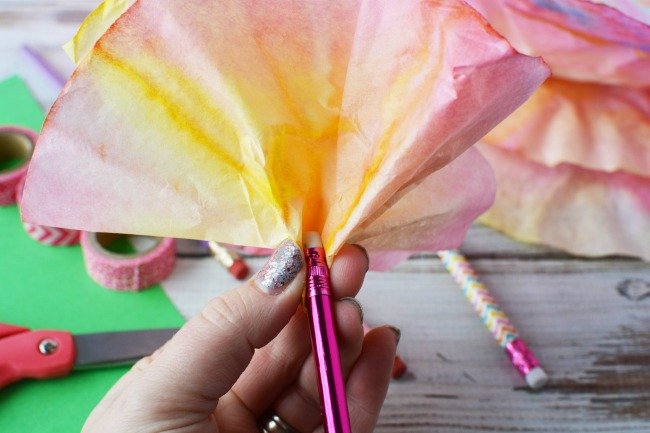
Step 3: Attach them to your Pencil Base
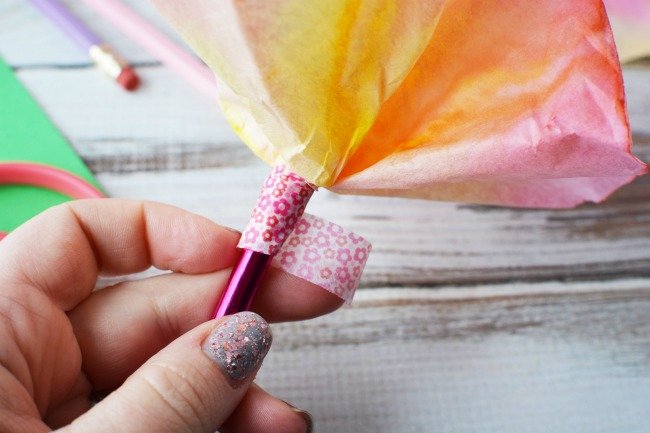
For this step, you will want to have your tape handy. Wrap the bottom of the flower around the eraser of the pencil and attach with tape. Craft tape is my preferred tape, as it is easy to remove later on, but regular scotch tape will work fine too.
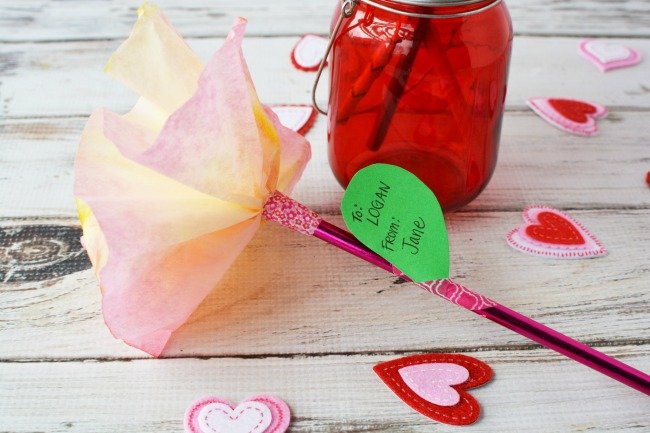
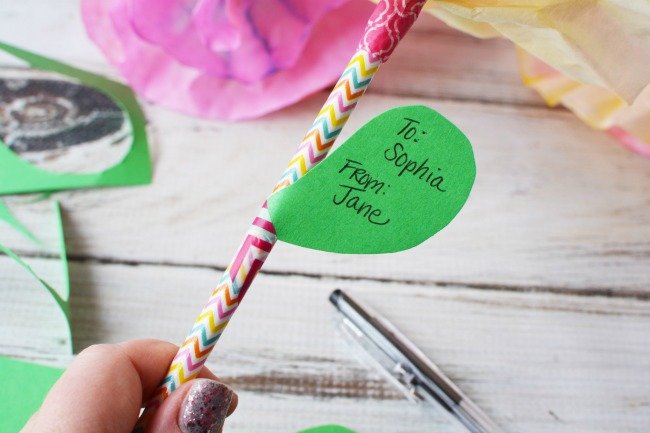
Step 4: Make the Leaf
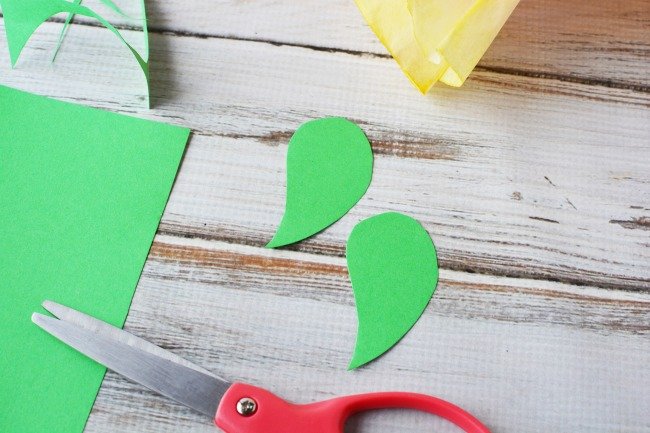
Cut out a leaf shape from the paper of your choice (we used green construction paper) and write the recipient’s name on the leaf.
Attach it to the pencil just under the flower and that’s it.
Your Flower Pencil Valentine is now ready to hand out!
More Valentines Articles you might be interested in:
- I’ll Stick By You Free Valentines Day Printable + Candy Kabob Valentine Treats!
- Free “You’re a Winner” Valentine’s Day card printable in Blue or Pink
- Free “You are the Highlight of my Life” Valentine’s Day card printable
- Free “I’m Stuck on You” Valentine’s Day card printable
- Free “I’m Bananas for You” Valentine’s Day card printable
- Free “You’re a Great Catch” Valentine’s Day card printable

One Comment