
Painted Wooden Pumpkins – Easy Fall Decor To Make!
This post may contain affiliate links and I may be compensated for this post. Please read our disclosure policy here.
Painted Wooden Pumpkins – Easy Fall Decor To Make!
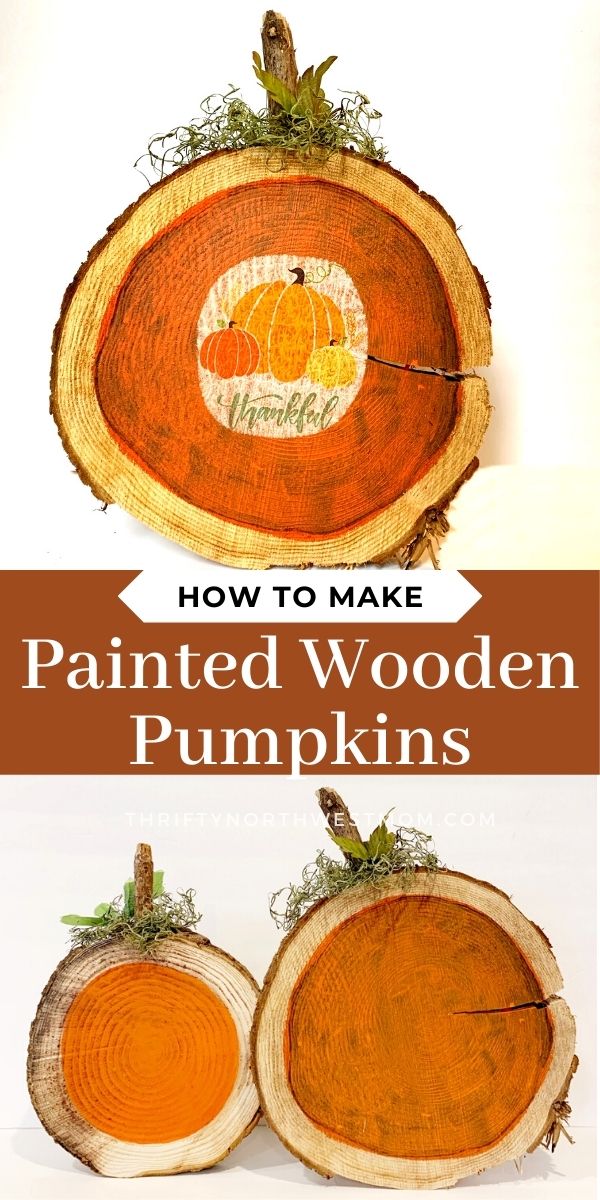
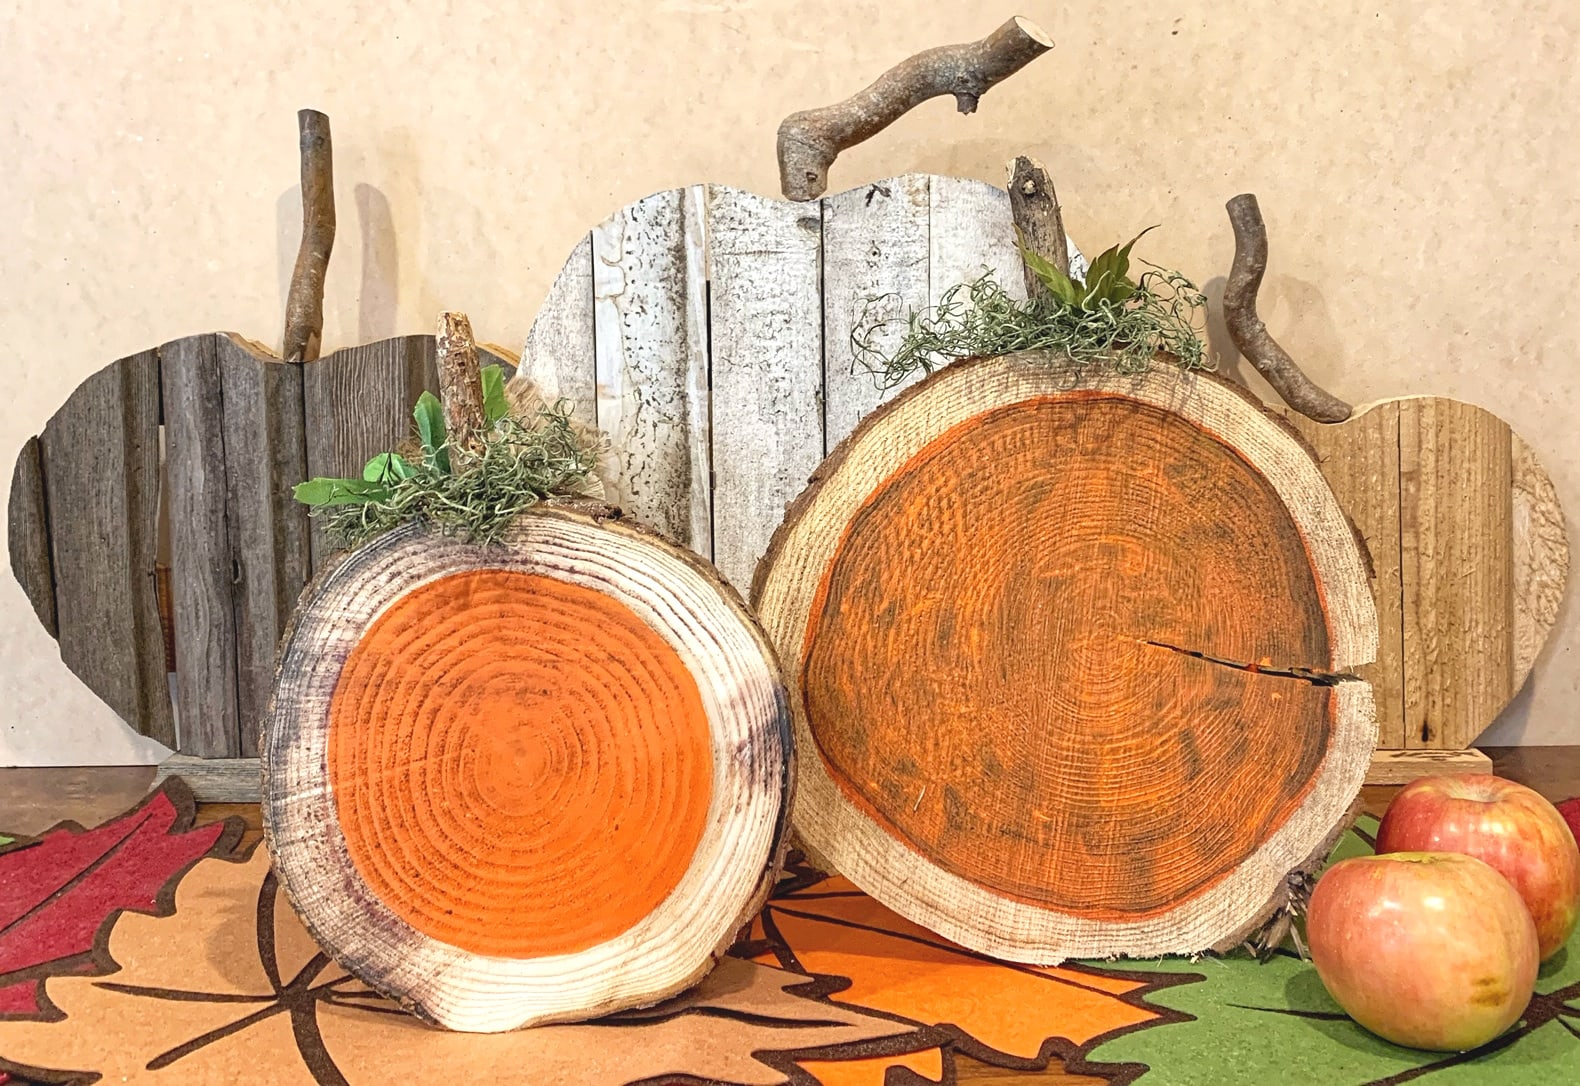
These Painted Wooden Pumpkins are so easy to make, and add really cute fall decor to your home (or could be used as gifts too). You start with the tree slices that are so popular these days. We cut them ourselves, but I have seen them all over the craft stores like Joannes, Michaels and Hobby Lobby. They come in all sizes too, so you can choose what size you want to make.
The process of making them is really easy, but once you have made your painted wooden pumpkins, you can embellish them with all kinds of things, from twinkle lights to Cricut Vinyl cut out sayings, or decoupage on your favorite napkin or fall picture.
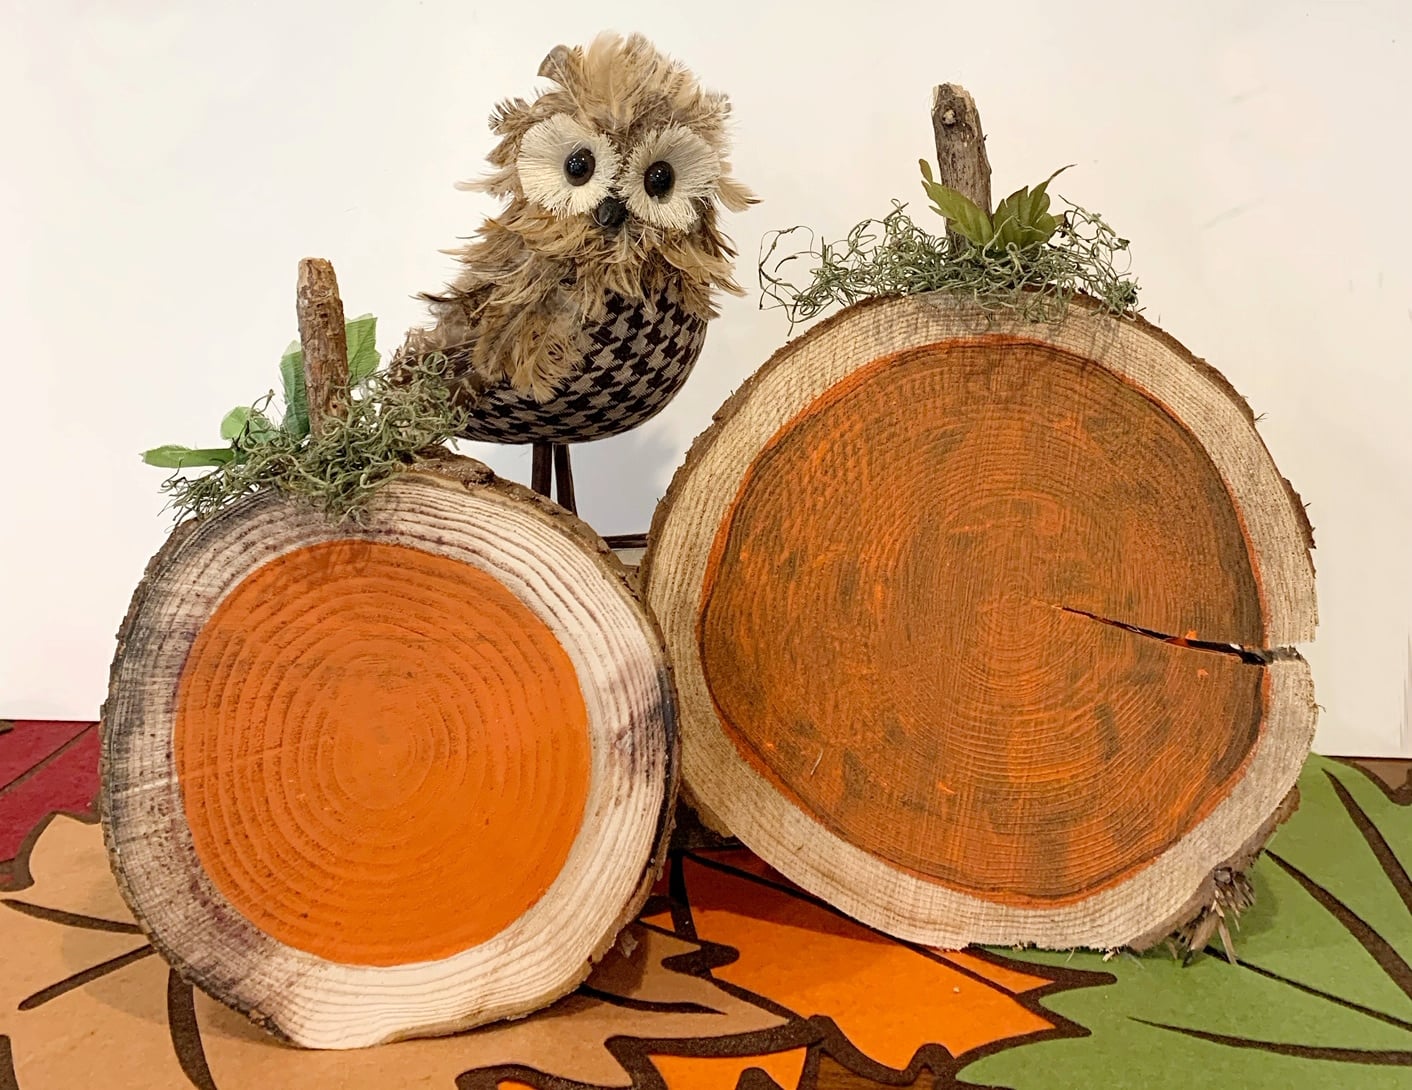
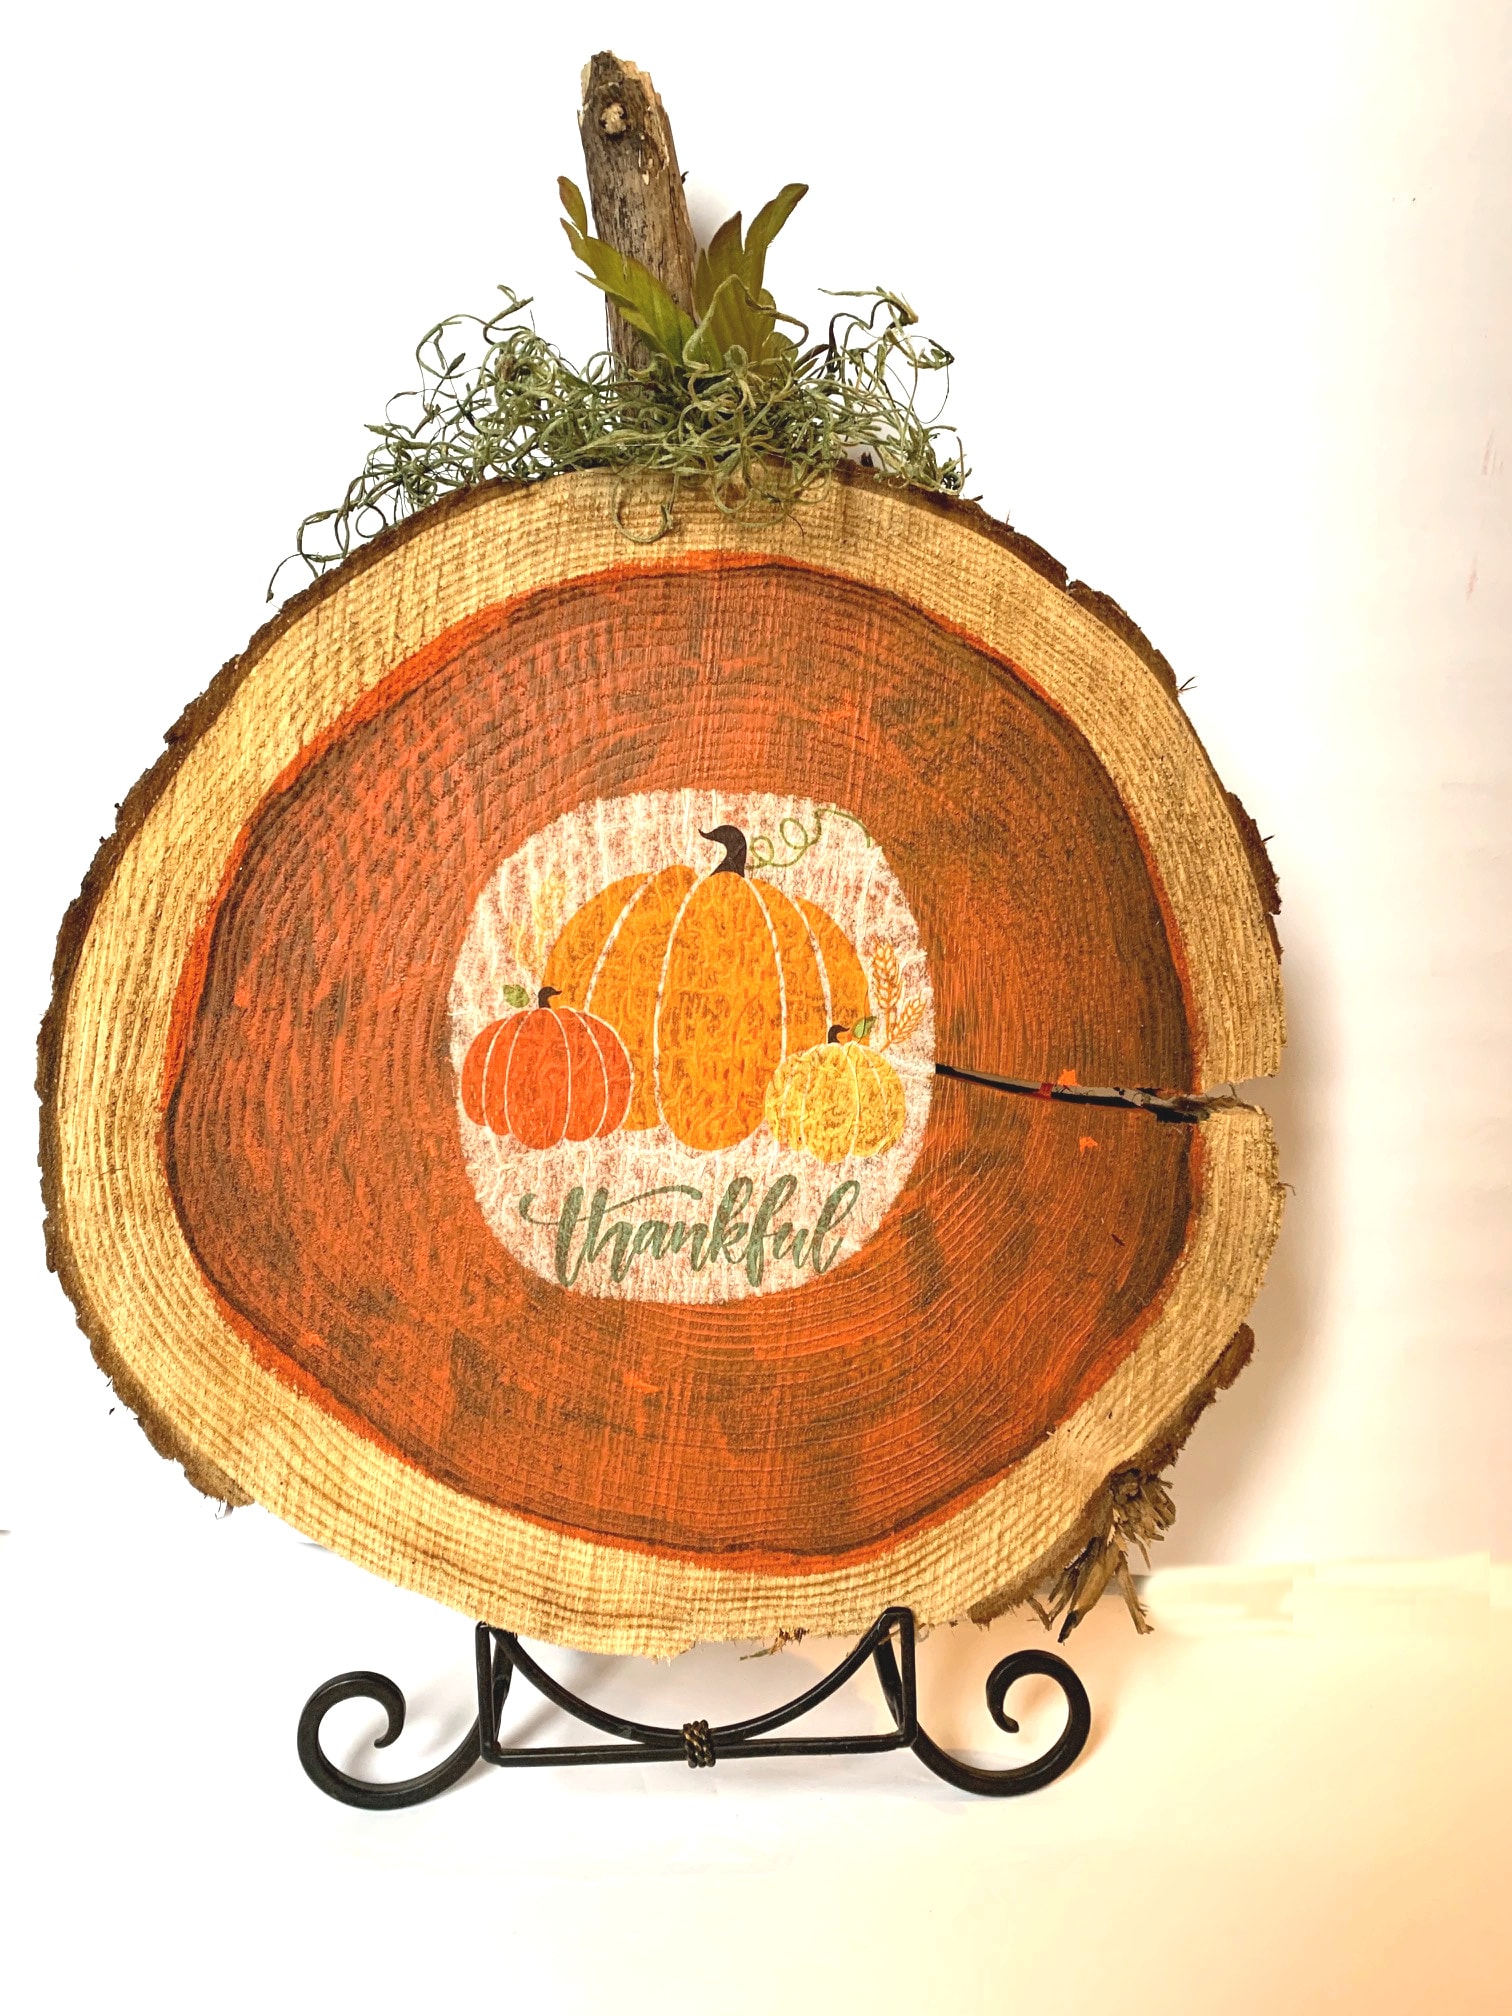
These are some of the simplest wooden pumpkins I have ever made. I had these wooden rounds that had been cut down from a tree on a family members property, but you can find them to purchase many places these days. What I love about these painted pumpkins, is that they are suppose to be rustic looking, so there is no hard work needed sanding your wood or prepping for this project. I simply started by wiping off my wood to make sure there was no wood dust on there that might make the paint grainy.
I painted a black circle under one pumpkin first, to see if I would like the look of putting the orange over the black, or directly on the wood better. I preferred directly on the wood, but show both here so you can decide which method you like best.
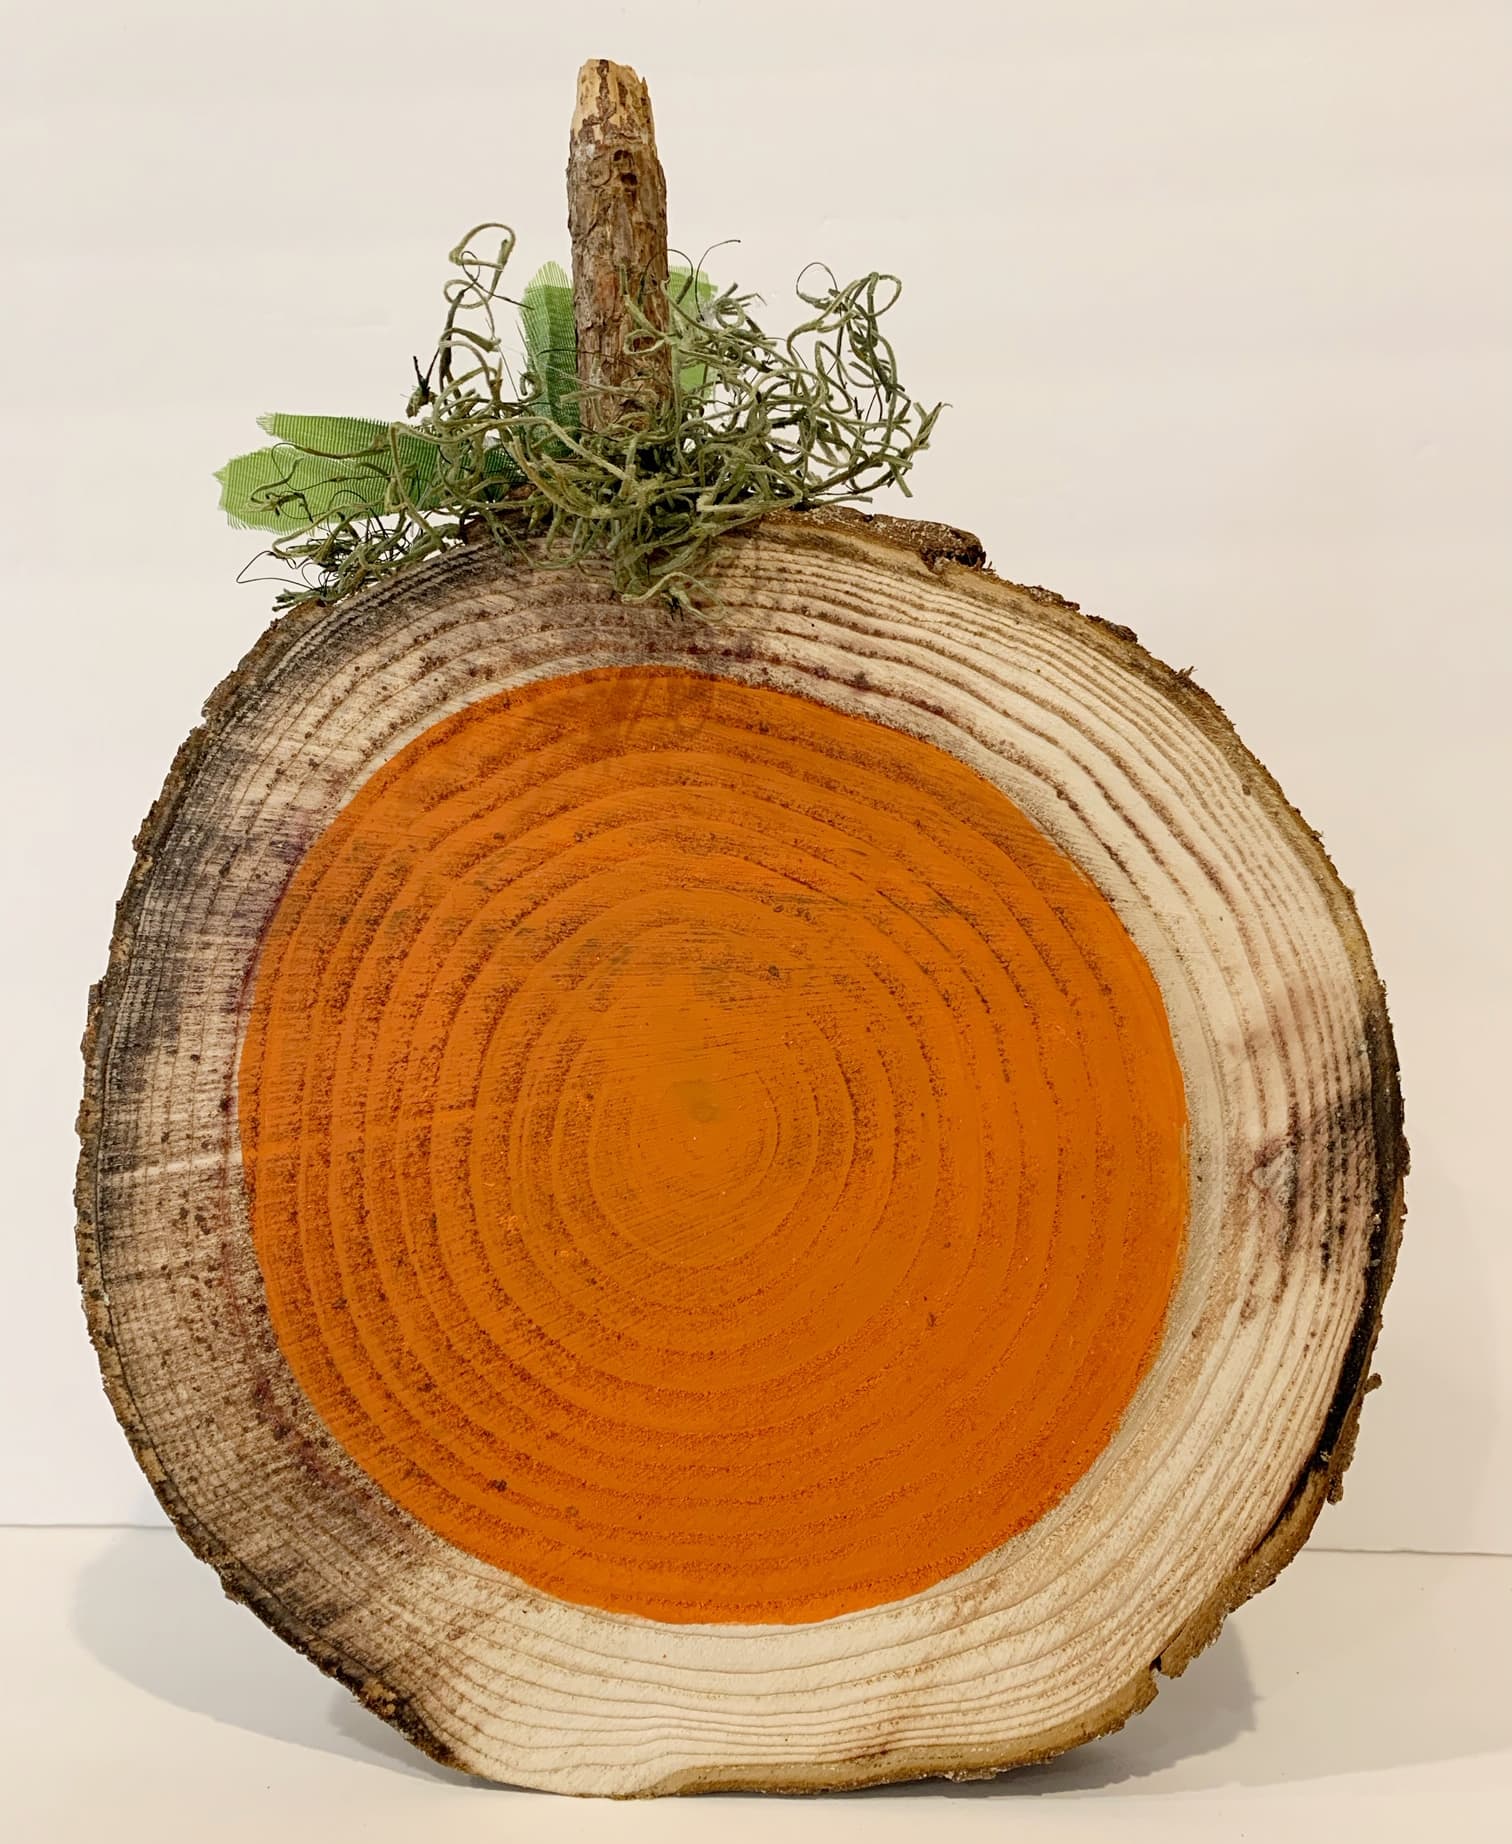
When painting the orange circle on the wood, I just freehanded it. My wood was very rustic to begin with (there were some darker areas from the chainsaw cut) so I did not feel like a perfect circle matched the wood. So, I simply followed one of the natural circles in the wood to paint my orange circle. If you have a more refined piece of wood, you could be more precise with your circle, it will all depend on the look you are going for.
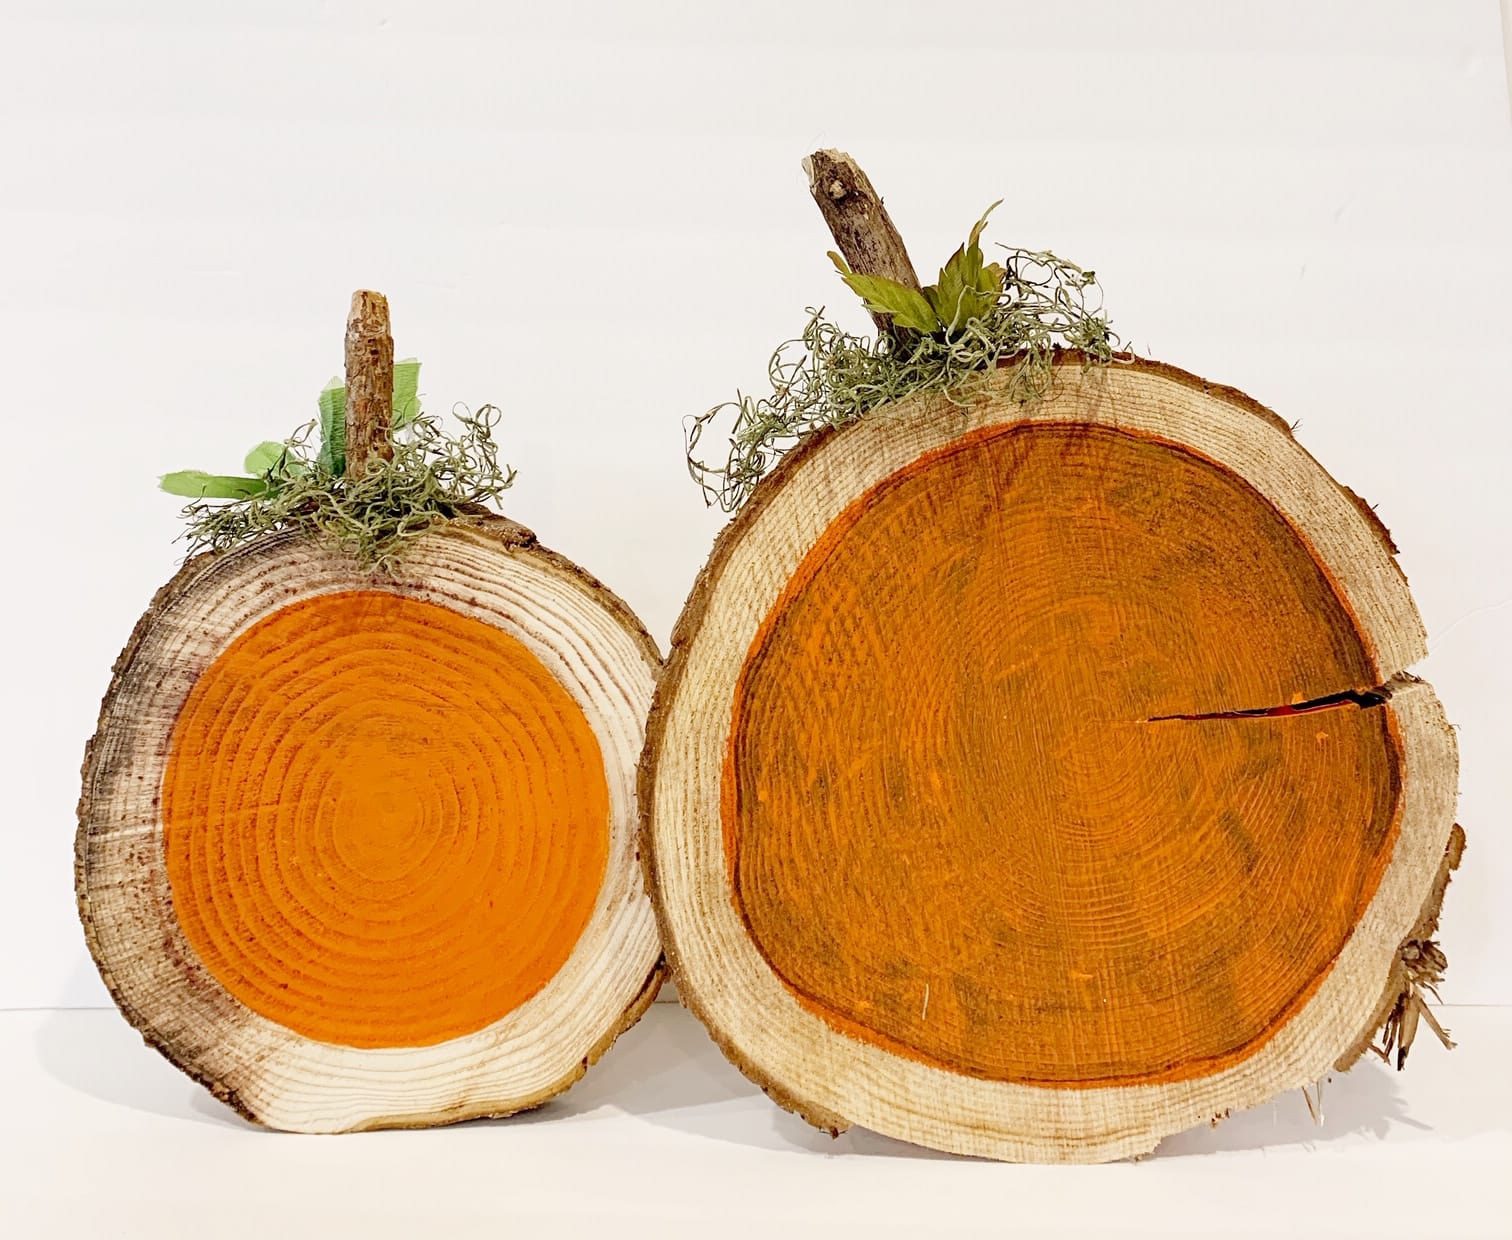
You could also do more coats of paint. I did two, because I liked some of the wood grain showing through.
Supplies Needed for Painted Wooden Pumpkins:
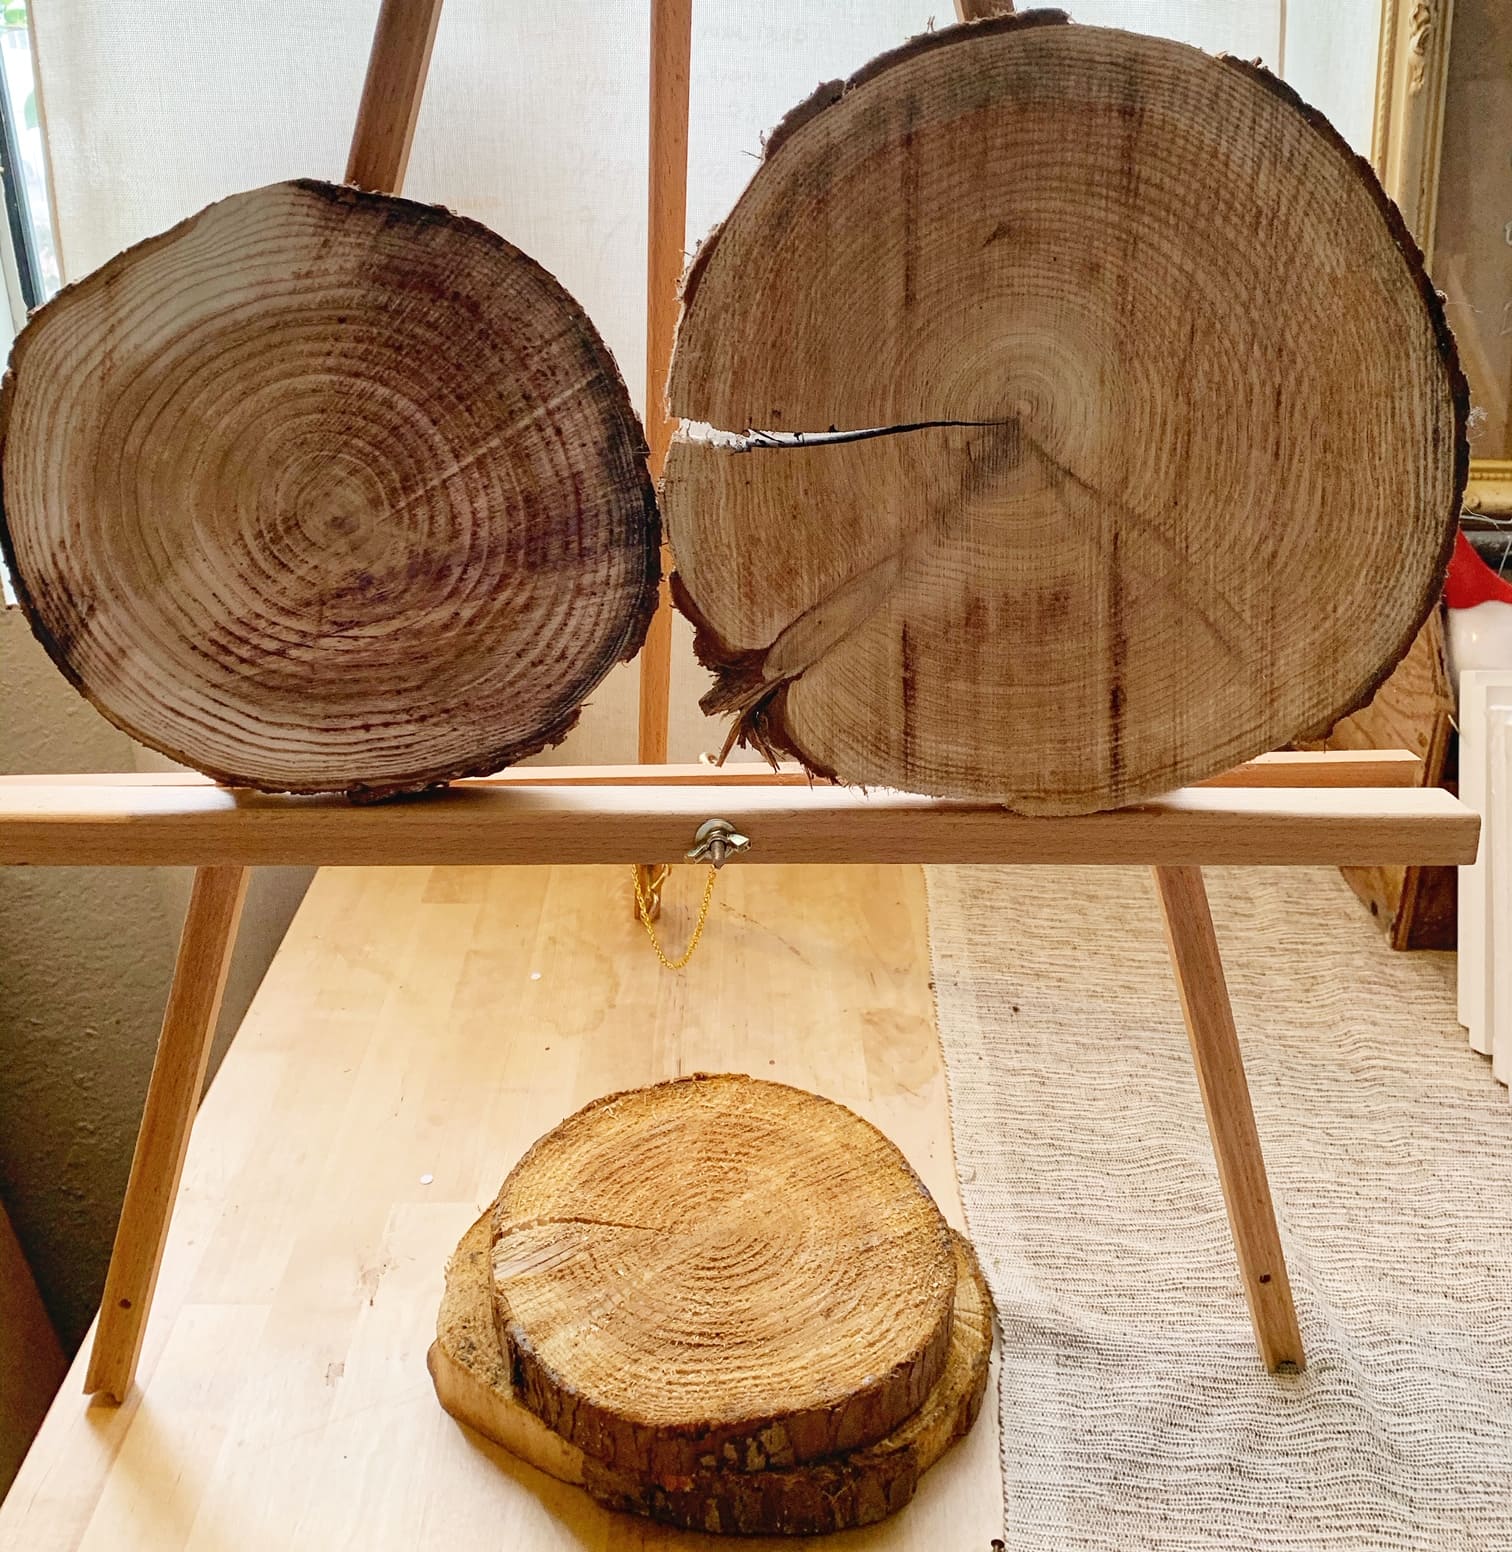
- Wooden flat rounds from a tree
(Or purchased from the craft store or online. This pack of 4 for $25.99, makes them just $6.50 each)
- Paint (I used acrylic craft paint – you can even get tubes at the Dollar Store)
- Twig, or tree branch for the stem (grabbed mine from the backyard)
- Hot Glue
- Leaves & Twine (optional) (grabbed mine from the dollar store)
How to Make a Painted Wooden Pumpkin:
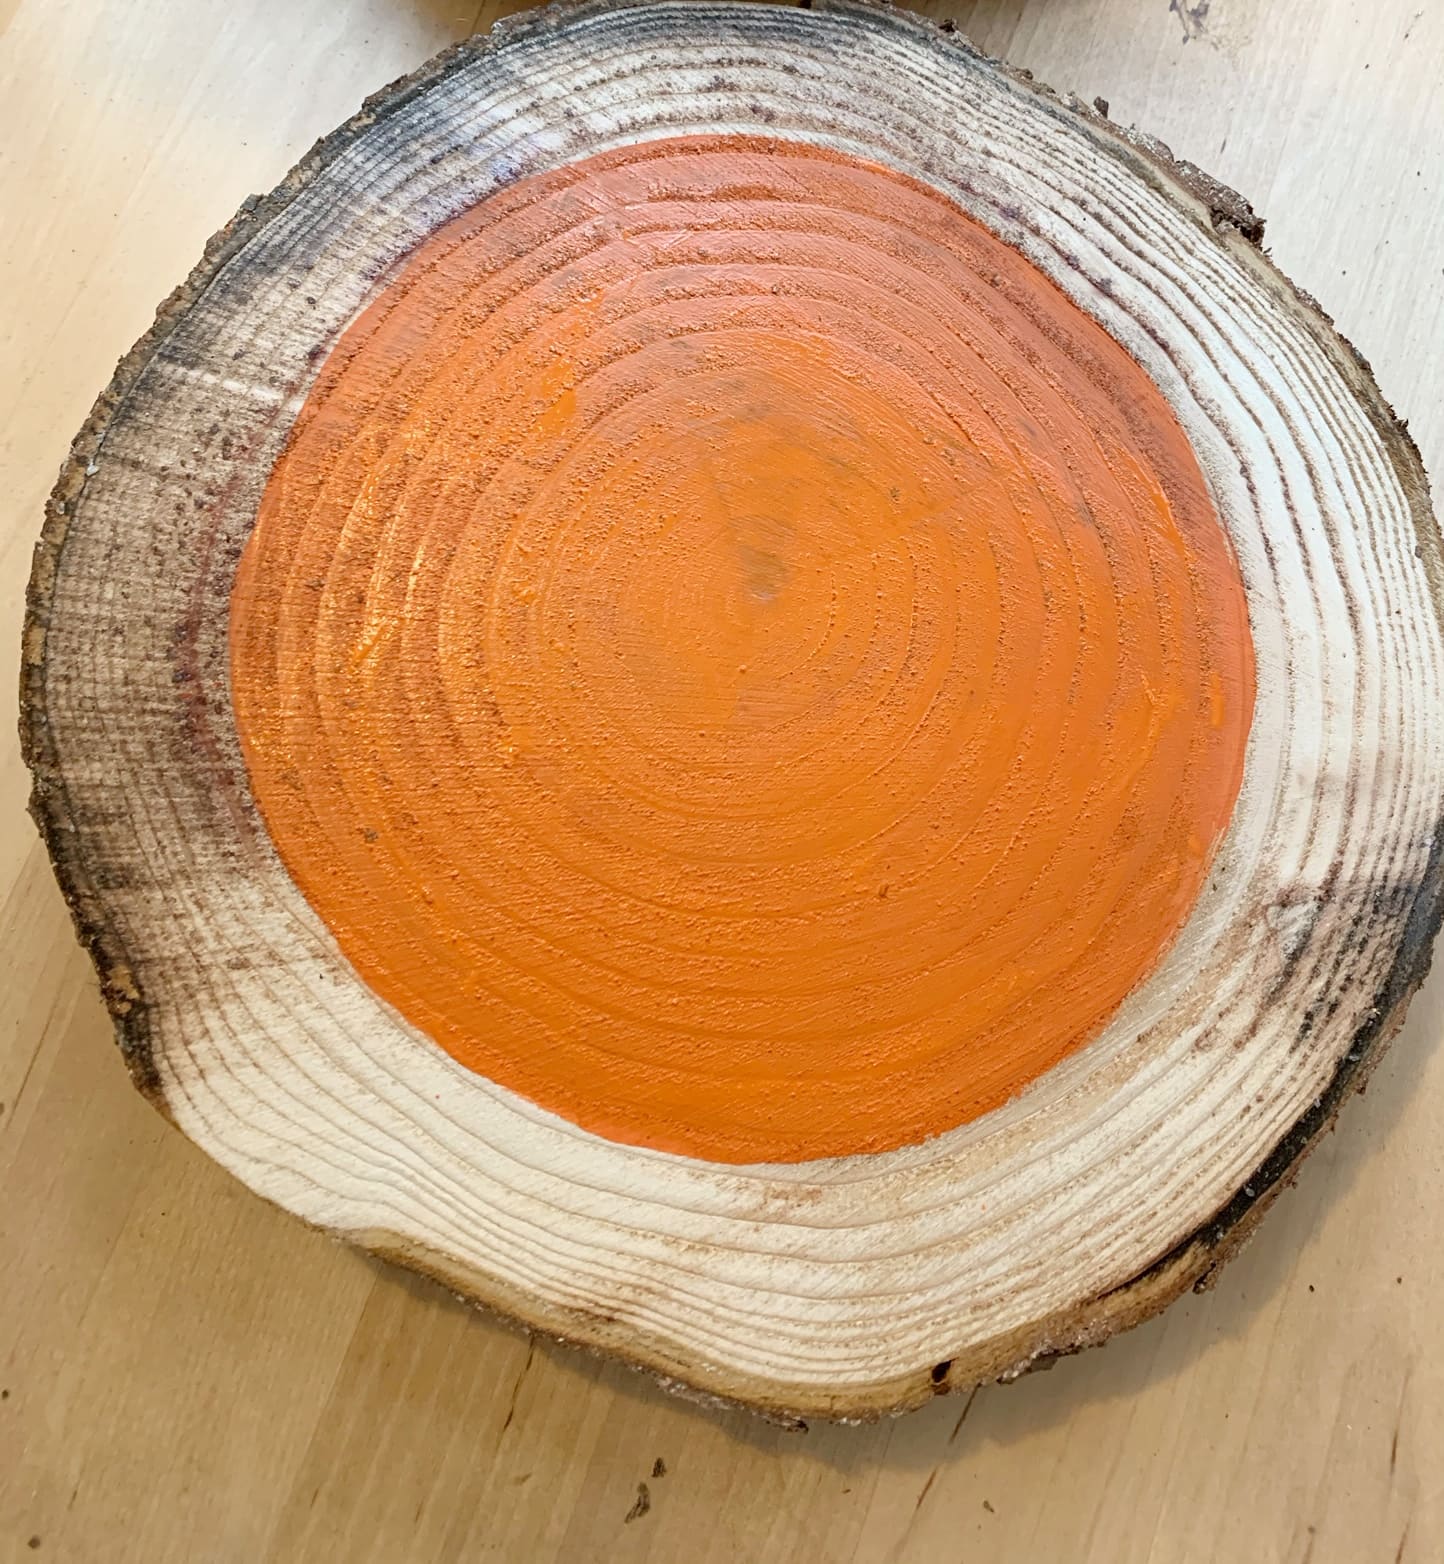
Lay out your wood round, and make sure it is dry and clean. Then paint a circle in the middle of your wood round in a shade of orange of your choice. I wanted to match my wood tone, so I mixed two colors of orange together to get something that was not too bright, or too red. I used acrylic craft paint for mine. Let the paint dry (it does not take too long), and you can do as many coats as you want until you get your desired look (I did two light coats above, one heavy coat would probably achieve the same look).
The wood will soak in some of your paint, so you can play with this step some, until you like how it looks.
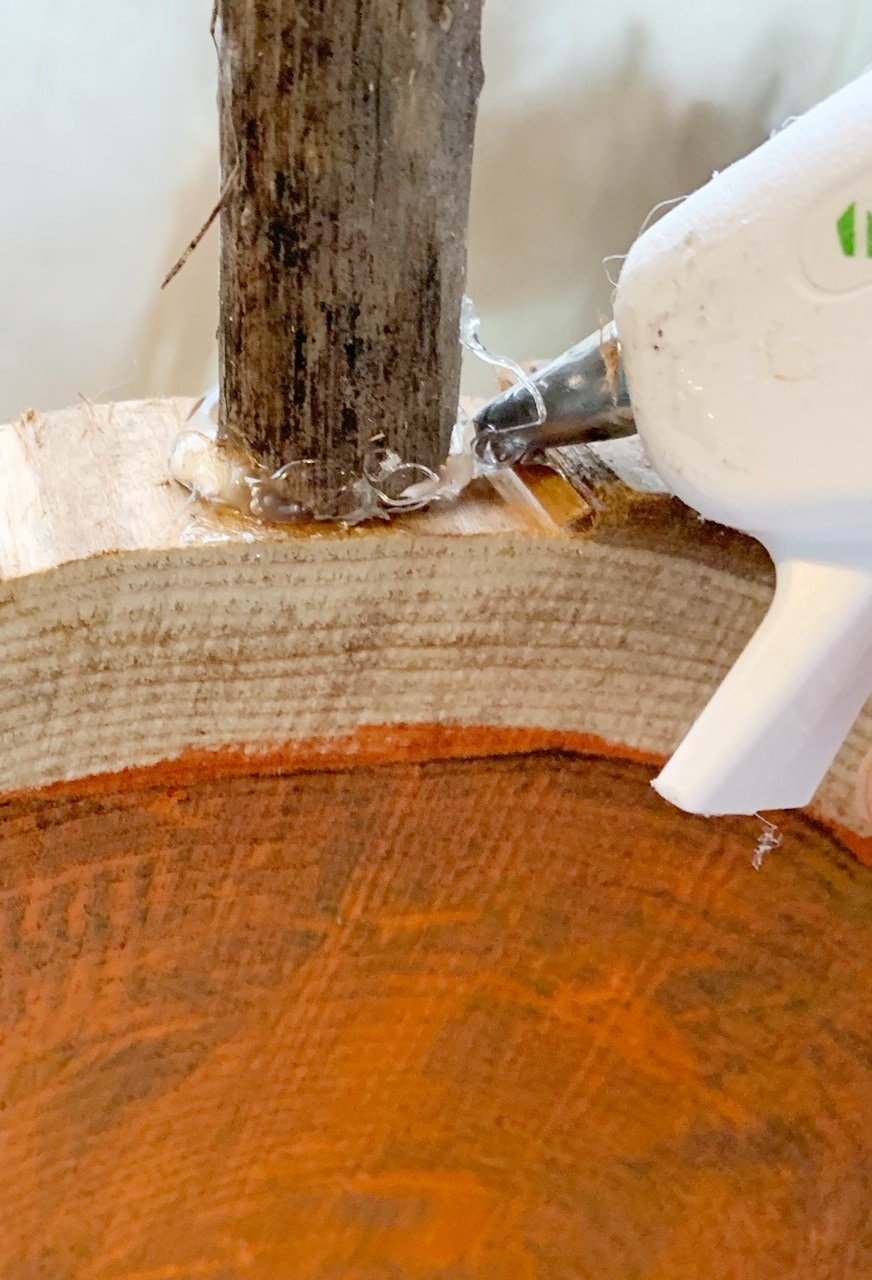
Once your paint is dry, you can add the stem. I just went out to the backyard and found a stick, and broke it down to stem size.
I attached my stick with hot glue. I knew that I would be adding the moss, so I was not too worried about being careful with my hot glue not showing (as it will be covered with moss in next step), and I wanted it on there securely. If you won’t be using moss or twine to embellish more, then you will want to be more careful to make sure your hot glue does not show.
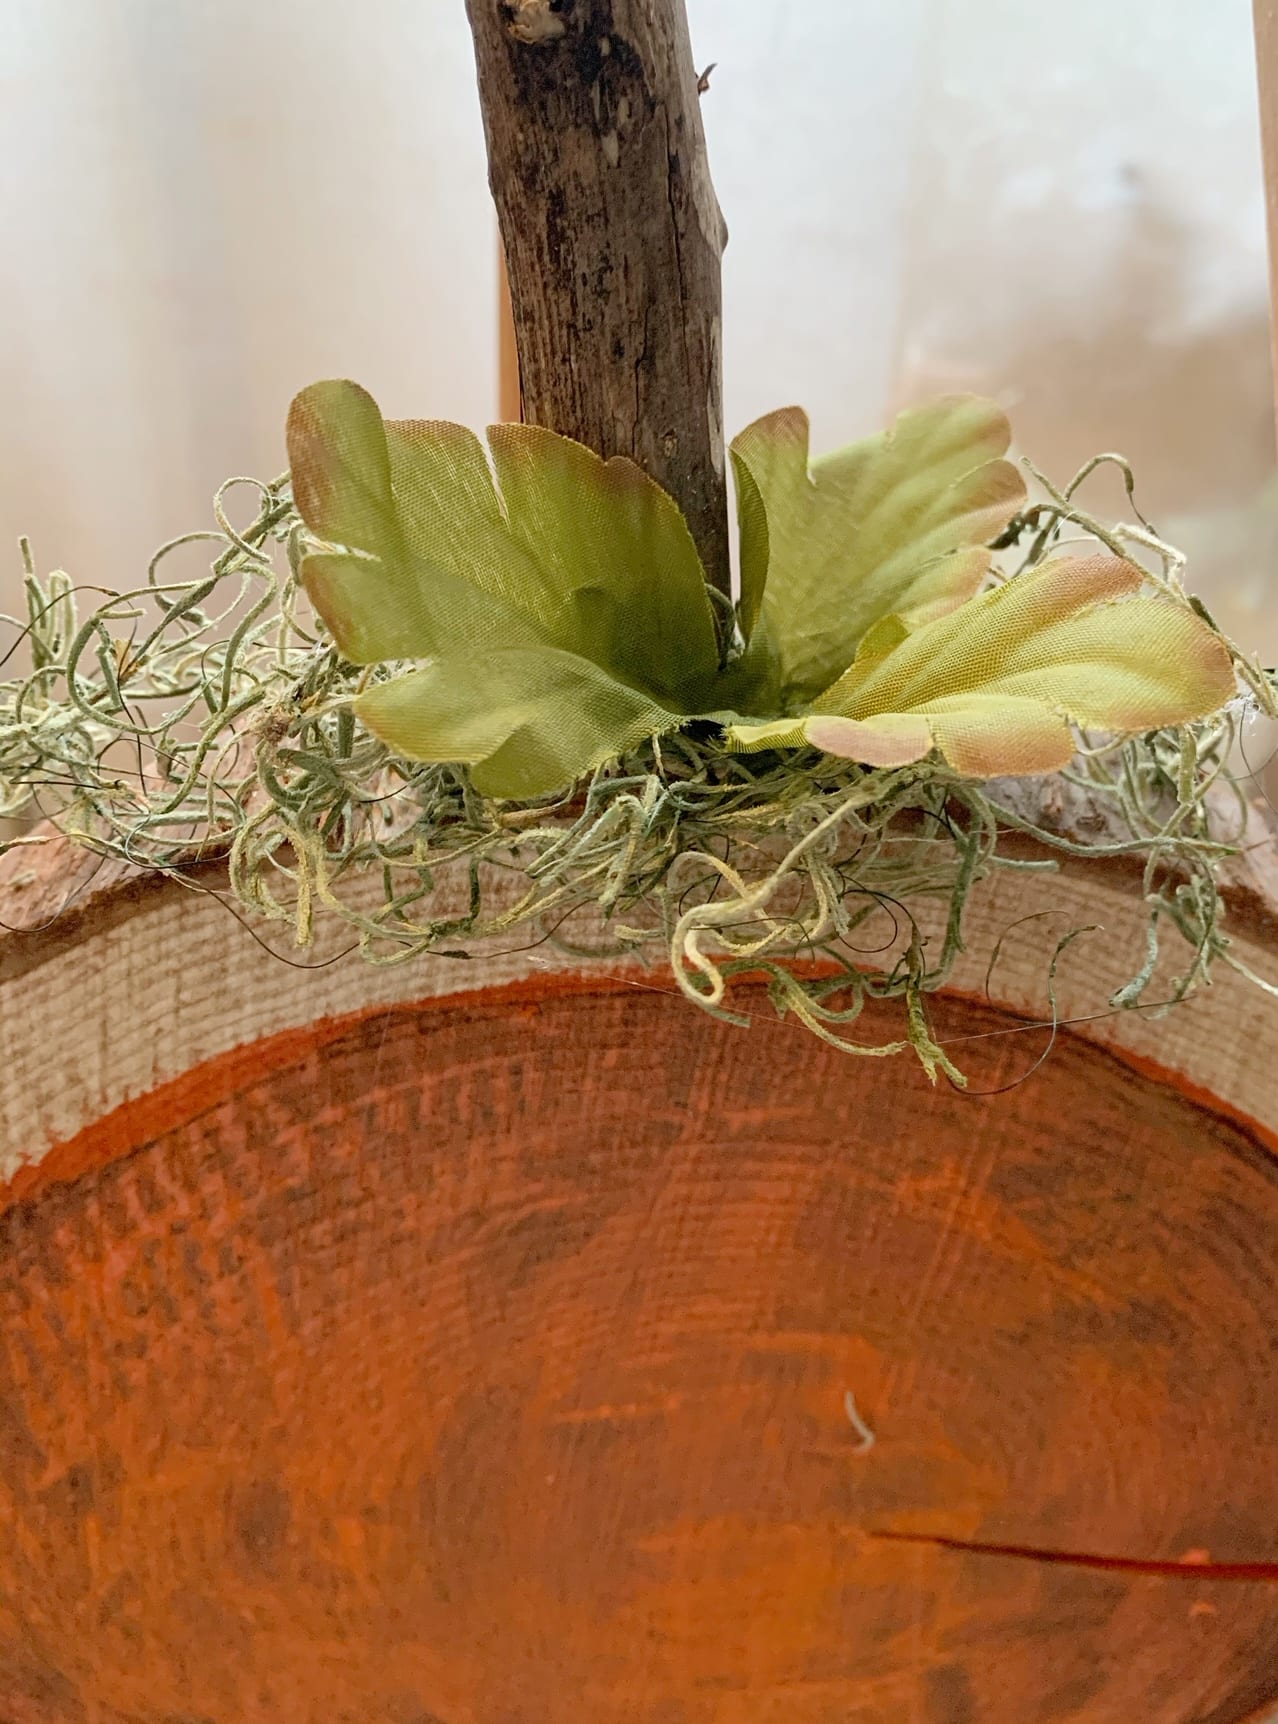
Once my hot glue was dry for my stem, I added a couple more dots and put some of this moss I got at a craft store on mine, and added a set of leaves that came off of a stem of flowers I got at the Dollar store.
That is it, for the basic painted pumpkins. It is so easy, it almost felt like no work. I love how they turned out, and since I had all of these items on hand it cost me nothing to make. Even if you have to buy everything, they will cost much less than buying this kind of home decor (if you shop for affordable rounds).
To make your painted wooden pumpkins stand up, you can do a few things:
- Use a round of wood that is thick enough it will stand on its own. This is generally around 1.5 to 2 inches thick, but will depend on the amount of bark around it, balance of the round etc, so you will need to test this out.
- You can find these photo frame holders to attach to the back of yours, to make it stand like a picture frame (or make your own by using hot glue to attach a peg of wood to the back to help it stand on its own).
- Use a small easel or plate/picture holder to display it.
You can also add picture hanging wire, or staple twine to the back if you want hang them around the house.
Ideas For Embellishing Your Pumpkin:
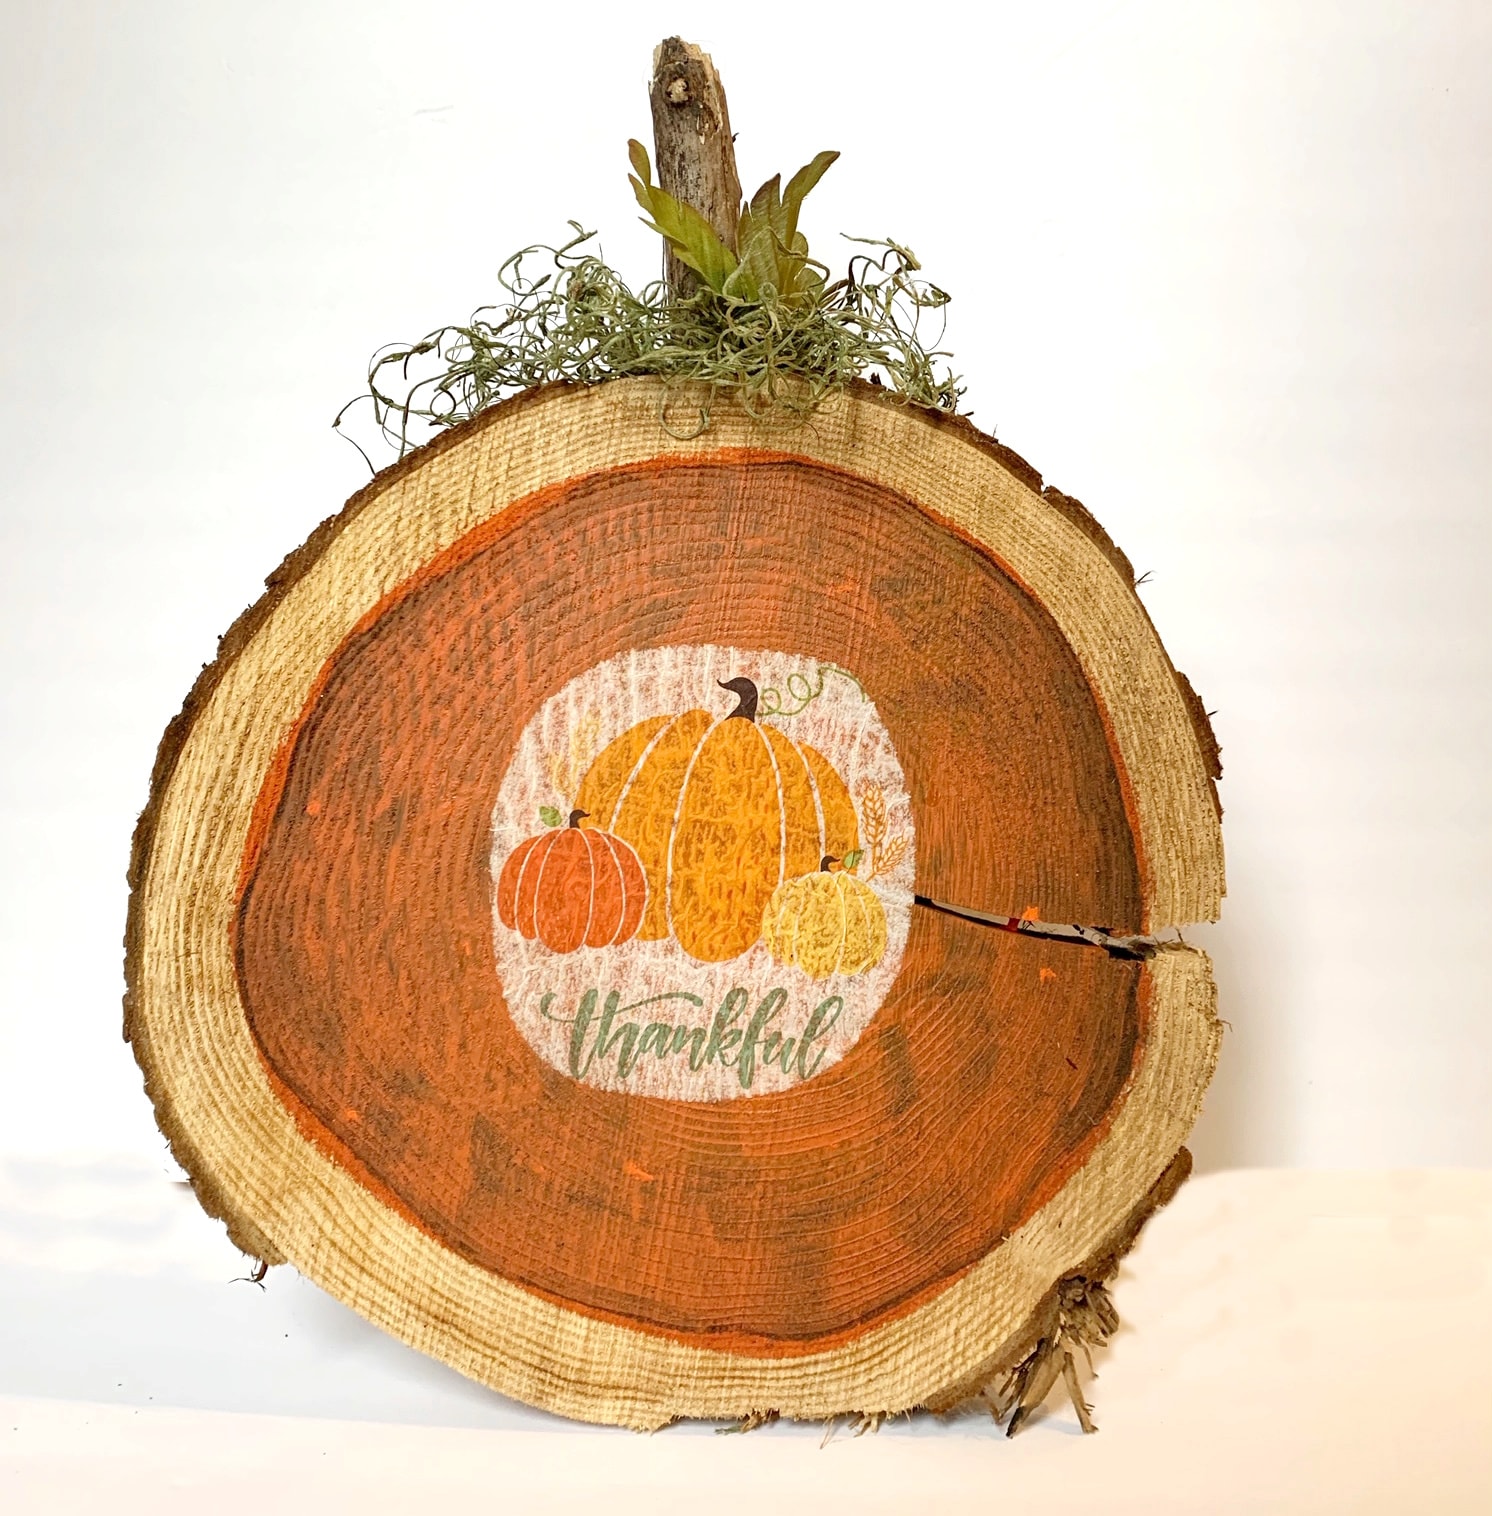
We used a napkin that we found at the Dollar Store to decoupage onto this pumpkin. Find your favorite set of napkins and cut out the design, add a layer of decoupage, and apply. Let it dry, and you have a fun customized wooden pumpkin to use for your decor!
Other ideas to embellish your wooden pumpkins, include –
- Leaves or twine
- Lights
- Decoupage
- Cricut Cutouts
- Free Hand Painting (if your good at that)!
Then you can display on a table scape or fireplace mantle, in bookshelves, on walls, or anyplace else you need a little fall decor.
You might also like:


Fall Decor you Can Make From Dollar Store Items
