
Dollar Store Red Truck Christmas Craft – So Fun to Make & So Cute!
This post may contain affiliate links and I may be compensated for this post. Please read our disclosure policy here.
Dollar Store Red Truck Christmas Craft
I recently had some friends over for a craft party for a pre-Christmas celebration, and she loves the red trucks you will find around these days. So I wanted to plan a party that she would love, and decided to make these little truck crafts from products you should be able to find at your local Dollar store. Normally you can find these trucks at the Dollar store, but mine was all sold out this year. You can also often find them throughout the year (ie like around Valentines with hearts on the back, or in the fall with pumpkins on the back). Do not hesitate to buy those ones too, as you can easily cut those extra details off. I did find an alternative online that I share with you below – and I used them for this craft as I could not get my hands on the Dollar store trucks this year. The other items you can also find at your Dollar store, or local retailers like Walmart and Hobby Lobby too.
Plus, check out lots more year round DIY Dollar Tree Craft Ideas too!

I have to be honest. This was the most fun I have had with a craft project in awhile. I loved that I had this cute template that I could work from, but then that I also was able to customize it in so many different ways. It felt like I was taking a popular idea (the trucks) and making it mine. I put snow on some, made my own bead garland for one of the trees, used ornaments, stickers and my Cricut to design signs and had fun with paint techniques.
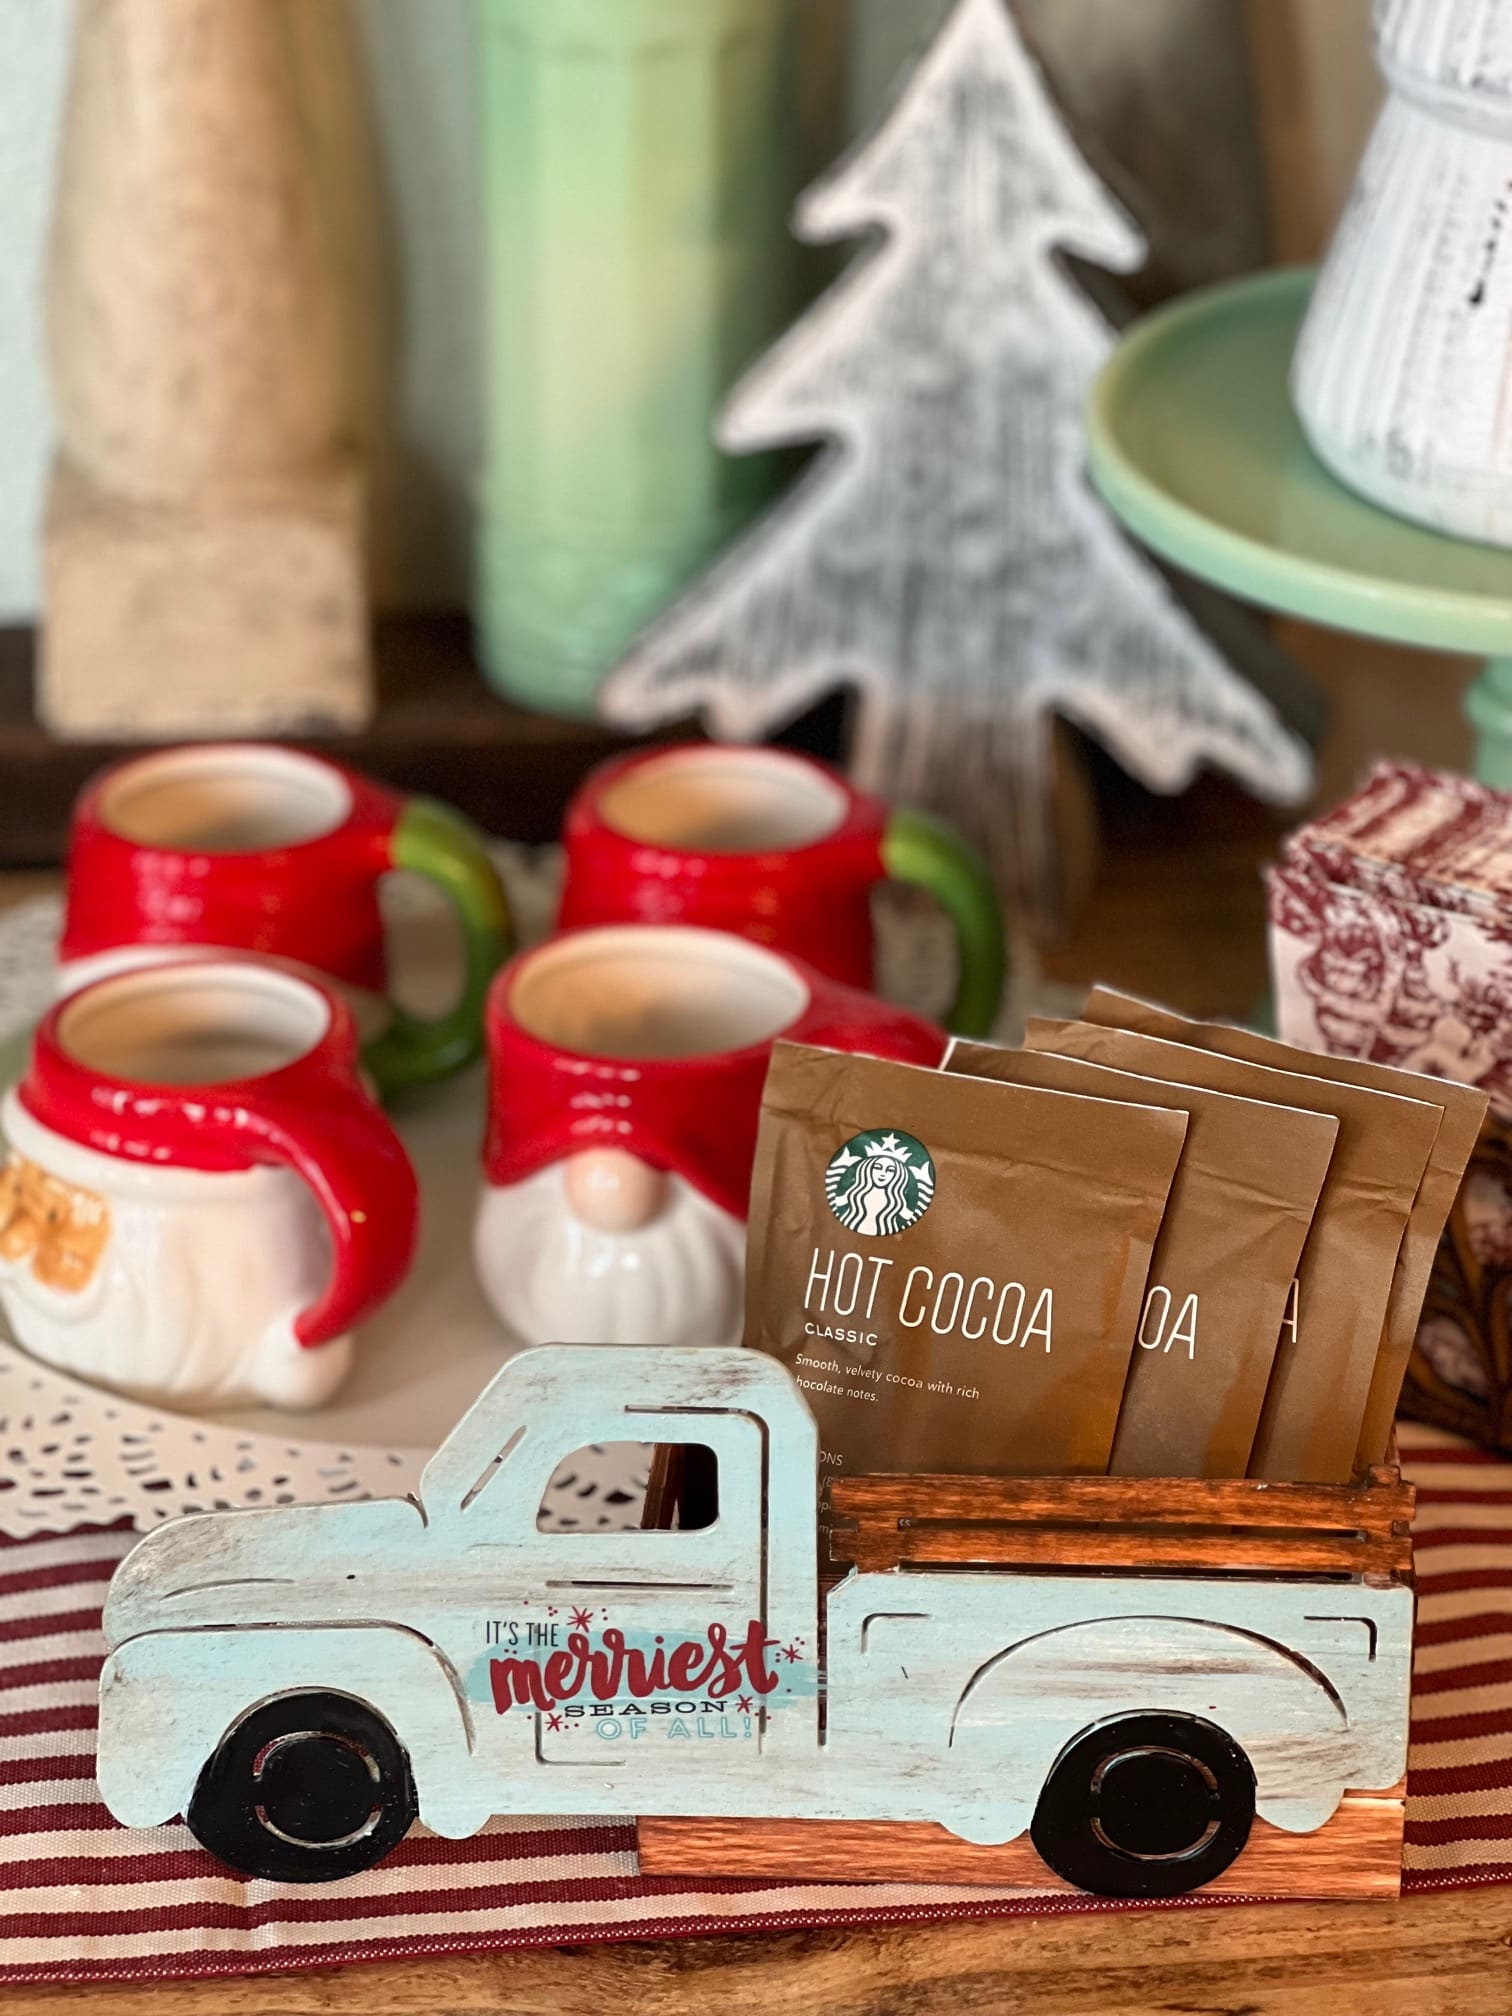
They are also a really fun way to gift things like hot cocoa, cookies or candies to friends and neighbors. Just fill the truck bed with your gift, and it is so cute!
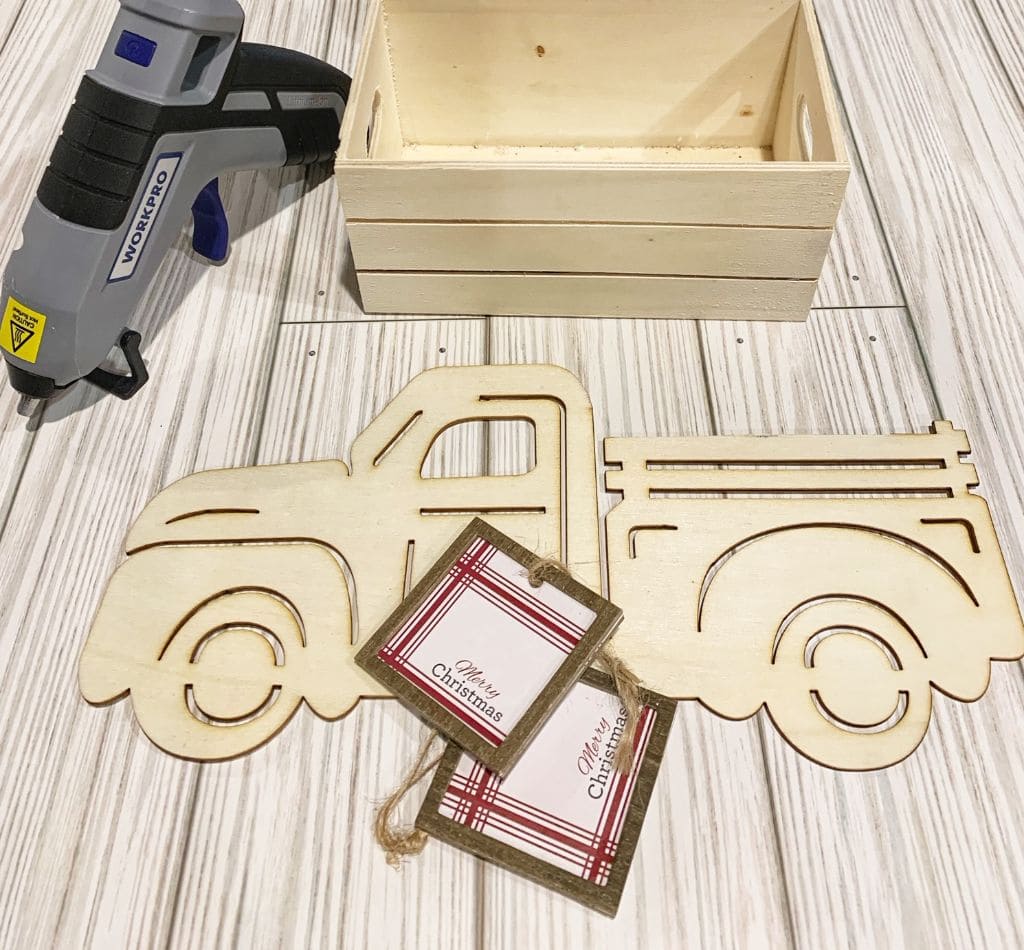
Supplies Needed to Make these Cute Red Truck Decor pieces (or really any color you want)! –
- Dollar store wood cut out trucks (or the ones I share below that you can find online)
- Mini crates from the Dollar Store
- Paint / and or Wood Stain & paint brushes (I used these wood stain pens when I wanted to stain my crates – it makes it so easy). The Dollar store sells paints too, in their crafting section and I picked up a few colors there and had some on hand as well.
- Small Christmas Tree for the back (I got mine for $2 to $3 each in store at Walmart but they do sell them at the Dollar Tree too if you can still find options – look for the Christmas House Bottle Brush Mini Christmas Trees, 8×3.25 in.)
- Hot glue (I use this cordless glue gun – so I don’t have to be worried about being tied to a plug in)
- Exacta knife or utility knife if you will be cutting a shape off the back of your tree
- Mod Podge (optional) if you want to coat it at the end with a finish coat (can usually also find this at the Dollar store in craft section).
- Various items to decorate with:
- I made a wood garland out of these small wood beads for one of the trees.
- I used battery operated lights for another (I had one on hand, but they are pretty affordable)
- I used small ornaments for some of my trucks, to act as signs and stickers for another (got those at the Dollar store).
- Really be creative and use whatever you love!
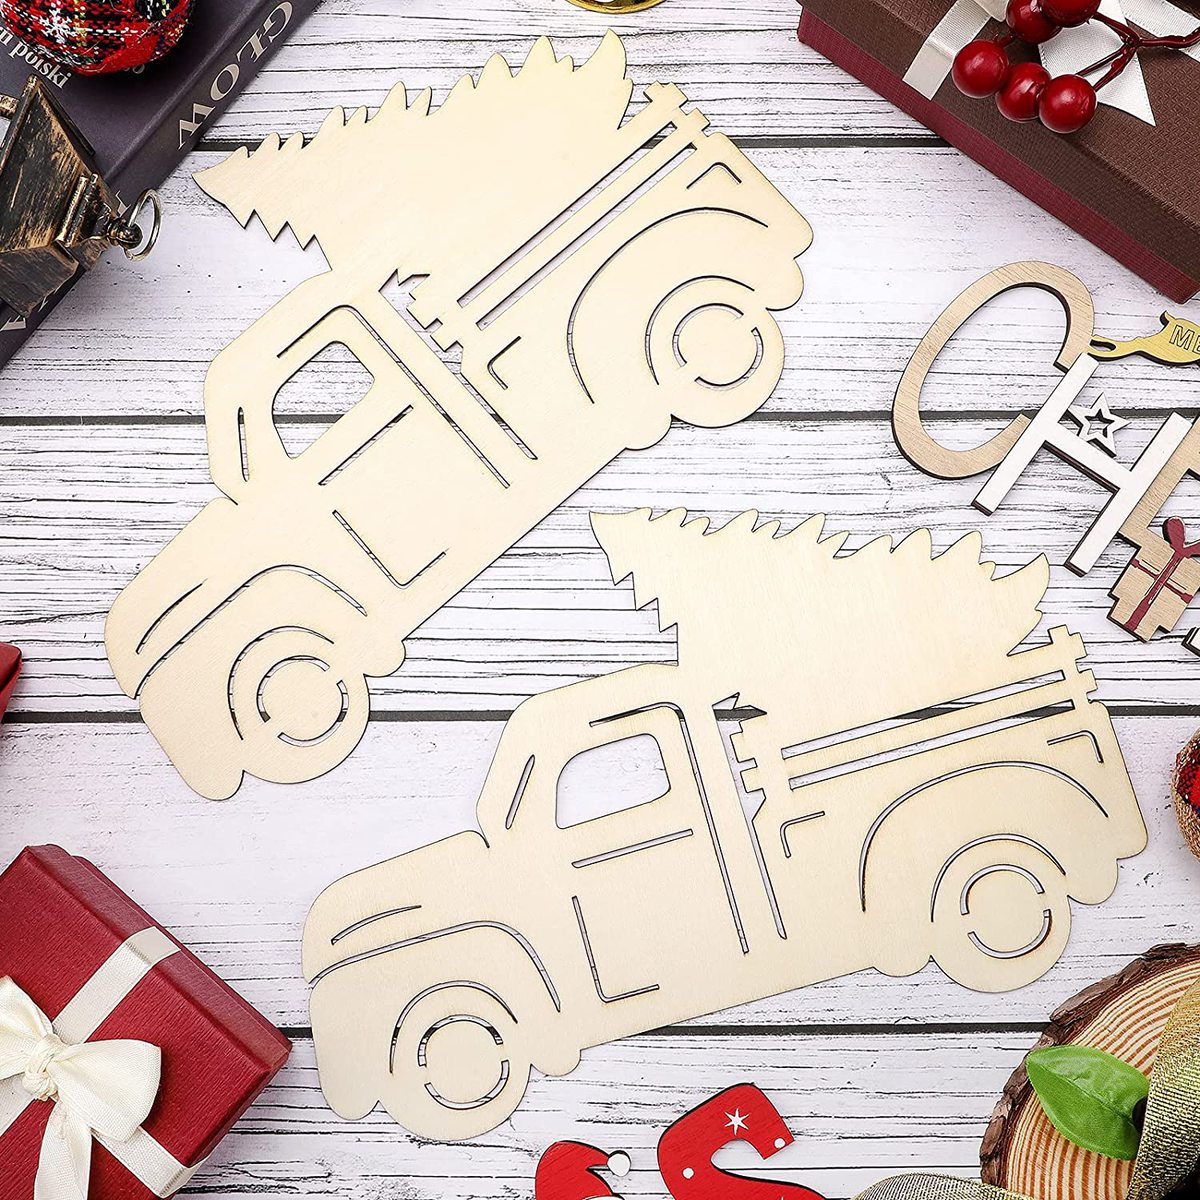
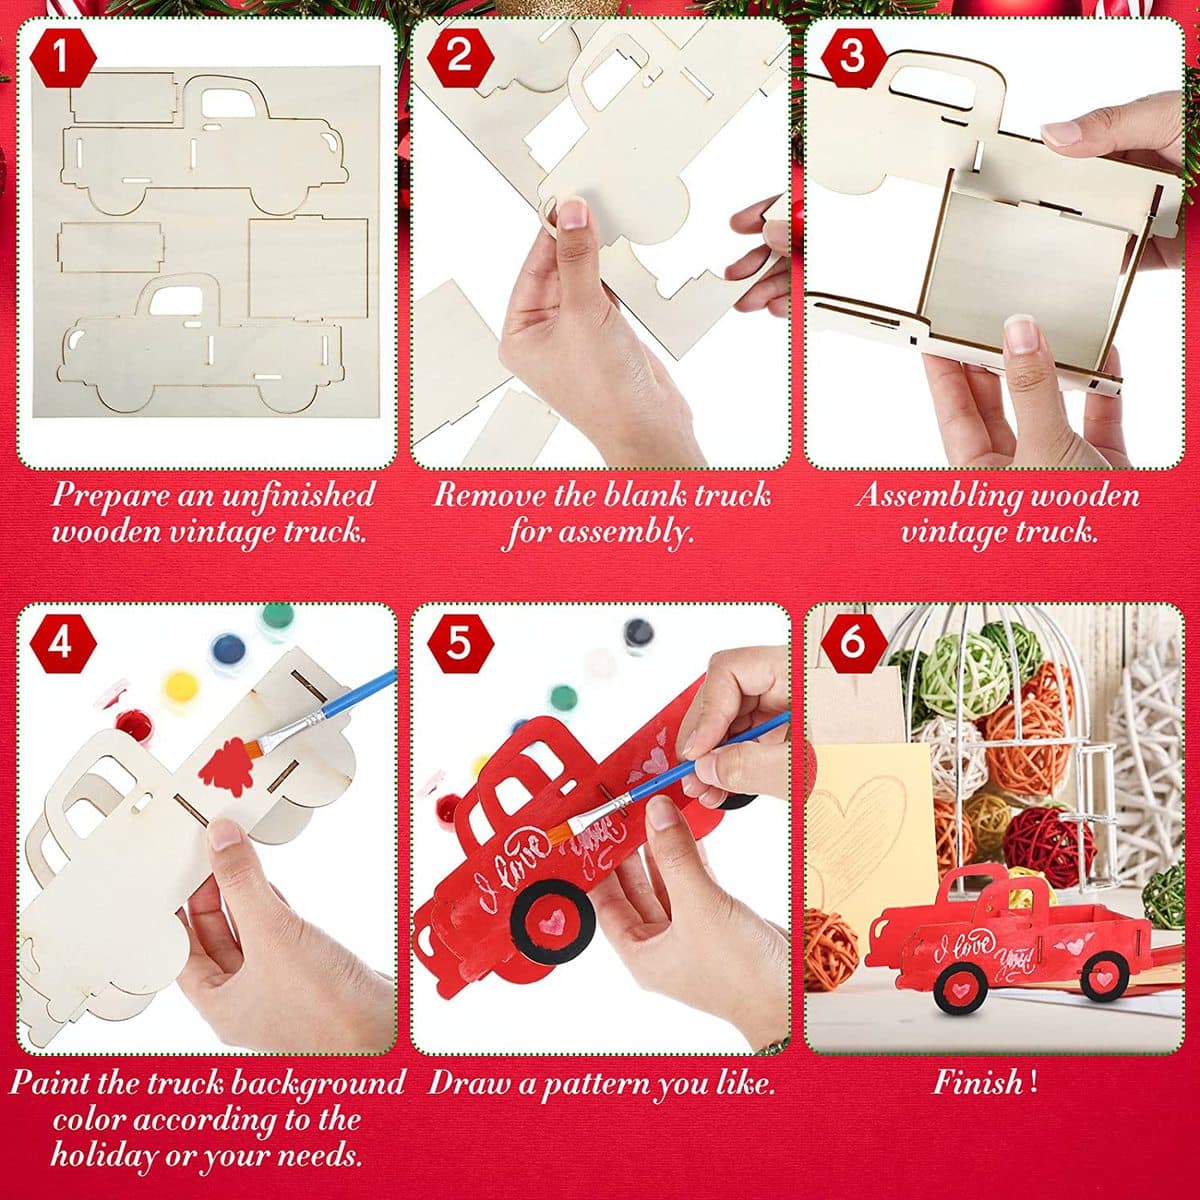
I bought this 6 pack of wood trucks here (currently on sale for $8.49. making them just $1.42 per truck cut out)!
They come with a tree on them, but I just wanted the truck, so I was able to easily remove that with an exacta knife. If you can find any wood cut outs (even if they have a shape you do not want in the bed) you can likely make them work for this project by using an exacta knife too.

How to make these cute trucks –

If you find the trucks at the Dollar store, they are ready to use. However, if you buy the pack above (or find any other options with a detail on the truck bed you do not love, it is an easy fix. We simply used an exacto knife to cut of the tree. Be very careful not to cut yourself, but we did it by using a ruler to score along the flat side of the truck bed, and then where the tree touched the top of the bed, we used a socket that was about the size of a quarter to act as our guide. We scored around our guide about 3 or 4 times, and the wood easily snapped off. After giving it a light sand, it was ready to go.

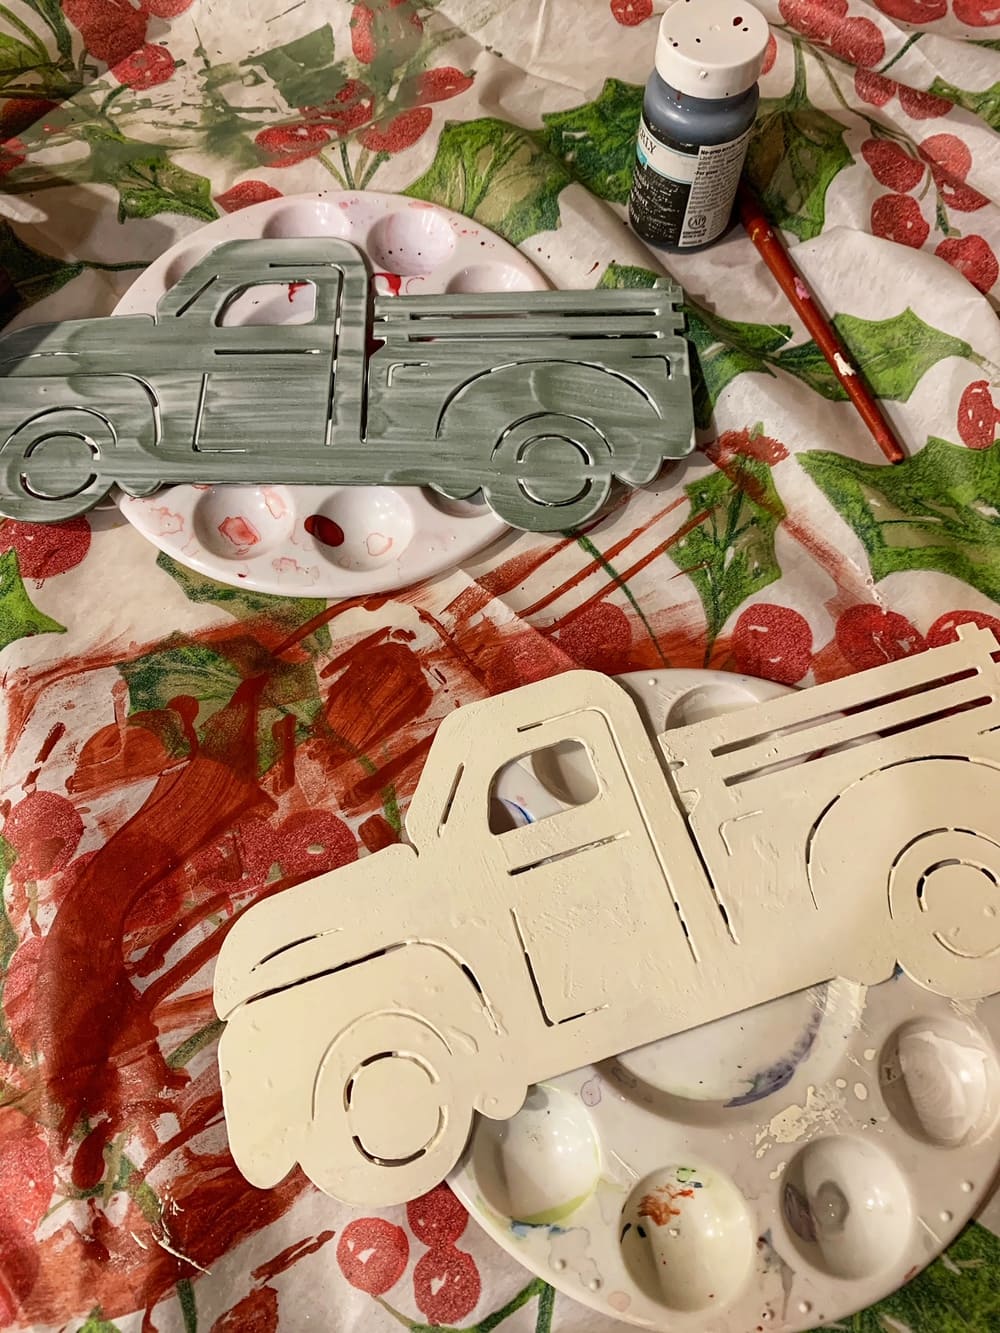
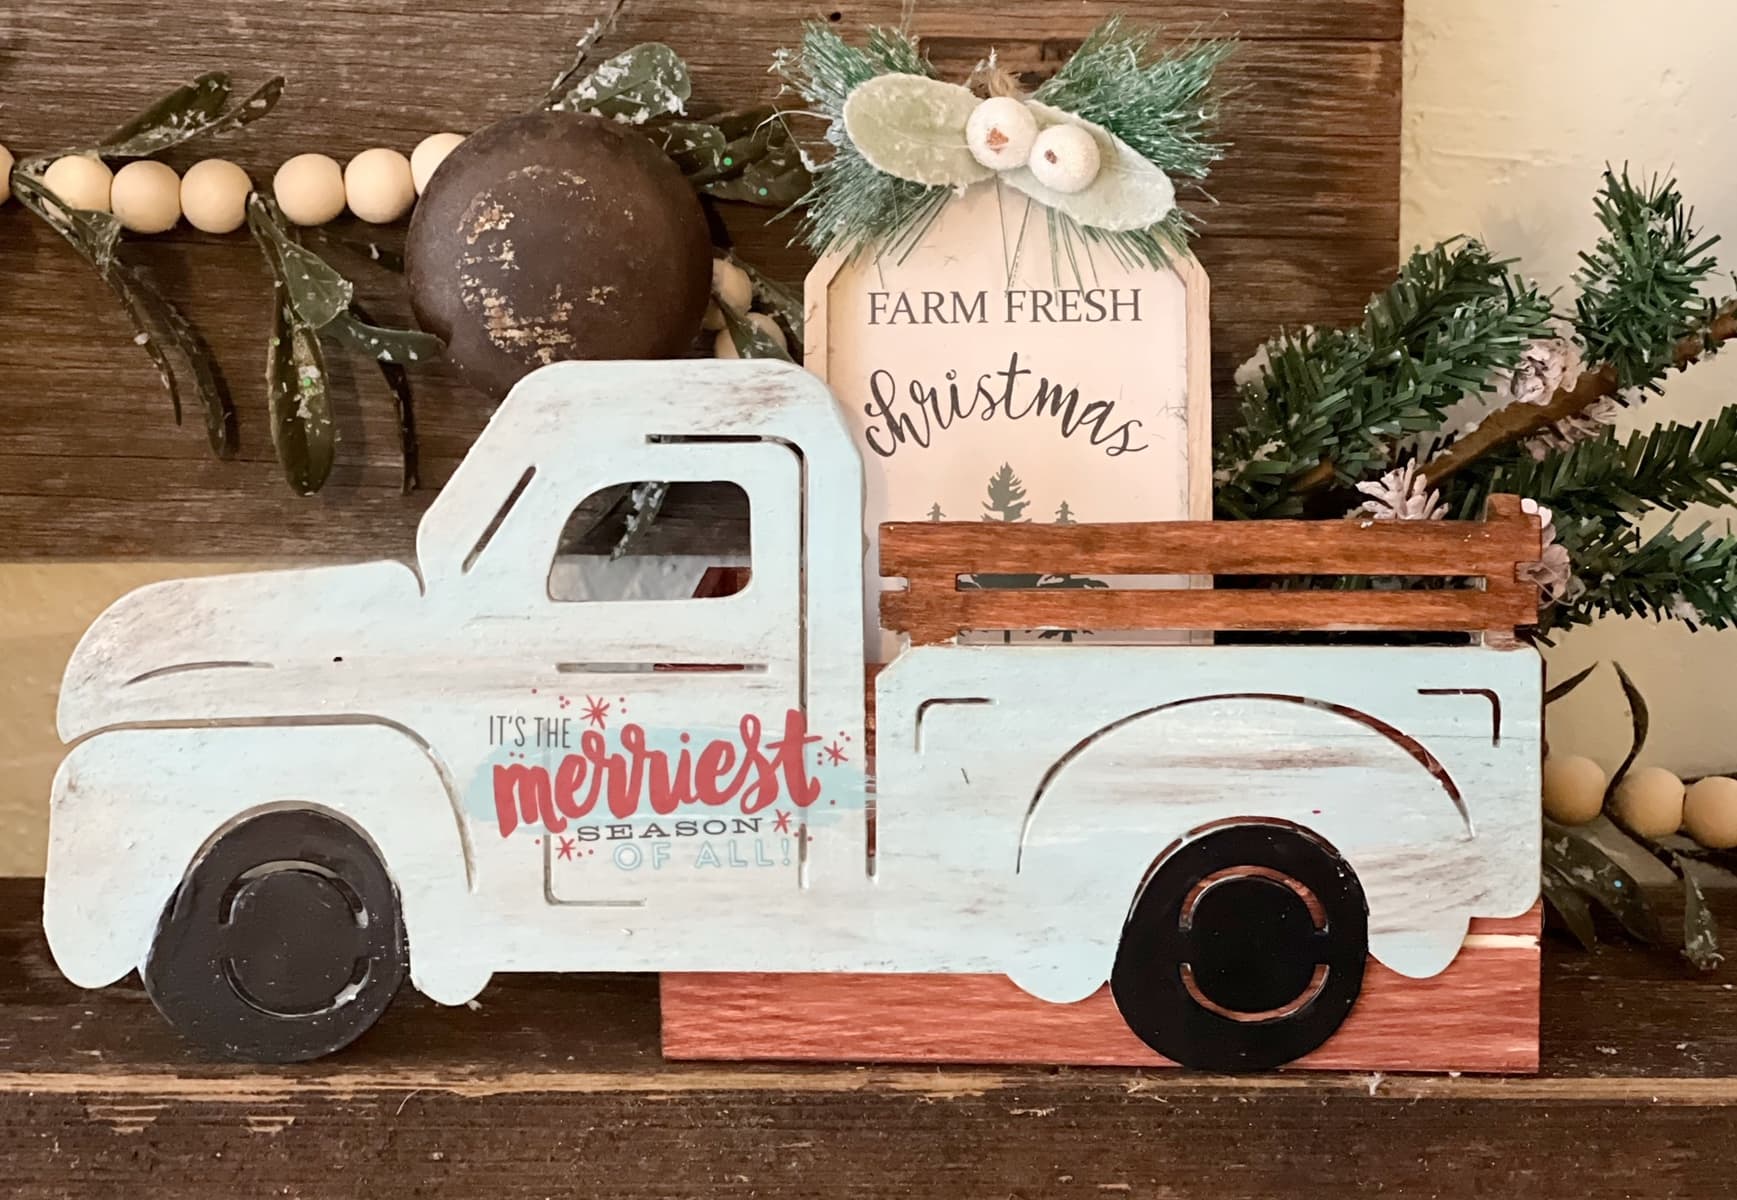
For this truck, I painted it a blue color (then used a little brown with a dry brush to distress it).
The next step is to paint your trucks whatever color you want. I did two in more traditional colors (red and green) and then two in colors that will work for year round decor (cream and blue). I did all of mine in a rustic style, but you can use whatever style you love in your home. Be as creative as you want, that is what makes this craft fun. 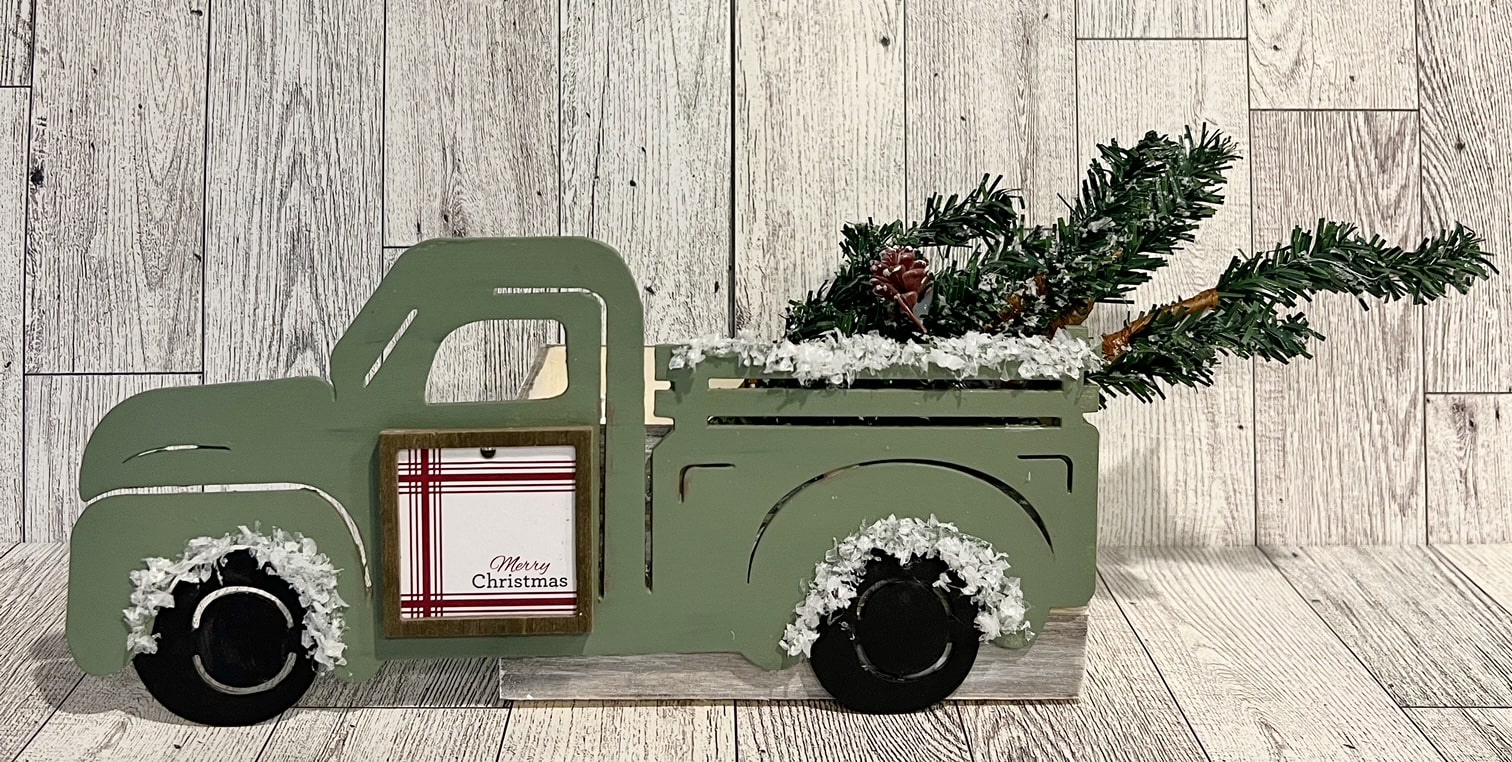
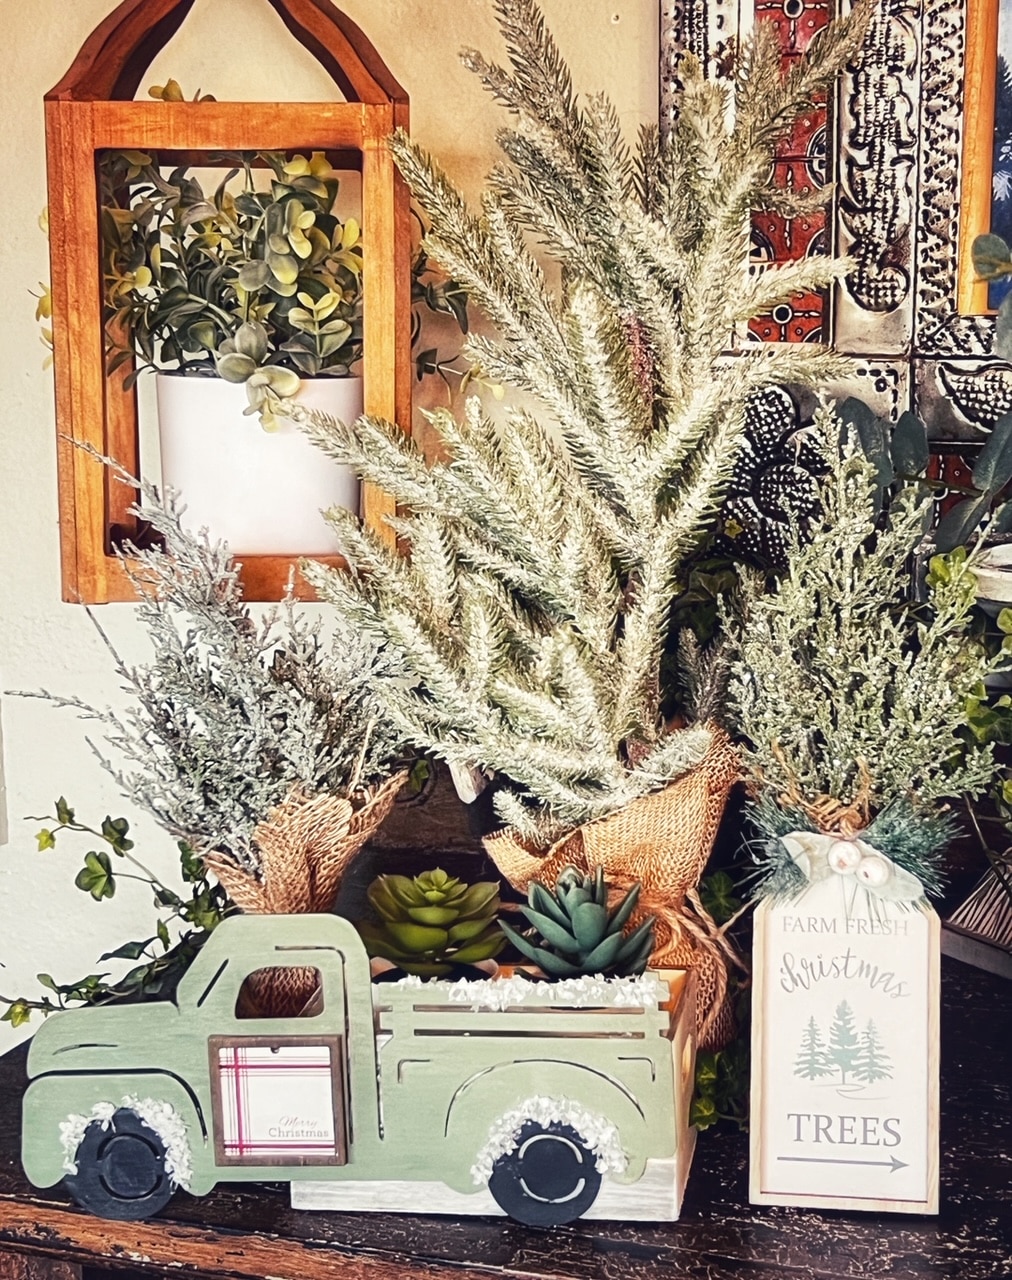
This one I painted green, and added some fake snow. I just applied a little bit of hot glue where I wanted the fake snow, and then applied the fake snow there while the glue was hot.
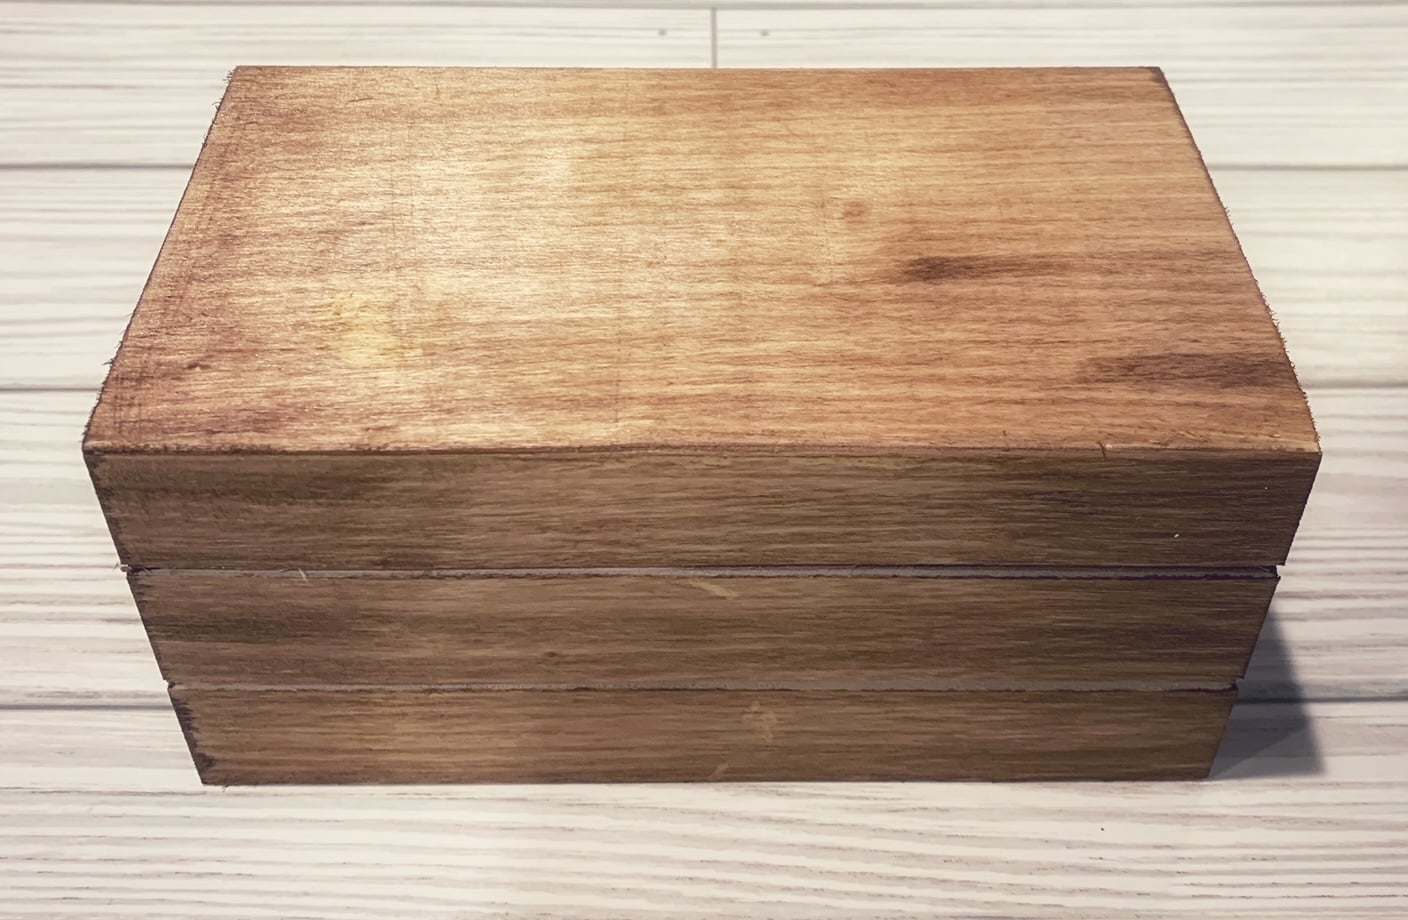
You can leave your crate the color you bought it, but I love to stain mine. You could also paint it the same color as your truck, or a different color. I used the stain pens mentioned above and stained my all different colors (from lighter wood stains to really dark ones). For the green truck above I used a grey wood stain, and added a bit of white paint to it to distress some.
Figuring out the color combos I wanted for each truck was one of the parts I enjoyed the most.
I then painted each of the wheels a simple black.
When I was done painting mine, I added a coat of Mod Podge on top to seal it. This is totally optional, you can just paint and move on, but I liked the finished look that added (and protection) to the project.
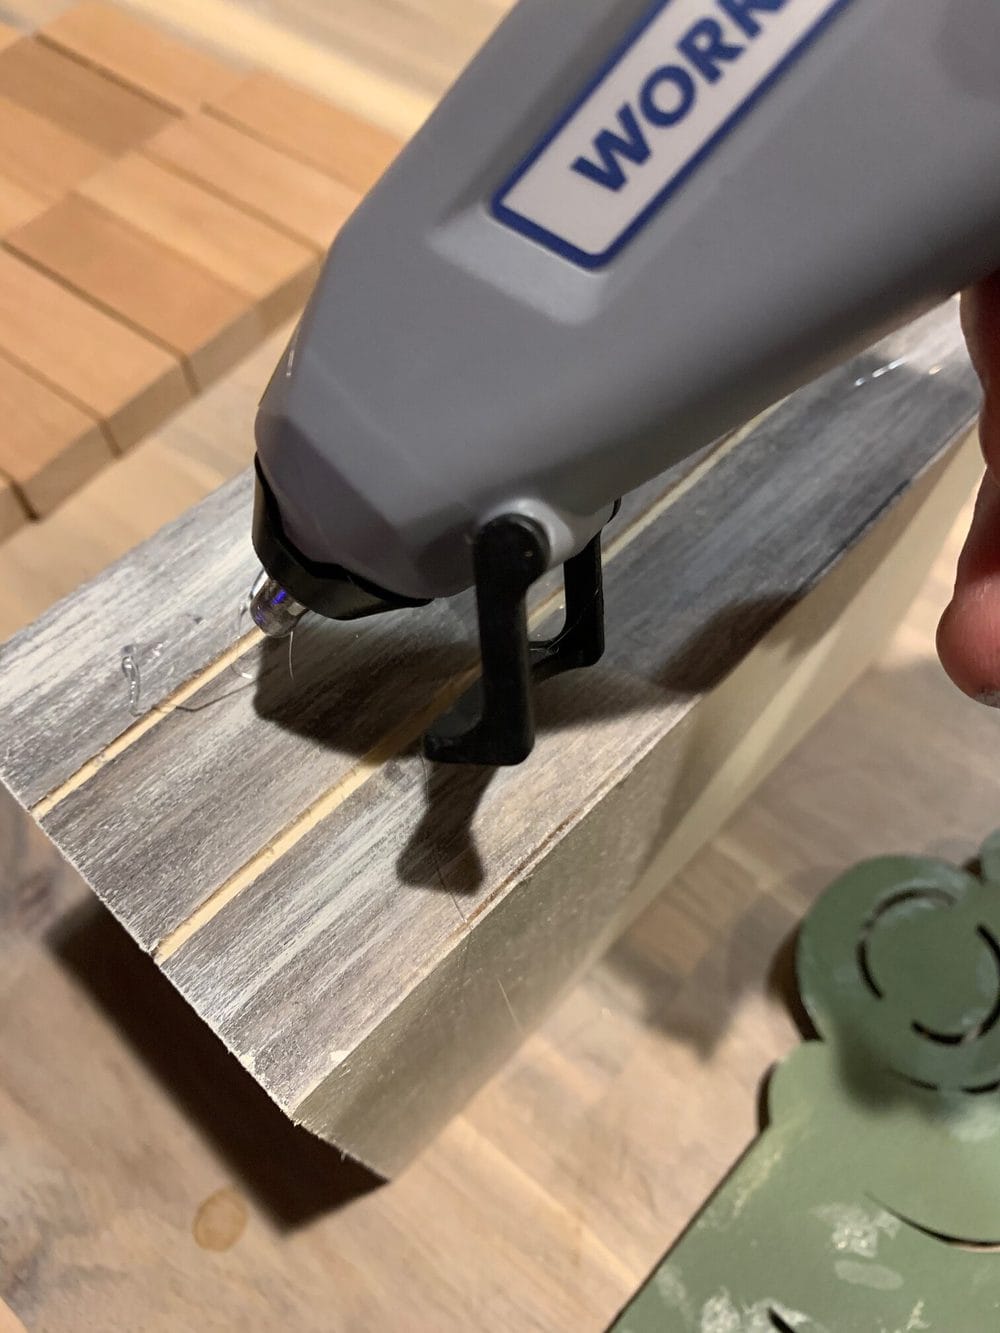
The last step is to hot glue the crate to the truck cut out. The easiest way I found to do this, is to put your crate down on a table, and match your truck to the crate where you want it to sit. I started by putting the glue on the crate first, but found it to be easier to add it to the truck first when I knew where they would match up (that way the glue does not peak out open parts of the truck).
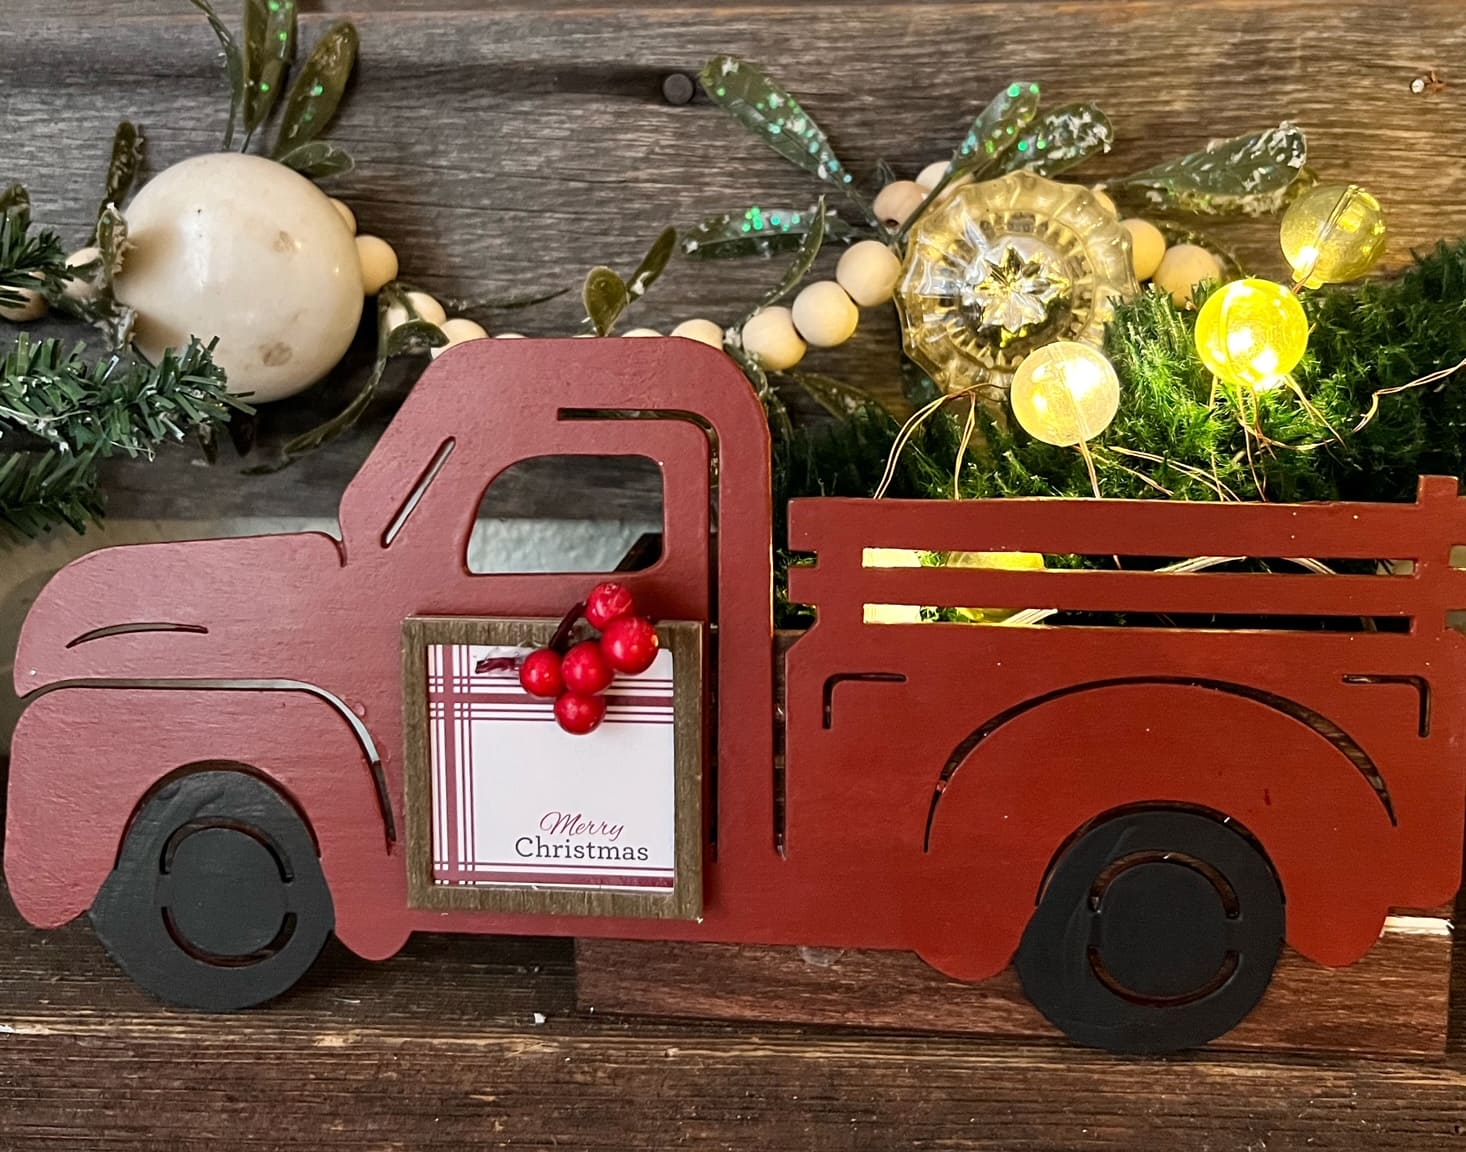
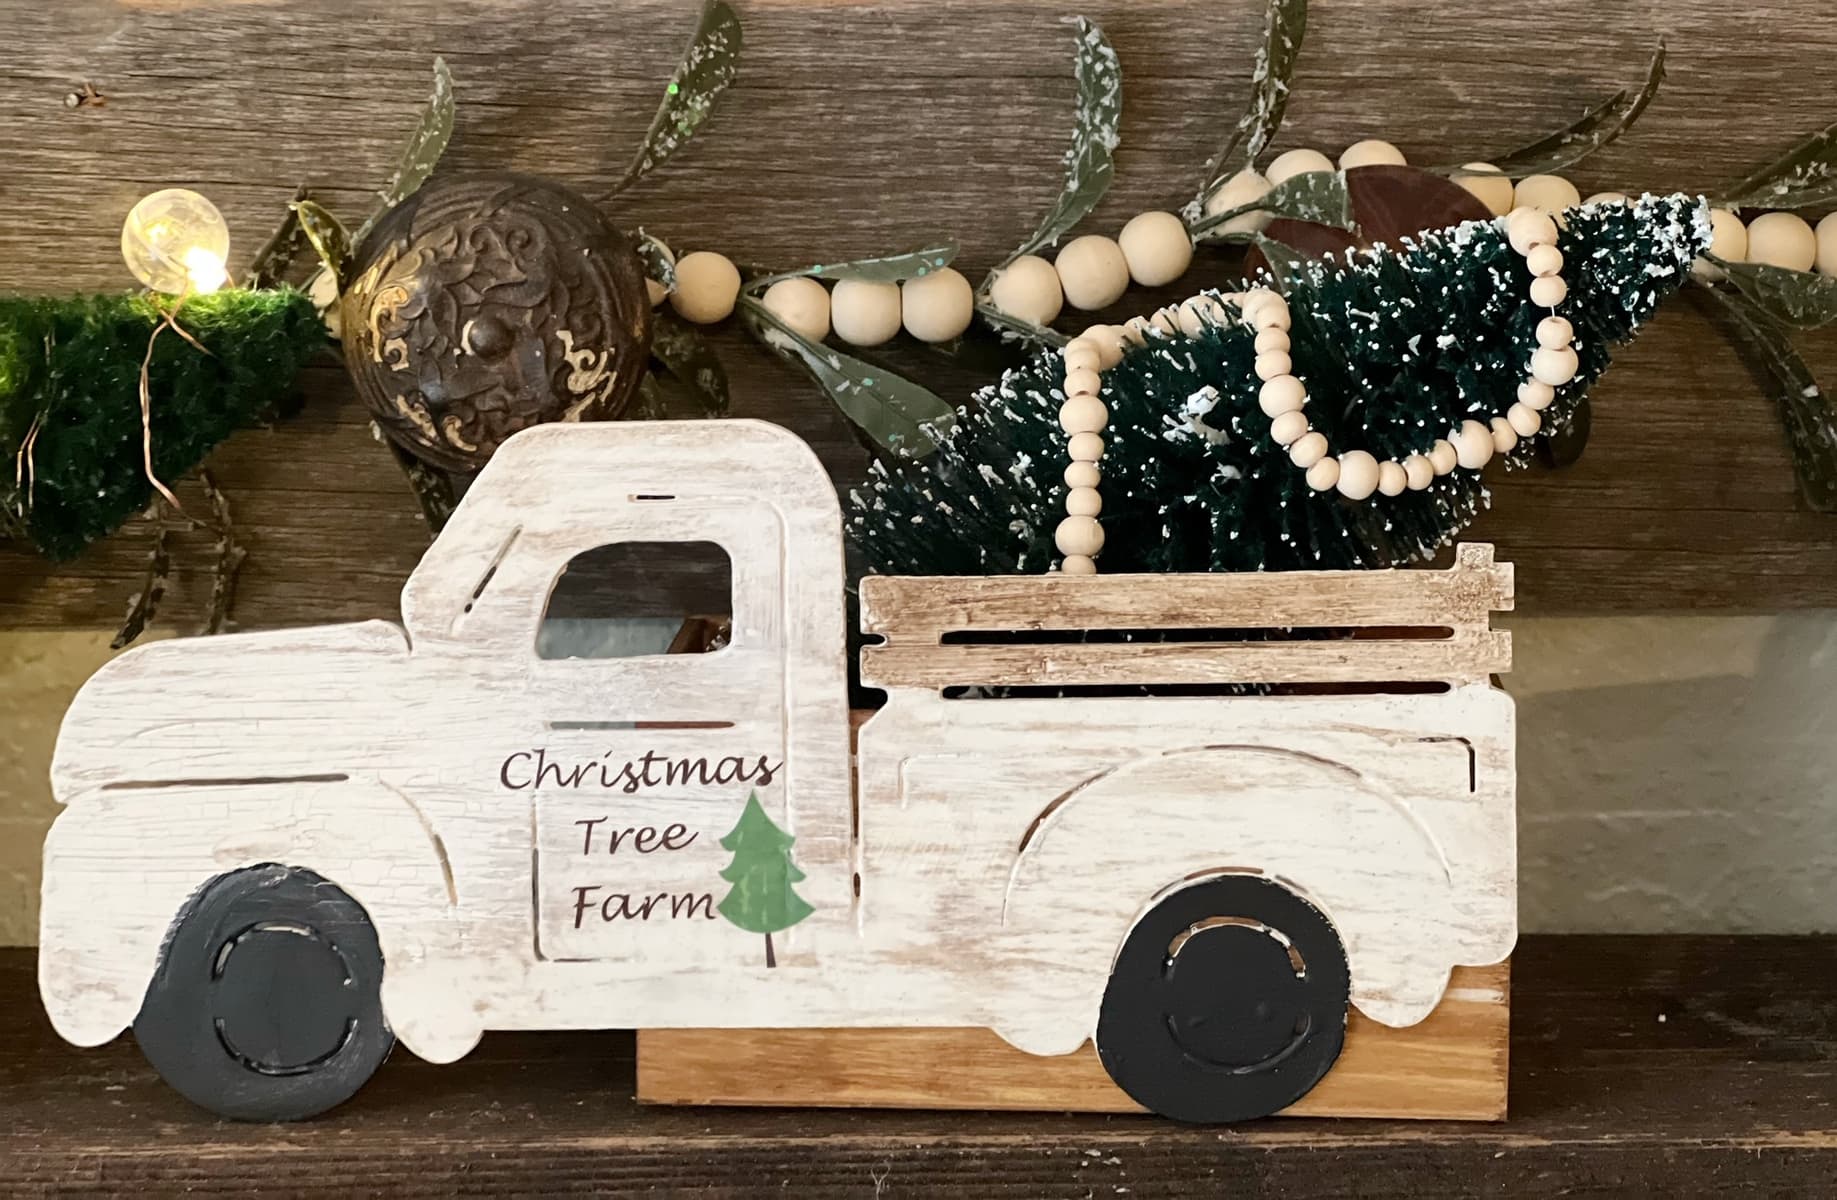
For my more traditional Red Christmas Truck, I started by painting it red. I then added the ornament as a side door sign, with a little sprig of Holly Berries from the Dollar store. I then added one of the $2 trees from Walmart, and decorated my tree with some battery operated lights (it looks so nice at night time)!
I used one of the $2 trees from Walmart for the back of this one, and made a little bead garland with small wood beads and jewelry wire to decorate it.
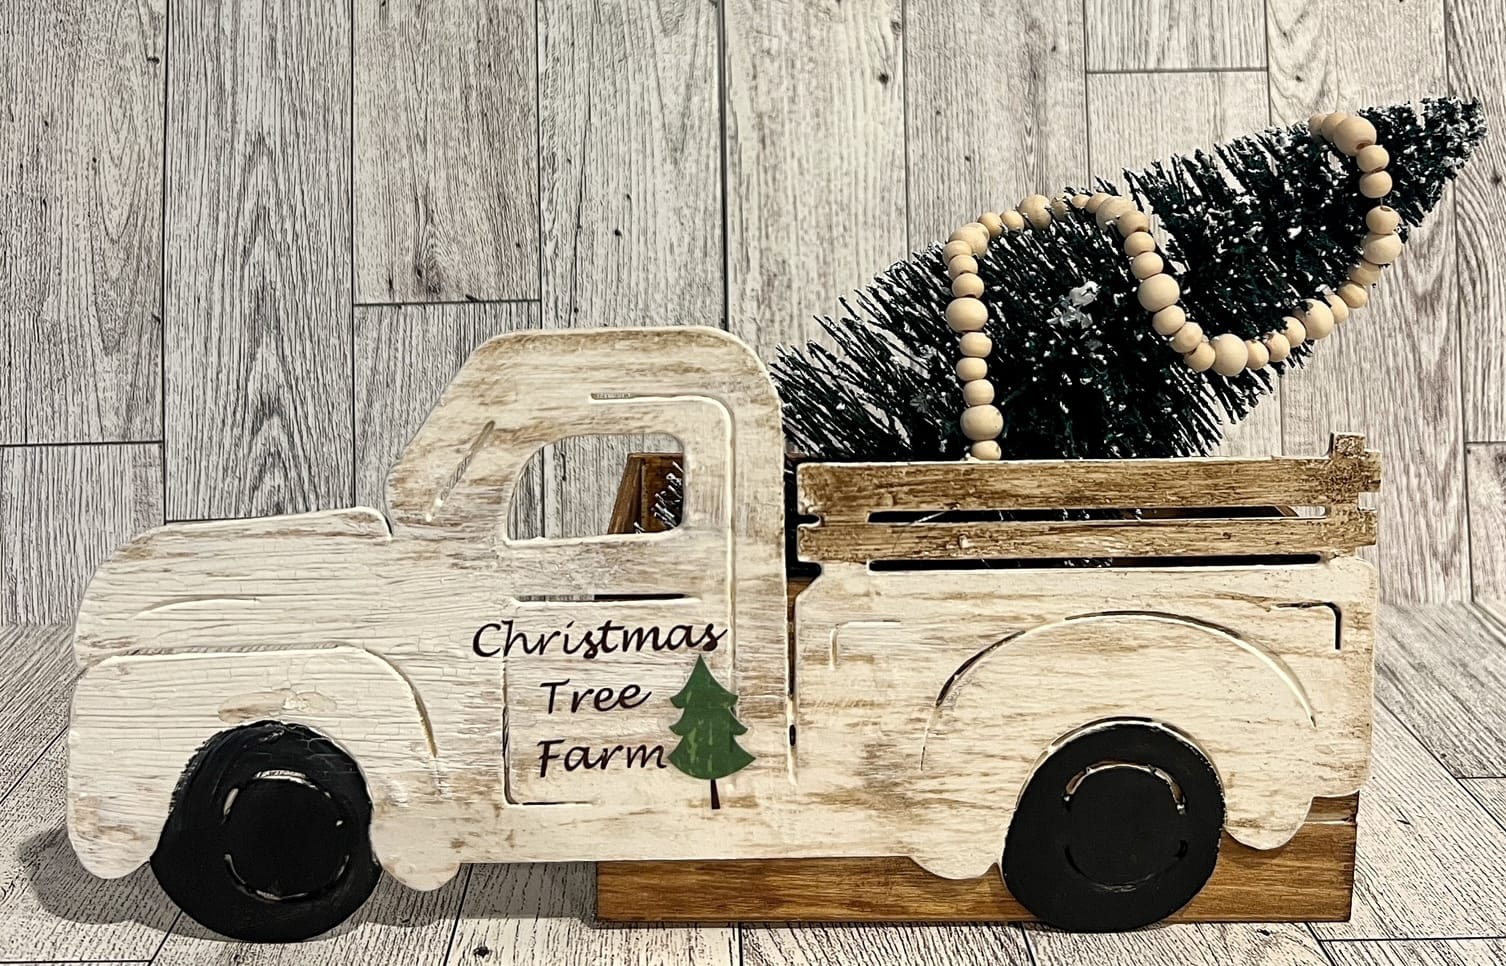
For this truck I started by painting it cream, then used the brown wax stain from Walmarts Waverly paints to give it a little 3-d texture and age it too.
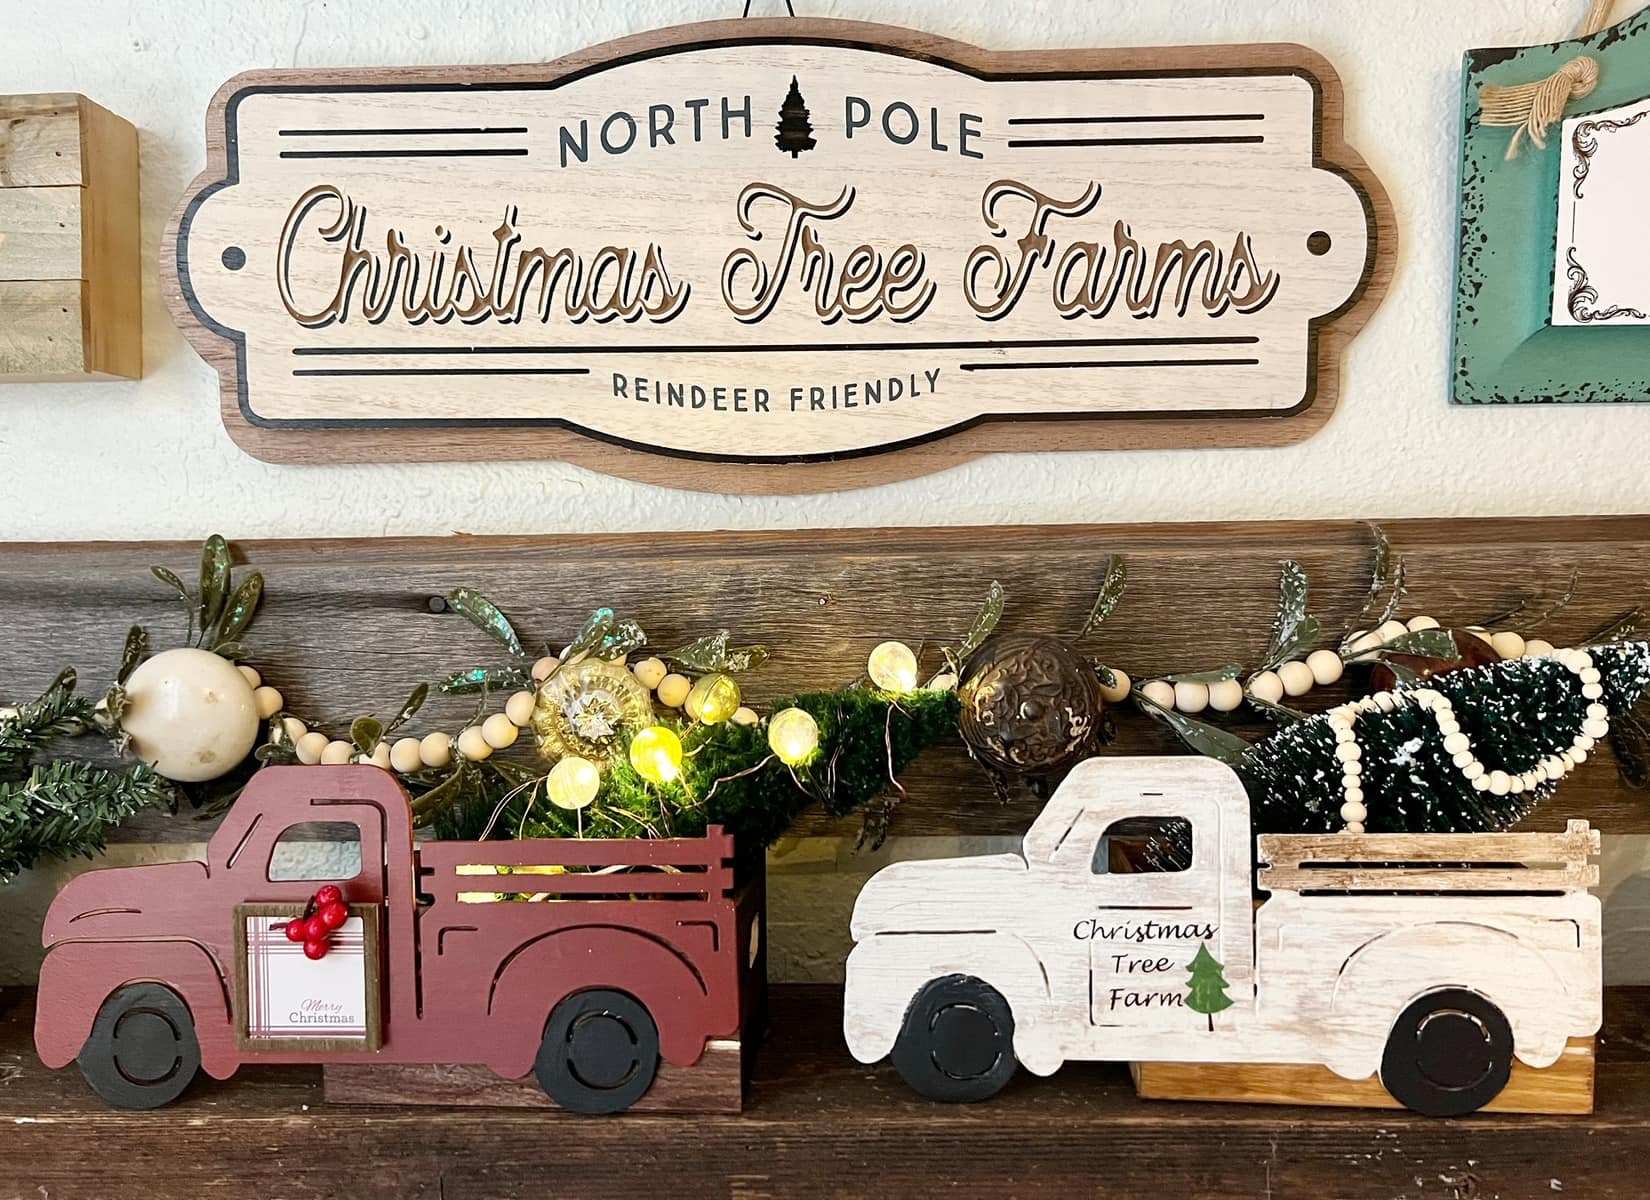
I am displaying my old fashioned trucks on my coffee bar this year, and cannot stop looking at them. I love them!
I wanted to show you various ways to decorate the trucks, so anyone can do it. One truck I just put a sticker on, one I decorated with my Cricut, and two I used small ornaments I found at Walmart. This is just to inspire you that there are so many different ways to do this one.
I then used a sticker to put a sign on the side. I like the stickers with the clear background (so you just see the writing once they are applied) for projects like this. This is one of the $3 Christmas trees from Walmart in the back of it!
I used my Cricut to cut out the design for my cream truck. You can design whatever you want here if you are using a Cricut!

For the red and green trucks, I used two small ornaments as signs. I got a 4 pack of mini ornaments at Walmart and hot glued those on to my “truck door”. This one also has one of the $3 mini trees from Walmart. These are fun as they add a 3-d effect to the project.
More Christmas Projects You Might Be Interested In:
I also grabbed this set of smaller trucks too (it makes four full trucks) for gifting small treat bags in. This one is $10.99 (so it works out to $2.75 per truck), and works well for kids as they just have to paint it and fill it!
Find More Christmas Projects here!
Simple No-Sew Christmas Gnomes!
