
DIY Tin Flowers for Home Decor (Using Dollar Store Cookie Sheets)!
This post may contain affiliate links and I may be compensated for this post. Please read our disclosure policy here.
DIY Tin Flowers for Home Decor (Using Dollar Store Cookie Sheets)!
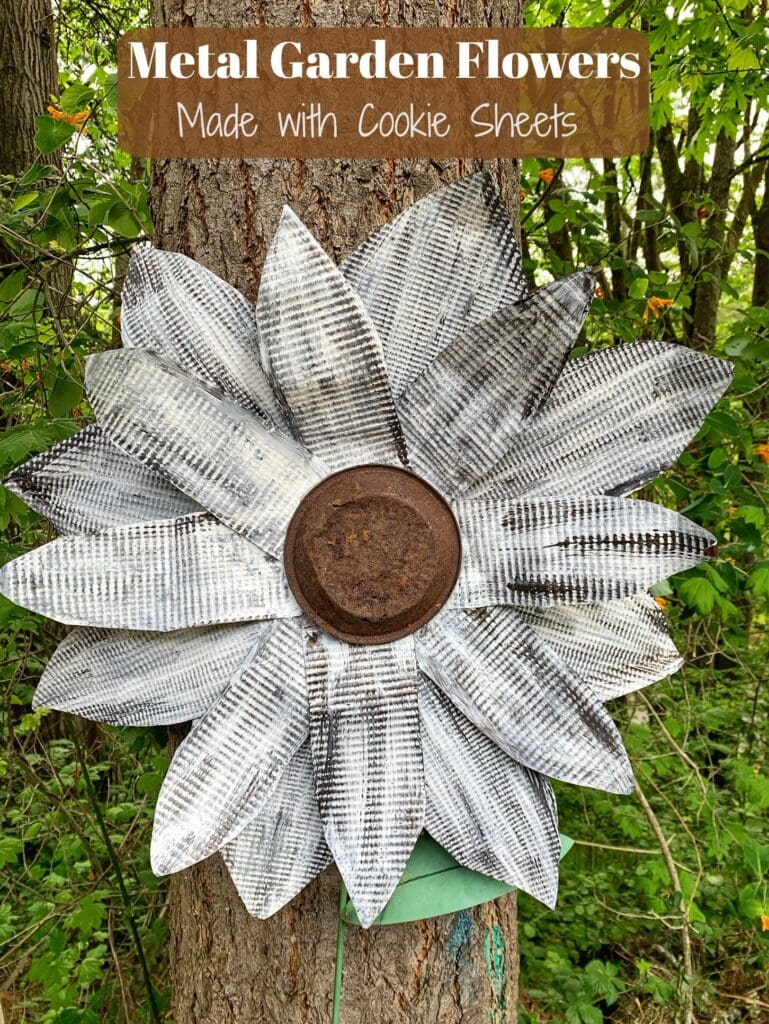
These beautiful tin flowers are made out of simple tin cookie sheets, and are really fun to make. You can really use any flower design (like you might for paper flowers) and use them outdoors or indoors. I made one to put out in my garden, and it was so affordable to make I thought some of you might want to make them too.
Plus, check out lots more year round DIY Dollar Tree Craft Ideas too!
It cost me $4 to make one flower (but I had some supplies on hand). Even if you did not, you could still easily make them for under $10. Not only are they affordable, but they also do not take much time to put together. Waiting for the paint to dry, is the longest part of the process. They are very simple to make!
Supplies Needed for the Tin Garden Flowers –
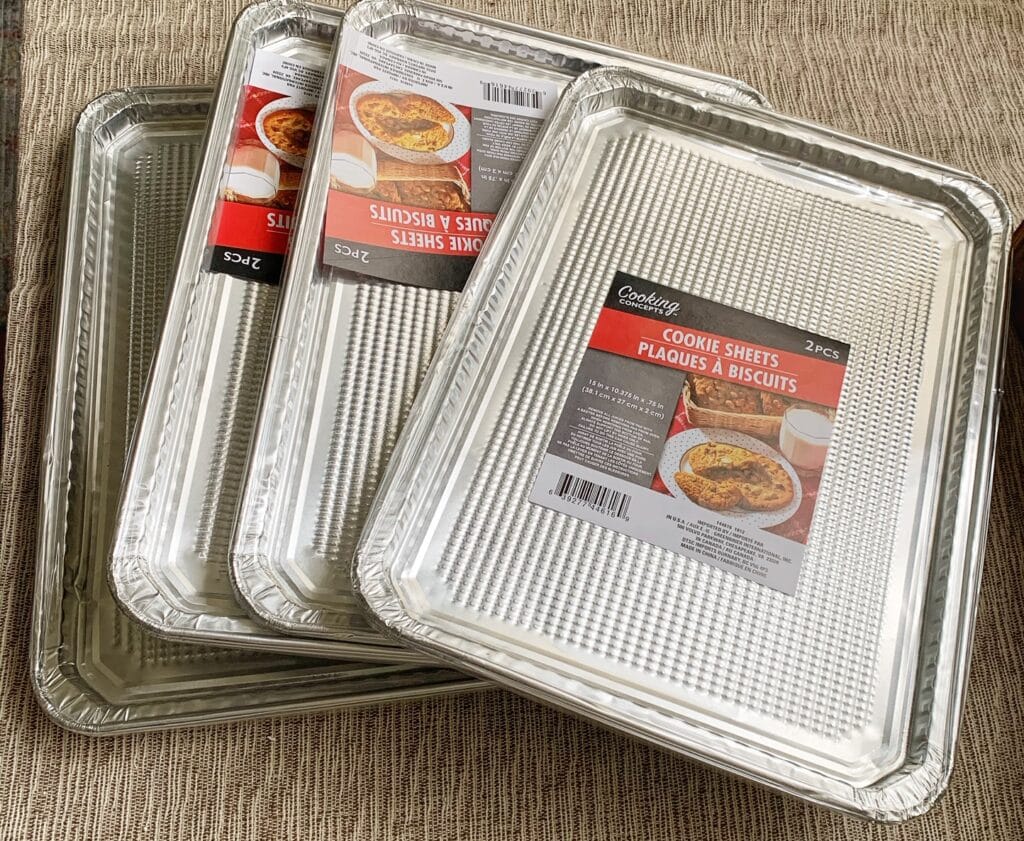
- 4 sets of 2 tin sheets (I found these at the Dollar Store for $1 per set of 2 – so $4 total)
- Paint of your choice
- Glue (we used a combination of E6000 to hold long term as well as hot glue to bind it quickly, but you could use epoxy or Gorilla Glue too – or hot glue if you are just using it inside)
- Scissors
- Picture Hanging Kit, Ribbon to hang, or a post of some kind to put in the ground if you want to use it outside.
- Round object for the center of the flower (we discuss various options below)
- Round object to glue petals too (I used an old cd because my flower was going to be used outdoors – if you are using it indoors you can use a cardboard circle).
How to Make Your Tin Flowers:
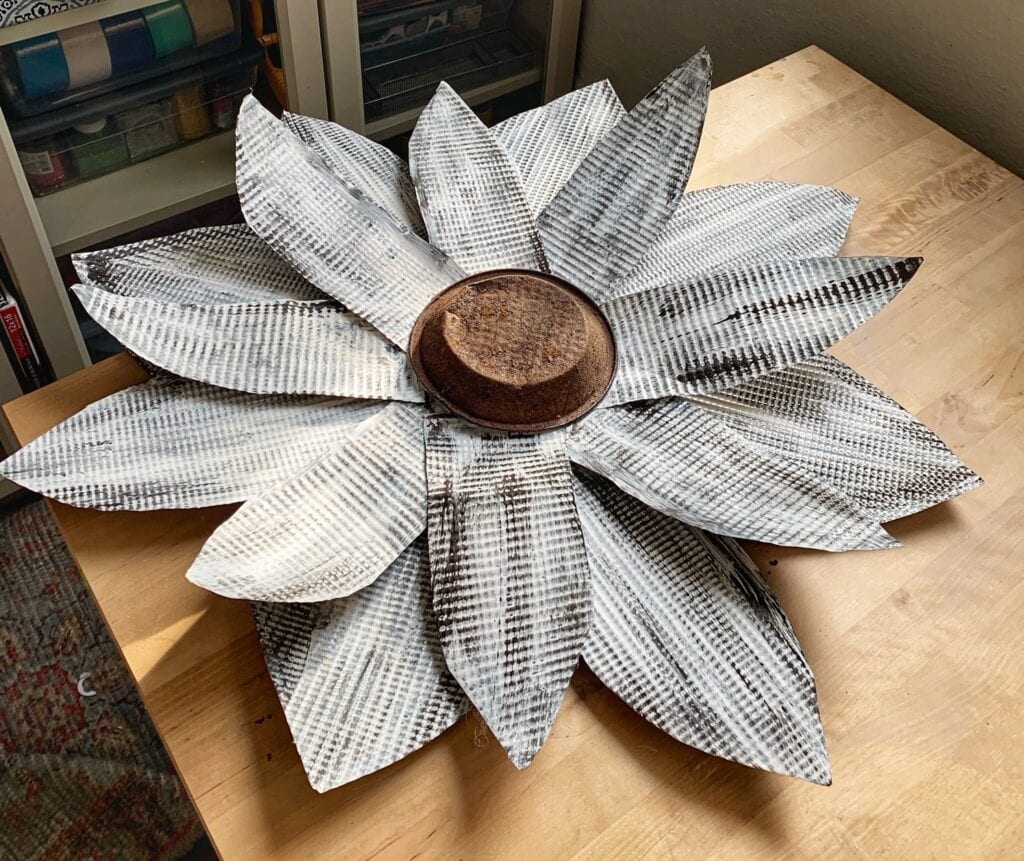
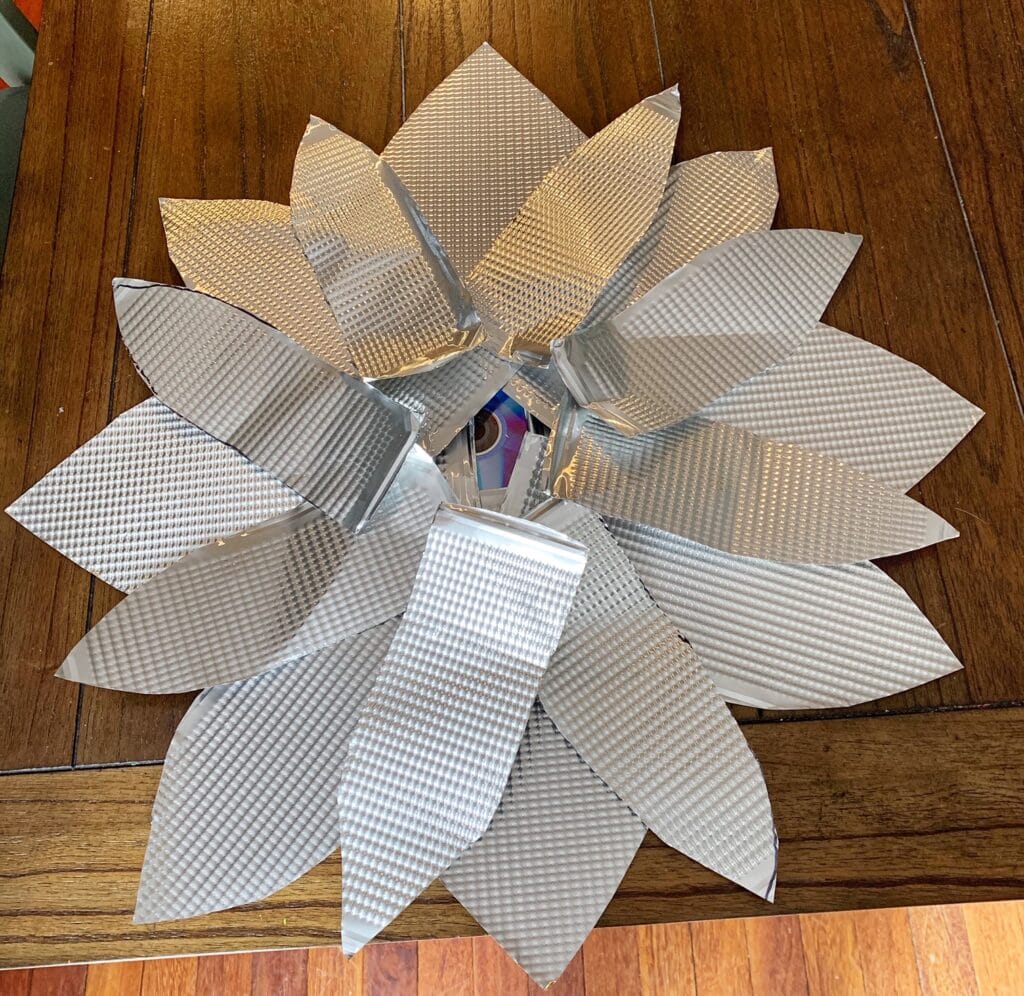
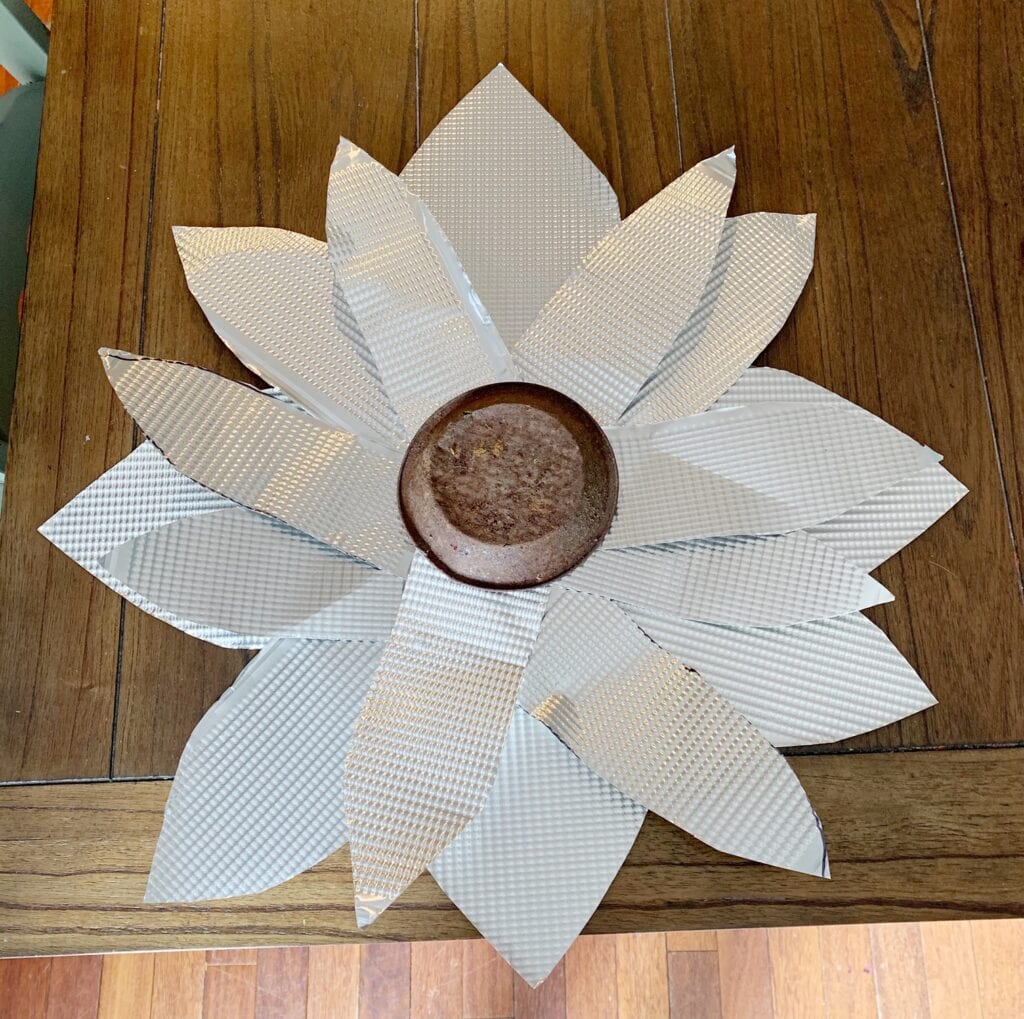
These tin flowers can be used in the garden, or hung on your front door, or from a wall in your home. Here is what the flower looked like when we were done with it, but before we mounted it to a post to put in the garden. You could glue ribbon or a picture hanging kit to the back of this flower instead of putting it on a post, and hang it on a door or wall in your home too. I love how it is so versatile and you can use it to decorate in so many places. Because it is made of tin, it is very light too, so it is easy to hang.
The main part of the flower is made from those disposable tin cookie sheets (we got ours in sets of 2 for $1 at our local Dollar store). That means we got 8 sheets to cut out, for just $4!
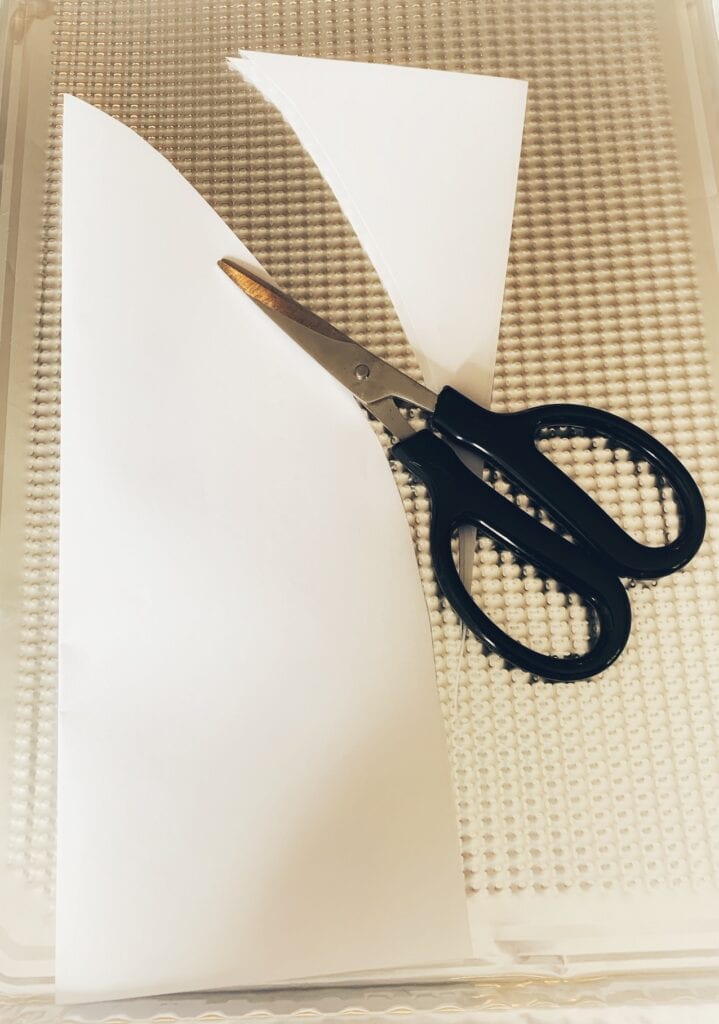
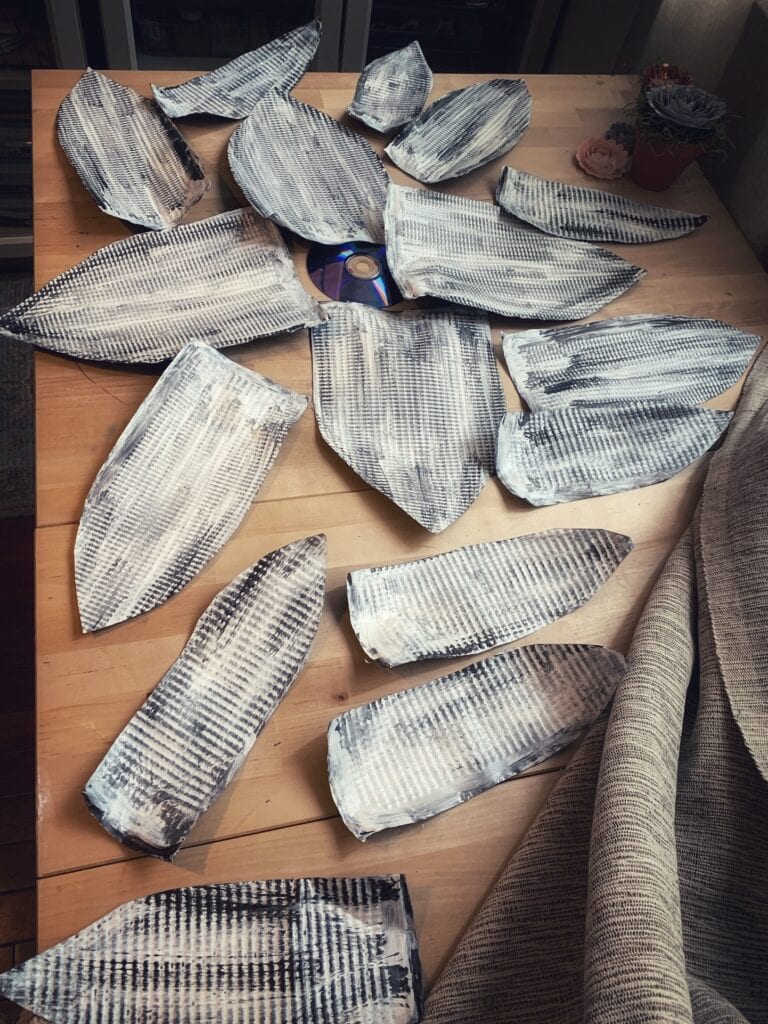
The first thing you will want to do is to create a template of a petal to cut out of your tin cookie sheets. I kept mine simple. For this daisy flower look you can just use a piece of 8×10 paper, and fold it in half, then cut out the shape of a petal like shown above. If you prefer you can google flower petal templates too, and use those.
I used the same basic petal shape, but I cut it out in three different sizes.

I started with this large size of petal, that took up most of one sheet each (so 4 cookie sheets required to make this petal size).
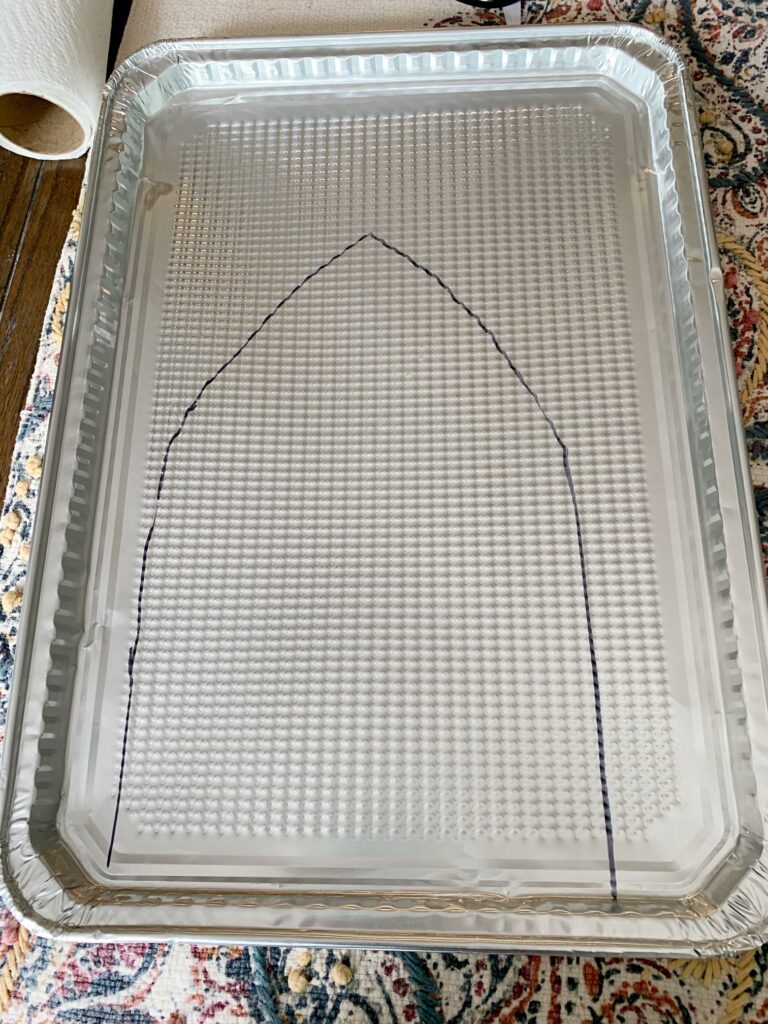
Next transfer your template shape to your tin sheets. I used a sharpie to do this, but you can use a regular pen and just make an indent if you prefer. I knew I was painting mine, so I was not concerned about the lines (or you can just turn them over and make sure any markings are on the backside).
![]()
Cut out your first four larger petals and place them on the centerpiece to get an idea of the size of your flower. We used an old CD, but you could use anything that is this shape that you can glue the petals too. If you are using it indoors you could even use a cardboard circle.
![]()
For the next size of petal, I used the same petal shape, but cut it down to be much thinner (so two petals fit on one cookie tin). Trace your pattern and cut out just like above .Two cookie tins should give you 4 petals.
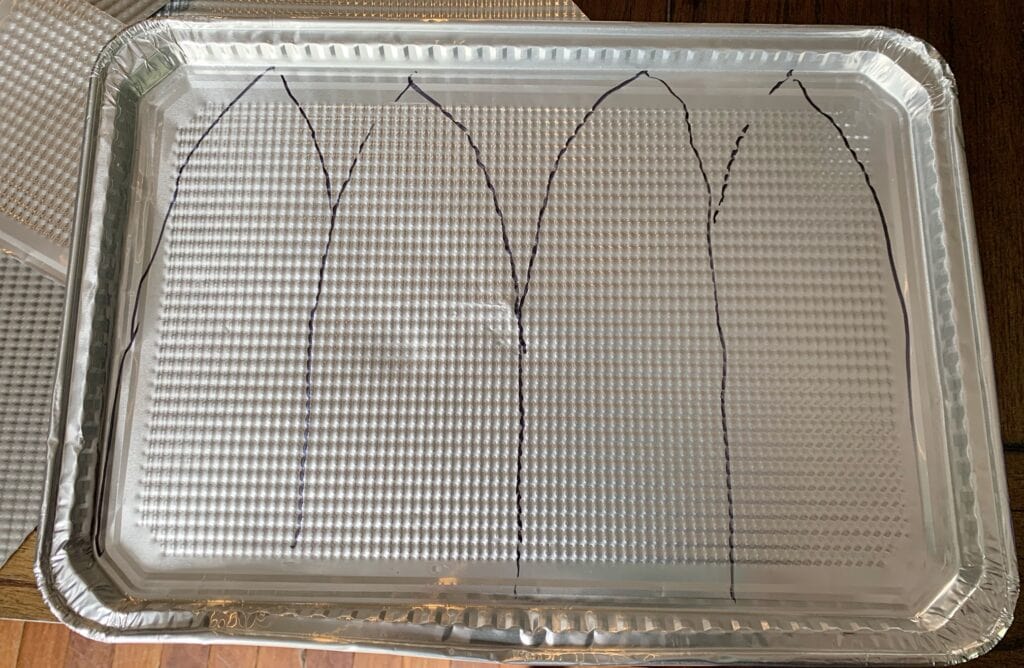
And then I cut the size down one more time, and flipped the cookie sheet so I could fit 4 leaves on one cookie tin, for this last set of leaves. For this leaf, 2 cookie tins yield 8 leaves.
Cut them all out.
Next I placed them all around the CD, to make sure I liked the shape.
Once I was happy with the shape, it was time to get ready to paint them (do not glue them down until they are painted). It is much easier to paint them first.
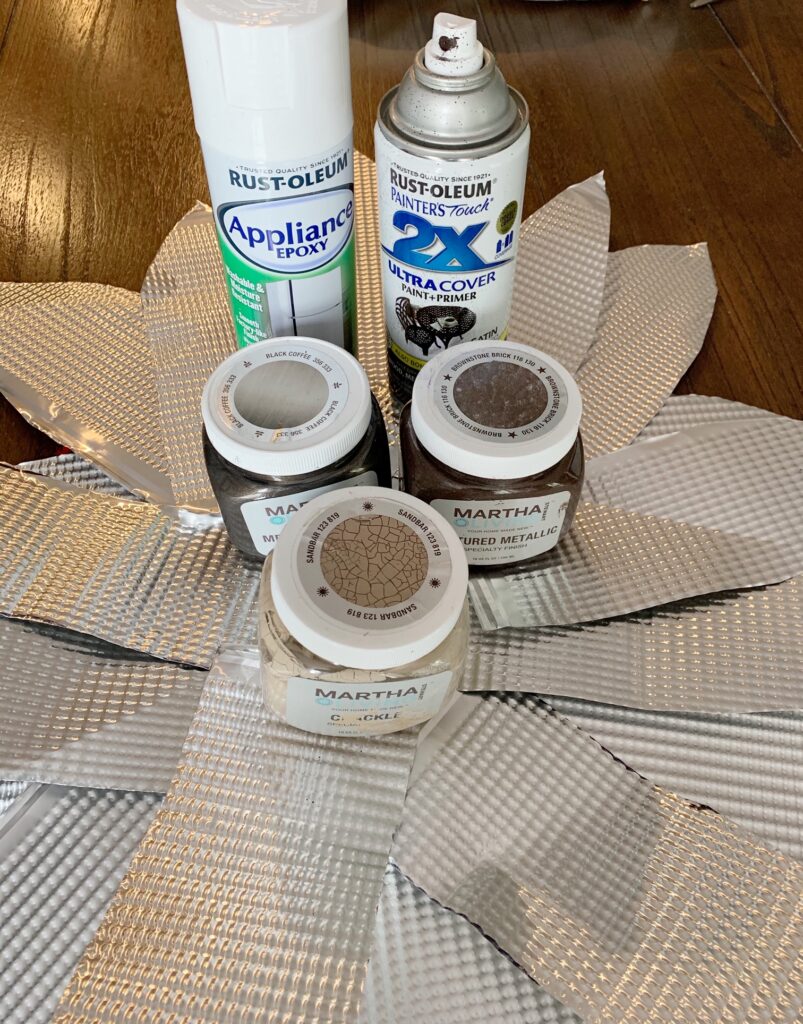
You can paint them any color you want. I had these paints on hand, and wanted to do an antiqued paint technique to make them look a little more rustic. If you have a favorite color, you could paint them just one color too. It all depends on your tastes and your vision.
I will say that spray paint is the quickest and easiest way to paint them, so if you are looking for an easy flower – pick a spray paint color and use that. If you want to add a few layers to it, this is what we did.

I started by painting mine a bronze metal color with spray paint (front and back). Let it dry completely.
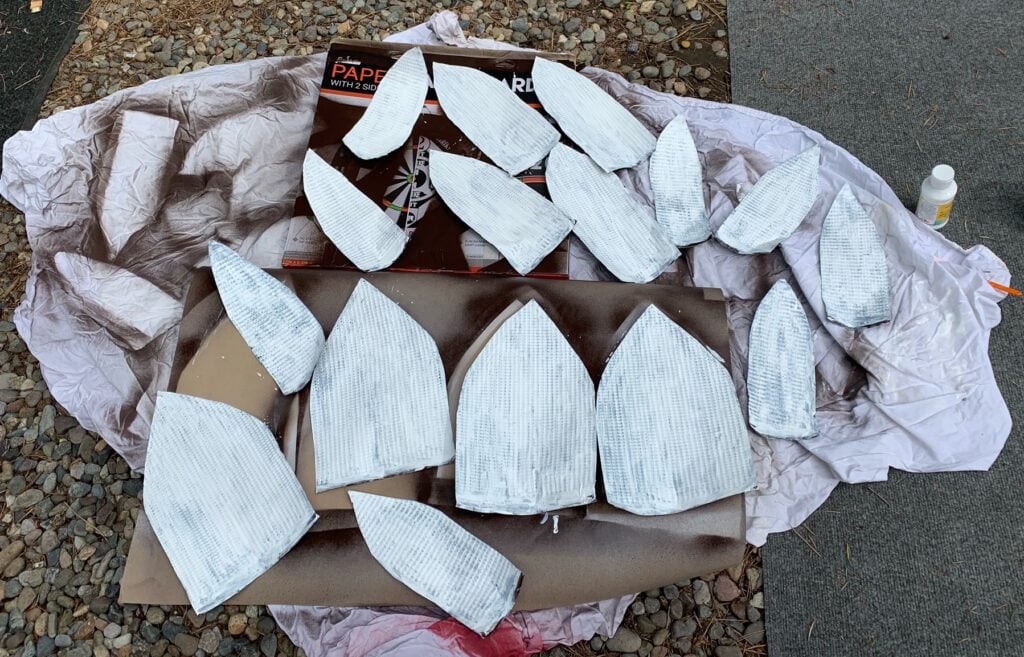
I then covered each of them in white on the front, and let that layer dry completely. I used three coats of white, letting it dry in between coats.
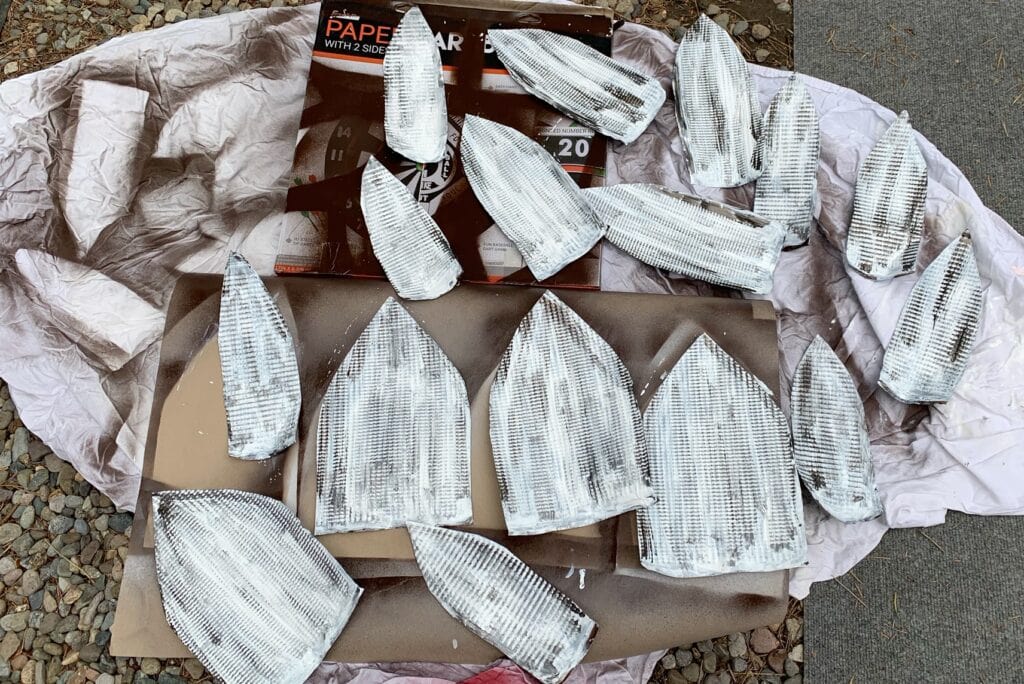
Then I added a metallic bronze color (just used a dry brush and added it here and there for an aged look). Let it dry thoroughly after that.
Once the paints where completely dry, I sprayed everything (front and back) with a clear coat to protect the paint out in the weather (if you are using yours indoor this step will not be as important, but is still a good idea).
I then let all my pieces dry overnight, to make sure it was thoroughly dried.
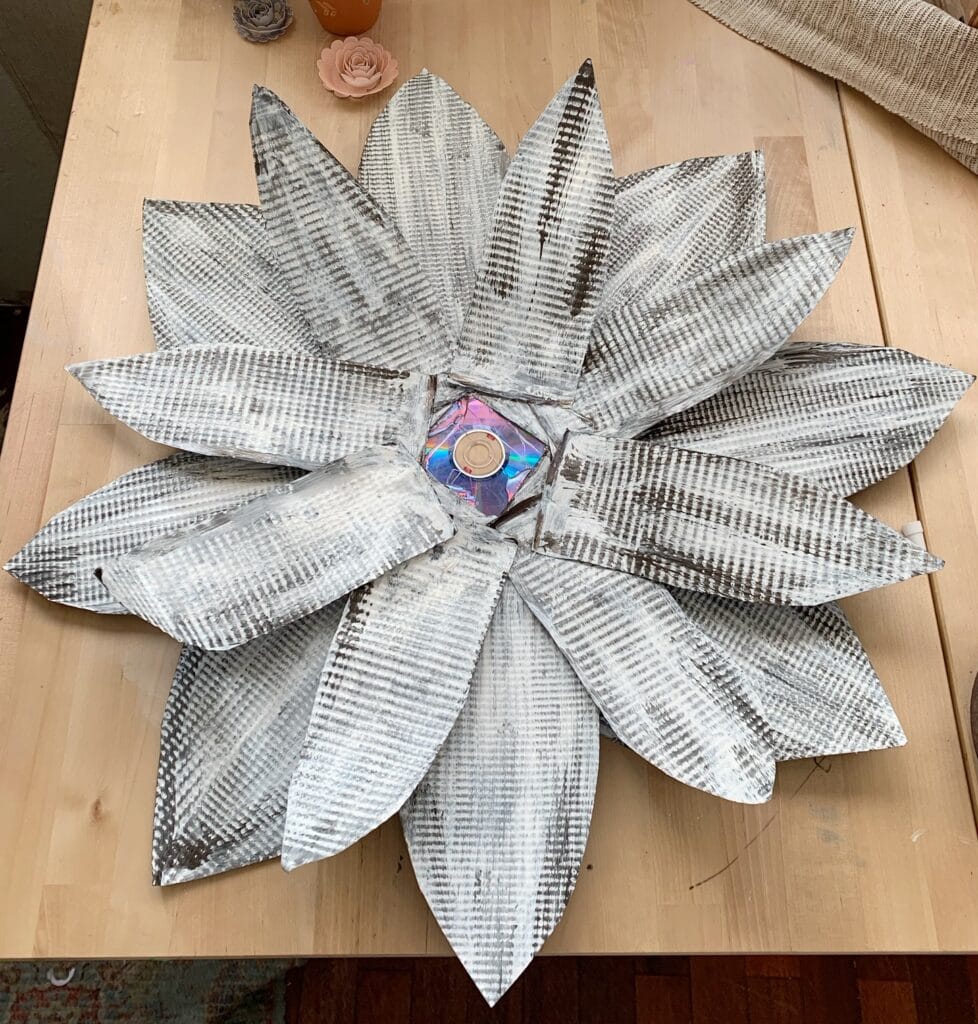
Now it is time to glue your flower together. Start with the largest 4 petals and glue that bottom layer to your circular middle piece (the CD for us).
Then glue the next 4 smaller petals on top of those (spreading them out to cover the areas you had not covered with the first 4).
Finally glue the last 8 smallest petals to the CD.
Let that dry overnight to be really solid. I mentioned above that we used both E6000 and hot glue. The reason for that is that the E6000 will keep it all glued together over the long term, and I can use outdoors (or Gorilla glue or epoxy). The reason I used a dab of hot glue in this process was that it would keep it from moving, and make it much easier to assemble the entire flower. So I would add a glob of E6000 to each petal, and then a glob of hot glue, and press it down until I felt the hot glue dry. Then I could add petals on top, without worrying that the petals underneath would move.
Lastly, you will want to glue the centerpiece in your flower, to finish it off. I had an old mini pie plate that we had used out in our garden. It was rusty and perfect for my flower, so we turned it upside down and glued it there. You could buy a mini pie pan to use on yours, or you can just wind or ball of the left over tin parts from the cookie sheets, and paint and use those too. This is where you can be creative with whatever you have. You could also use rope or thick twine and wrap it up to make a centerpiece for your flower.
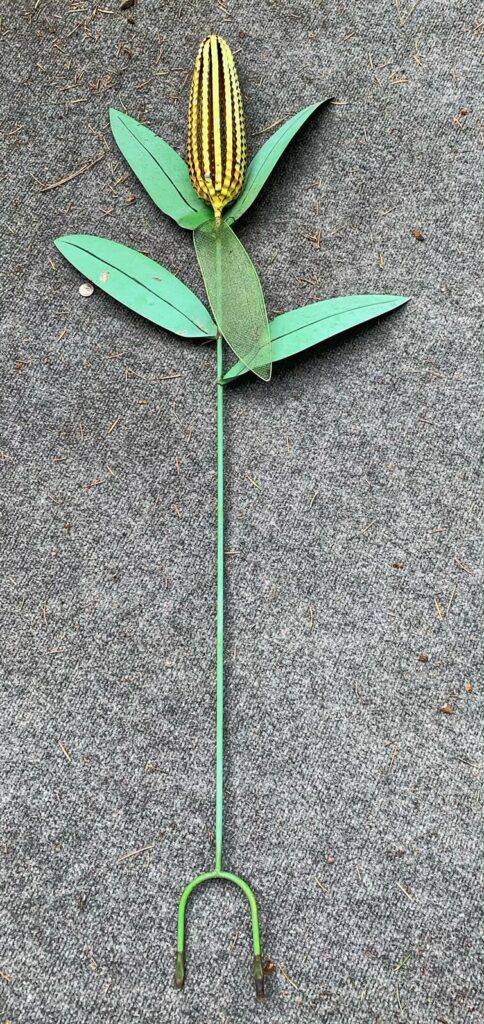
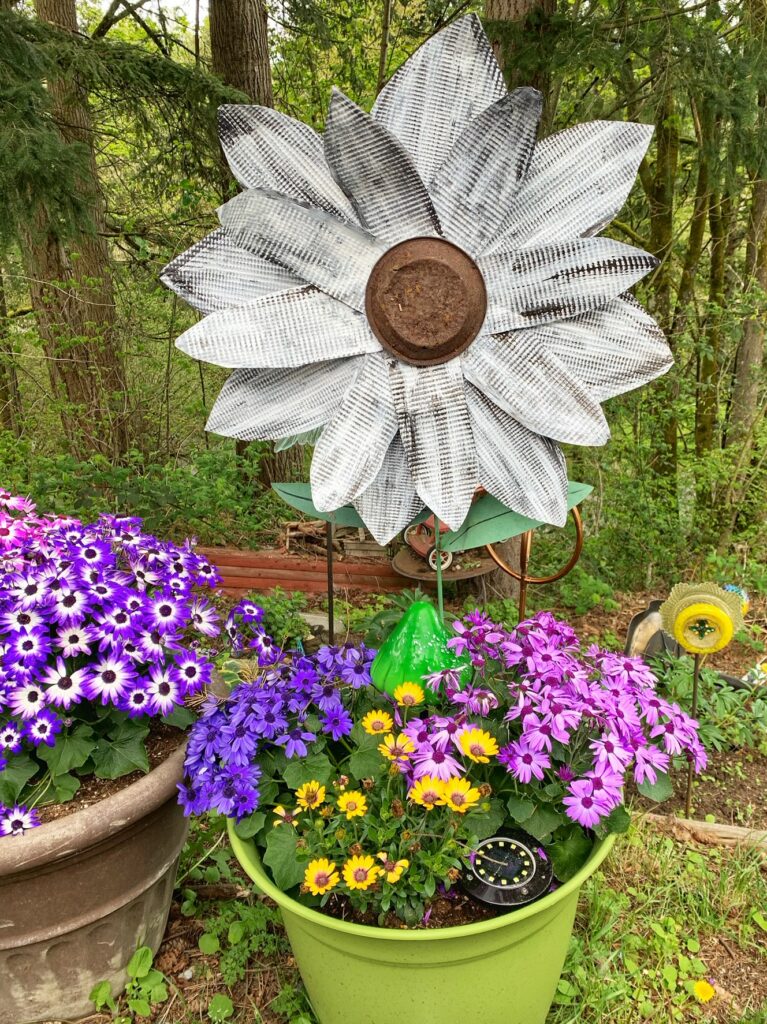
I had these old corn stalks that I was not using any more. You could buy just the metal ground stakes at the Dollar store (I found them in mine) or hardware stores too. Basically you will need a post to stake into the ground as a stem if you want to use it outdoors like a garden flower.
Alternatively you can glue a ribbon on the back, or picture hanging kit, if you want to hang it somewhere, vs staking it in the ground.
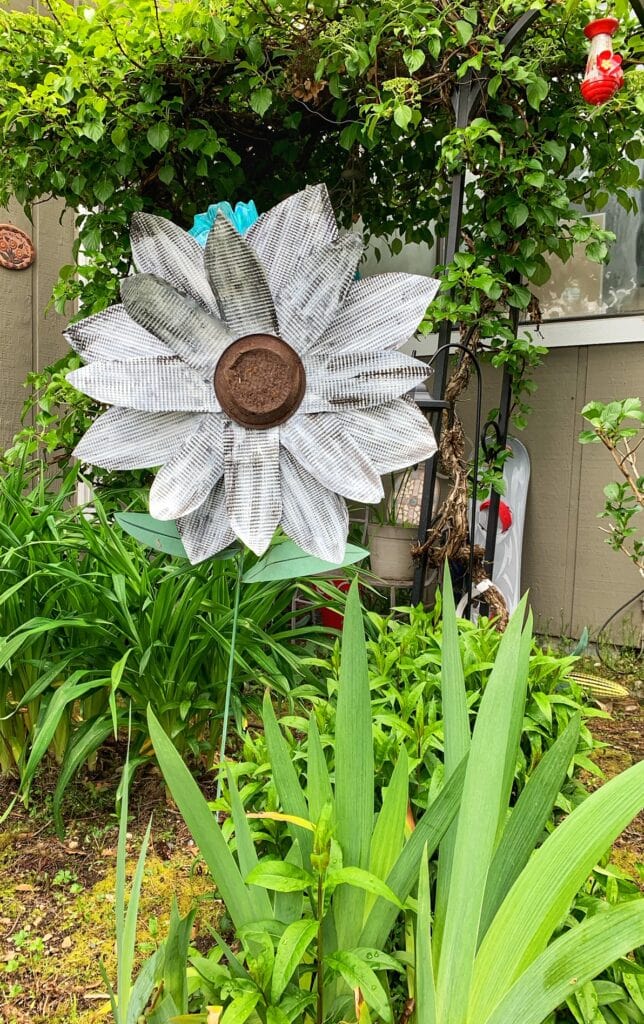
Then just find the perfect spot in the garden to display (or hang from a door or wall). It is light (since its made out of tin) so you will want a spot that is protected from too much wind.
More projects you might like:

Make glass garden flower art out of dishes
Find more garden projects here too.

Would a cat food can, painted and turned upside down and glued to the center cover the center?
That sounds like a great idea to me – let us know if you try it and how it worked out!