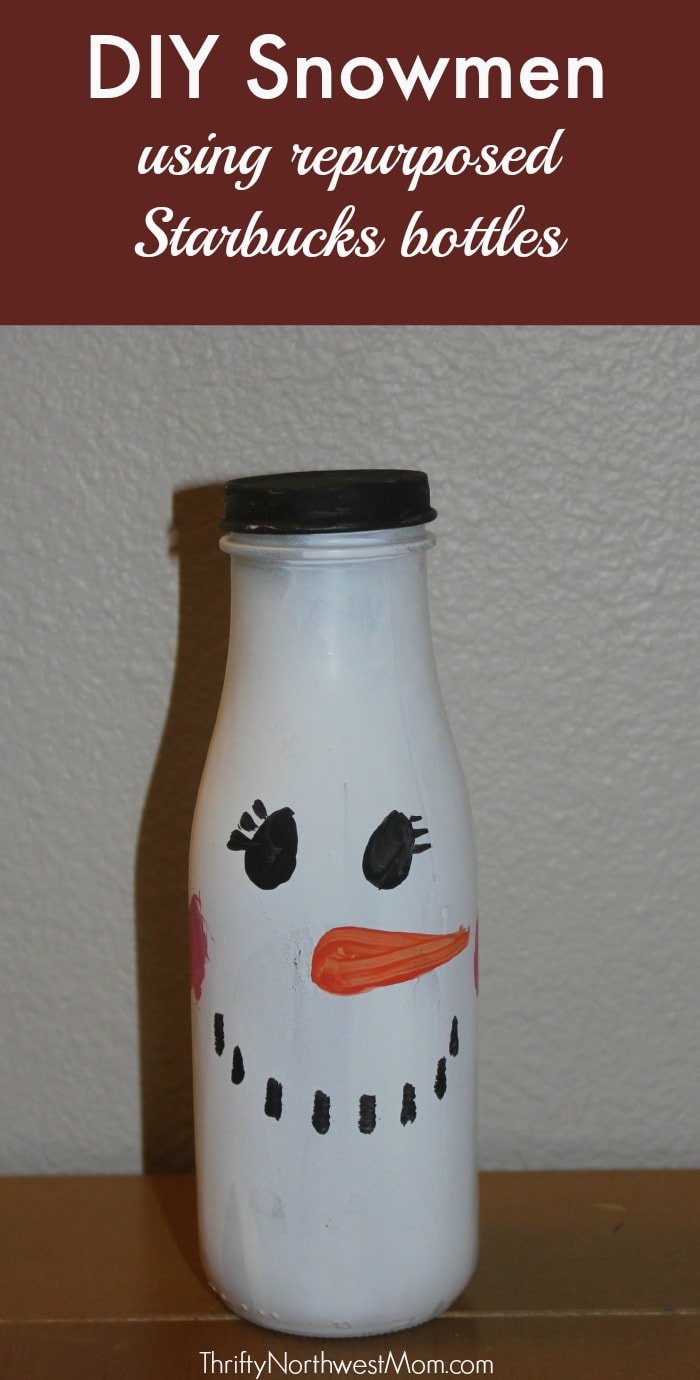
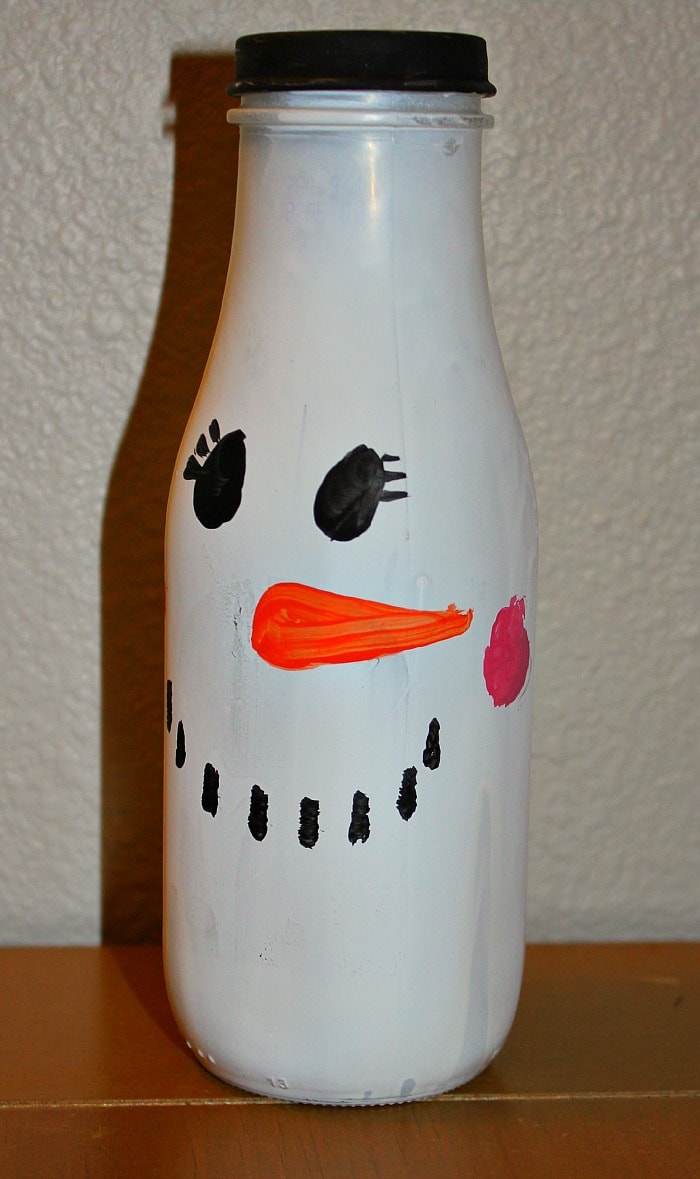
DIY Snowmen using Repurposed Starbucks Coffee Bottles
This post may contain affiliate links and I may be compensated for this post. Please read our disclosure policy here.
DIY Snowmen using Repurposed Starbucks Coffee Bottles
We decided to do a craft day with some friends yesterday for our 25 Days of Christmas Activity for the day. I was thinking of doing a few crafts and needing some ideas, when my husband happened to bring home a whole box full of empty Starbucks Iced Coffee bottles. He’s a high school teacher as I’ve mentioned before and high school students love their Starbucks Frappucino drinks apparently, as he convinced them to recycle their bottles in his room. I was so surprised to see them, but he’d remembered that I’ve used the bottles in the past for birthday parties when we would use the bottles with cute little straws for different themes.
After seeing these bottles and trying to think of a way to repurpose them for some Christmas decorations, I was struck with inspiration (which is rare as I really don’t have a crafty brain at all) and I decided we would make little snowmen out of the bottles. It’s fun to come up with ways to repurpose items that you already have & so much more frugal for crafts too! And now that I know I have an endless supply of these bottles from the teenagers, I’m going to come up with a lot more uses for them. {If you don’t buy these Starbucks drinks, I’d suggest you ask around to your friends or put out a Facebook request as I bet there are some who are addicted to these drinks & would save the bottles for you.}
We did these Snowman Bottles as a fun craft with our girls & their friends (elementary age) but I think any age would enjoy this – preschool up through teen/adult as it’s fun to let your creative side take over & create these cute snowmen!
Supplies::
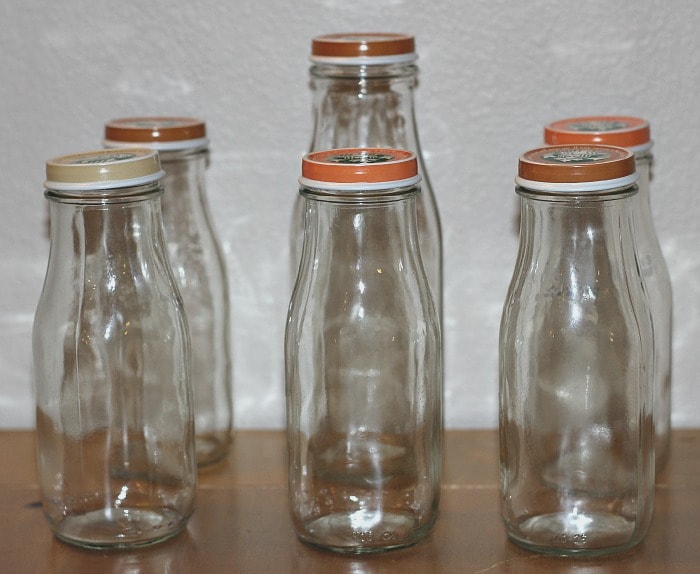
- Empty Starbucks Frappucino bottles (or any bottles will work, even taller glass soda bottles)
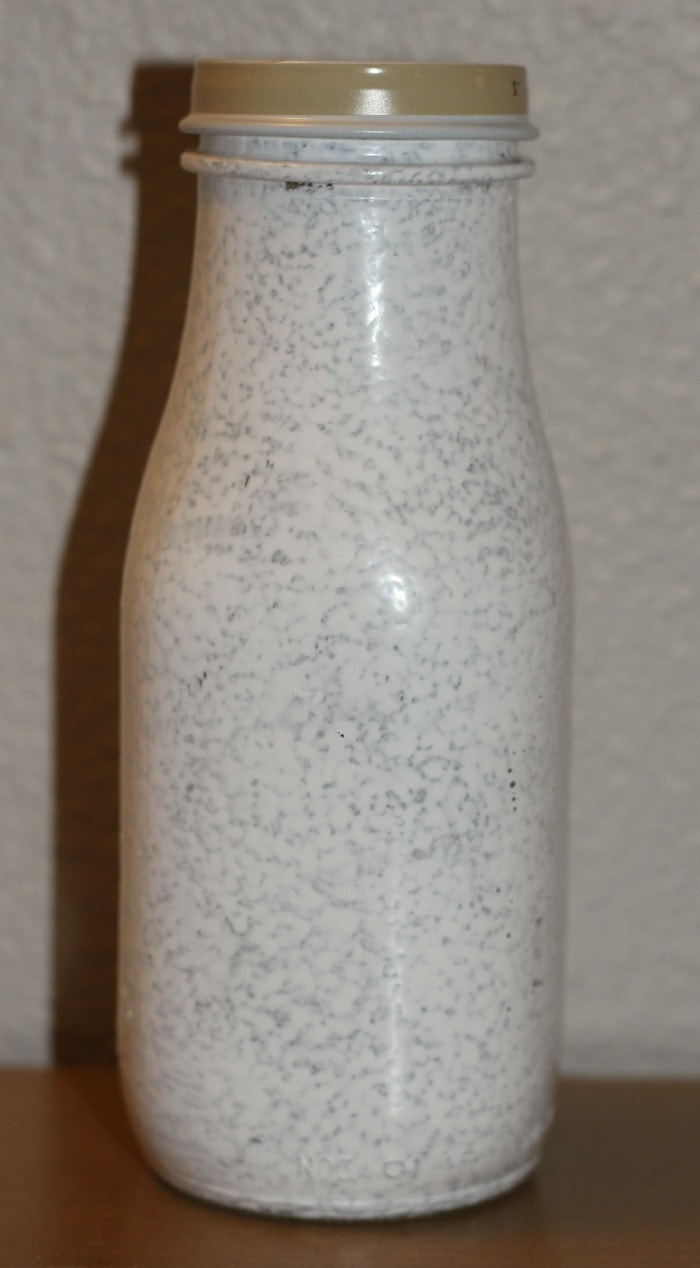
- White Paint – I used spray paint as it is much faster and I could do a number of them at once and I like the look of the spray paint, especially the matte finish (similar to a chalk paint look). You might prefer glossy spray paintas the matte finish does seem like it could crack/chip easier). A more frugal option is to use acrylic paints and it can give it quite a different look. {Just make sure to give yourself plenty of time to spray paint the bottles, so you don’t have to rush & do them fast as I did & have the drips – it will look much smoother}
- Acrylic Paint – black, orange and pink (or red/white to make pink which is what we did)
- Paint Brushes – you might also want a sponge brush if you want to paint the bottle using acrylic white paint for a “snowy” effect
- Goo Gone -This is an optional item to help with getting sticker residue off. If you can get the residue off with soap & water, that will save you the expense. We just had this on hand to speed up the process.
- Fleece (optional if you want to add a hat or a scarf, which we didn’t do for ours but we might add them later for others)
That’s all you need – these are really so simple to make! You could make little fleece hats if you want – just cut the fleece into a rectangle & put it around the top of the bottle & glue it on. Then cut fringe at the top. You could also make a simple scarf out of a scrap piece of fleece & tie it around the neck.
Instructions::
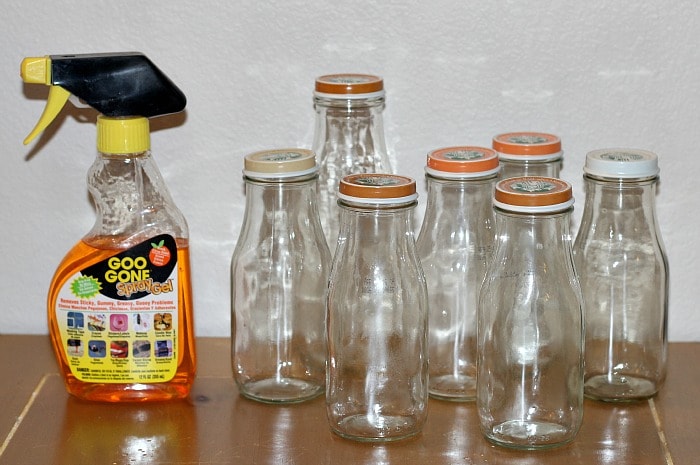
- Peel all the labels off your bottles. Scrub the residue off . You can use soap & water to scrub it off. If you have Goo Gone, this works well, too.
- Wash your bottles thoroughly and make sure they are totally dry – I just put all the bottles and the lids in the dishwasher to wash them quickly. I will say that even though I used the Goo Gone, I was in a hurry when I prepped the craft and must not have scrubbed them enough with the Goo Gone as some were still sticky. But once we painted them, they were totally fine, no more stickiness. So, you may not need to work too hard on getting the stickiness out with having the paint cover it.
- Paint your bottles – it may take several coats of paint to get the paint opaque enough. I only did one coat with the spray paint & did them quickly, so did get some drips, so I will do at least 2 coats from now on to get that smooth, opaque look. It will also help so the paint doesn’t chip/crack if you do at least 2 coats.
*I’d also recommend that you make sure to take the top off when you paint – you don’t want the top to get stuck as we painted the tops black.
*If you want to have a really smooth finish with your spray paint, you may want to do a spray paint primer first. - Now they’re ready for kids to paint if you’re doing this for a craft activity with friends, at school, etc
- Kids will paint the lids black & set those aside to dry
- Kids will paint the faces – we did the eyes and mouth first with the black paint (which helps you to see where to put the orange paint)
- Enjoy your kids’ creativity – my daughter who is quite the girly girl decided her snow-woman needed eyelashes, an orange scarf AND bright pink lipstick around the mouth. Oh my! It used to bother me when my girls would not make a craft exactly how I planned as I wanted a pretty item to display – until I realized how cool it will be to look back on their creations years from now & see all of their unique personalities that they used to create these & how silly I was being for wanting it to look “just right”! She ended up making her “boy” snowman with a typical face, but then we have the unique snow-girl to always remember her love for “all things pretty”.
- Let them dry completely before kids take them home (if you’re doing these as a craft at class or for a craft activity with friends) — I was surprised how quickly these dried, maybe because I used the matte spray paint (they were almost totally dry after an hour with the faces). It also depends on how much paint your child uses – the thicker the paint, the longer it will take to dry.
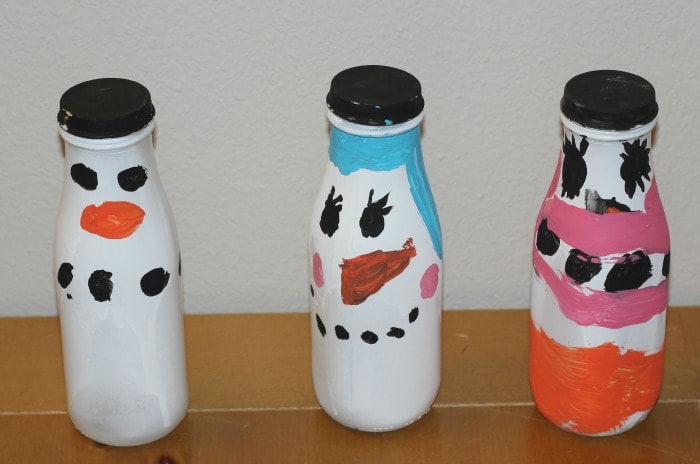
Here are a few of the finished products – as you can see, my daughter’s snowman has a lot of personality, but we’ll sure get some smiles out of it when she’s older & looks back on it. If you have enough bottles, you could even make a little snowman family, which is what my girls are going to do next -using the smaller bottles for the “snow kids”.
Give these as Gifts:
Another fun idea is to use these for little gifts for the grandparents, neighbors, friends, etc – you could fill the bottles up with Christmas candies or even cash for a fun way to wrap the present!
What are your favorite ways to repurpose empty bottles?
Make sure to check out more fun Christmas crafts to do with your kids or your family on our Christmas DIY page:
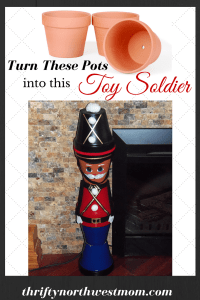
Toy Soldiers Made from Clay Pots