
DIY Coffee Bar Ideas – Convert An Old Dresser or Table!
This post may contain affiliate links and I may be compensated for this post. Please read our disclosure policy here.
DIY Coffee Bar Ideas / Wine Bar – Convert An Old Dresser or Table into a Coffee Bar / Wine Bar
Looking for diy coffee bar ideas or wine bar ideas (it can really be for whatever beverages you love. I have put together a few for my own house, as well as coffee bars for church, and here are some really affordable ways you can make your own custom coffee bar that you love.
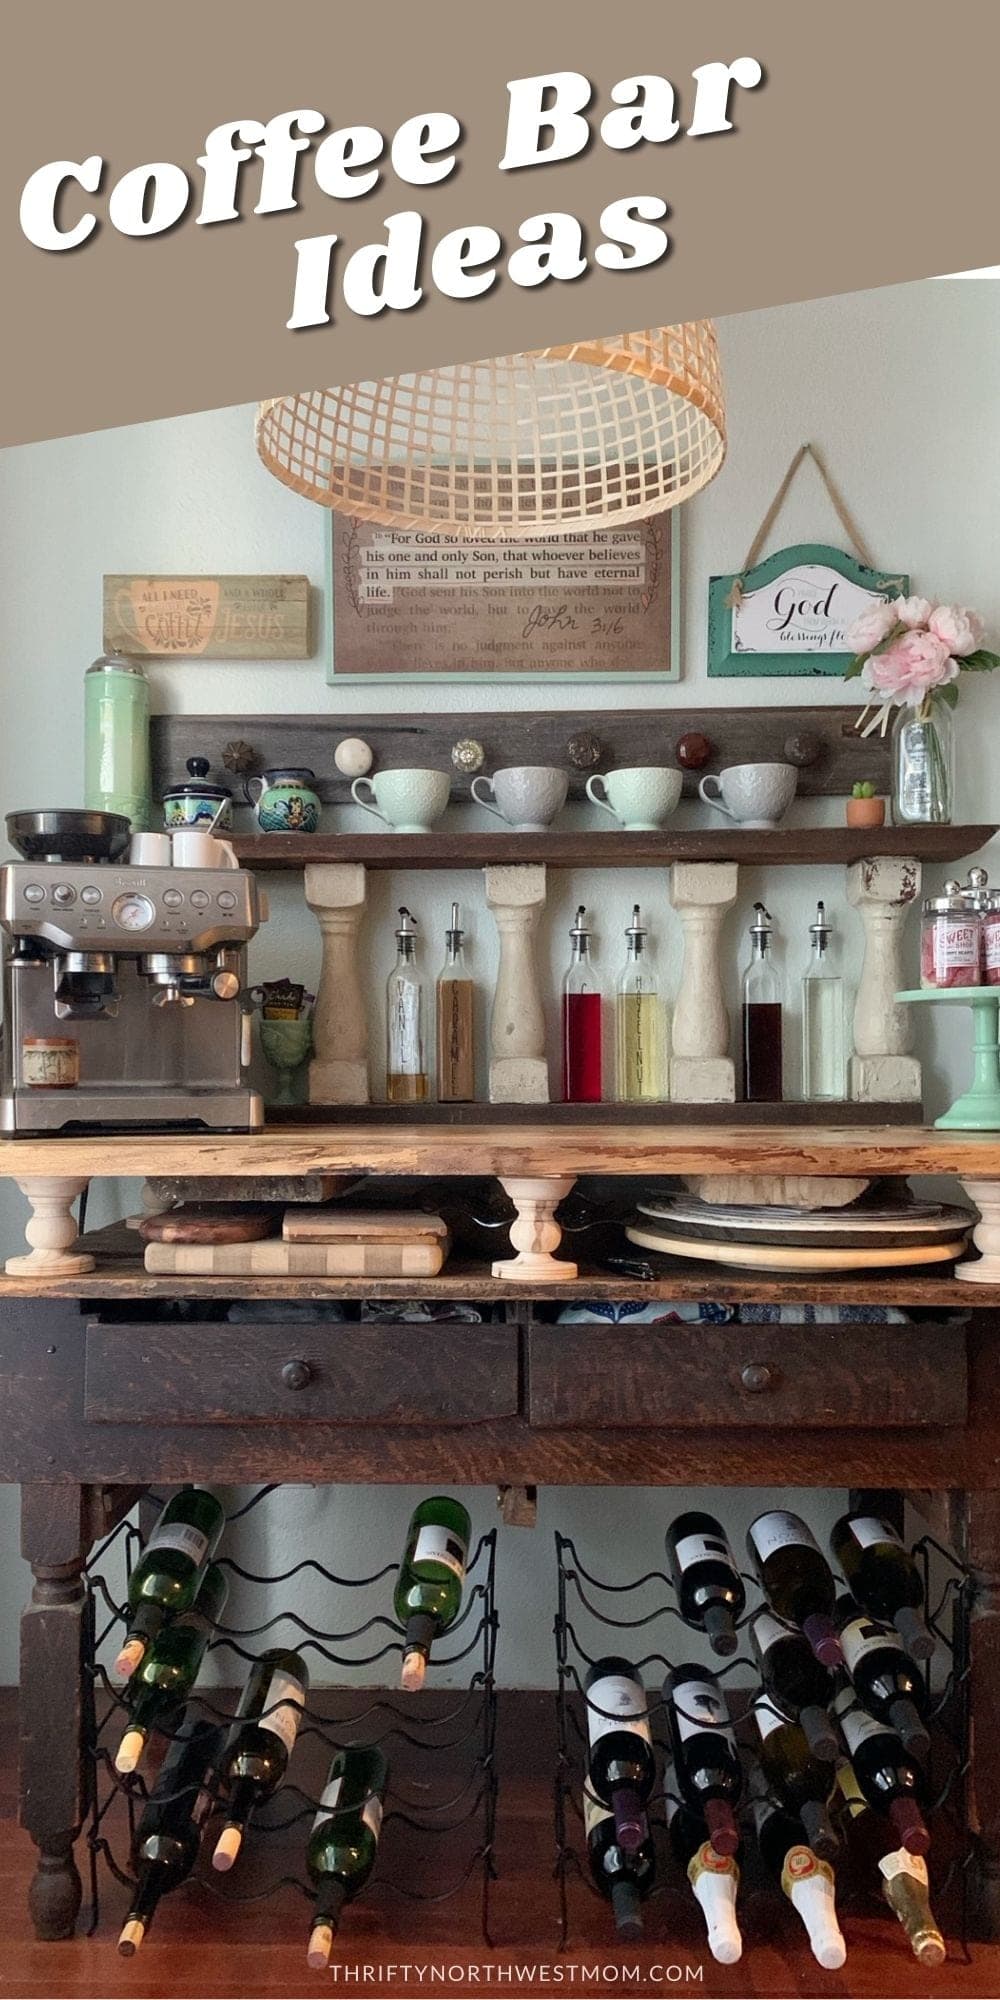
The point of this article is to inspire you with coffee bar ideas, so you can go find your own items that will work for your space (it would be hard to recreate this exact one). We have provided a few examples to show how you can repurpose so many different items into adorable and practical coffee bars or wine bars. I did a combo coffee/wine bar for my house.
I liked the rustic two toned wood look personally, but if you do not you can easily stain it all one tone.
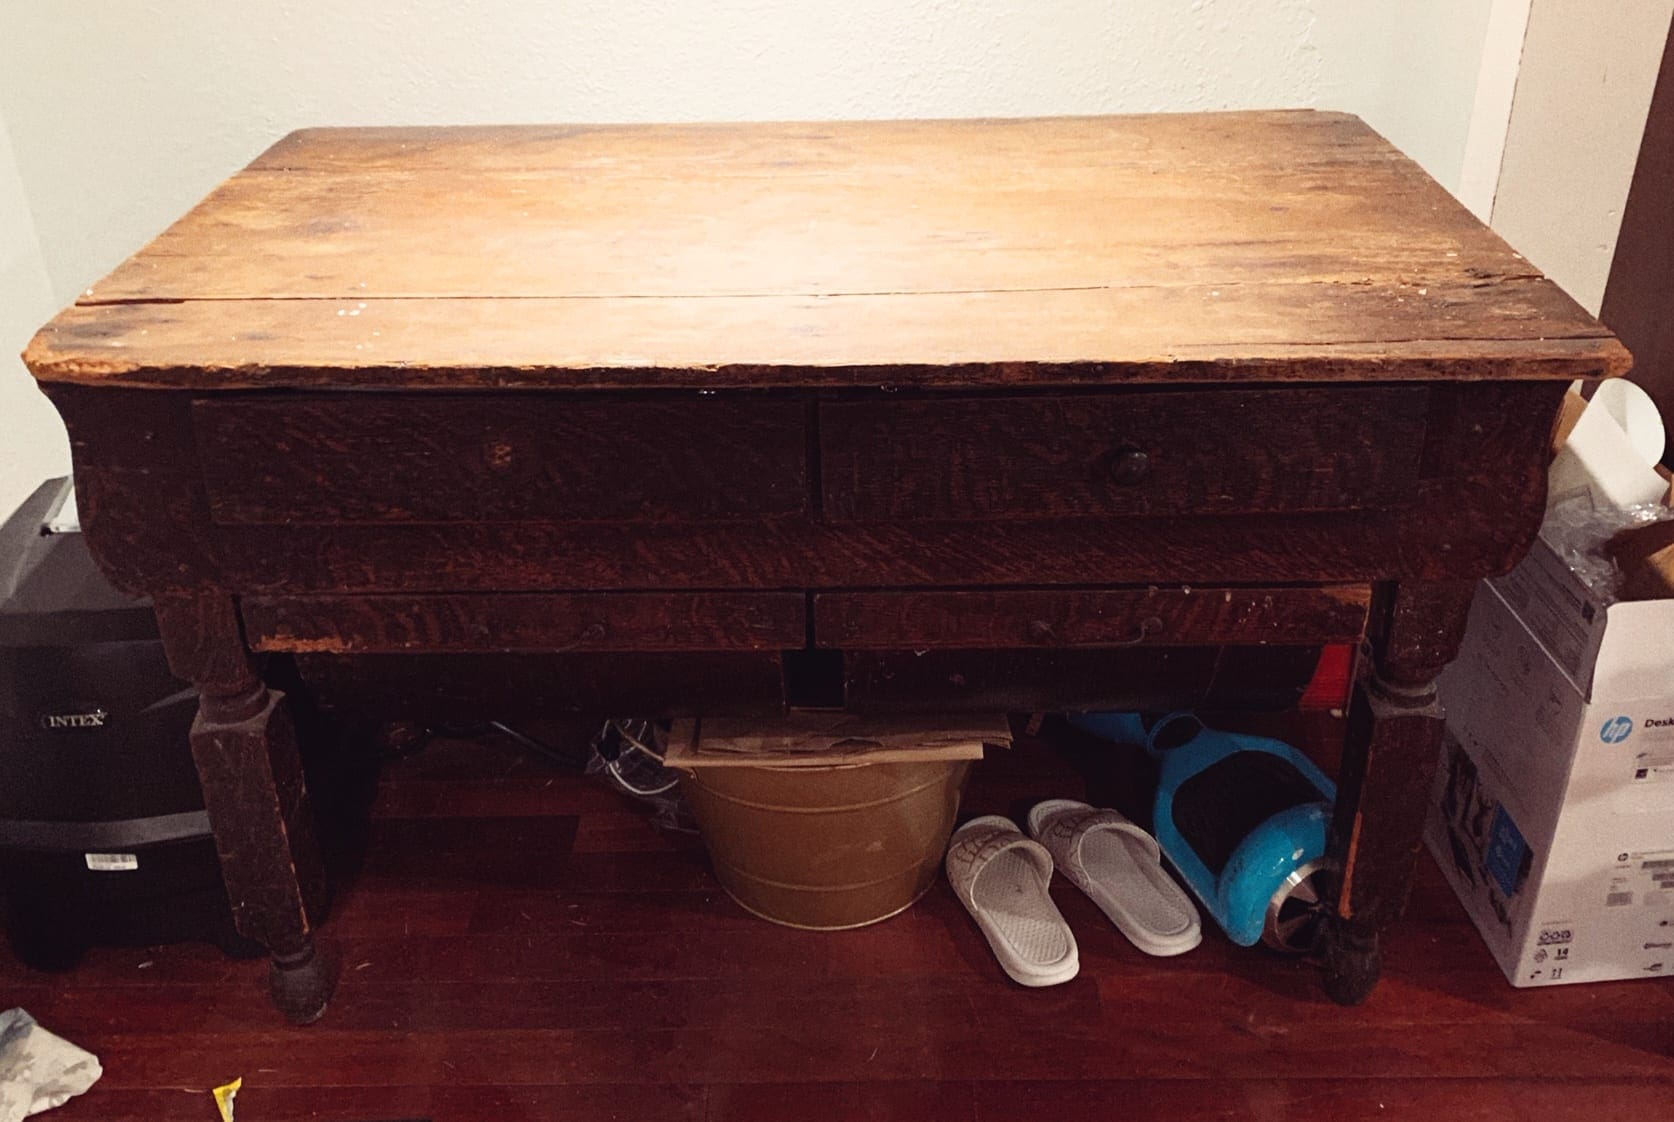
Mine started with an old bakers table that I got for free (someone was getting rid of it). Be sure to join your local buy nothing groups – you may see a dresser or table being given away for free that will work for you). I just started layering from there, finding things that fit the dimensions I wanted, until I got this.

I knew I wanted it to be bar height. I had tried it at table height, and it was not comfortable bending over to make the coffee, and I did not want to deal with finding a new piece, so I started to think how I might be able to raise the height of the bakers table. I did that by getting these wood pedestals to use to add height and then built my own bar top, out of some wood I had that I loved. You can buy butcher block pieces already put together at places like Home Depot too if you prefer (it will just cost you more).

I needed some place to store my wood trays and lazy susans, so the space between the table and bar top worked perfect for that. You could also put baskets there, and use it for more storage too.
I then added this shelf I had built previously to the top of it, to provide place to store my coffee syrups. I created the coffee bottles by using Oil & Vinegar bottles I found in a local store for a few dollars, and added their names with my Cricut.
For more visual interest, I collected old door knobs, and attached them to an old piece of wood, and secured that to the wall at the top of my bar.
Under the table I found some simple wine racks that fit that space, and used those. You could also use crates to store your wine under a table if you want to make it into a wine bar too.
It really was just a simple process of layering. Adding one more thing that I loved each time. If you want to be inspired with coffee bar ideas from your own decor, start by deciding what the main table/dresser or shelf piece should be, and build from there. I did not build mine in a day, it took me about a month to get it where I wanted it (I would try one thing, and I if I did not love that then, I would try it a different way until I loved it). That is the beauty of this project – there is no right or wrong ways to do it….just add what is useful and that you love to look at.
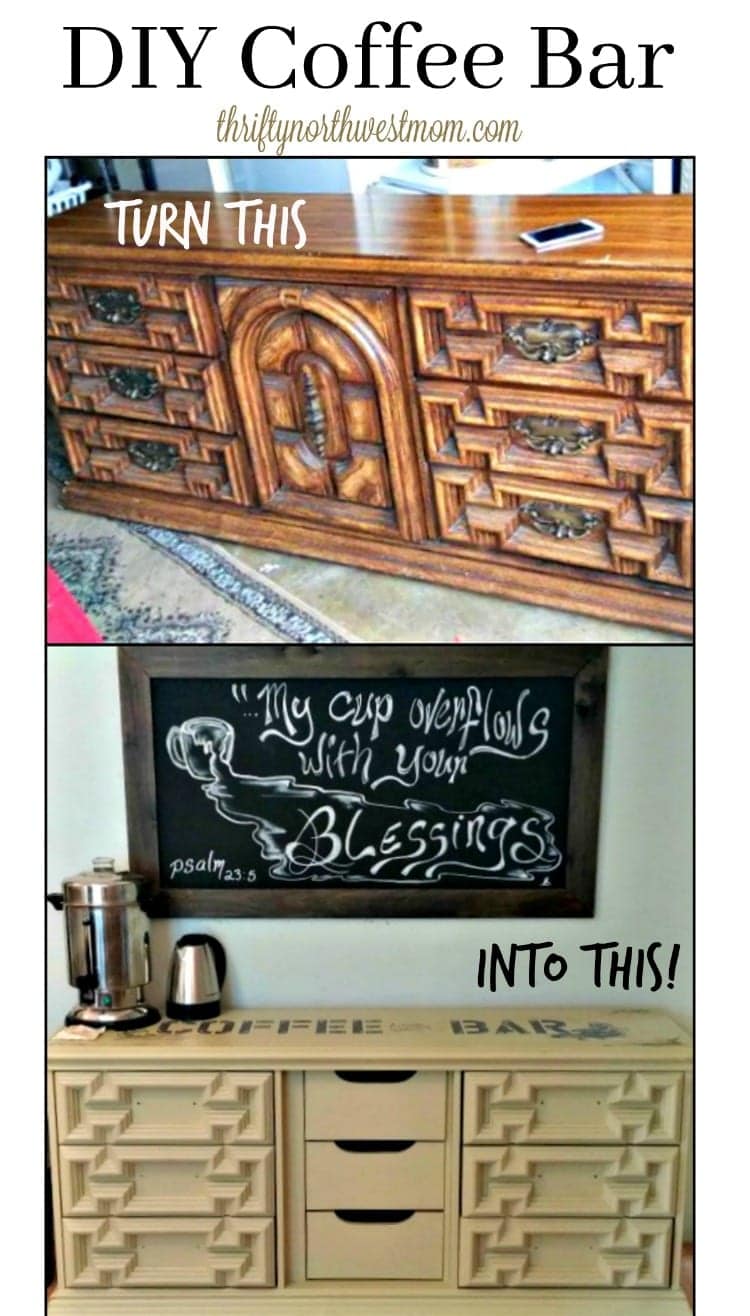
Here is a coffee bar cabinet we did for church, with a super affordable dresser make-over:
Are you looking for a way to add some more counter space and storage space to your kitchen, without the big costs of a kitchen renovation.
If you have a wall space that you can bump a dresser up against, here is an idea you can do on a serious budget! We used a long dresser to maximize space, but you could use any size that will fit in whatever space you can squeeze out (even a file size cabinet if you just have a small space).
We used ours as a coffee bar, as we were making a small gathering space at church – but you could use this same idea in your own home as a coffee bar, buffet area to display food and snacks, or look for a remnant piece of granite or laminate and make a real counter top for it.
Start by looking for a dresser that will fit the space you have available. We were looking for something that was long (like a counter), and had drawers for extra storage. Don’t let something that looks outdated throw you off. Remember, you can always change out hardware, and paint updates a piece so well. Ask around in case anyone has a dresser they are giving away (or do you have one you want to re-purpose around the house). If not, look at spots like Offer Up, Craigslist, or local exchange groups. Thrift stores are another option.
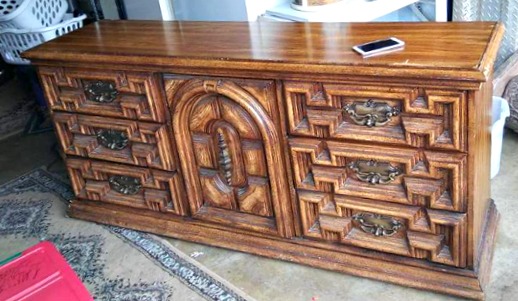
Here is the dresser we found on Offer Up for $15 (well, they were asking much more for it, but we offered $15 and they accepted). This dresser was heavy, which we liked for durability.
Supplies Needed:
- Dresser
- Sand paper
- Primer
- Paint
- Sealer
We started by removing the hardware, and the middle door (behind it were the three simple drawers).
Next we cleaned the dresser, and lightly sanded it (be sure to clean again with a tac cloth, or something that will remove the sanding particles).
Then prime your dresser and let it dry thoroughly.
Once the primer coat is dry, paint the dresser. Two coats is best, allowing it to dry completely in between.
After you have painted out your dresser add a sealer to make sure the paint does not chip off. You can find sealers with a sheen, or flat ones, depending on the style you are going for.
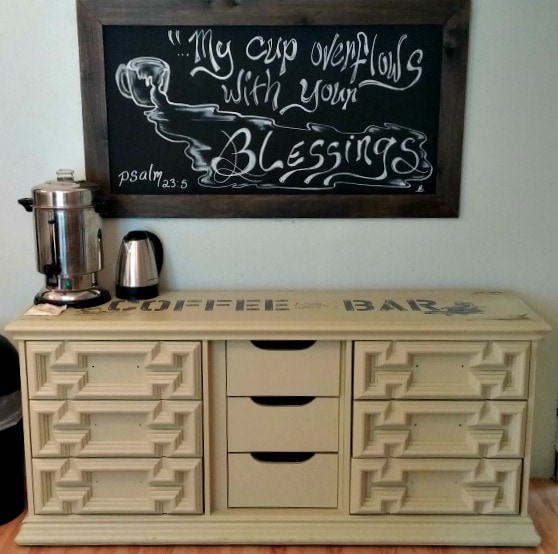
We are still hunting for the right hardware, but love how the bar turned out. We embellished our coffee bar by adding a stencil to the top and then did some free hand painting of a coffee cup on it.
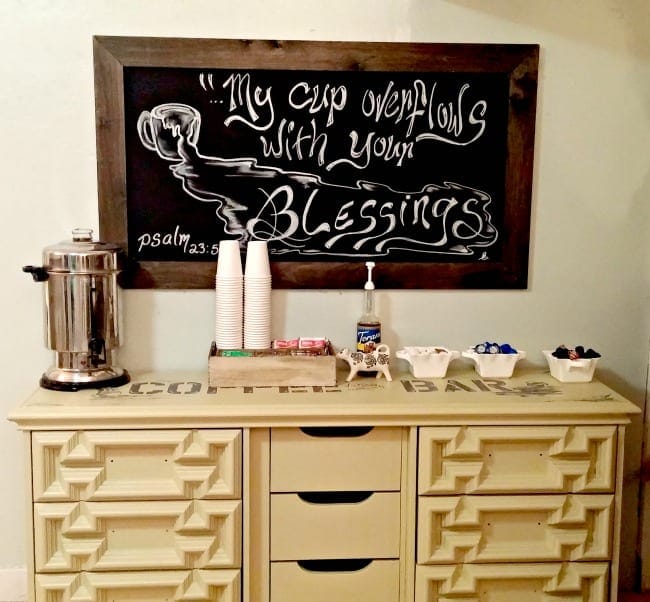
The last step was to put out all of the goodies, which we are then able to neatly store away in the drawers when we are done using them!
We also added a simple (and affordable) DIY chalkboards above it for more design. To make this we bought a peice of wood veneer at our local hardware store (veneer is the really thin wood). We then spray painted it with spray chalkboard paint (super easy!), and mounted it to the wall. We drew the sign with a chalkboard pen, and then framed it out with a piece of 1 x 4 wood that we also grabbed at the hardware store, and stained first. All together it cost us around $25 for the chalkboard.
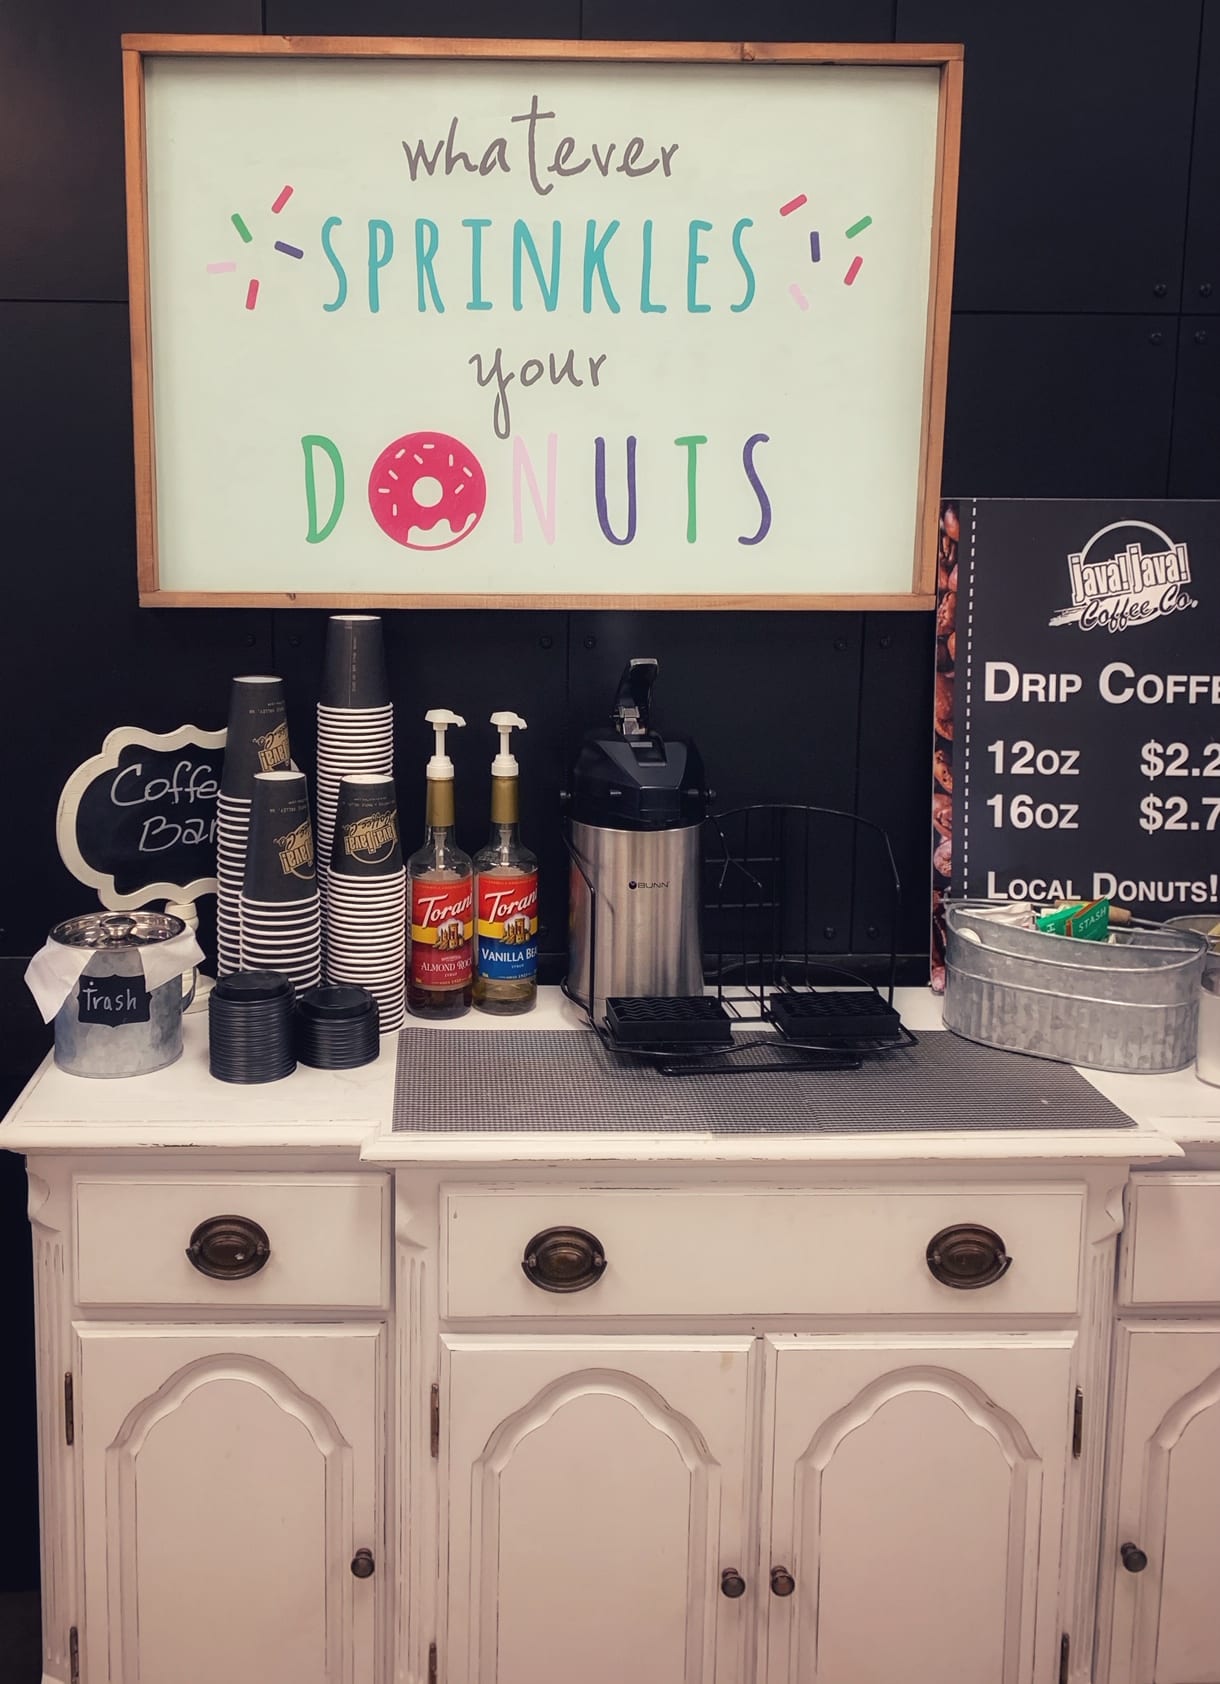
Here is an example of how a local coffee shop made a small coffee bar with just a white dresser too.
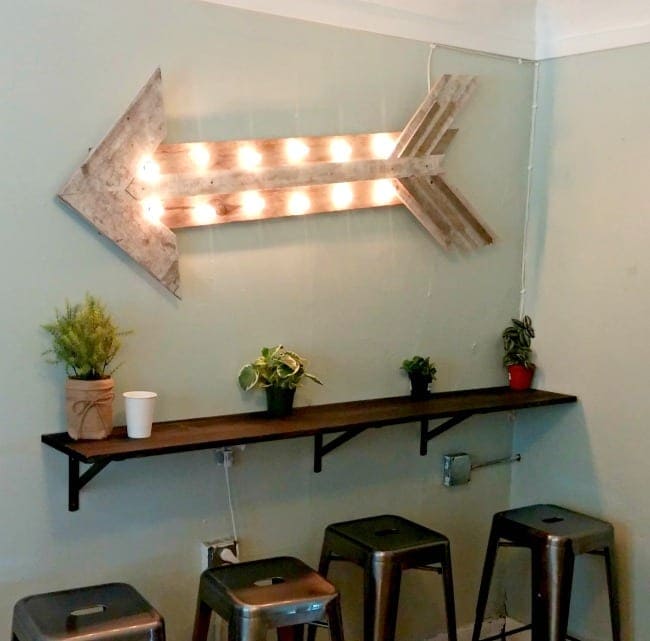
Here is an alternative idea for building a very affordable coffee bar area. In this spot we used an 8 inch wide plank board (you could use a 6 inch if you have less room, or two 1×4’s too). Cut it to the length of the bar you want, and stain it your favorite wood stain. We got ours for about $15. Next purchase large L brackets and secure those to studs in the wall (its important they are securely installed, or the bar may come down when you add stuff to it). Then secure your dried board to the brackets.
We made an arrow light out of reclaimed wood for the wall, and found our stools on sale at Fred Meyer.
These are just a few coffee bar ideas to inspire you to create with what you can find around you! Let us know what great ideas you come up with.
More articles you might like:

3 Comments