
Redoing a Small Office Using Minwax Wood Stains (On A Budget)!
This post may contain affiliate links and I may be compensated for this post. Please read our disclosure policy here.
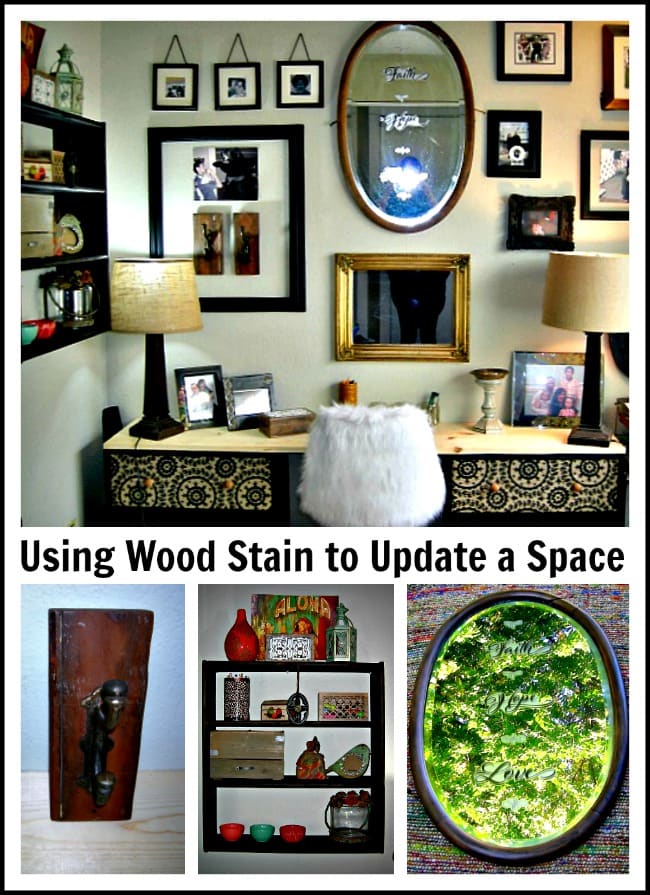
I have a small space that I use as an office, and have been wanting to decorate it for sometime now. Because its a smaller space I struggled with how to add all the things I wanted into it, and make them fit together. I had items with all kinds of finishes, and after thinking on it for awhile I decided to paint and use wood stain to bring it all together.
I started by visiting the Minwax Made with Love page for inspiration. I was able to narrow down what kind of stain, and what color, I wanted to use for my projects. I had a number of items around the house I wanted to mix and match together, and wood stain and paint would allow me to make all of these mismatched items that I love, fit together in one small room.
Some of the wood stain projects we did in the office include:
- Staining the antique mirror I have had since childhood
- Staining a set of shelves
- Staining a few frames to blend
- Using a dark stain to antique a gold mirror
- Making a couple of coat hangers by staining wood and adding hardware
I want to stain the top of the desk, but am hoping to get input from you all on that one (see below).
Since I used items I had on hand, and just pulled them all together with wood stain and paint, this office redo only cost me supplies (did it for around $75).
Here are some of the stain projects we did in this office redo.
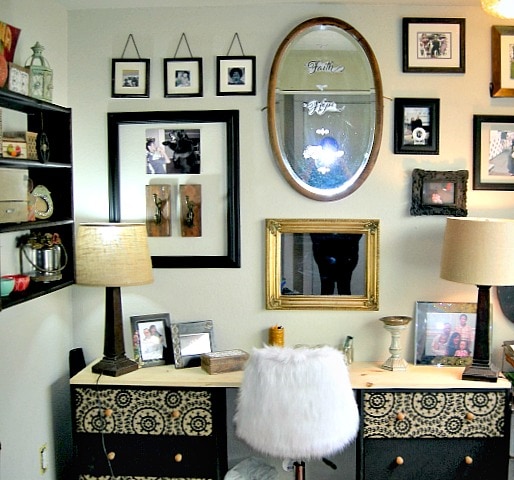
Updating Antique Mirror with Stain & Wall Appliques
When I was a little girl my mom came across this old antique mirror in an abandoned house on Whidbey Island. The mirror is old, and has that antiqued look, so its best suited for decoration. I have wanted to make it the centerpiece of my office wall, but it was a yellow color of wood that would not go with anything else in the office. The floors are dark, many of my accents black, so I decided to stain it in the Ebony stain using Minwax stains. The mirror inspired me to start staining other things in the room, and before I knew it the room came together just as I had imagined. It looks like its full of items I acquired over time, instead of a room I put together in one weekend.
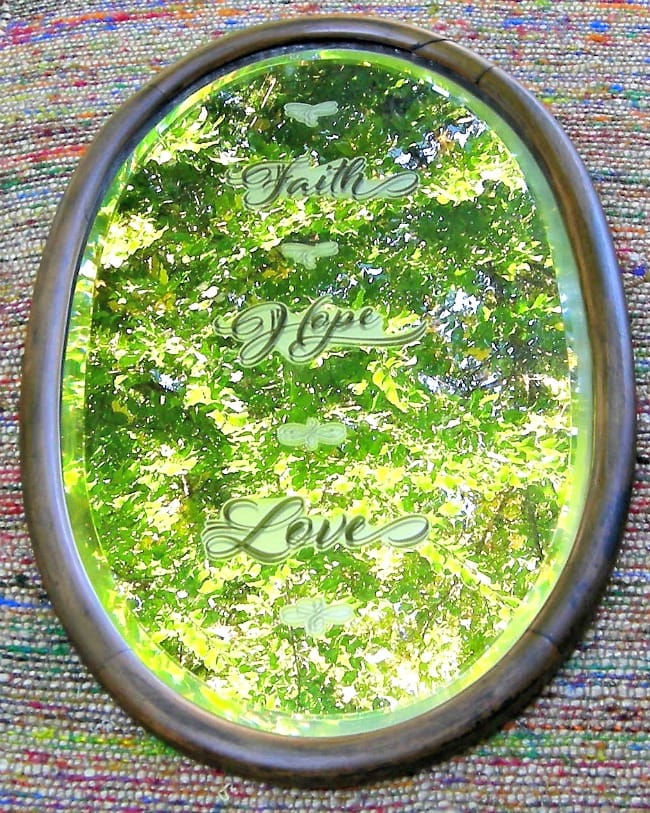
This is an old mirror, so the mirror is milky – but I love the patina!
This mirror has traveled with me from house to house over the years. Its one of the few pieces I have kept from my childhood, so although it shows alot of wear, it is very special to me, I wanted to keep that old distressed look, but just make it a color that I could make blend with everything else in the office.
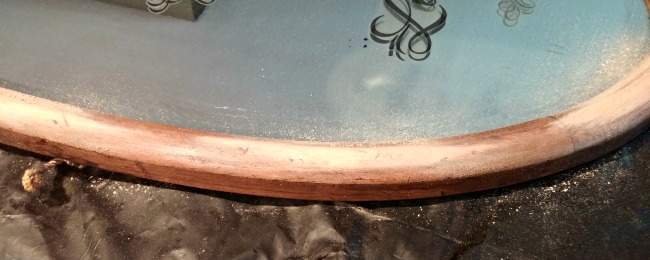
I love what the stain did for this piece. I simply sanded it (I sanded deeper in some areas then others, as I was going for an antique finish, vs the solid color I did on the shelves below), cleaned it and then added the Minwax stain (and repeated the stain process three times on this one). It turned out just like I hoped. It still looks old, but works with everything else I have in the office. I found the stickers at the Dollar store, and they finished my mirror off perfectly.
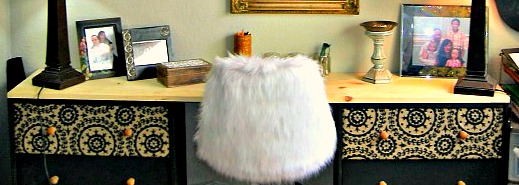
Staining Shelves To Give Them New Life
I loved how the stain worked on the mirror, I then used the Minwax stain to do the shelves (shown below). For the rest of the wall frames I mixed them up by painting some in chalkboard paint, to match the desk, and some in the dark wood stain.
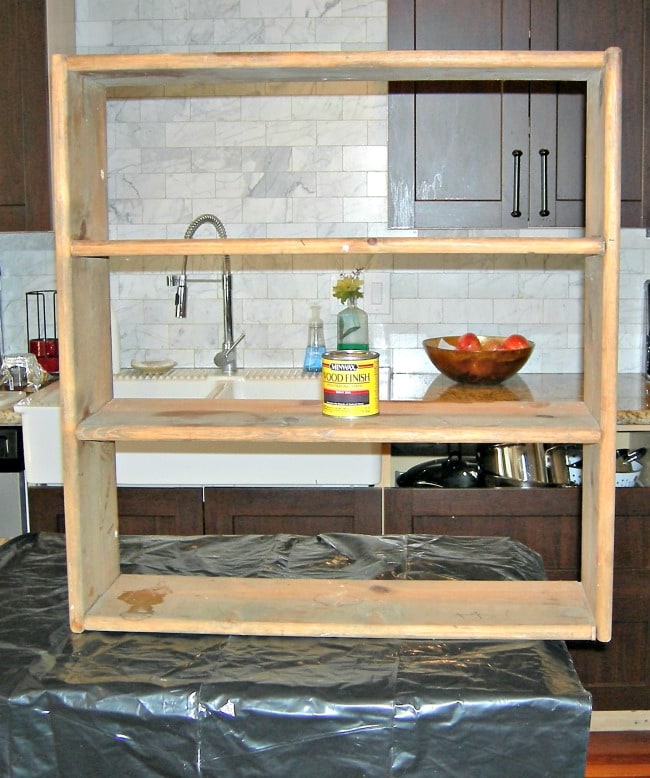
I had this old wood box shaped shelves that we picked up years ago for free at a garage sale. I have had it sitting around, waiting to be inspired to do something with it, and decided to stain it a dark finish with Minwax’s Ebony stain. I wanted an area to bring brighter colors into my office, and these shelves where just the spot.
Above is the unfinished shelves. These had no finish on them, so we simply cleaned the wood and then used Minwax Ebony oil based stain. It was easier to do then paint them, and I love how they came out.
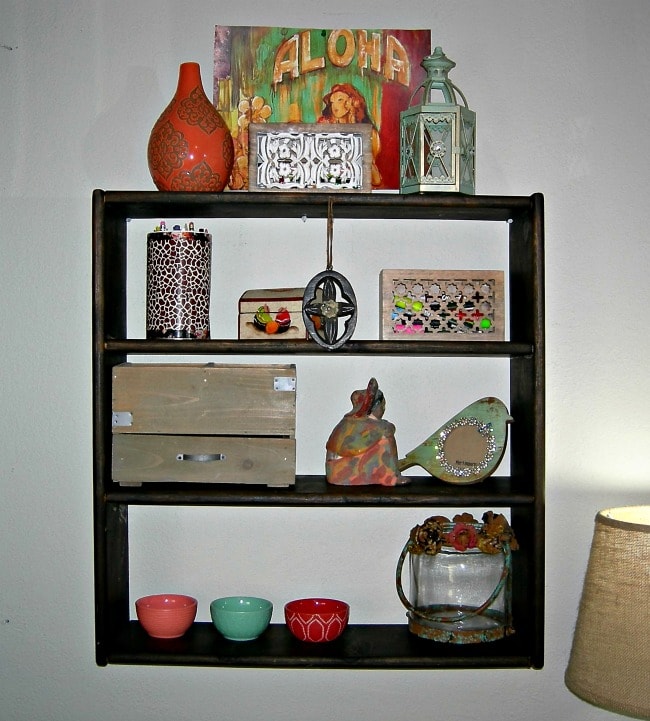
The newly stained shelves sit in my office, offering me a place to add some pops of color, and organize small office items. It has become one of my favorite spots in the office, and it was a very budget friendly way to dress that wall up.
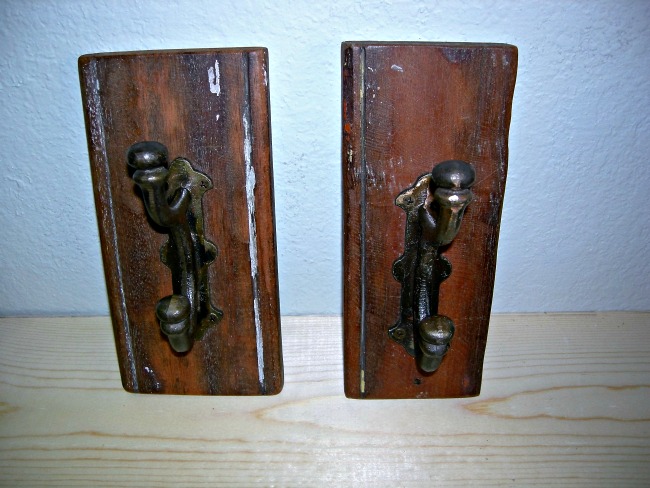
Using Wood Stain to Make Decor Accessories
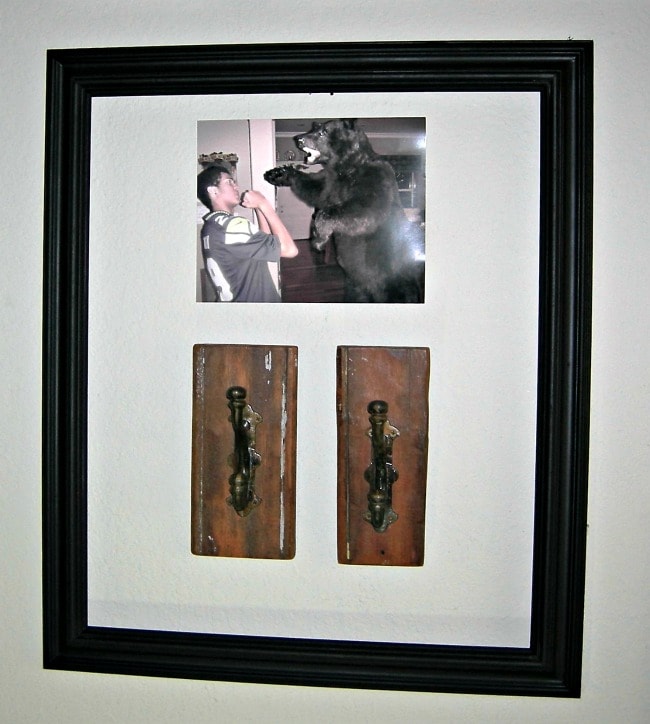
We also made these coat hangers by using two pieces of scrap wood, staining it, and then sealing with wax. We were going for that antiqued look, so we did not do a bunch of preparation to the wood. We did do some distressing of it (scratching it, dropping it on the ground, hitting it with a hammer a few times) before we stained it, just to add more antiquing to it. We let the stain dry overnight, added some bees wax as a finish, and then mounted the hanging hardware on the wood added a hook to hang it on the back.
I initially intended these to be to hang the kids backpack on a back wall in my office. However, I loved the way they turned out and decided to hang them on my front wall, just as interesting pieces, so I could look at them throughout the day!
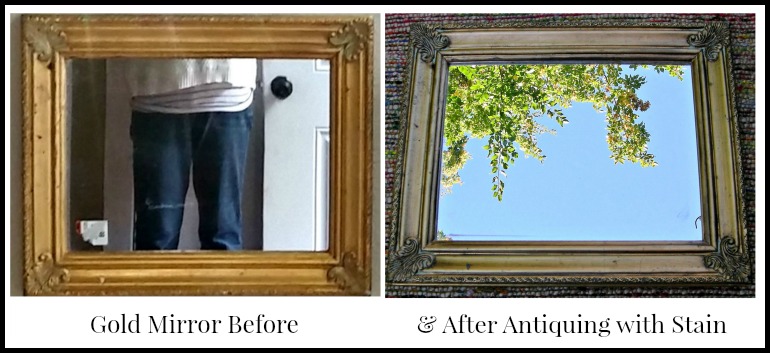
I also used the dark wood stain on my gold mirror, to antique that as well. That helped that piece blend in with the rest, I had initially planned to paint that black, and just use the frame for a photo. However, with the room being smaller, I liked how the mirrors made it feel bigger. By antiquing it with some dark stain, it let me keep it gold and still blend with the rest of the room.
If you have never used stain before Minwax has a resource page you can use here. It will provide tips on how to do your projects, as well as ideas on projects to do! Be sure to follow Minwax on Facebook here too, to stay on top of the latest product tips and tutorials!
So here is my dilemma. I made this office desk out of two small dressers and some 8 foot long boards across the top. I have a cousin who did this very cool floral design on her kitchen table, Its done completely with wood stain (Minwax stains are perfect for this project). The design is etched onto the table top, then filled in with wood stain. I fell in love with this idea.
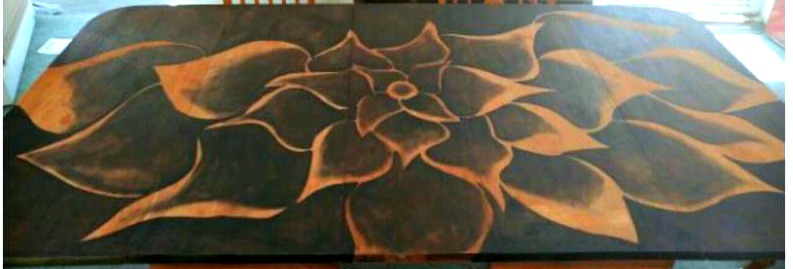
My question for all of you is this? Do I do a similar design on my desktop, using Minwax. Or should I simply stain the top in the Ebony shade to match the shelves that I did above? As much as I love that look, I am afraid it will be too much for my small office. Leave a comment below to let you know your thoughts on what you think the best way to finish this part of my office off would be!
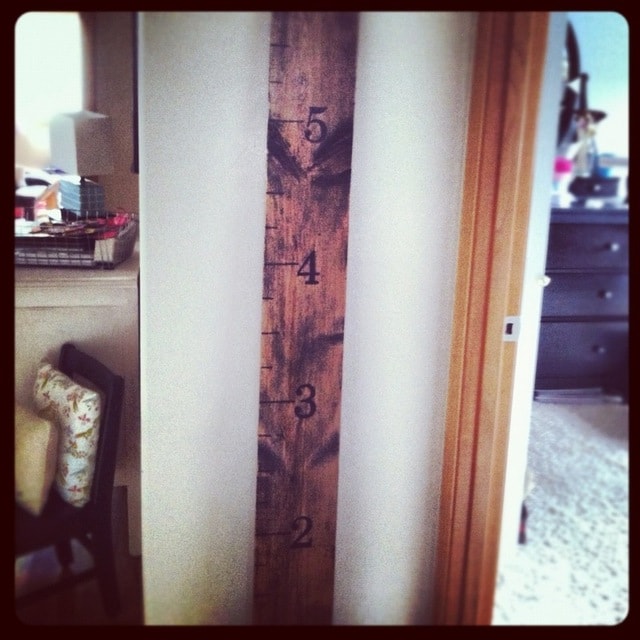
If you are looking for more inspiration on how to use Minwax for projects at your house, check out this idea for a Pottery Barn inspired growth chart. These make great homemade gifts too, with the holidays coming up. You could really use any shade of stain you want from Minwax for this project!f
Disclosure: This post is sponsored by Minwax. All opinions are 100% my own, and all projects were done by us. Please see our disclosure policy for more information.
