
DIY Coffee Table Idea – Re-purposing an Old Window Into a Table!
This post may contain affiliate links and I may be compensated for this post. Please read our disclosure policy here.
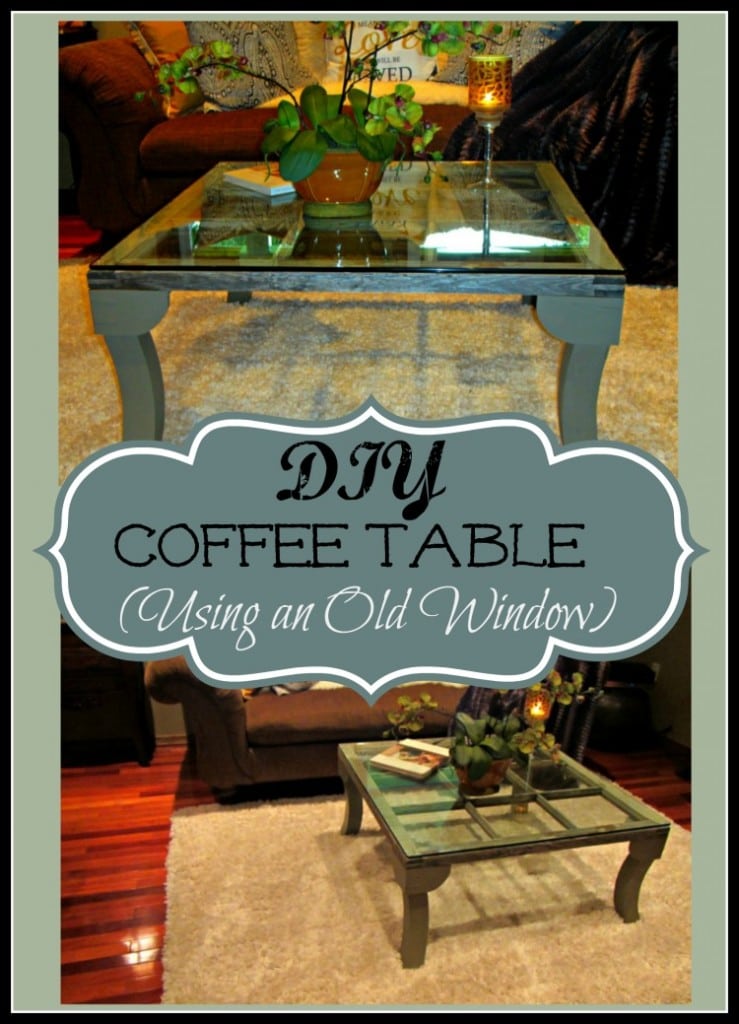
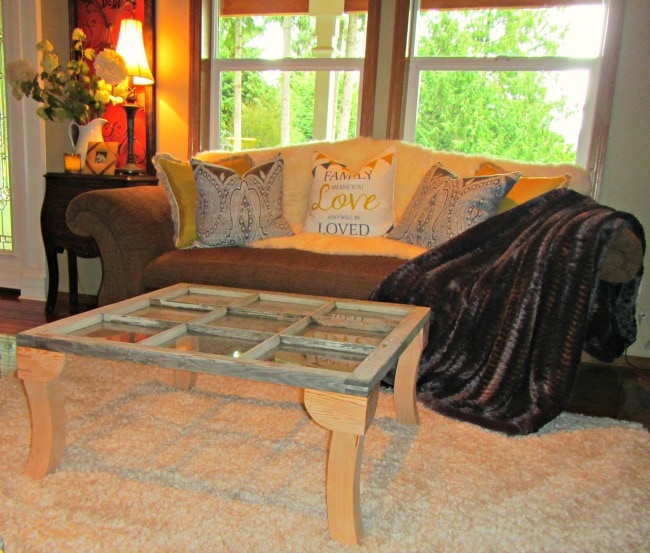
DIY Coffee Table Using an Old Window!
My mom and I love these old windows! We buy them at garage sales, estate sales or where ever we can get our hands on them for cheap. I have one hanging in my office that I use for pictures (we just taped black and white photos to each window pane, and display them that way), and turned one into a wall cabinet (see below for that one).
My mom on the other hand, turned her most recent window find into this cool rustic coffee table. Its a great option if your looking for cheap coffee table ideas!
My mom made the coffee table pictured above for $10. She paid $2 for the window at a garage sale, made their own legs out of scrap wood they had, paid $8 for the glass top, and used paint they had on hand. Your cost will vary, depending on what you find a window for, if you choose to buy legs vs. make them, and what supplies you have on hand, but it can be a very affordable way to get a beautiful coffee table for your home too!
Here is what you will need to make a DIY Coffee Table of your own, by re-purposing an old window:
- Old window
- 4 legs
- Screws
- Wood Glue
- Paint
Important Note: Many old windows have glass that breaks easier then modern day panes, and it can shatter. That makes it dangerous, especially if you have kids around. If your window pane has that type of glass in it you will want to either have it replaced with modern panes that will be safer and stronger, remove them and replace with chicken wire for a rustic look, or remove them and top your coffee table with one sold piece of glass that is meant to top a coffee table.
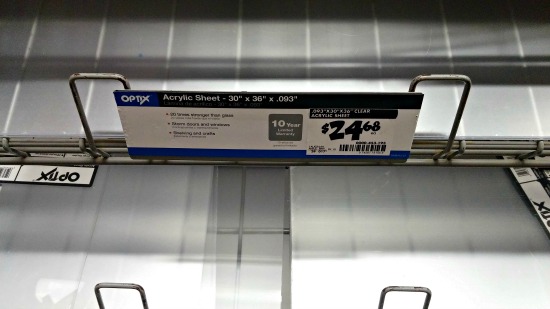
My mom opted to put a solid piece of tempered glass over the top (this will probably run you about $100). This adds some expense to your table, but if you want to keep your costs lower you can find a piece of clear acrylic at stores like Home Depot (we found it for $25), and use that to mimic the look of a glass top. This sheets shown above have a protective film on them, but they are clear when its removed. You can also find various sizes of Plexiglass online.
To make your table:
Lay your window on the ground, top side facing down.
Add a few beads of wood glue to the top of the legs where it will attach to the table before screwing, for added strength.
Screw in the screws at a diagonal angle. You will want to make sure that the screws you use are long enough to go through the leg and go half way into the window, but not so long that they will go through the top of your window. Use two screws per leg, on opposite sides.
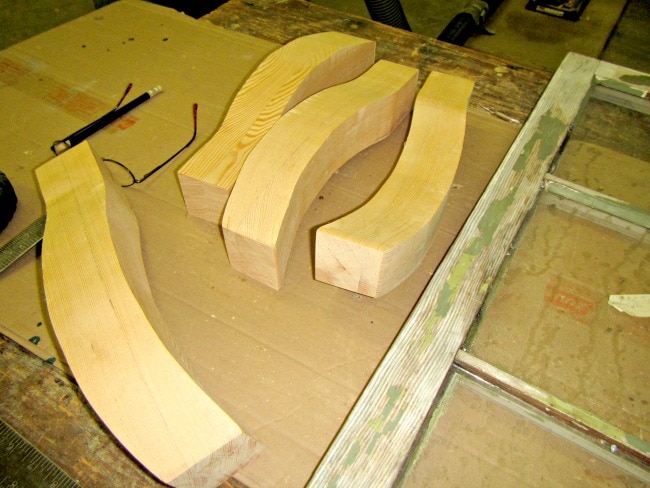
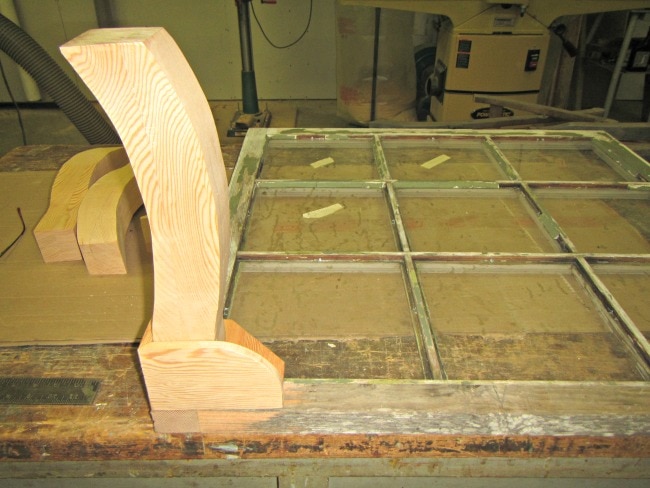
My mom designed and made her own legs, and you could do that too if you have a little more experience with wood crafting.
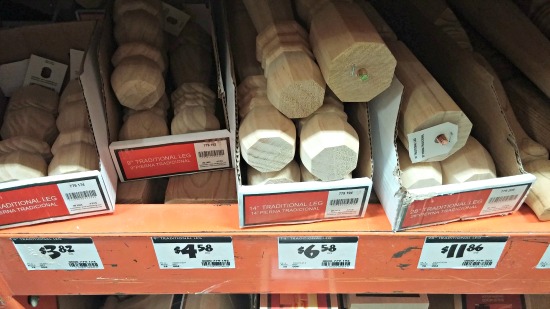
If not, you can buy pre-made table legs at places like Home Depot or even on Amazon. I found them for just under $7 per leg at Home Depot, and Amazon had some styles for under $5 per leg here (so you could pay between $20-$30 for the legs).

Once your legs are attached you can turn your table right side up, and let the glue dry for about an hour.
Your table is then ready to paint. Depending on the condition of your window you might want to do some sanding first. How you want to paint your table will depend on if you want to keep it as a rustic coffee table, or if you are looking to make it a little nicer.
There are a number of different paint techniques you could use at this point. My mom started by trying the table out in her living room. She wanted to see if she liked the look of the window as is, in which case she would just paint the legs to match. Its always a good idea to try it in the room you plan to use it in, as sometimes colors don’t always look the same in different lighting, etc.
After looking at it in her living room she decided to paint the whole thing, but with a distressed look. There are a number of ways you can make a piece of furniture look older or rustic with paint.
They include:
- Distressing
- Using Milk Paint
- Using Chalk Paint
Each of these techniques has various ways you can pull them off as well. One of the easiest ways I find to distress a piece of furniture is to:
Paint the piece in the color you want to peak through (the base coat). Once you have completed a solid base coat let it dry over night, so its completely dry.
Next take a wax candle and run wax on it in various spots (especially edges). The thing you want to keep in mind with this step is that where you put the wax is where you will be sanding the piece in the end to have the base coat peak through.
Then you will paint the piece your top coat color (the main color of the piece). Let this dry thoroughly (overnight).
The last step is to carefully sand the piece where you had put the wax, so that the bottom coat will peak through (to mimic the look of paint peeling over time for an antique look).
Other ways to accomplish this is to use a dry brush to put the top coat on, or sand without the candle wax, or buy a kit to help you distress the table.
Here are a couple more ideas of how you can use old windows in decor too:
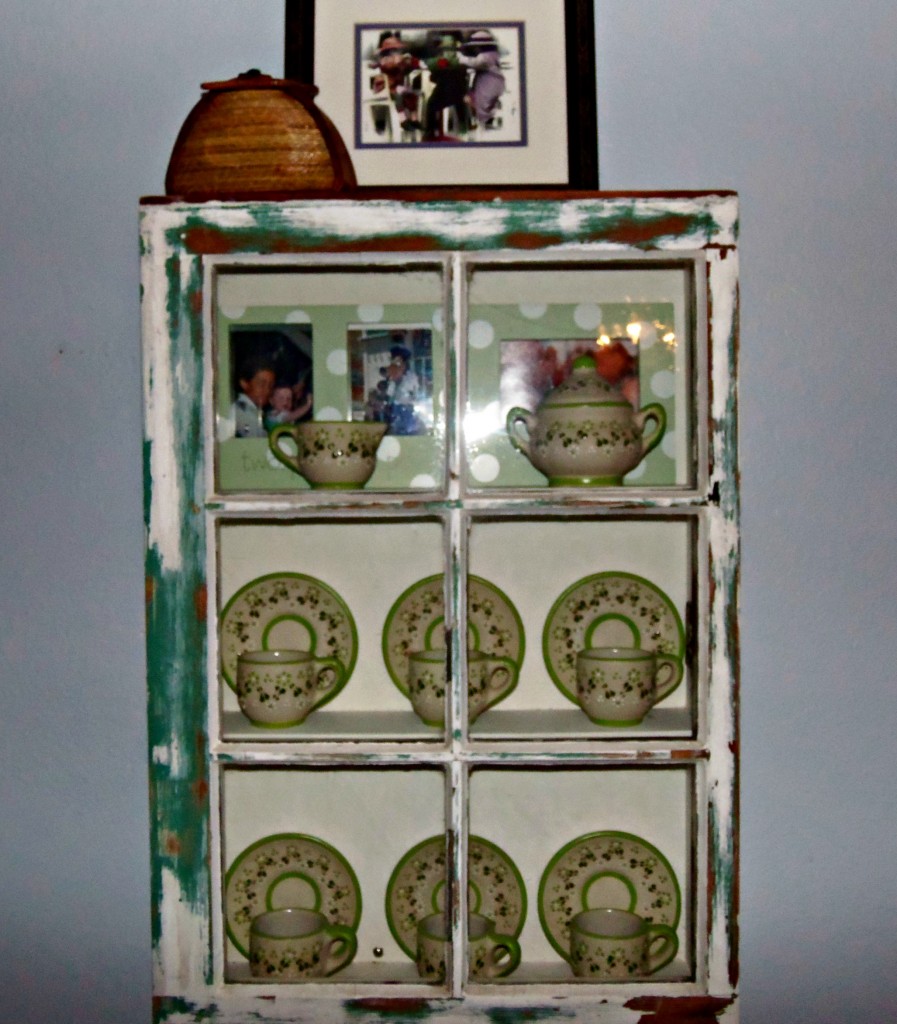
Here is a widow pane that we built a box behind and turned it into a wall cabinet for my kids room, to display their tea set in.
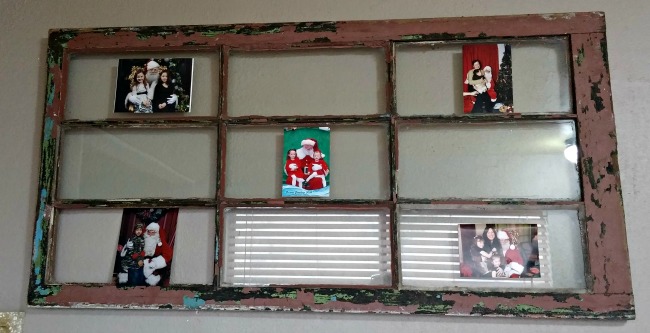
My husband brought this window home from a job, and we used it to display some of our Santa Photos at Christmas (just tape them on the glass, that simple)!
More Articles You Might Be Interested In:
Create A Chalkboard – Super Simple Idea!
Recovering Bar Stools – 5 Easy Steps
DIY Table Redo For Less Then $20
