
Fall Porch Signs Made with Dollar Store Pumpkins!
This post may contain affiliate links and I may be compensated for this post. Please read our disclosure policy here.

Fall Porch Signs Made with Dollar Store Pumpkins!
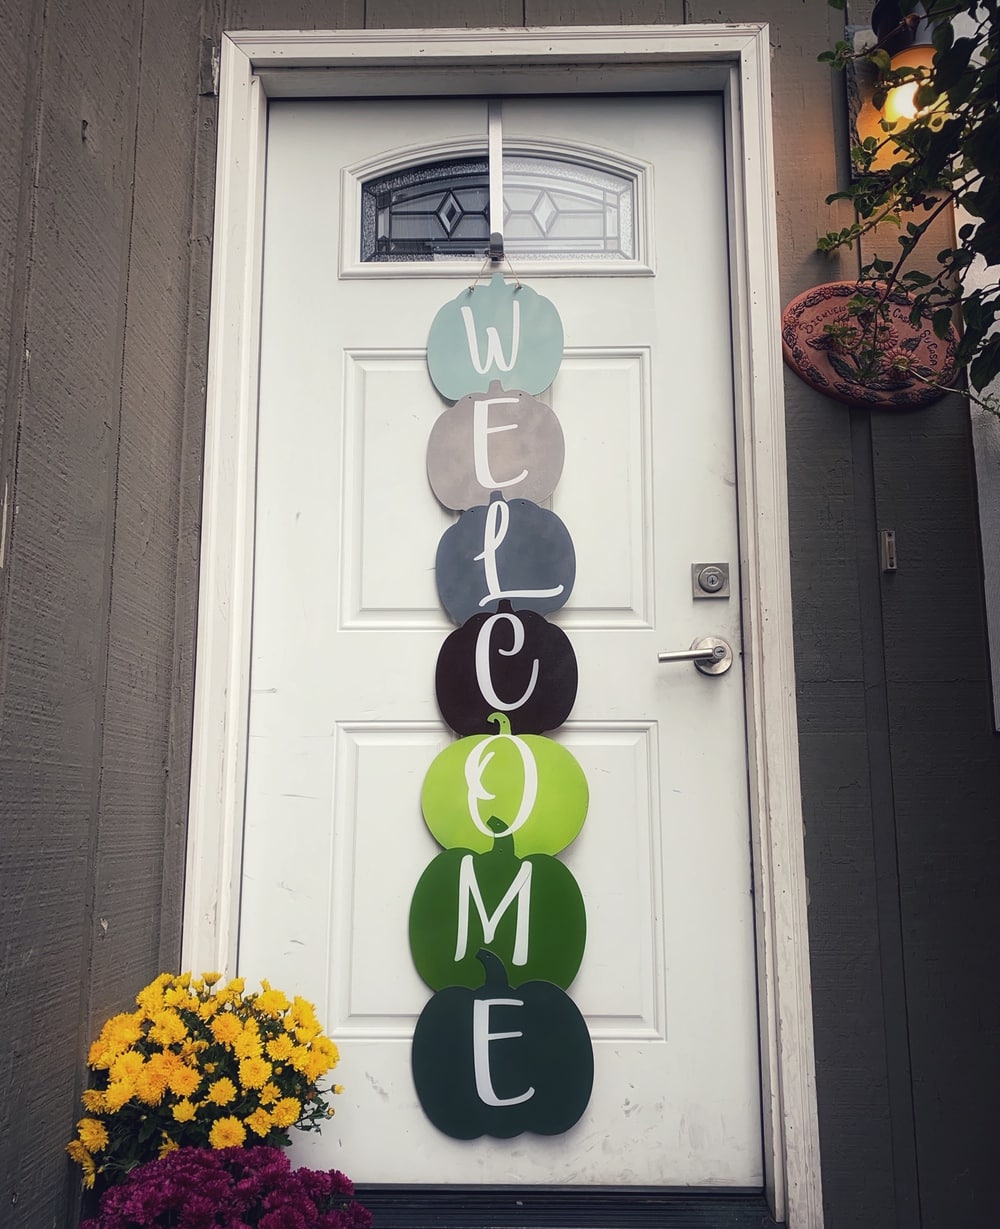
Looking for ideas on Fall Welcome Signs to make for your porch or front door? Here is a really cute idea for Fall porch signs you can make using the pumpkin signs from the Dollar Tree. Wood can be pricey, so this is a really cost effective way to repurpose these $1 signs into something more grand. I used seven signs for mine (so $7), but you could even cut it back to 4 and do one that says fall, for a smaller more affordable version too.
Supplies Needed to Make Your Fall Welcome Signs
- Pumpkin signs from the Dollar Tree (as many as the word you want to spell out – so to make your sign say welcome you will need 7 pumpkins for example)
- Epoxy Glue + hot glue (hot glue is optional)
- Clear Sealant (optional, but a good idea if you are using outdoors)
- Paint (if you want to paint yours)
- Lettering (I used my Cricut, but you could also buy something like these letters from Walmart, and it will give it a 3-d effect too).
- A door hanger (also optional, and only if you want to hang from your door vs. leaning on your porch).
If you are looking for more ideas on Fall wood signs, check out these fun wood signs we made here – or these wooden pumpkin decor items here.
We also show you how to make these these custom DIY fall signs here from Dollar store items too!
How To Make These Fall Porch Signs
These make fun Fall Porch Signs, by leaning up on your porch, or you can hang them from your door too (I did that with a door hanger).
I made mine as Fall Welcome Signs, but you could put any saying on it you like (ie Fall, Hello, etc).
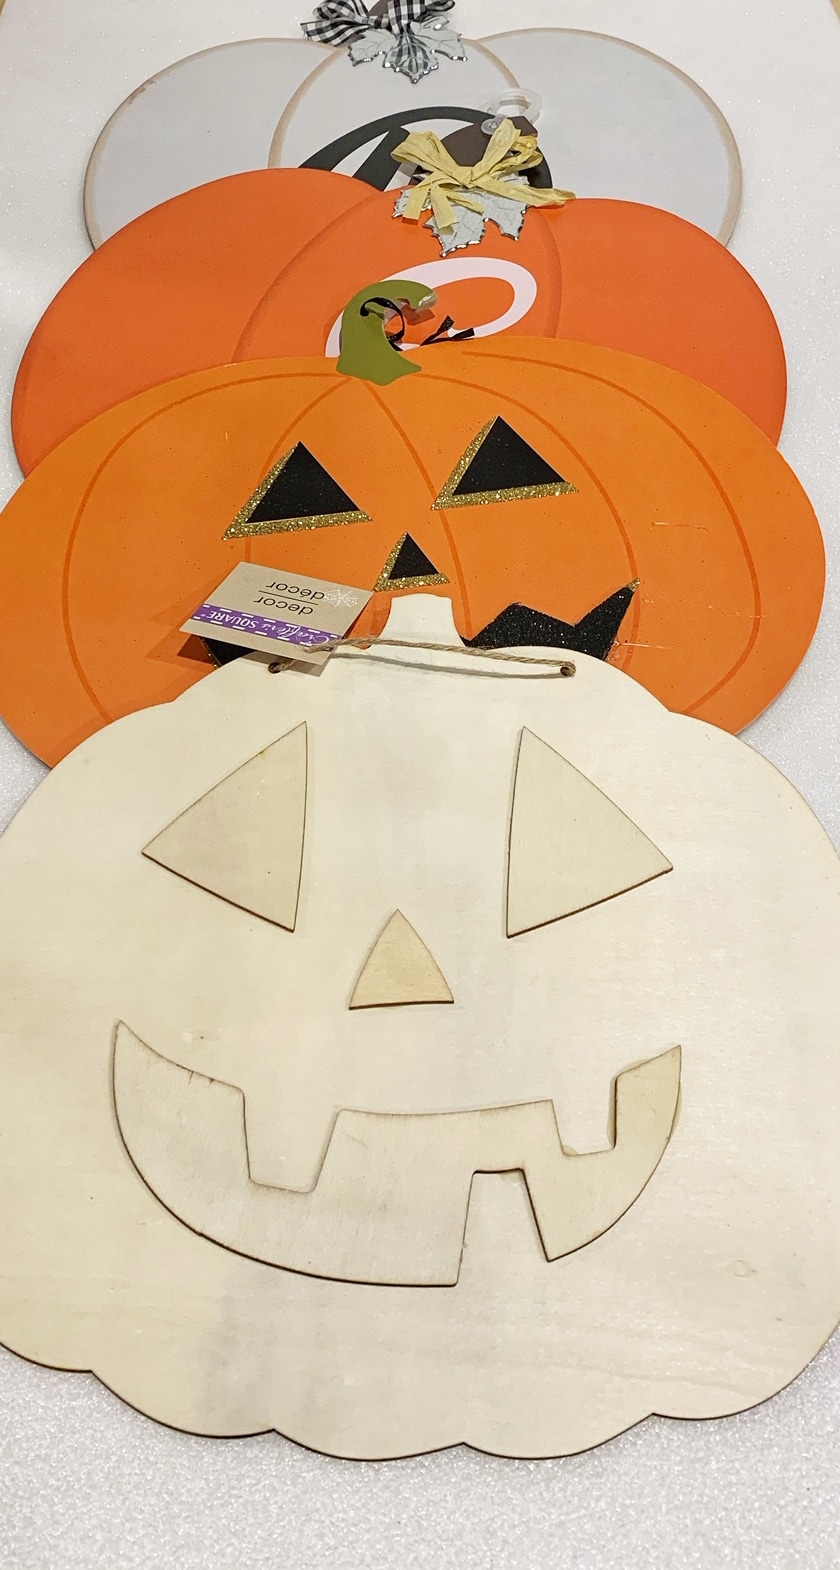
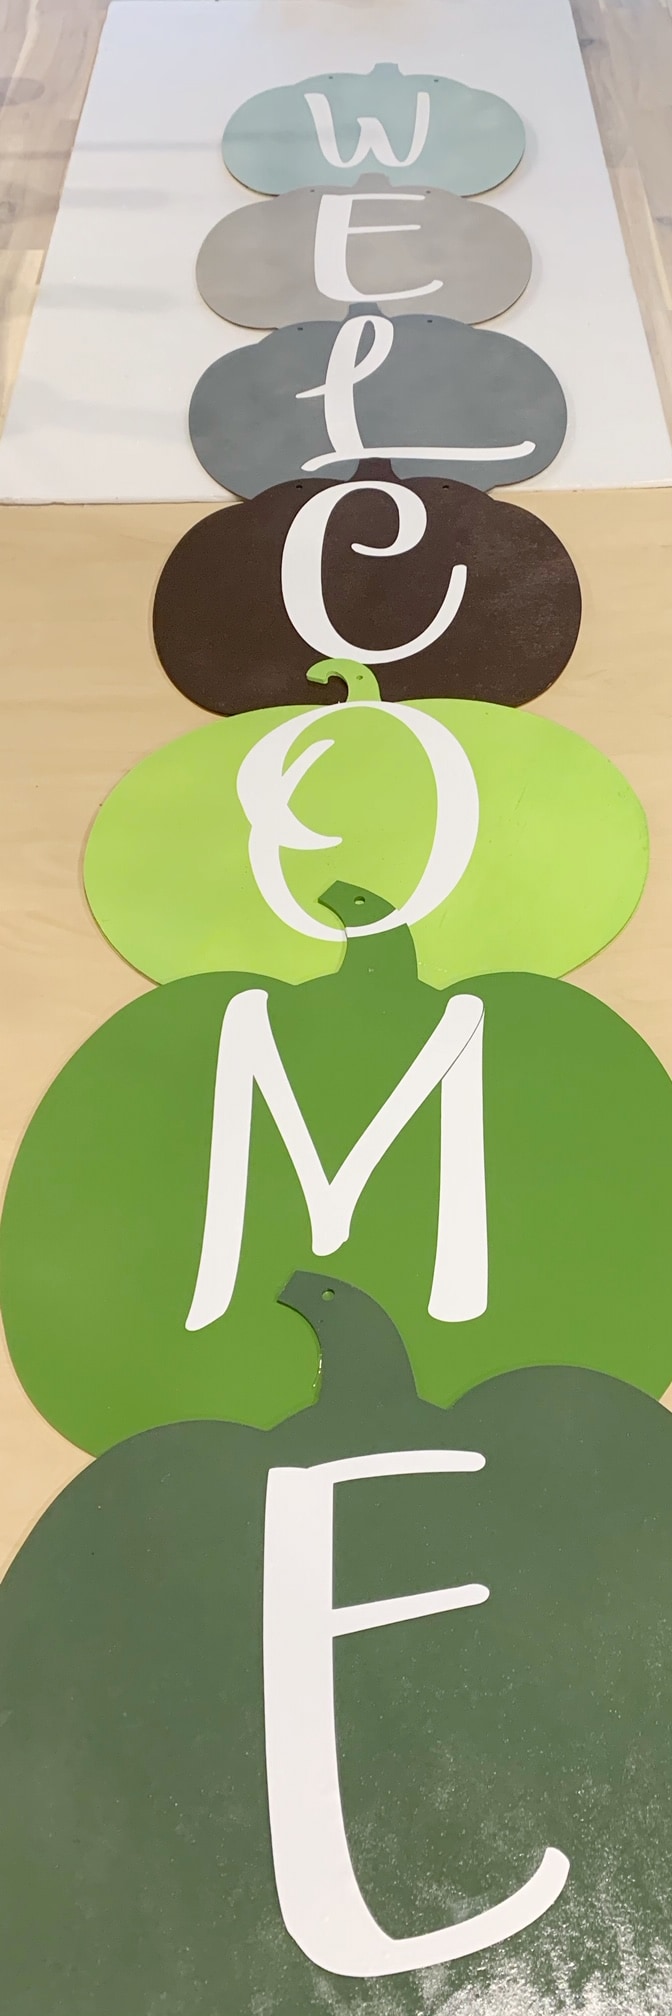
Start by heading to the Dollar store to get your pumpkins you will need to make your fall welcome signs. I chose different pumpkins, as I wanted mine to start smaller, and get a bit bigger at the bottom, but you can choose all the same size too.
Select as many pumpkin signs as you have letters in the saying you want to make. So for example, if you want to do a fall welcome sign, you will want 7 pumpkins (one for each letter in the word welcome).
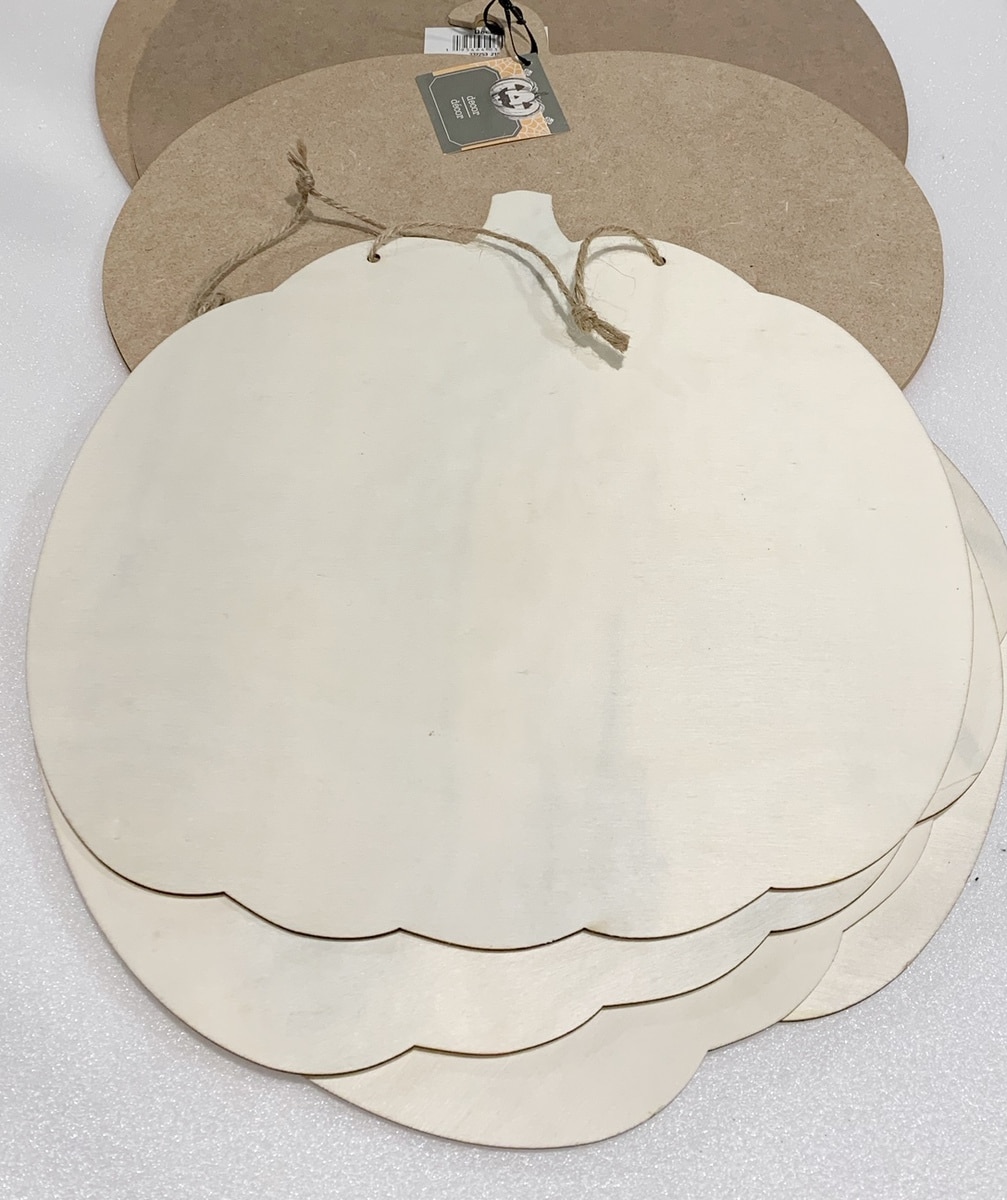
The next step is to turn them over to use the back side of them. You could use the front sides but it will require more work (you may need to remove parts of the sign that stick out and sand them down to a smooth surface). I used the backside to keep things simple, as those were all already smooth and ready to paint. The only reason that I would use the front, is if you want the stems to lean to the right instead of the left. Some of the pumpkin signs I had had stems that went straight up, so that would not make much of a difference anyway.
Another reason why you might want to use the front, is if you like the actual pumpkin design from the signs you purchased, then you could skip the painting step, and just add lettering on top of that. I was going to paint mine, so I chose to use the back sides.
It is important to mention that most of these signs are made from a particular board, or something like a chip board. These will warp (or break) if they get wet, so although you can make these signs for the outdoors, you will want to keep them in a covered area (like a porch sign) to make sure the last the season.

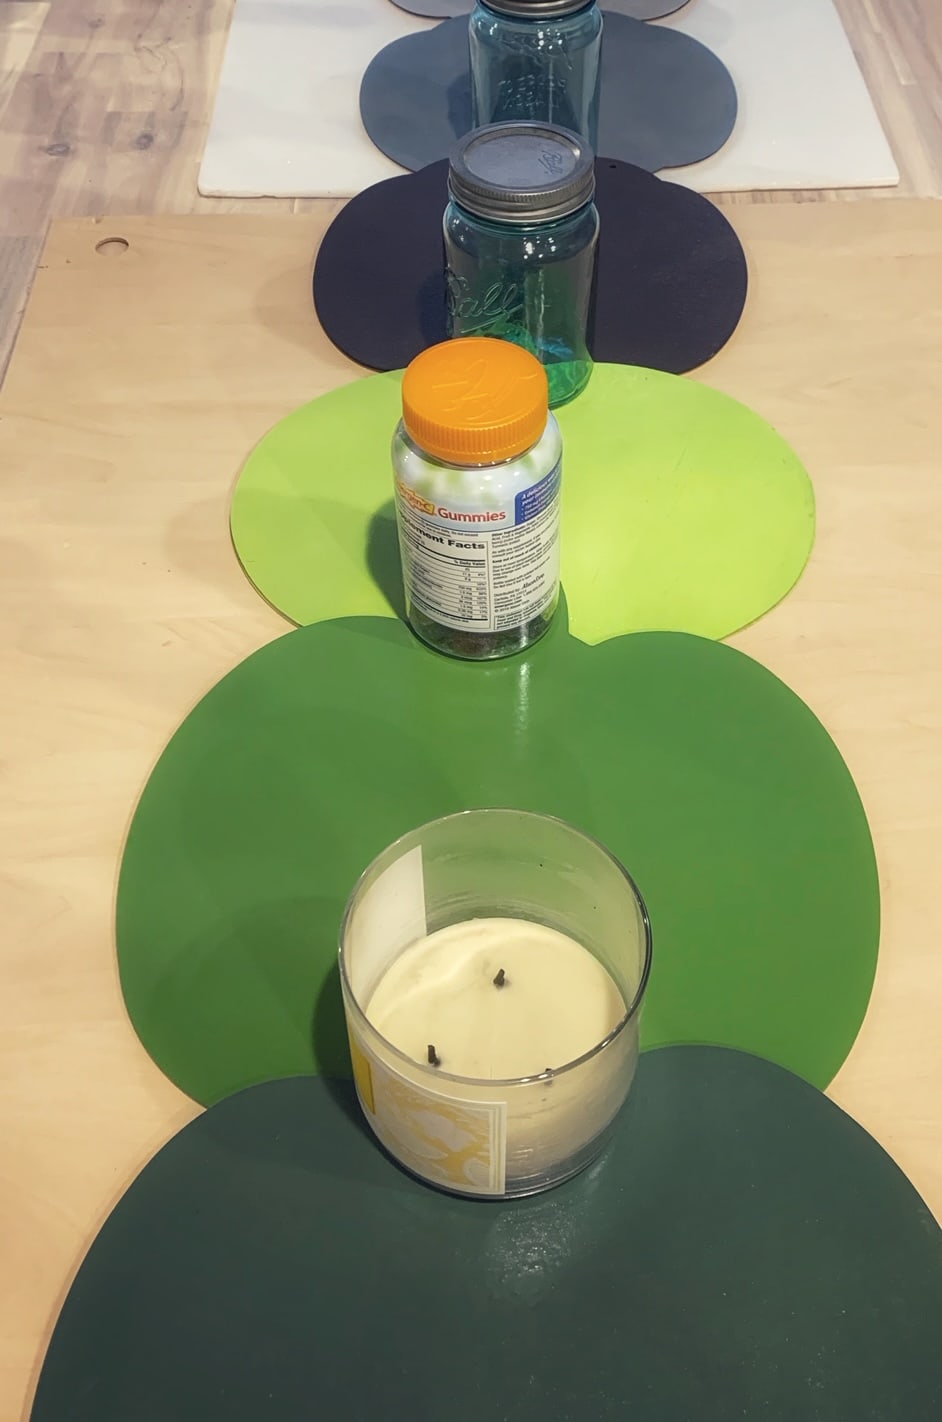
Remove any strings or embellishments on your pumpkin signs (set aside in case you want to use them later on in the sign making process. I did reuse the strings to make one to hang my final sign with).
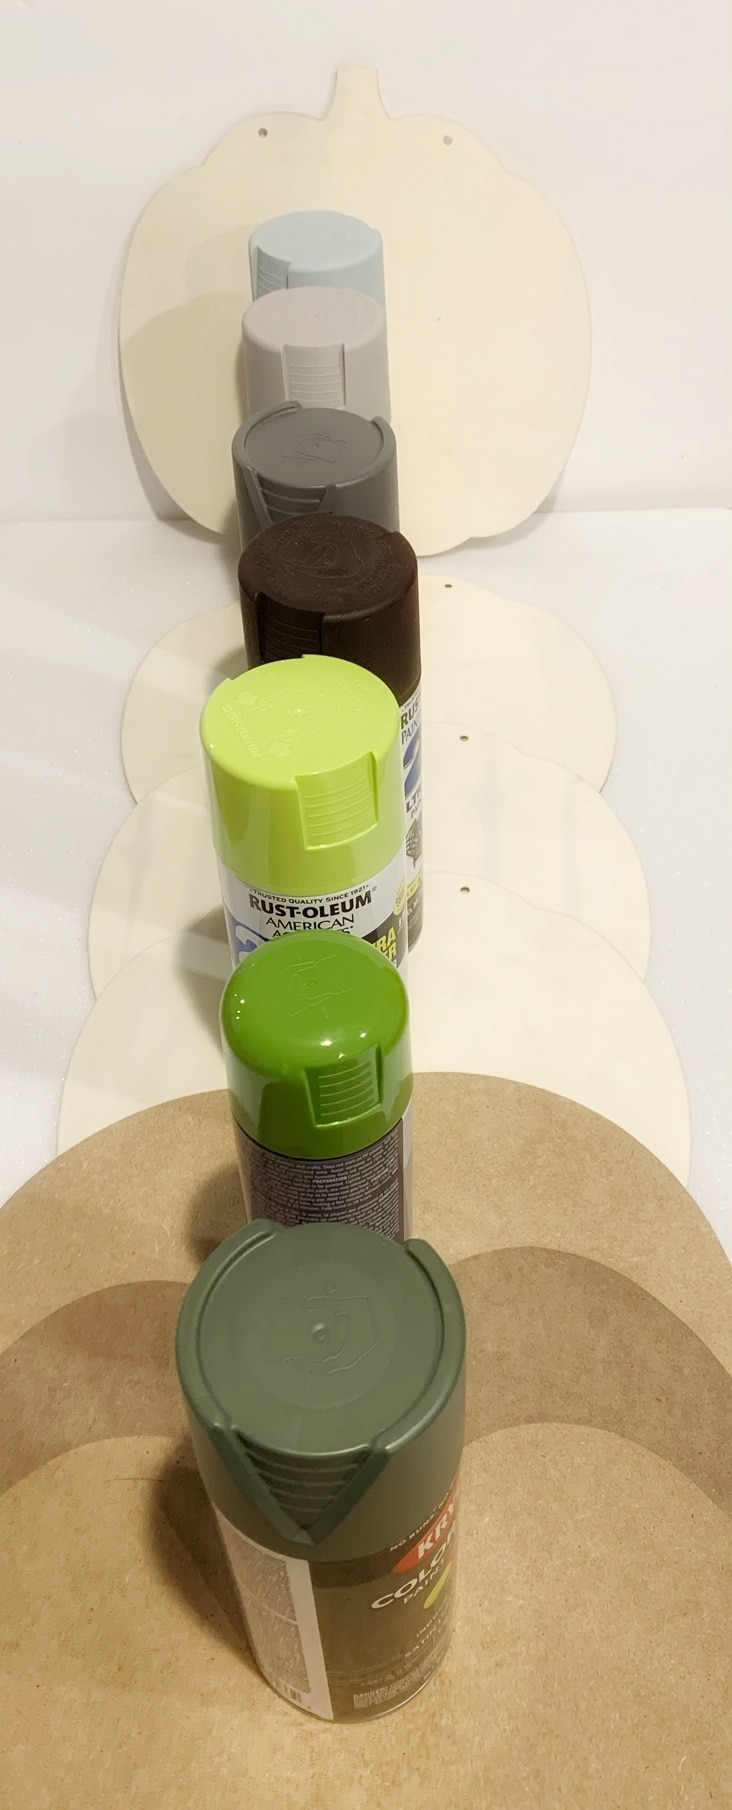
Now you need to decide how you want to paint your pumpkins. There are a number of things you could do here. Some ideas include:
— Painting yours. You can do them all one color (like a shade of orange). You really only need one can of paint for these signs, making this a very affordable option. I have a craft room, and had a number of different color spray paints with a little left in each can, so I chose to do each one a different color (going from light to dark in fall hues I loved). I used spray paint, because it was easy, but you could also use an acrylic paint (it will just take a little more time is all).
I do recommend 2-3 coats per pumpkin sign, to get the best coverage.
Let each sign dry fully in between coats. Once you have the coverage you like, let it dry fully, and then add a top coat to protect it. I also used a spray paint of clear coat paint, to do this for mine.
Note that it is important to do this step before adding your vinyl letters if using a Cricut to make your letters (if you add the clear coat on top of that it can cause your vinyl to ripple and bubble).
— Use the front of your signs with the pumpkin design already on there. If you plan to use this method, it works best when you buy all the same kind of pumpkin sign, and use the 3-D letters you glue on (vs the vinyl I cut from my Cricut above).
— Mod podge on a paper design. If you like the buffalo check look for fall for example, you could mod podge on a paper in that pattern before adding letters. This process would take the most time.
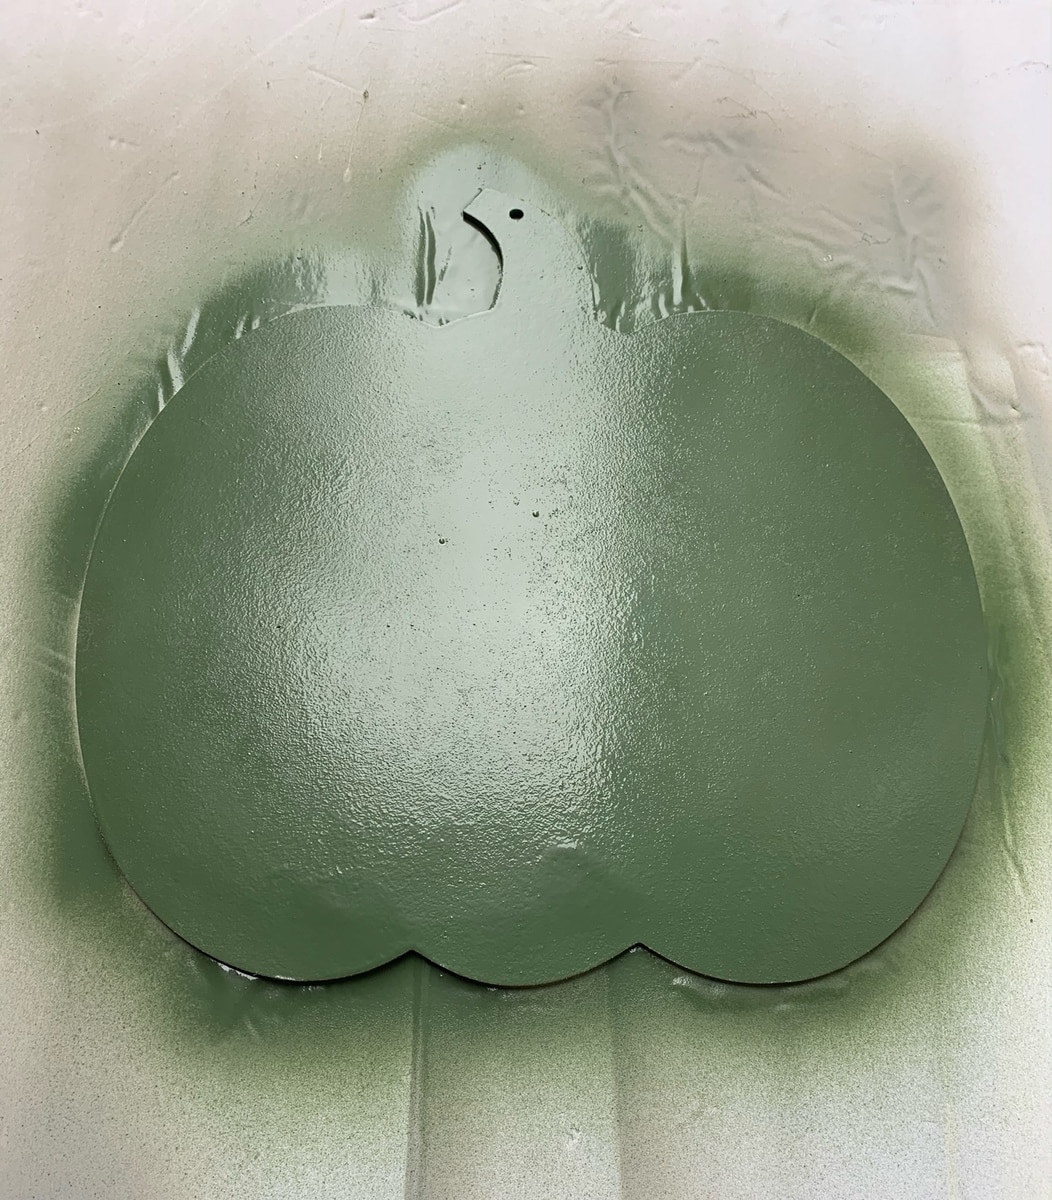
Since I chose to spray paint mine, I simple added on coat at a time to each pumpkin, with each color, allowing it to dry completely in between coats.
Once my pumpkins where spray painted and fully dried, I applied a clear coat (just for some added protection since they would be outside).
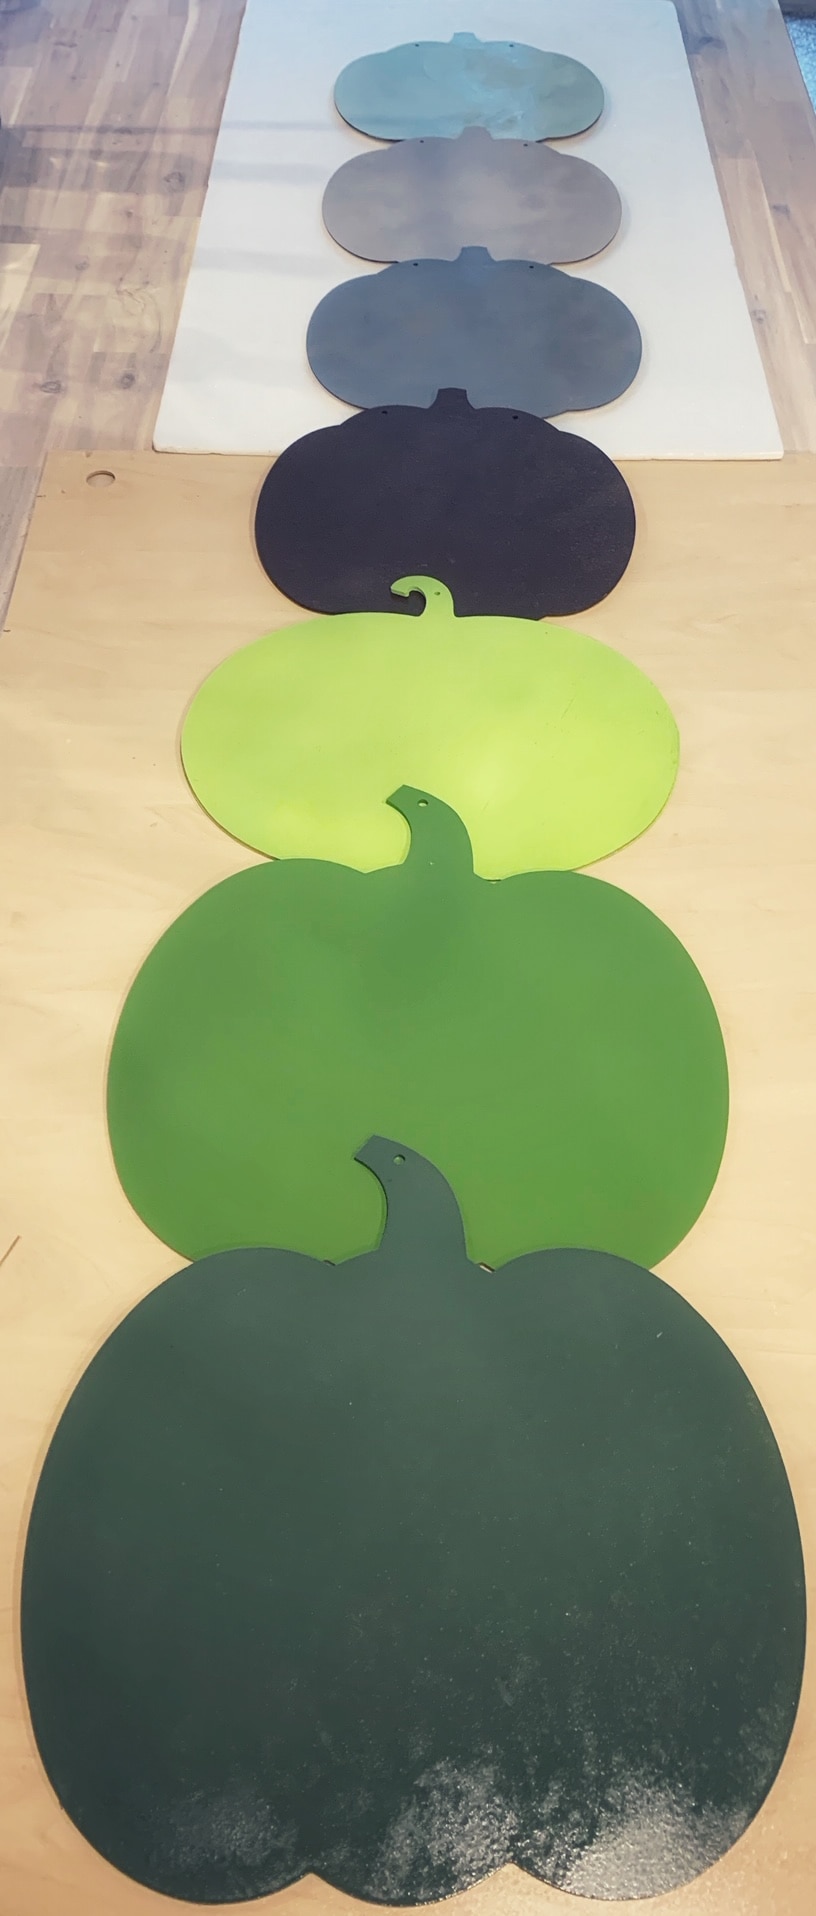
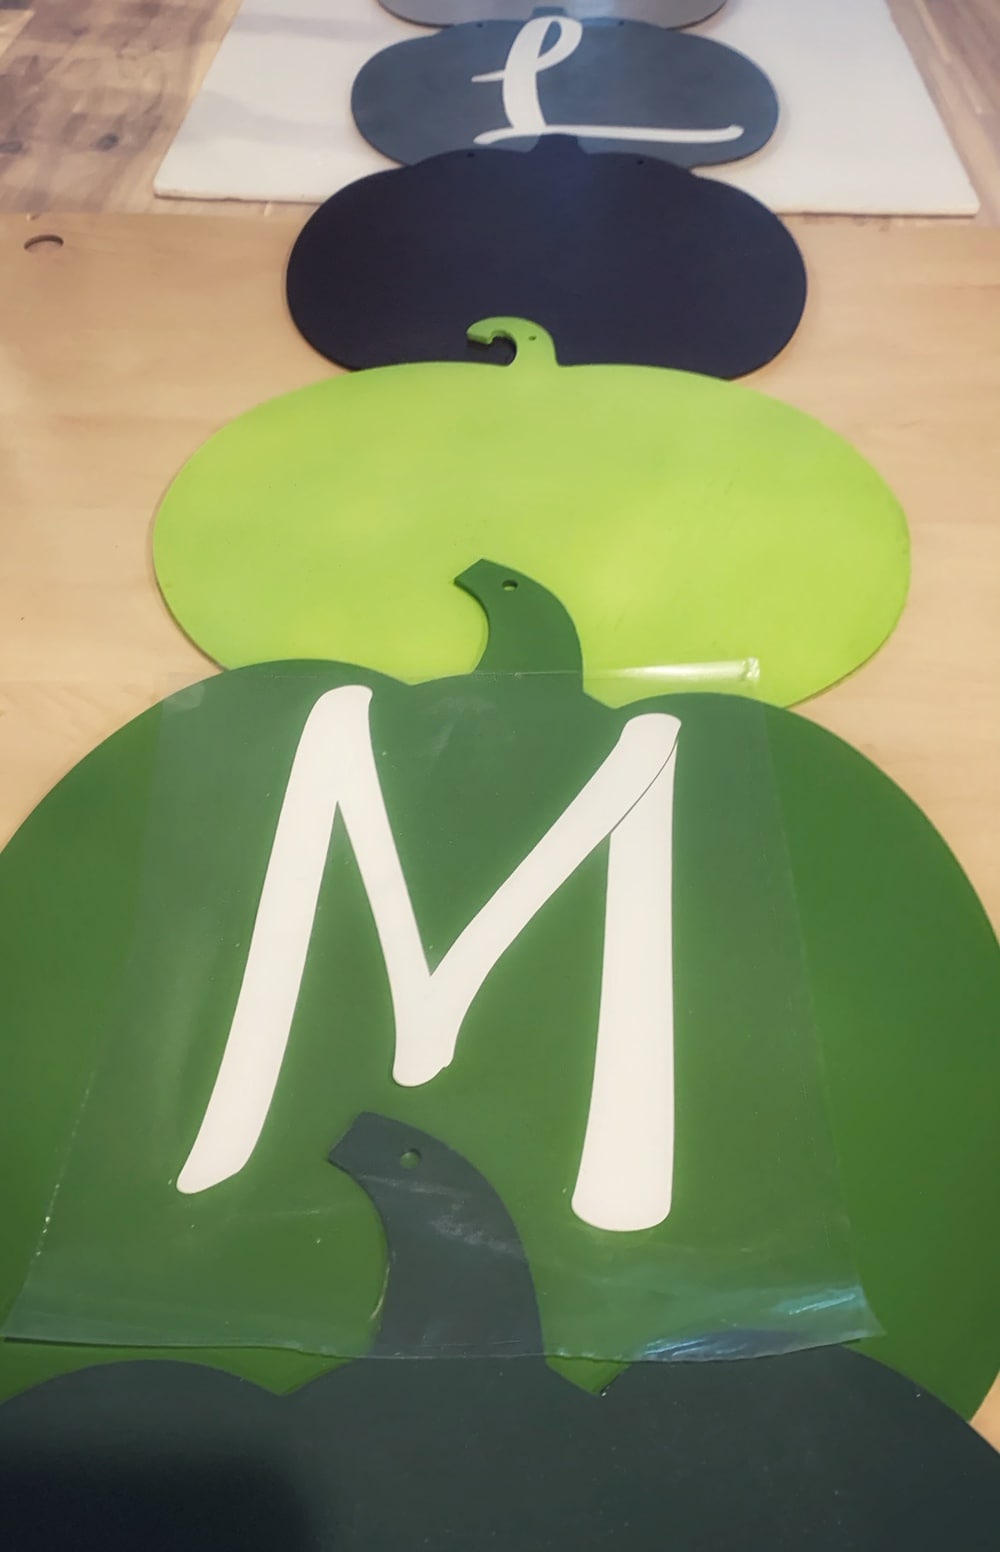
Then I lined them up in the order I wanted to attach them for my final sign. Make sure you are happy with this look before moving on to the next step.
Once each individual sign was painted, dried and lined up like I liked them – they were ready to attach. Lay them out so you can decide how much overlap you want on each pumpkin. You will also need to decide which way they overlap. I chose to have my bottom pumpkins on the very top, but you could also do it in the reverse order that I did (start by tucking the second pumpkin under the first – which is opposite of what I did). Play around with this a bit to make sure you like the look before you start gluing.
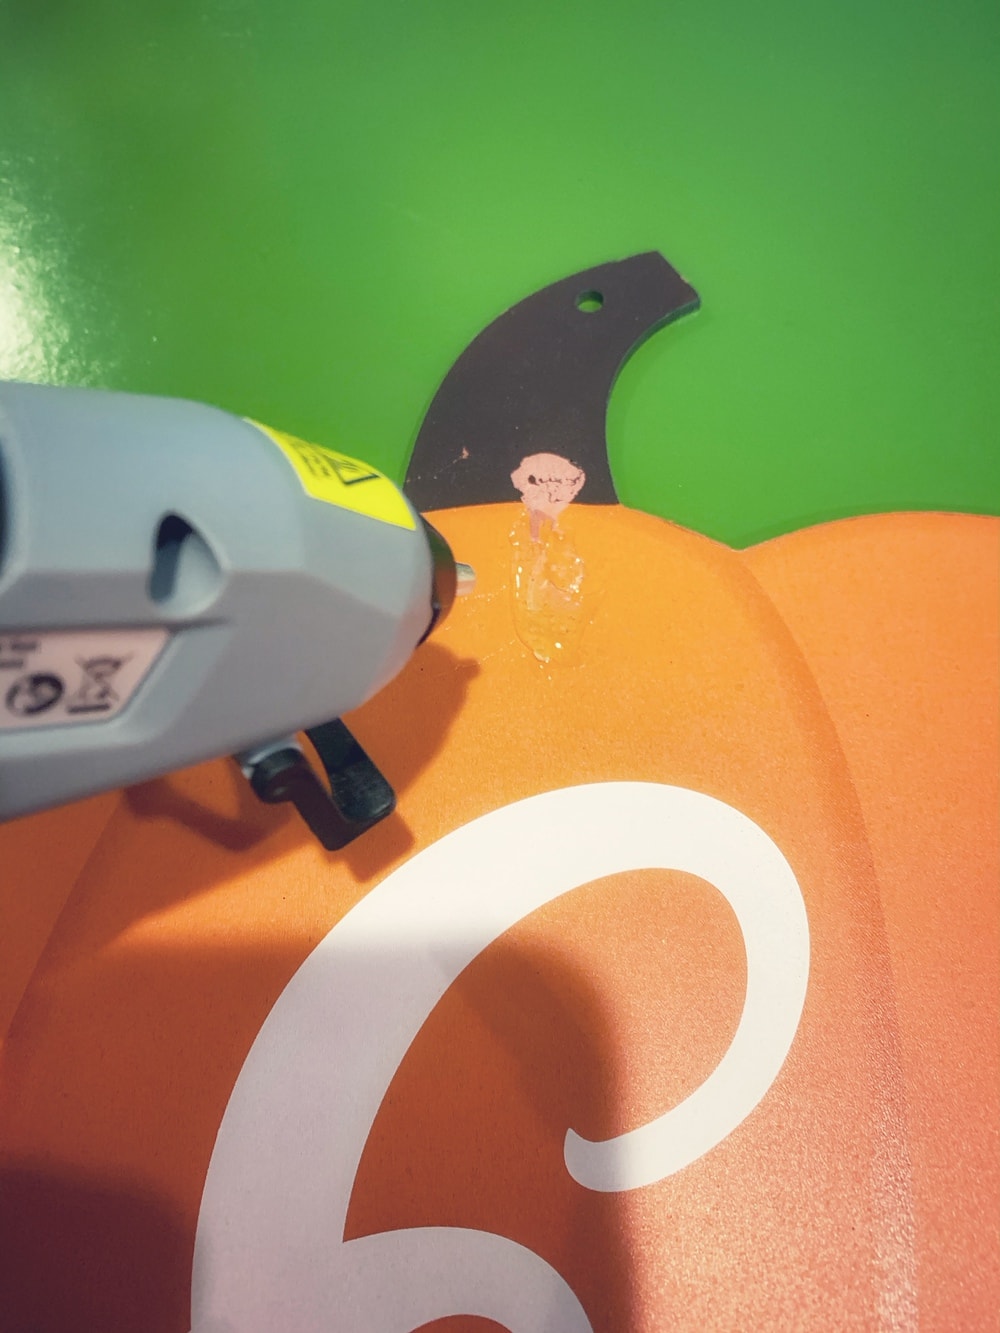
To attach one sign to the next, I used an epoxy glue (I love the Gorilla epoxy) and some hot glue. The epoxy is to give it that long lasting hold, and the hot glue is to help hold it in place immediately so it does not slide around. You can skip the hot glue step, but I would not recommend skipping using a long lasting glue that will hold up outdoors.
Alternatively, you could use a good staple gun (maybe a furniture grade, that will go through the two layers of signs here).
Once I had them all glued, I added a little weight on top of each place that I glued the signs – just to make sure the dried well.
Once your sign is fully dry (good to let it dry over night), you are ready to add your lettering.
I used my Cricut, but you can also use these pre-cut letters (paint them first)! I cut my letters at 6 inches in height – which I found was a good size for most of the Dollar store signs. You can measure your signs, and decide what size works best for you – but 6 inches is a fairly safe bet.
If you want to use wood lettering, here is a 4″ letter that is already painted (so you would simply have to glue it to each sign). You can also find them unpainted at most Walmart stores for under $1 each.
Once your sign is dried, you are ready to attach your letters. If you are using a Cricut, simply use transfer tape to add your vinyl. If you are using the wood letters, glue them on.
Note – I glued my pumpkin signs together first to make sure my letters aligned on the final sign the way I wanted them too. You could add the letters to each sign first, but I think it will be harder to get the final alignment you want if you do it in this order.
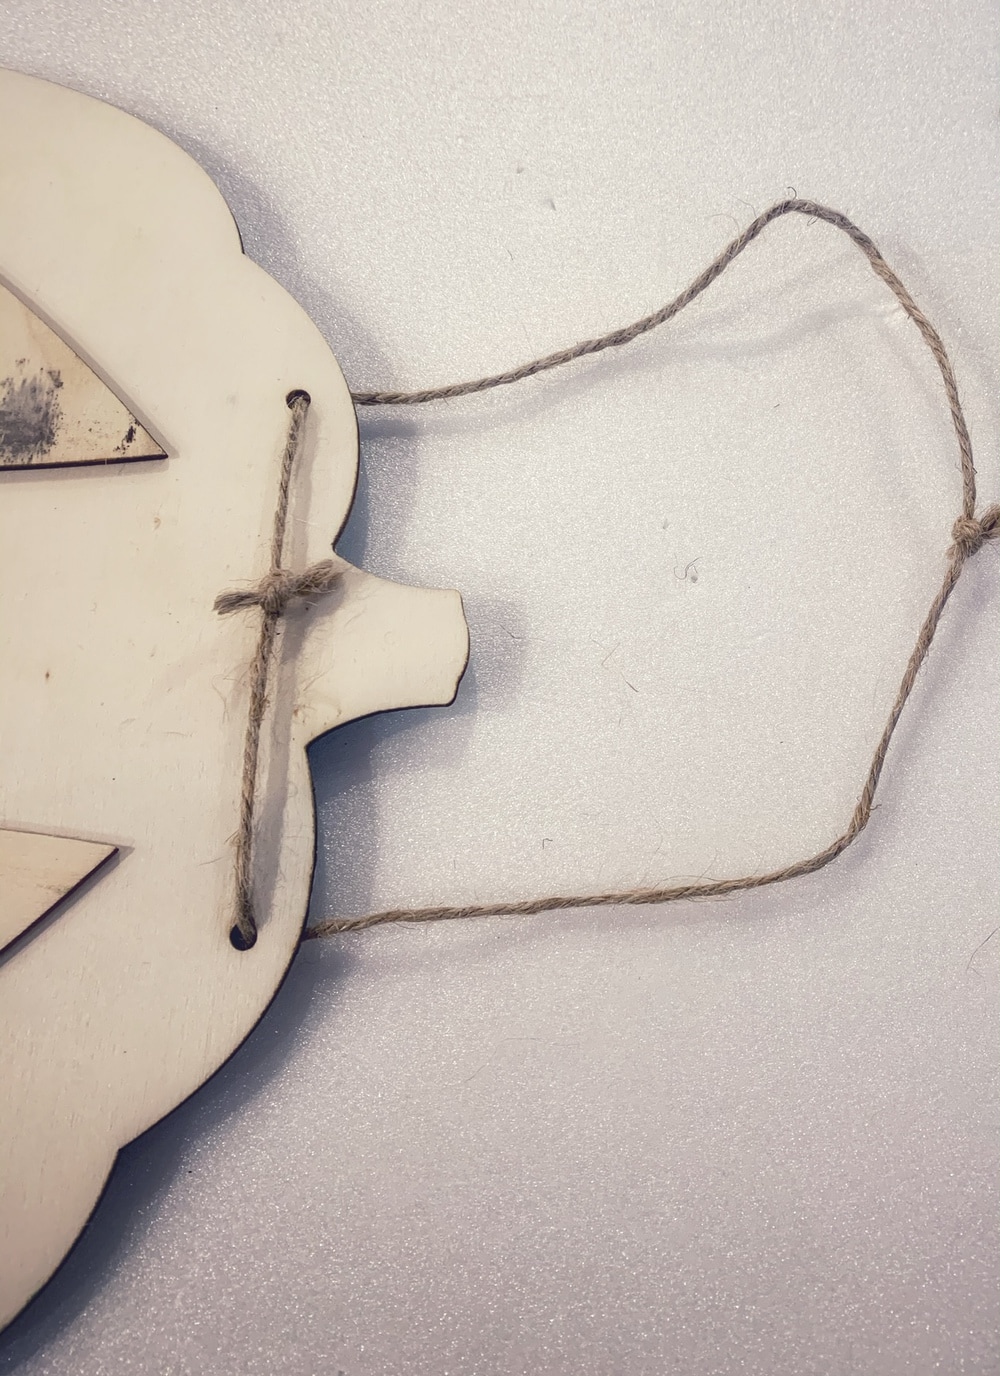
The last step is to add some string to hang it from (if you are hanging off of your door, vs leaning it on your porch). I used the same string that came on the original signs (used two of them and tied them together then hung from my wreath hanger over my door).
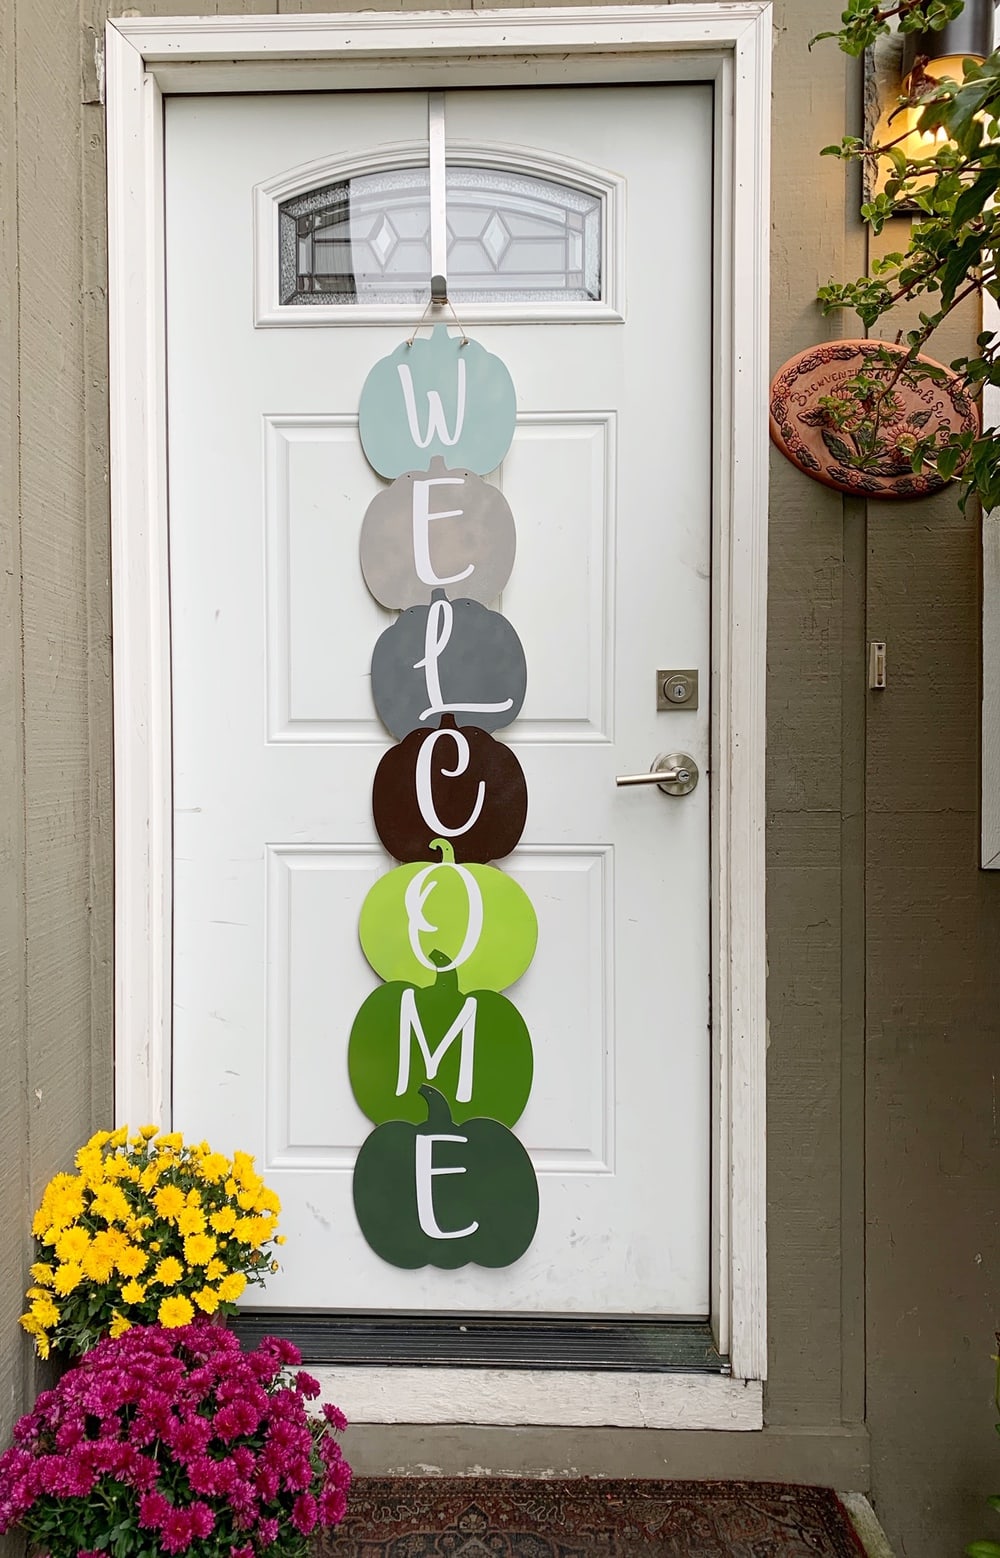
I have already received so many compliments on my fall welcome sign on my front door. It is a really simple, and economical way to add a little fall flare to your front porch or door for the season!
