
Custom Fall Signs From Dollar Tree Calendars
This post may contain affiliate links and I may be compensated for this post. Please read our disclosure policy here.

Custom Fall Signs From Dollar Tree Calendars
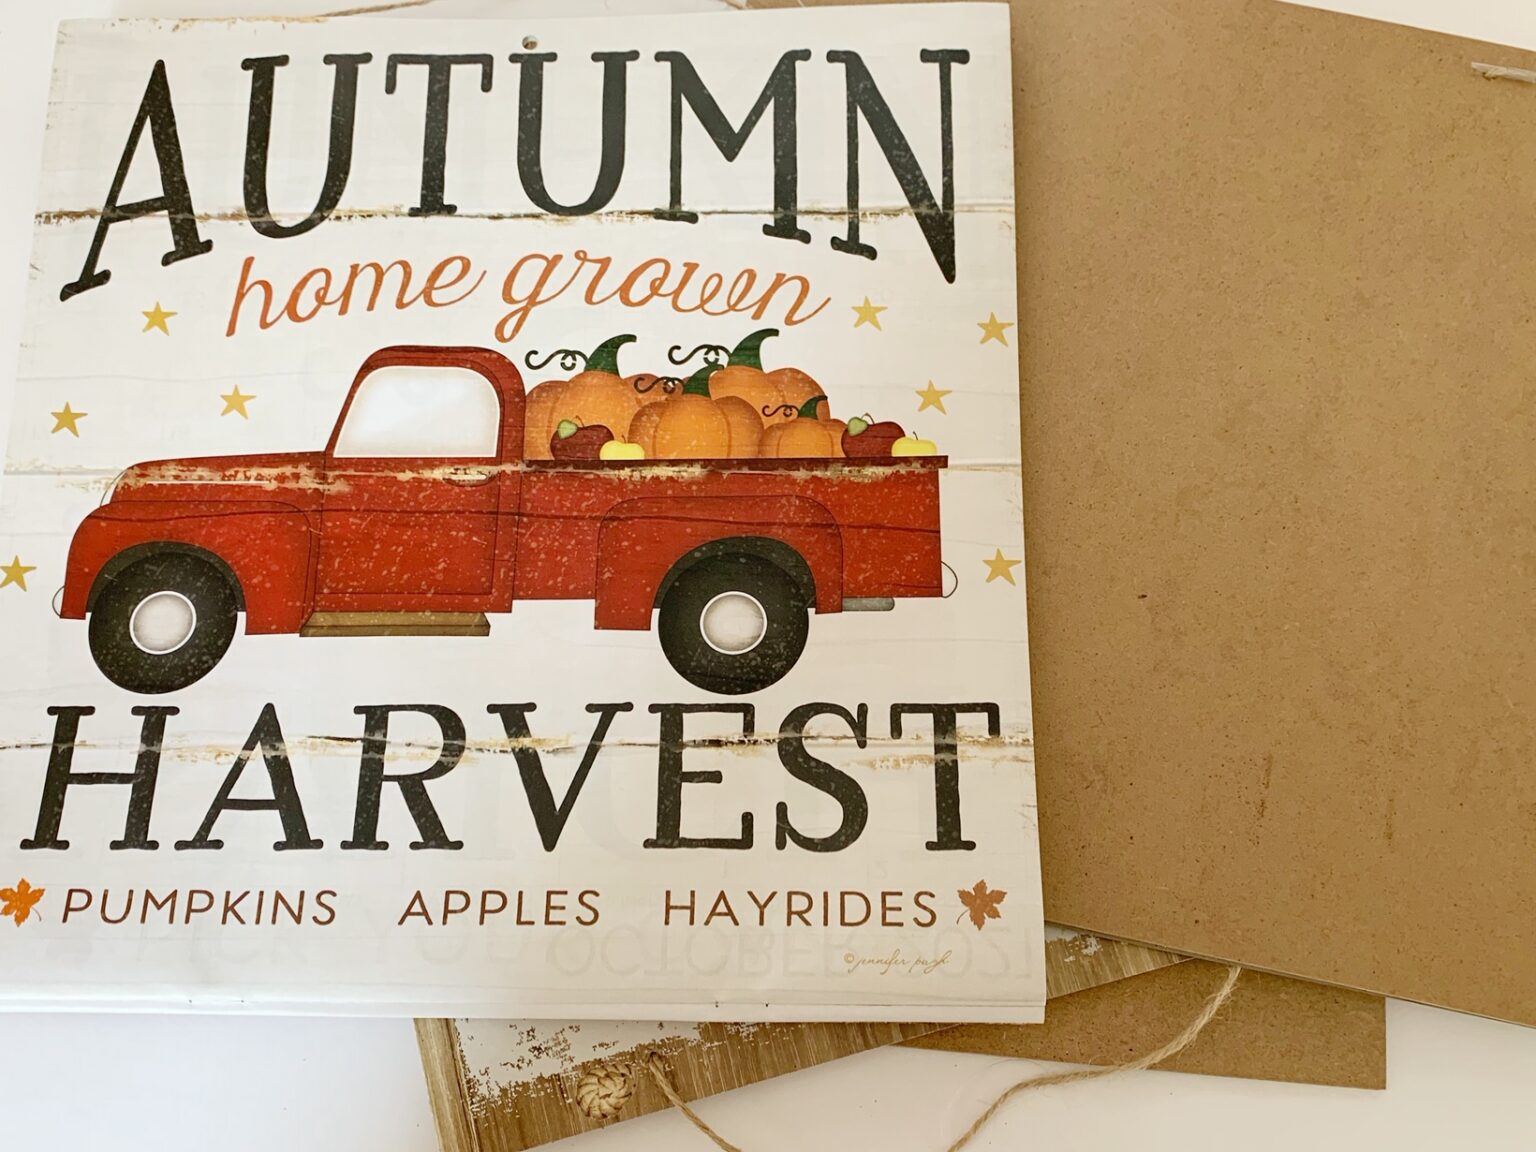
Here is a really simple, yet adorable way to spruce your home up with some fun fall signs this year. The trick here is to head to your Dollar store, and grab one of these 2021 Farmers Market Calendar, so you can make signs from the really cute pictures included in it. This project takes very little effort, and was one of my favorites this season.
I used the 12×12 particle board signs from the Dollar store as our base (well, because they are only $1). I just turned them around and used the back of the board, but you could use a real wood base too if you wanted to buy something at a hobby store or home improvement store for example. You can also find various free printables online if you cannot find the calendars, to make your signs.
To Put Together Your Fall Signs You Will Need:
- 1 of the 2021 Farmers Market Calendars
- 12 x 12 Signs (made of particle board, you will use the back, so ignore the sign on the front – shop for the shape and size you want).
- Mod Podge

This project is so simple! You are going to choose the picture you like from the calendar and carefully cut it out.
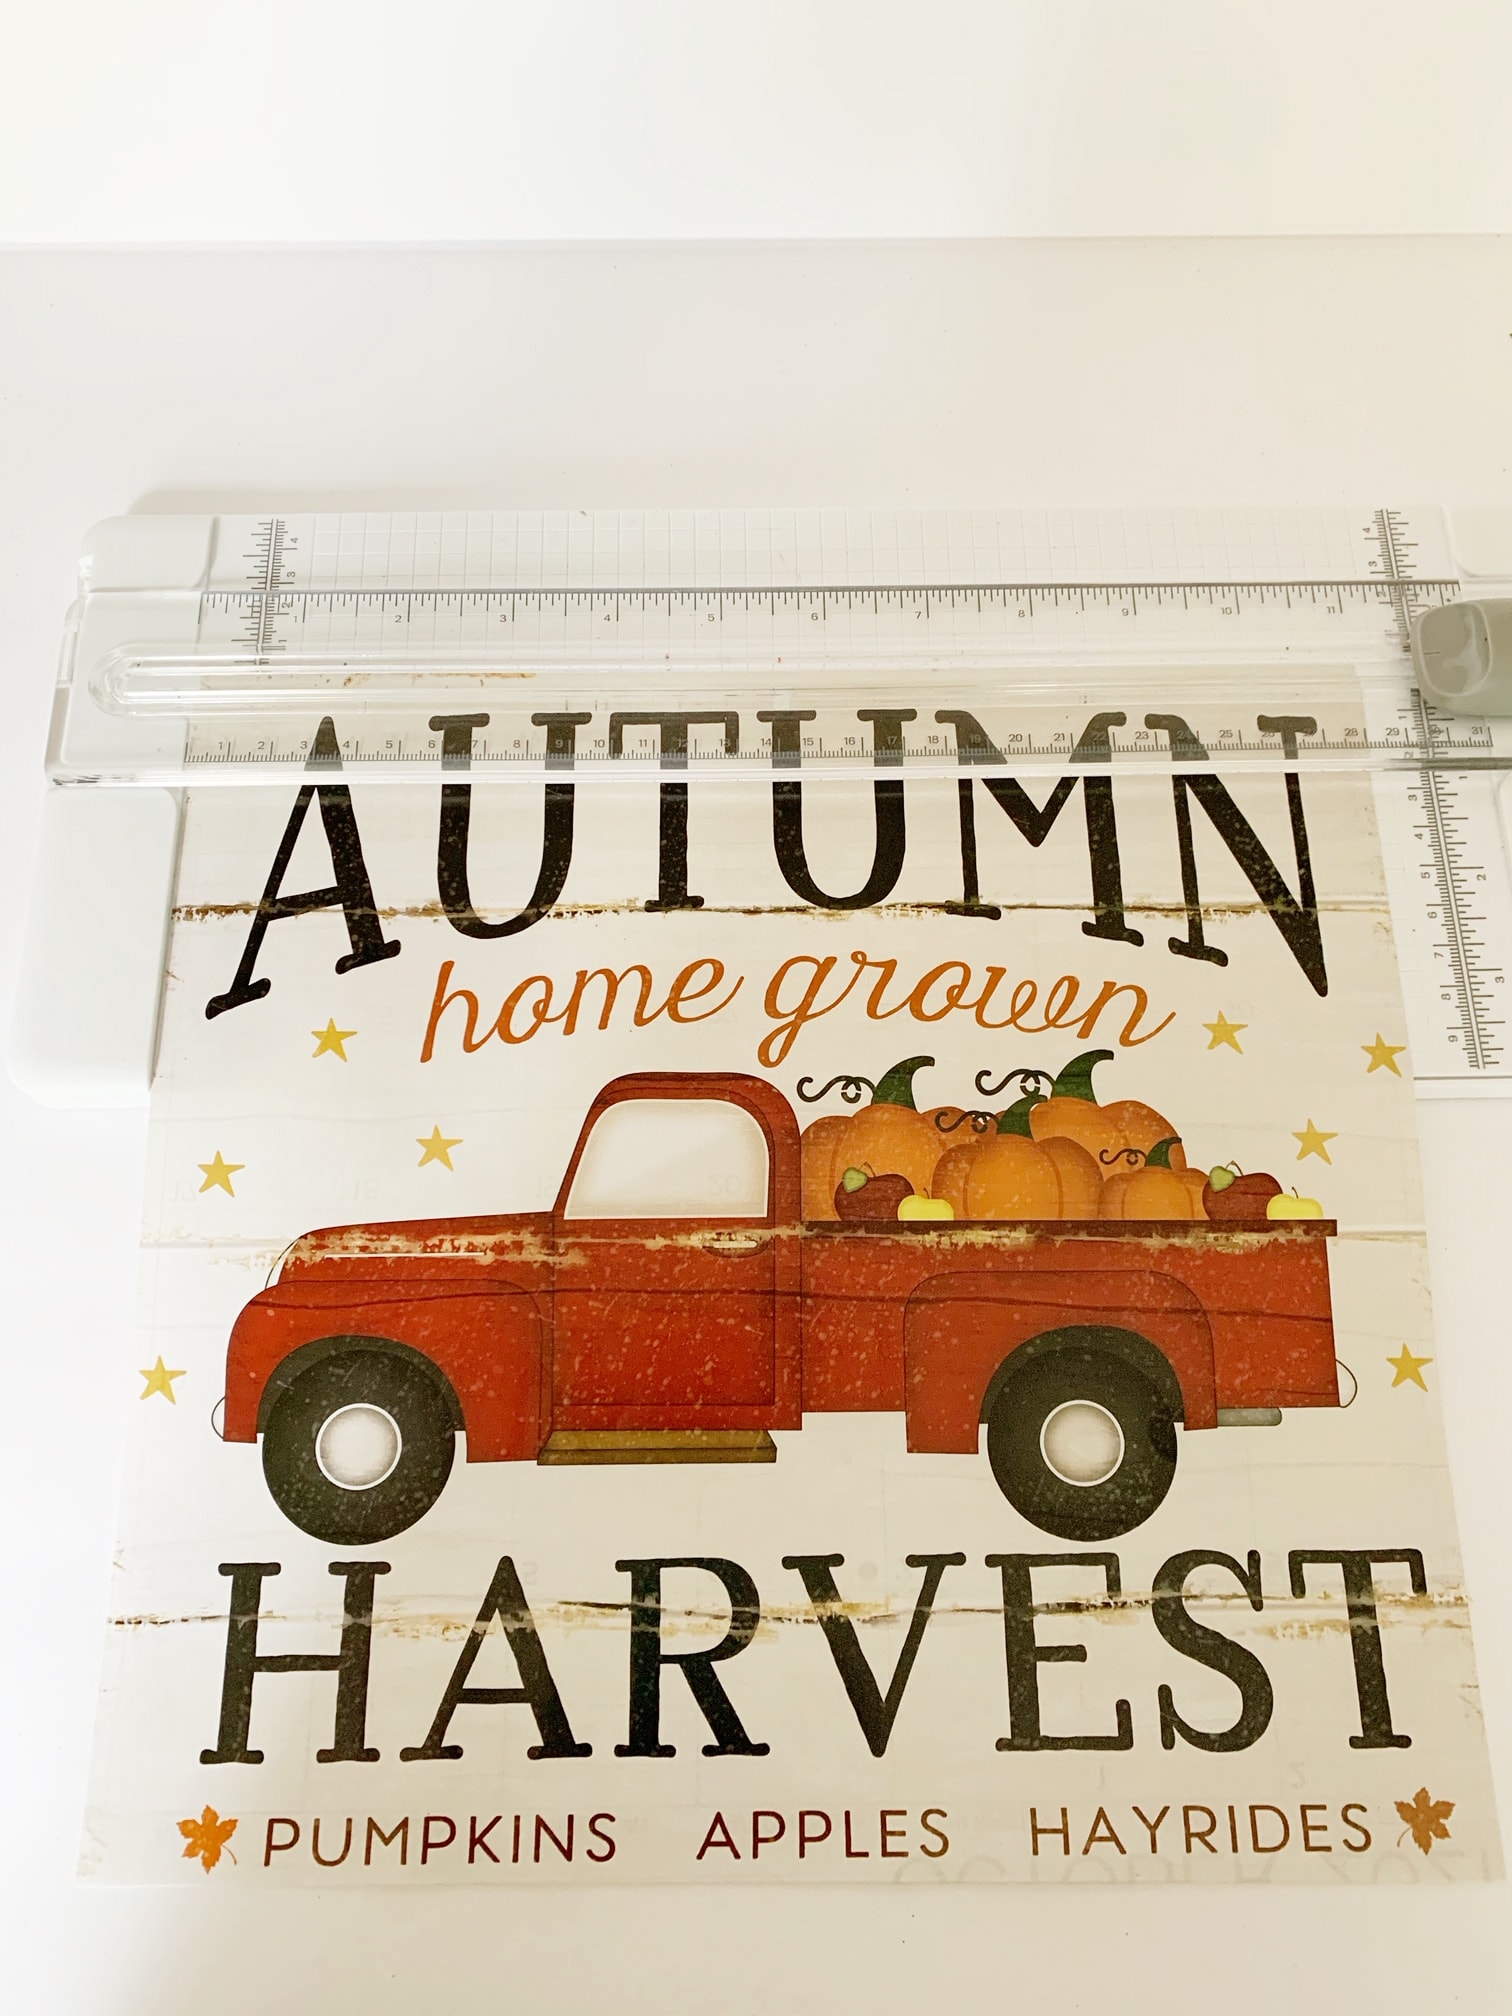
 Cut down your calendar picture to the right size to fit the way you want it to in your sign.
Next turn your 12×12 sign around (work on the back of it), and remove the twine that is meant to hang it. You will put that back on when you are done with your sign (but backwards) as the back of the sign will become your front.
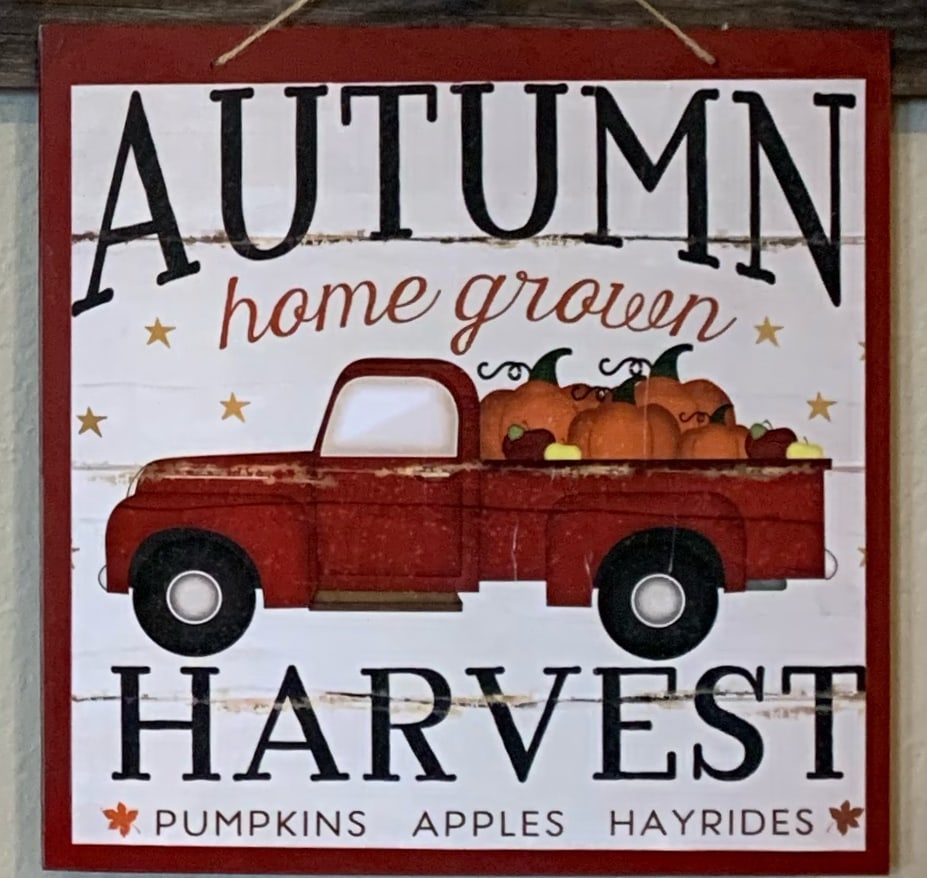
Next spray paint the outer edges of your board the color you want it to be (ie we wanted our Autumn Harvest sign to have a red outer edge, so we spray painted the outside first prior to mod podging it on).
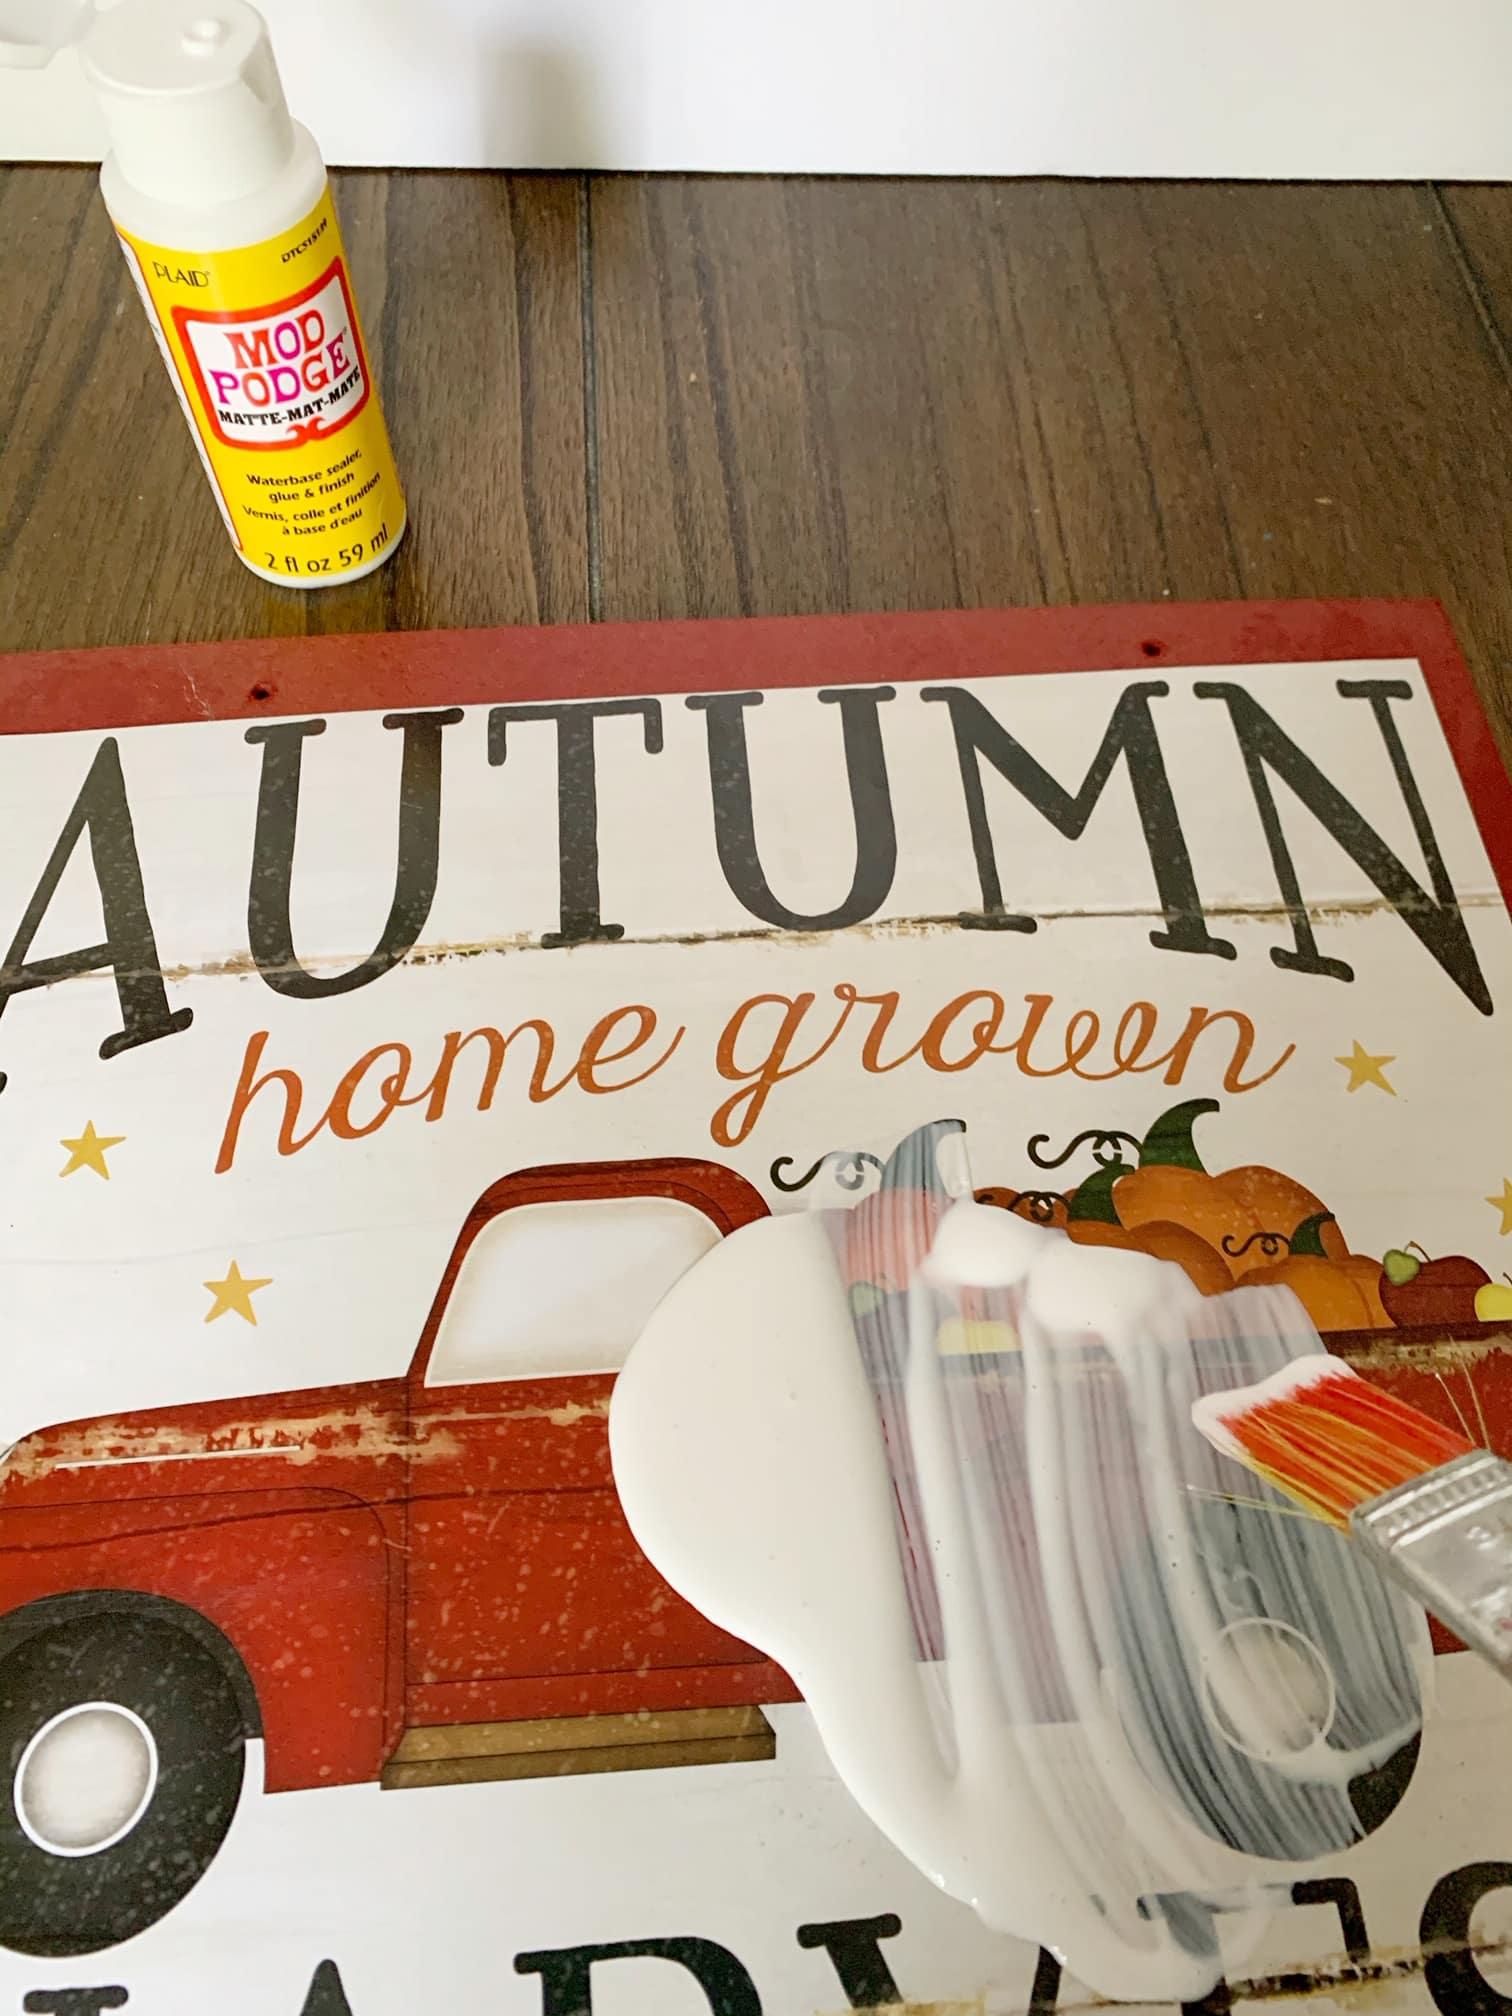
Once the paint is completely dry, you are ready to attach your calendar page to the board using mod podge.
Note that you can use spray adhesive to attach the sign to the board as well, depending what you have on hand), but mod podge will give it some protection too.
To mod podge it on cover your board with a layer of the mod podge, then position your calendar paper on top of that and let that dry. Next add a layer to the top of the paper, again covering the full board and let that dry. You may notice some wrinkling of the paper when you do this, but those should shrink back up once it is dried. You can add one or two layers to the top, depending on your liking. I used a flat mod podge look, but you can find it with shine to it as well.
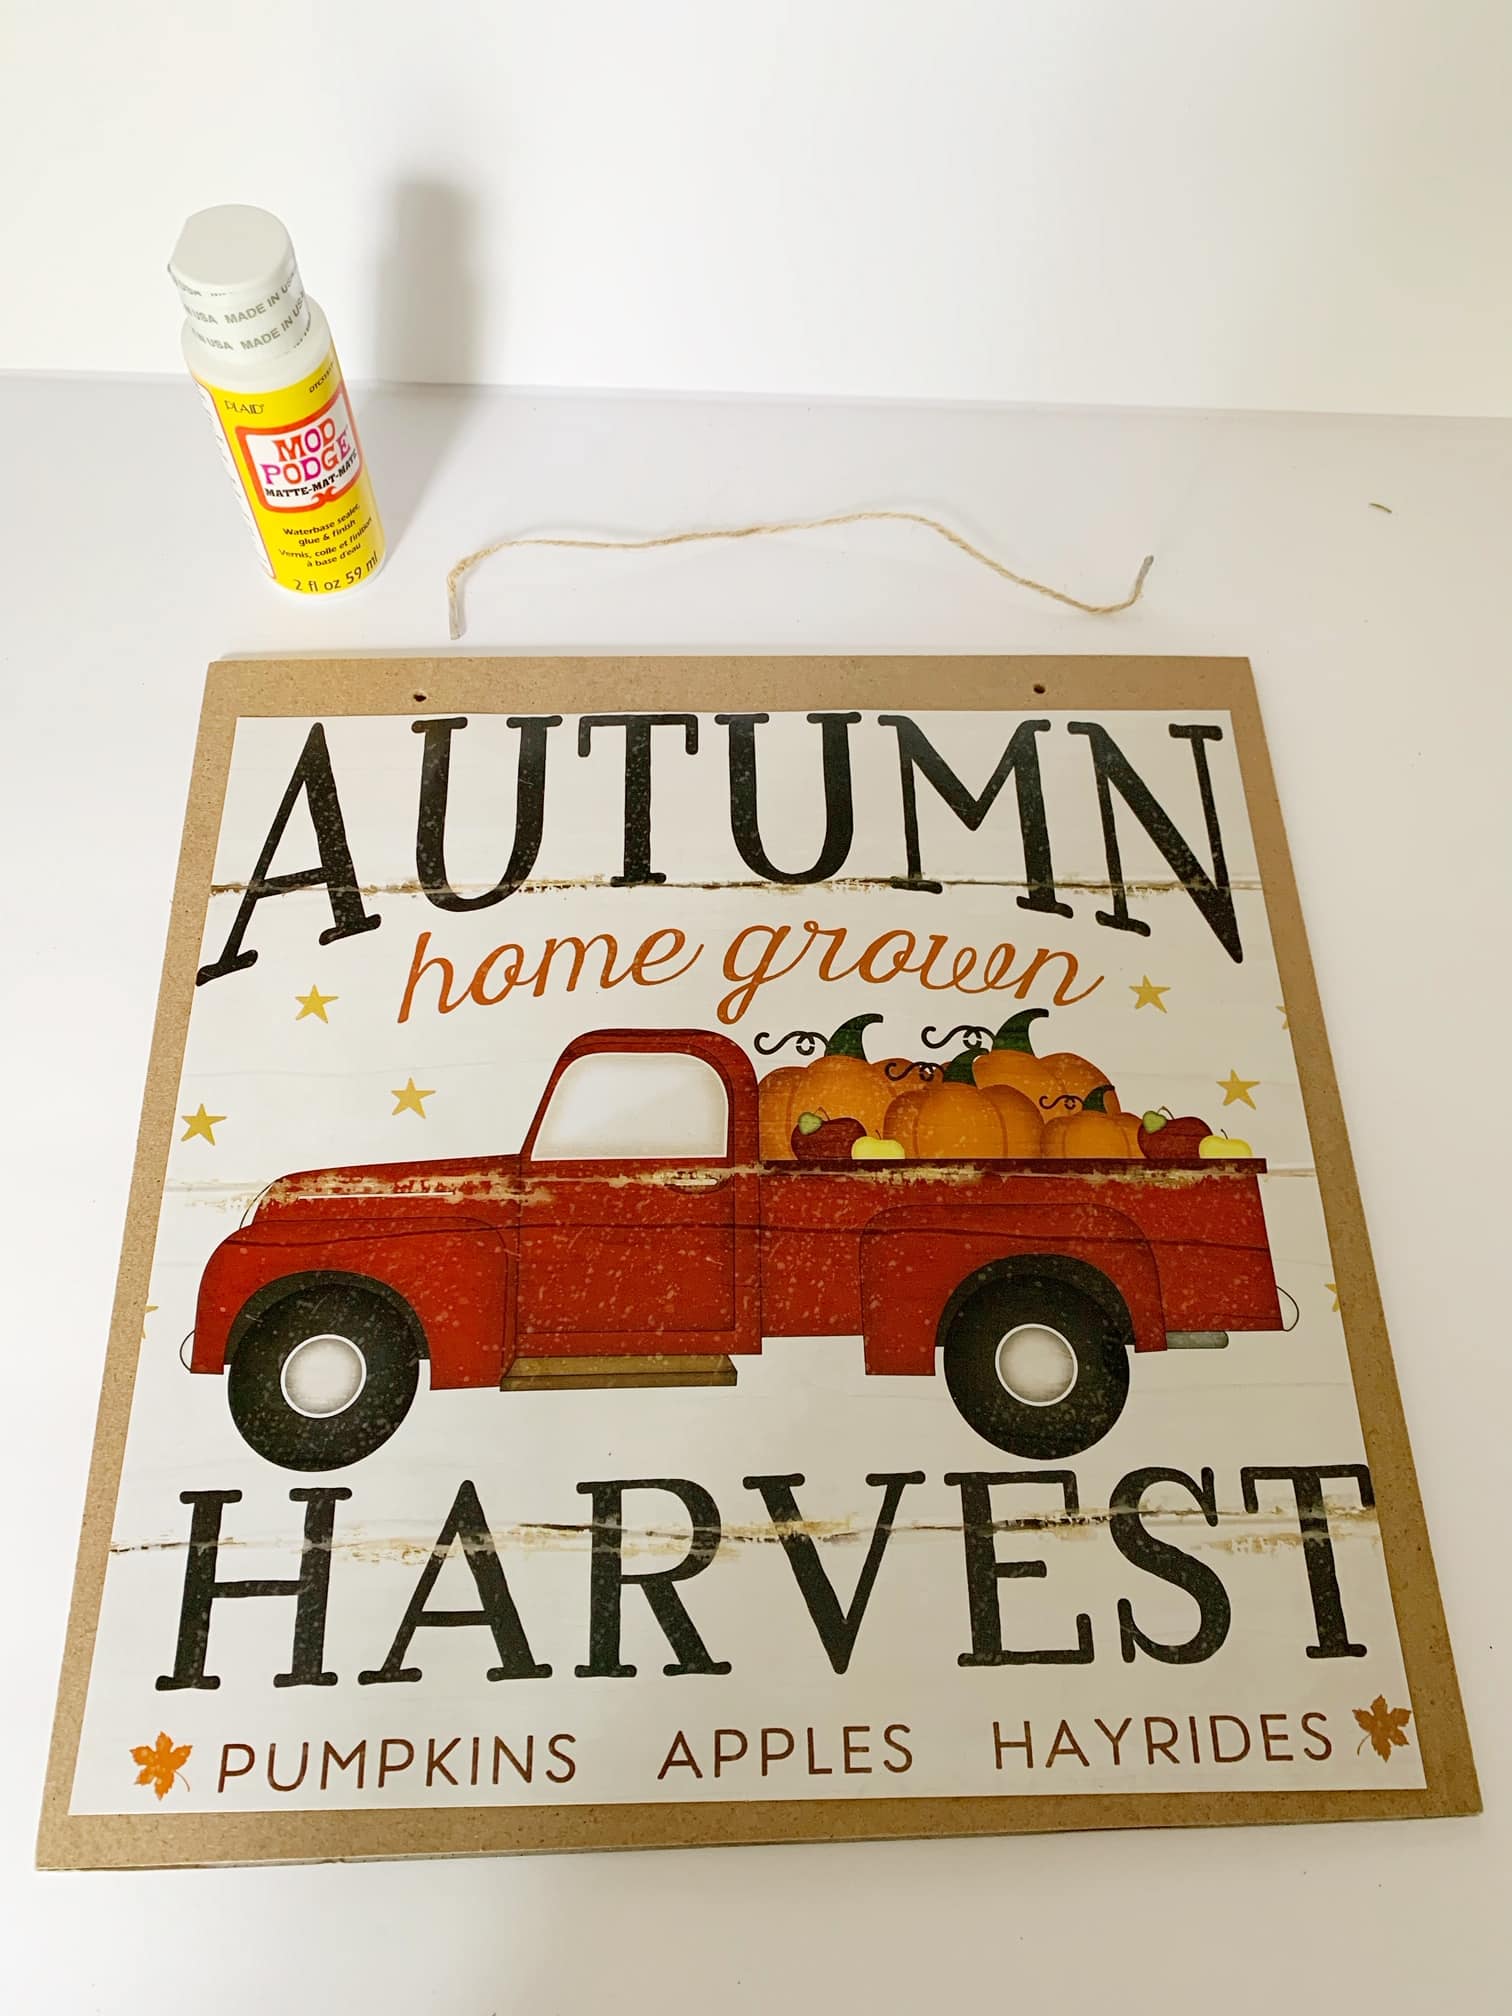
Once it is all dry, put the twine back on to hang it from and you are done!
And there it is, the simplest but cutest (and most affordable) fall signs you will find this season!
