
DIY Dollhouse That Fits In Your Kids Lap (Road Trip Ready)!
This post may contain affiliate links and I may be compensated for this post. Please read our disclosure policy here.
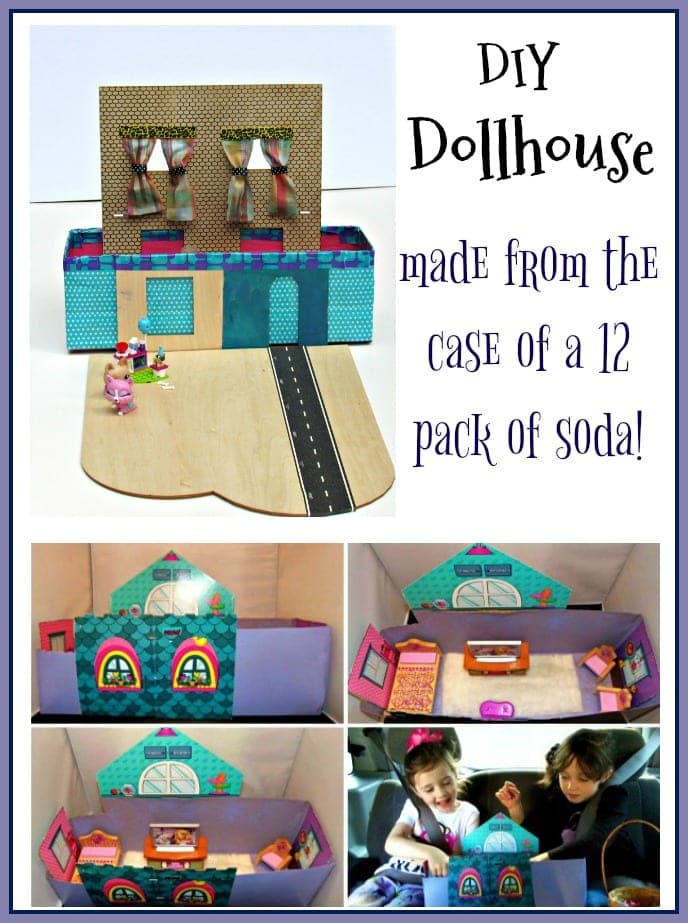
This is the time of the year that we head out on a number of road trips with the kids, and we are always looking for ways to keep them entertained in the car, so we wanted to share this idea we used a few years ago for my kids. We came up with this portable doll house for the girls to play with their Polly Pockets (and other animals (like Little Pet Shop, LOL Dolls, Num Nums and all of the other small toys that kids collect) and dolls that size) in the car. We had all of the materials on hand, so it was a freebie for us, but here is how you can make one for anywhere from $1 to $5 – depending on what you have on hand.

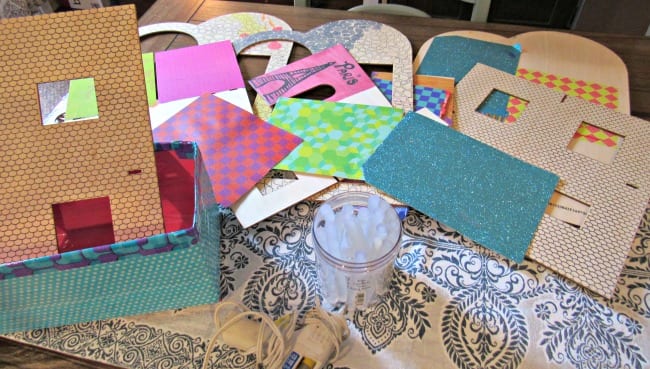
The first one we did we used just cardboard for the house. It worked fine for the road trip, but I wanted one that I could pack back and forth to use for play time in a Sunday School class I teach too. As a result, I used the same concept (starting with a 12 pack soda container), but reinforced it with duct tape I got from the Dollar store, to make it a lit bit more heavy duty for more play. Here are the two versions. I would encourage you to look around your house, and be inspired by whatever supplies you have on hand to make your own!
Cost: Under $5 (Depending on what you add)
Supplies:
- Used 12 pack soda can box
- Paint (get $1 cans at Dollar Store or Walmart)
- Fabric
- Hot Glue Gun
- $1 store furniture (or what you have around the house)
OR, Cost $5 – $10 (depending on what supplies you have on hand):
Supplies:
- Used 12 pack soda can box
- Duct Tape (I found it at the Dollar store for $1 per roll, and bought a couple of designs to use).
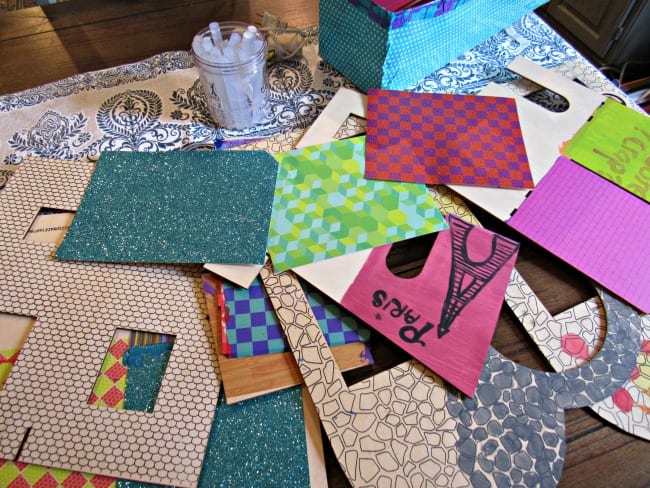
- Fabric/ or decorative paper
- Wood Venneer Sheets or Chip Board Sheets (you can usually find these at craft and hobby stores like Michaels or JoAnnes).
- Hot Glue Gun
- $1 store furniture (or what you have around the house)

How To Assemble version for under $5:
#1 – We took a box that a 12 pack of soda came in and cut off the top of it.
#2 – I had a can of spray paint on hand that we used to spray the box with (you can get a can for $1 at Walmart or Home Depot), so we just sprayed the box to make it all one color and let that dry.
#3 – We then used a paper dollhouse we had gotten at from the Dollar store (Dollar Tree), and cut out roof lines and windows to staple on the box for added dimension. You could use barbie packaging, or just add magazine photos to the inside and outside of your house. If you are really creative, you could draw things like windows and doors yourself.
#4 – Next we cut out a rug from a piece of fabric that we had on hand (you could draw a rug on, use stickers or fabric from an old sweater, etc.).
#5 – Lastly we used a few pieces of furniture that we had picked up at the dollar store to decorate the house and it is ready to use.
We now throw some of their small dolls (Polly Pocket size) and animals (Littlest Pet Shop) into a basket or zip lock bag and the girls have an easy to use dollhouse for road trips.
The house is made of cardboard, so its not going to last forever, but it was a fun project that the kids helped with and they have really enjoyed it on the last couple of trips! Definitely worth it for us. Besides the drying time of the paint, it only took around 15 minutes for us to put together.
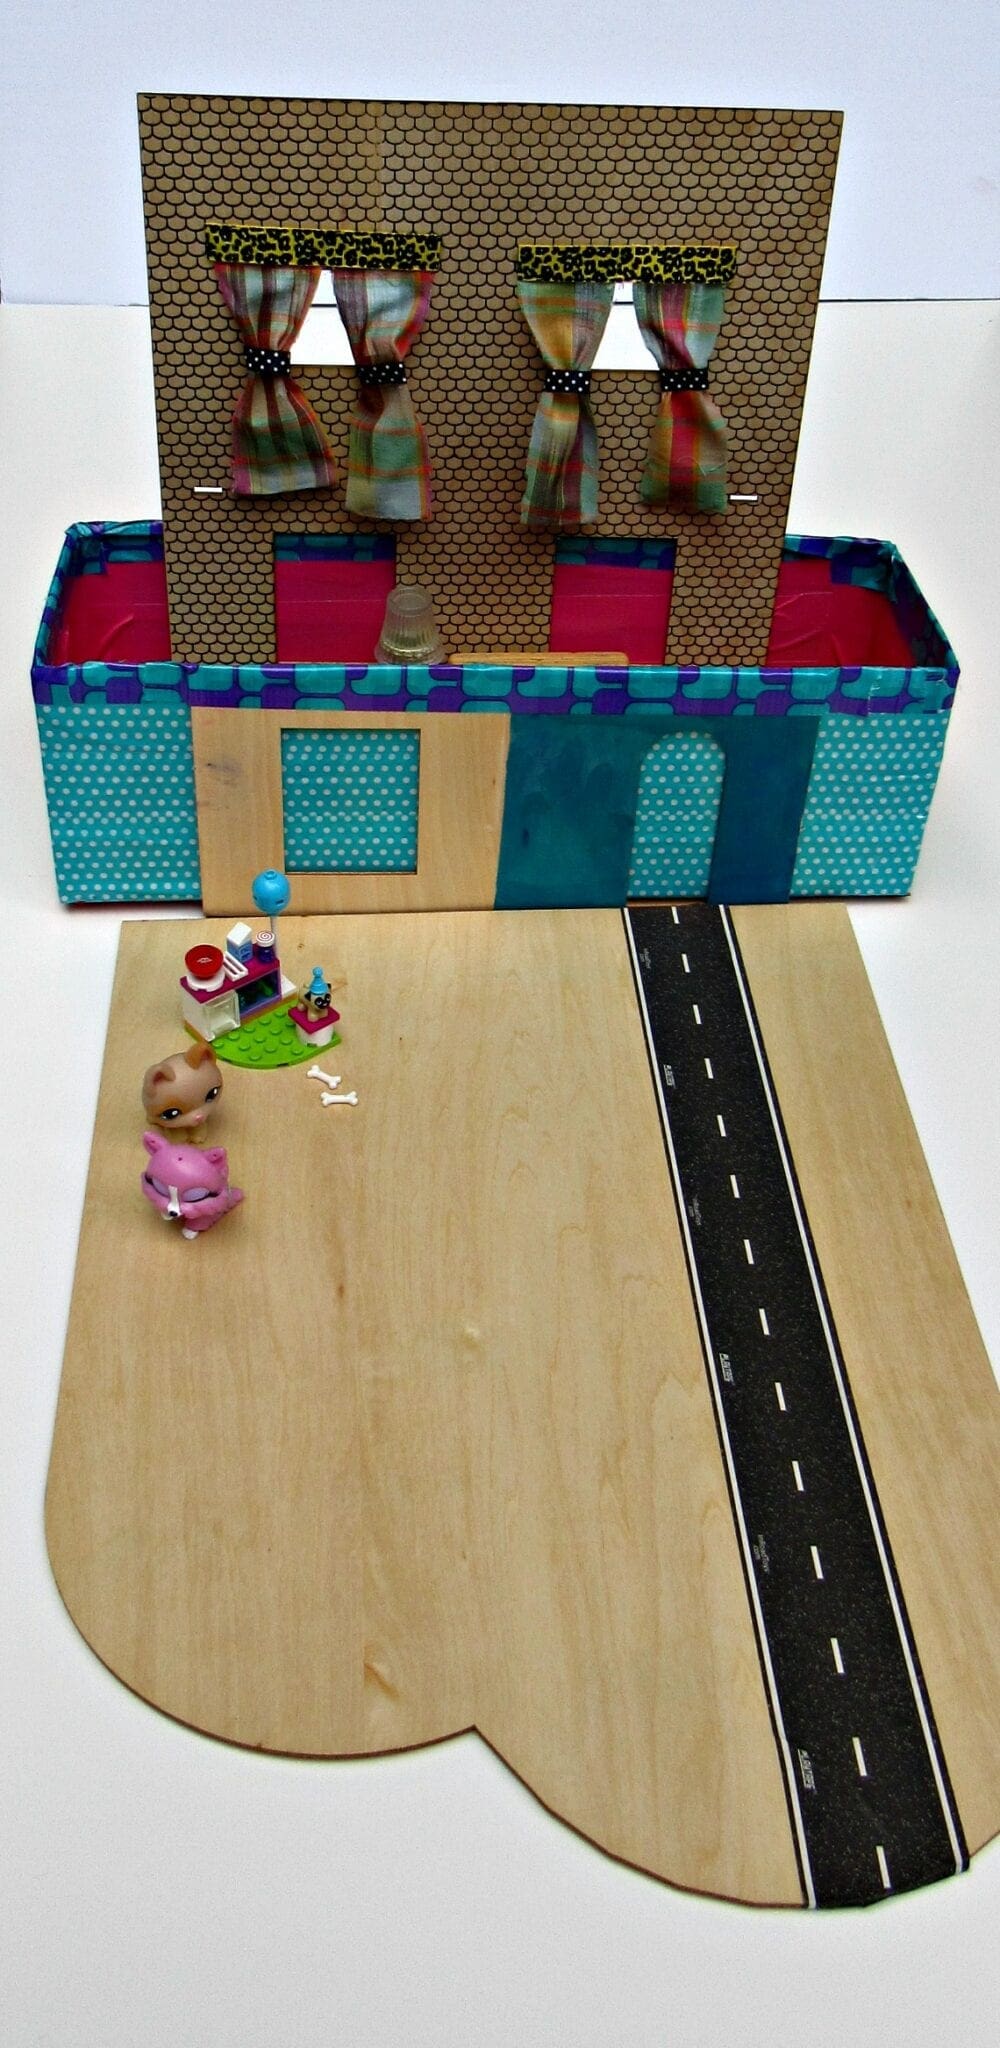
How To Assemble Duct Tape/ Wood Veneer version:
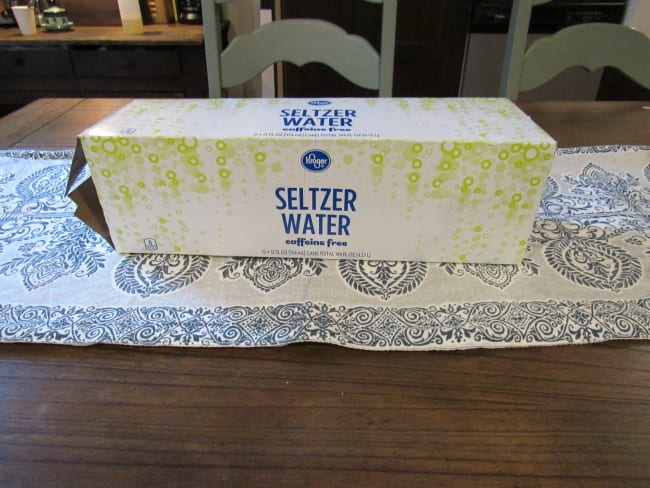
#1 – We took a box that a 12 pack of soda came in and cut off the top of it.

#2 – I then covered the inside and outside of the box in duct tape to make it stronger.
#3 – We then used a Wood Veneer dollhouse pieces my kids had lying around from an old craft project. You can also buy wood veneer sheets, or chip board sheets at craft stores. I was able to score mine with a utility knife to cut it to the sizes we wanted. You will want a sheet for the front and back of your doll house, so that it balances out (and is not too heavy on the back). You will want the part on the front to be no higher then the 12 pack box, so little hands can get in and out of the house for easy play.
#4 – I hot glued a couple of pieces of fabric on for windows and used ribbon for valances. I just used scraps I had lying around the house.
#5 – We used craft paper to add to the bottom of the inside so that it created two separate spaces. We also had a few rug and wood veneer samples we picked up at Home Depot during a home remodel I considered using. Look around your house and be creative with whatever you have on hand.
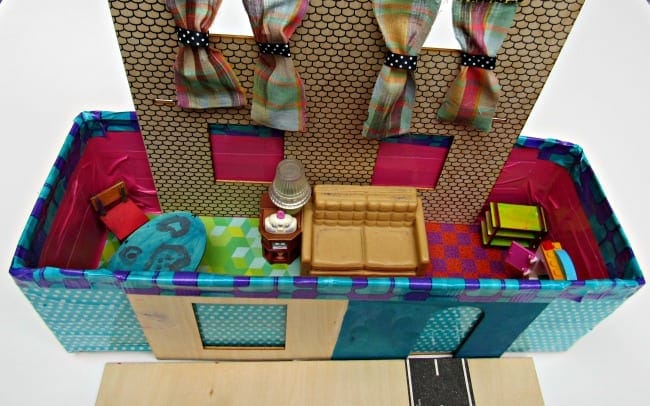
#5 – Lastly we used a few pieces of furniture that the kids painted up and decorated.
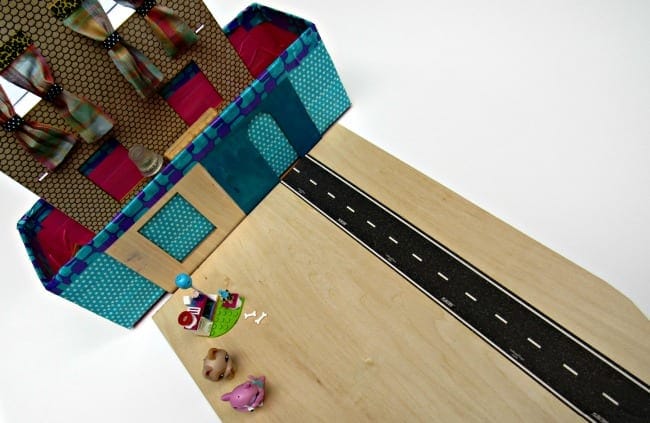
#6 – We also added some road Play Tape to another piece of wood veneer to act like a driveway to the house. This is a separate piece so its easy to store away or leave behind if your taking in the car.
Other articles you might be interested in:
- Melissa & Doug Reusable Sticker Books for Road Trips – $5
- Ways To Save on Summer Travel
- Saving Money at the Pump – Five Ways to Reduce your Gas Budget for Travel!
