
DIY Pencil Picture Frame for School Photos with Mess – Free Paint!
This post may contain affiliate links and I may be compensated for this post. Please read our disclosure policy here.
Disclosure: This post is sponsored by Kwik Stix. All opinions are 100% my own. See our disclosure policy for more details.
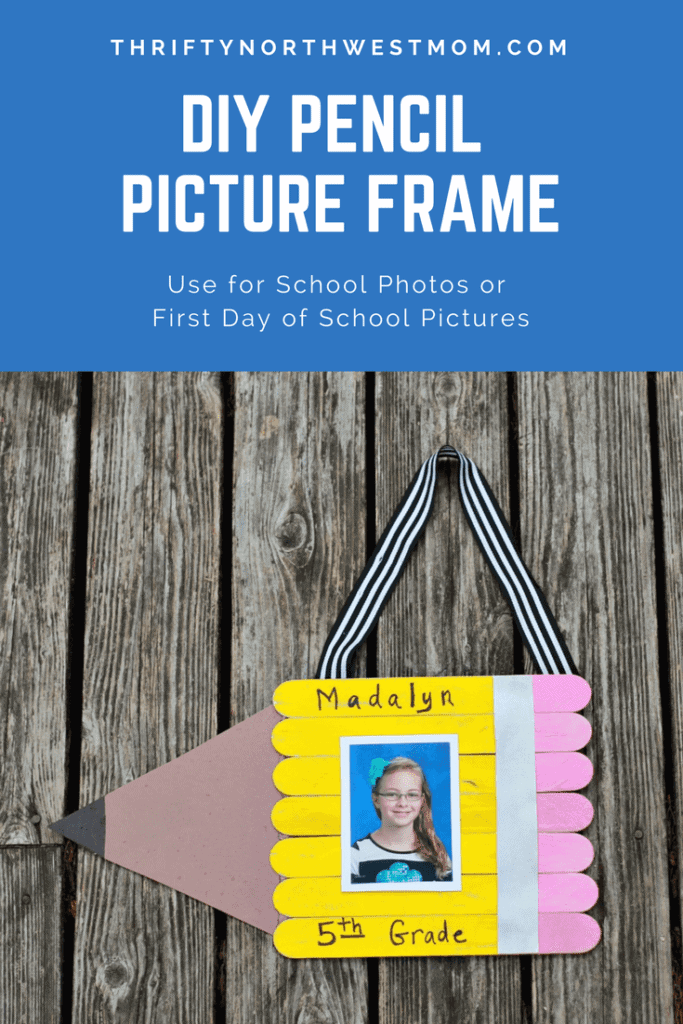
DIY Pencil Picture Frame for School Photos with Mess-Free Paint Option
My kids love to do crafts and the best part about making crafts for them is seeing the finished product that they can be proud of doing themselves. They love to have us display their art and craft projects around our house and I love looking back at their creations. But I love pictures of my girls even more – so crafts that combine pictures with a special craft my girls have done are my favorite for memories!
We buy the school photos every year to give to all the grandparents and to have a picture record of each of their school years, but it seems like we always end up with some extras, such as the wallet size photos. My girls and I came up with this cute DIY Pencil Picture Frame craft to use school photos for a fun back to school craft idea.
This craft would also be perfect for back to school photos you take on the first day/week of school & size it to fit this pencil picture frame (or make your frame bigger if you want the whole picture displayed). Or any candid shot you take at school or at home would work!
This would be a fun way to send grandparents your kids’ school picture in a frame the kids create themselves for a frugal DIY gift idea and a unique way to display kids’ school pictures year after year.
DIY Pencil Picture Frame for School Photos
Materials Needed:
7 Large popsicle sticks (you can vary this depending on the size of your picture – this was for a standard wallet size photo)
Brown Cardstock
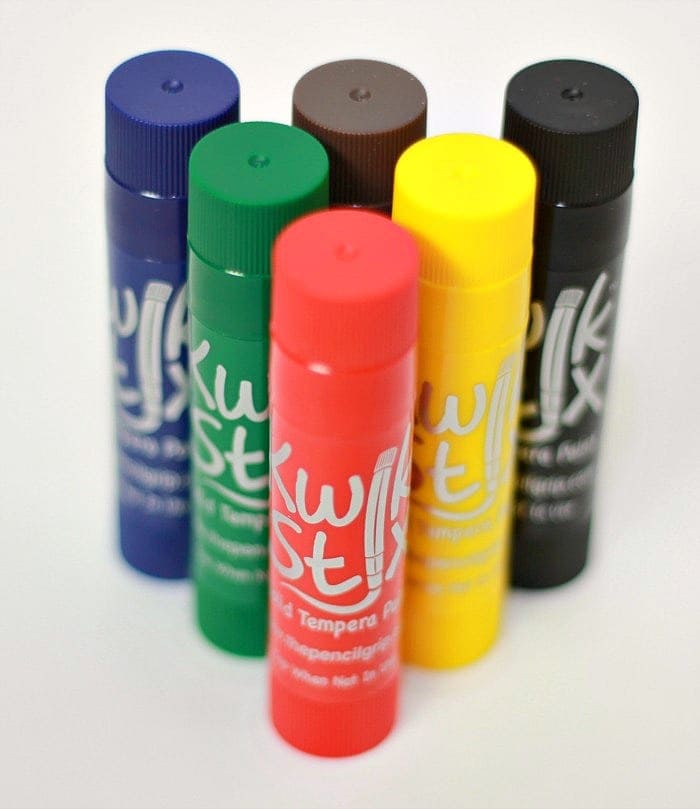
Paint or Mess-Free Tempura Paint Sticks (we used Kwik Stix mess free paint sticks)
Picture for your frame
Hot glue gun or wood glue
Twine or ribbon for your frame
Directions for Making the Frame:
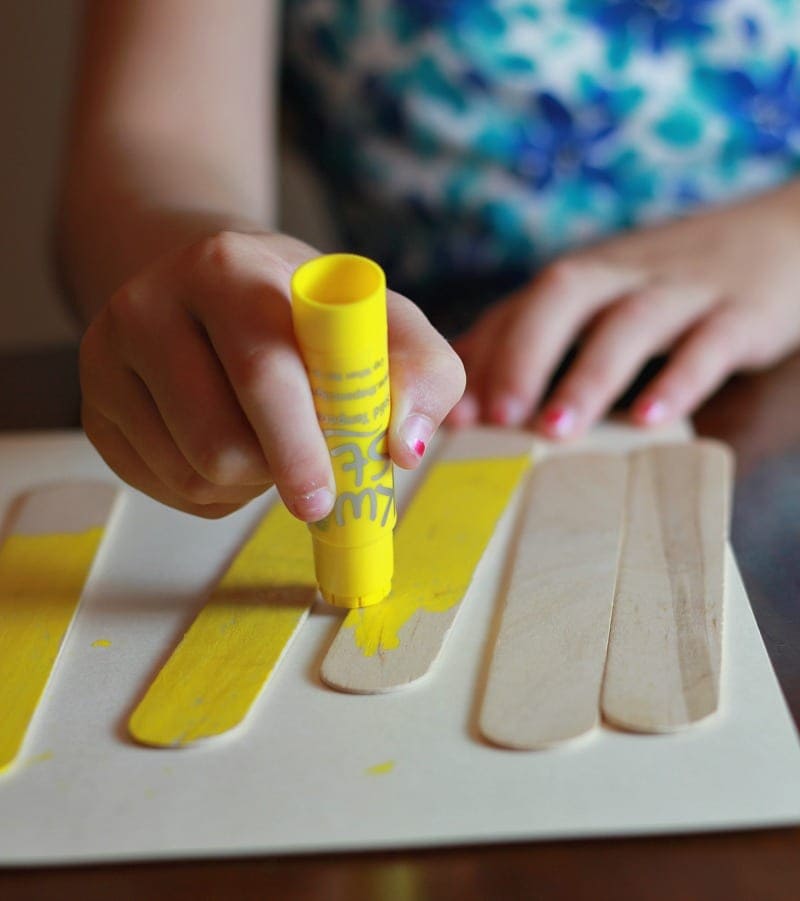
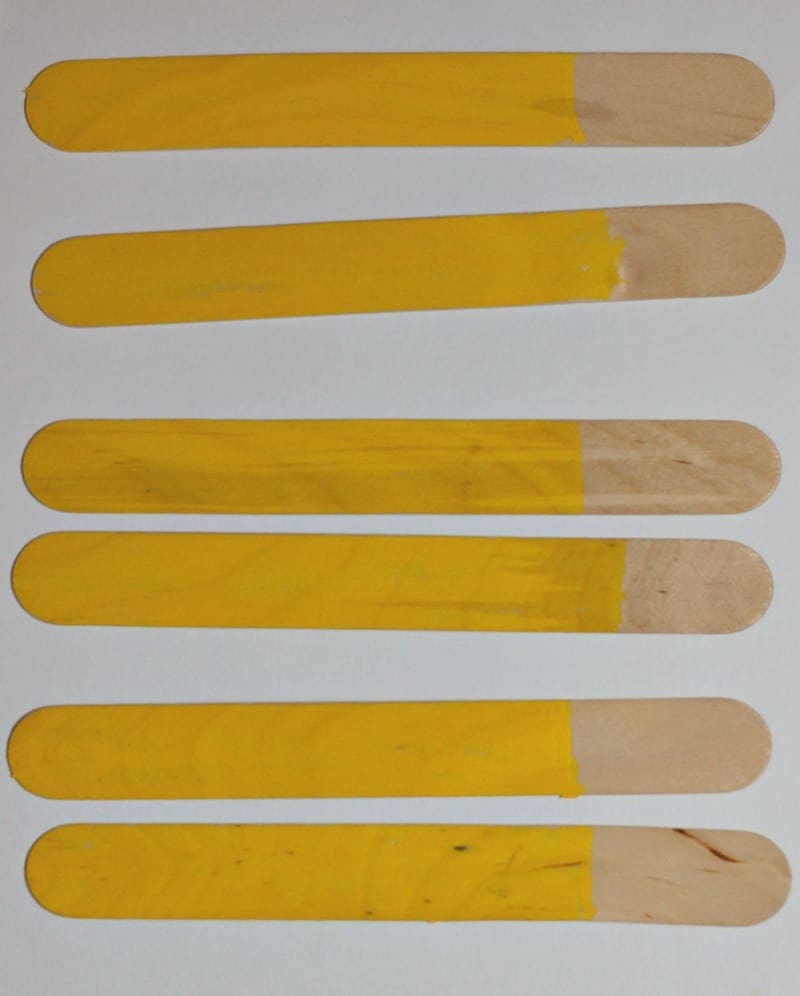
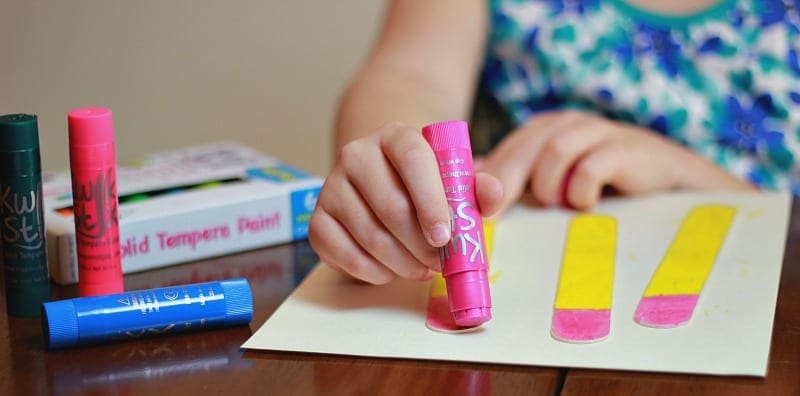
Paint the popsicle sticks yellow & leave room at the end for pink for the eraser.
Let the paint dry between each step. We used Kwik Stix paint sticks, which was perfect for this project as it is virtually mess-free, but it also dries in 90 seconds, which was important so that we didn’t have to spend forever in between these steps waiting for the paint to try.
Add the pink paint to the end of the popsicle sticks to make the eraser. Let it dry.
Flip over the popsicle sticks and line them up all in a row touching each other.
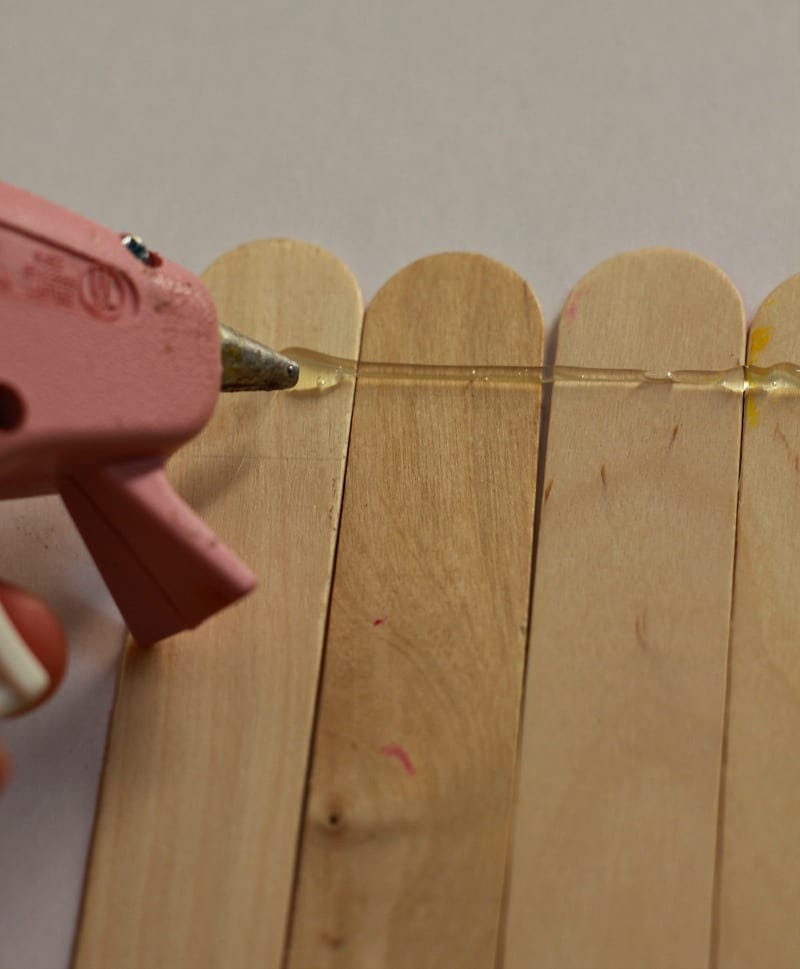
Use your glue gun or wood glue to run glue down the sides to hold it all together side by side. I did about 4-5 lines of glue down the sticks to make sure it would really hold. If you want extra stability to your frame, you could cut out a piece of cardstock to fit behind the frame & hot glue it to the back (it would make it more polished if giving as a gift too).
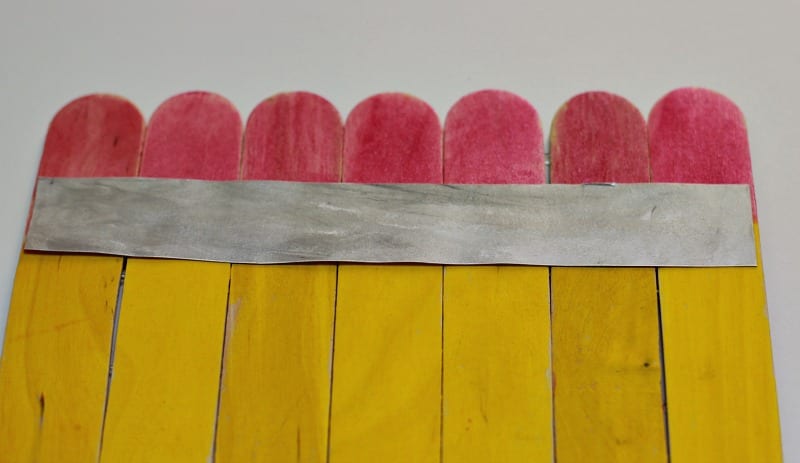
Cut a thin strip of silver paper or painted paper in a silver color to go down the length of your pencil between the eraser & the yellow pencil part.
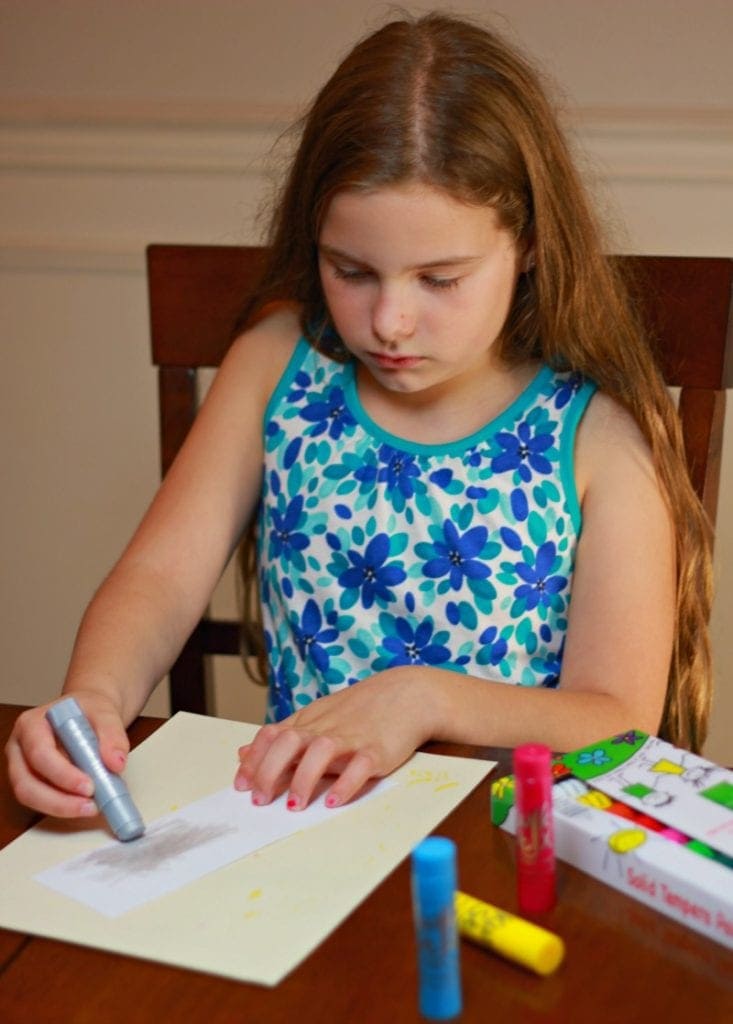
We used a Kwik Stix paint stick to paint the silver with a metallic silver color {I left it wider so my daughter would have an easier time painting it, then I trimmed it to fit after the paint dried). Or you could find a silver metallic paper to use and trim to the size you want.
Cut out a triangle with brown cardstock to fit the width of your pencil frame. Attach it to the pencil frame on the back with a glue gun.
Use a black sharpie or Kwik Stix paint stix to paint the end of your pencil tip black.
Add a ribbon or twine to the back of your frame so you can be able to hang it up to display.
Use white, black or brown cardstock to outline the school photo for a more finished look & attach this to your frame using a glue gun.
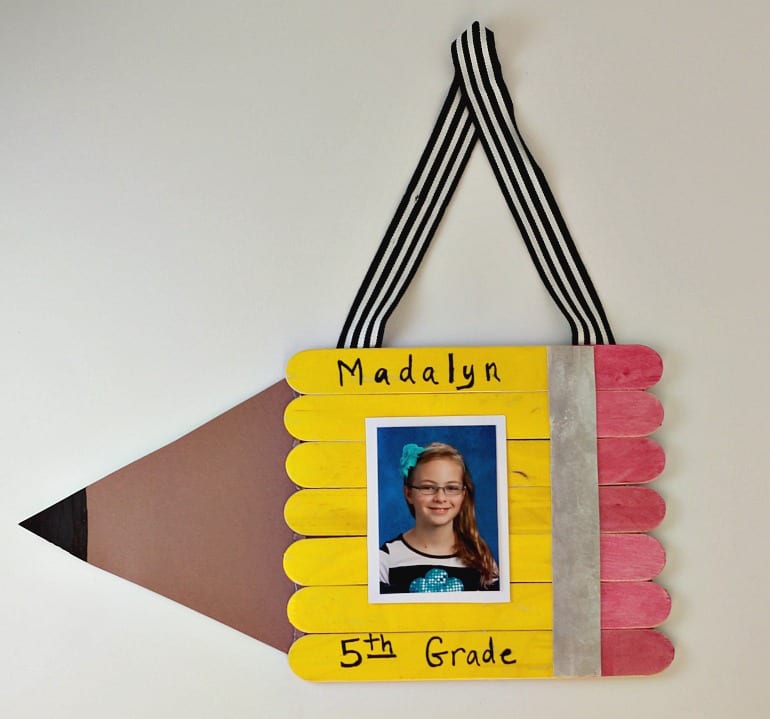
Write your child’s name and grade on the frame with a black sharpie. Even better, have your child write their name & grade, so you can have a sample of his/her writing each year and you’ll know what the grade is when you look back at the picture.
And there you have it – a fun, creative way to display your child’s school photo or first day of school photo! Plus, a great keepsake to look back on year after year!
Mess-Free Paint using Kwik Stix Paint Sticks:
One of our favorite craft materials for projects are the Kwik Stix paint sticks. These are solid tempera paint sticks that are AP certified, so they are non-toxic and safe for kids. I feel very comfortable using them with my own kids, as well as our neighbor kiddos and friends that come over. They are also egg, peanut, and gluten-free so you don’t have to worry when kids visit your house, whether it’s safe for kids with those allergies.
What I love most about Kwik Stix paint sticks are that they are virtually mess-free. All I need is just a piece of construction paper underneath them & even though my girls can be messy, there is really little mess to clean up or to get on clothes, fingers, the floor, etc. When we break out the full paints, it seems that a cup of water almost always spills on to the table or floor and it requires closer supervision to make sure we don’t get paint on my floor or furniture or their clothes.
The Kwik Stix paint sticks are much more simple to use for quick craft projects as the clean-up is so fast – just screw on the lid when you are done and keep them in their box, a container or plastic bag. When I have easy-to-use materials like this, it makes me more willing to do craft projects with my kids as I know it won’t create a big mess & clean-up is a breeze!
Our whole family has had fun creating art & craft projects with the Kwik Stix, too, as it just makes coloring go so much faster – instead of using markers, you can use the Kwik Stix to spread the paint over a larger area much quicker. And you can really fill in all the white spots, so the colors turn out very bright & vibrant. Plus, you can just wipe off the Kwik Stix if you get some paint on your fingers, while markers will stain your fingers right away & take quite a bit of scrubbing to get it out.
All in all, Kwik Stix make for a quick & easy way to paint when creating an art masterpiece or putting together a cute craft project with fast clean-up and little mess! The 90 second dry time is a huge benefit as well so you don’t have to make multiple stops during your project for drying time. Plus, they are so compact to bring on the go so you can create something in a park or at a friend’s house.
Where to Find Kwik Stix:
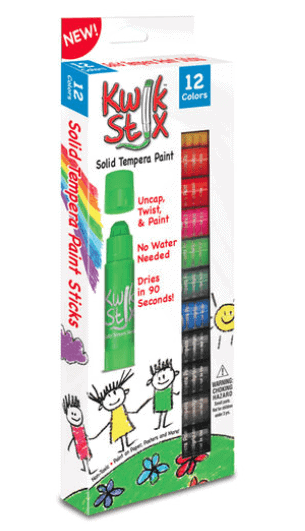
Kwik Stix can be found in a number of locations both in-store and online. The new locations where you can now find Kwik Stix mess-free paints are in Michaels and BJ’s Wholesale stores this fall. BJ’s only has the 24pk of Thin Stix available for $19.99 (normally priced at $24.99). And Michael’s has the 12 pack of Kwik Stix, plus the Neon and Metallix 6 packs of Kwik Stix.
You can find Kwik Stix online at Michaels.com and BJs.com as well. You can also find Kwik Stix at Amazon.com
We’d love to see pictures if you do make a Pencil frame for Back to School ! It’s always fun & inspiring to see different creative ideas that others have.

3 Comments