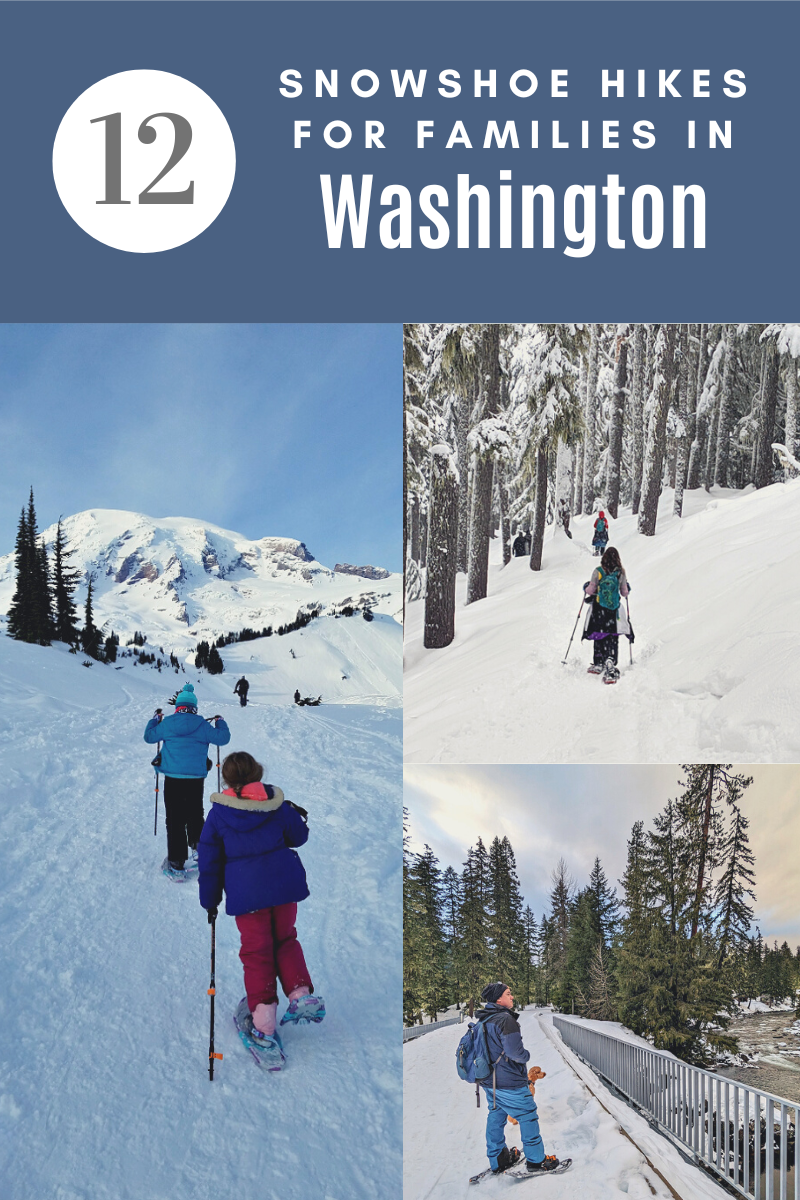
Snowshoeing Near Me – 12 Washington Snowshoe Hikes for Families!
This post may contain affiliate links and I may be compensated for this post. Please read our disclosure policy here.
 12 Snowshoe Hikes in Washington
 12 Snowshoe Hikes in Washington
My all-time favorite activity in the winter is snowshoeing – there is just something about heading out in the stillness of winter and experiencing the beauty of the area when it’s all covered in snow. It’s so peaceful and often so quiet as we don’t run into too many people snowshoeing typically, so you can really take in the full beauty of the mountains or rivers.
We love to snowshoe here in the Pacific Northwest & we have put together our favorite snowshoe hikes – both beginner & intermediate level that are perfect for families. The majority of these snowshoe trails are pretty flat, with a few that have some elevation but nothing more than 1000 ft elevation gain, with the majority under 500 elevation gain. And most of these (with the exception of a few which I noted) are very quiet & you won’t find many crowds, so they are the perfect way to get out & enjoy the beauty of nature in the winter. Heading to the snow in the winter helps me to deal with the rainy season here in the PNW. :)
Sno park permit
For many of these locations, you will need a Sno Park permit. And for select parks, you will also need a special groomed trail sticker as well that you’ll need to pay for. You’ll need a permit from November 1 – April 30th.
- Daily Sno Park pass – $25 – valid for 1,2 or 3 consecutive days
- Seasonal Sno Park Pass – $50 – valid for the whole season
- Seasonal Special Groomed Pass – $70 – valid for the whole season & is to be paired with the regular sno park pass
Check out the list of parks here to see if you need a regular sno park pass or if you also need a special groomed trail pass!
If you get to the park & realize you need a sno park pass, you can even buy it online & write the pass info on a piece of paper & put it in your dashboard until you receive the snopark pass, that’s what we did & it worked out.
Things to Know When Snowshoeing:
- Always check the Avalanche forecast before you head out for a trip in the snow – the Northwest Avalanche Center is the best resource. And check the trip reports, if you can find any on the WTA (Washington Trails Association) or AllTrails sites.
- If possible, check in with the local Ranger station when you arrive to find out about any current avalanche dangers (this is especially helpful for the National Parks like Mount Rainier & Hurricane Ridge)
- Make sure to always carry the 10 essentials with you on any hike or snowshoe hike, etc. You never know when you might end up stranded or have an emergency & need those items.
- Make sure to download the trail information to your phone (so you don’t need wifi) from WTA or AllTrails or take screenshots of the trail details so you can reference it if you need directions on the trail
- Always take a photo of the map at the trailhead (if there is one) – they are typically the best maps & if you have trouble finding the route or location, you can easily reference this
12 Snowshoe Hikes in Washington:
Beginner Hikes:
Gold Creek Pond – Snoqualmie Pass
Location: Snoqualmie Pass
Miles: 2.8 miles around the lake
Elevation Gain: 10 ft
Pass Needed: Sno Park pass
Parking: park along Forest Road 4832 & you’ll need to hike the .3 mile road to the turnoff to the Gold Creek Pond parking area (which is not plowed in winter, so you’ll need to hike to the parking lot & then hike around the lake
Restrooms: Port-a-potties
Pet Friendly: yes
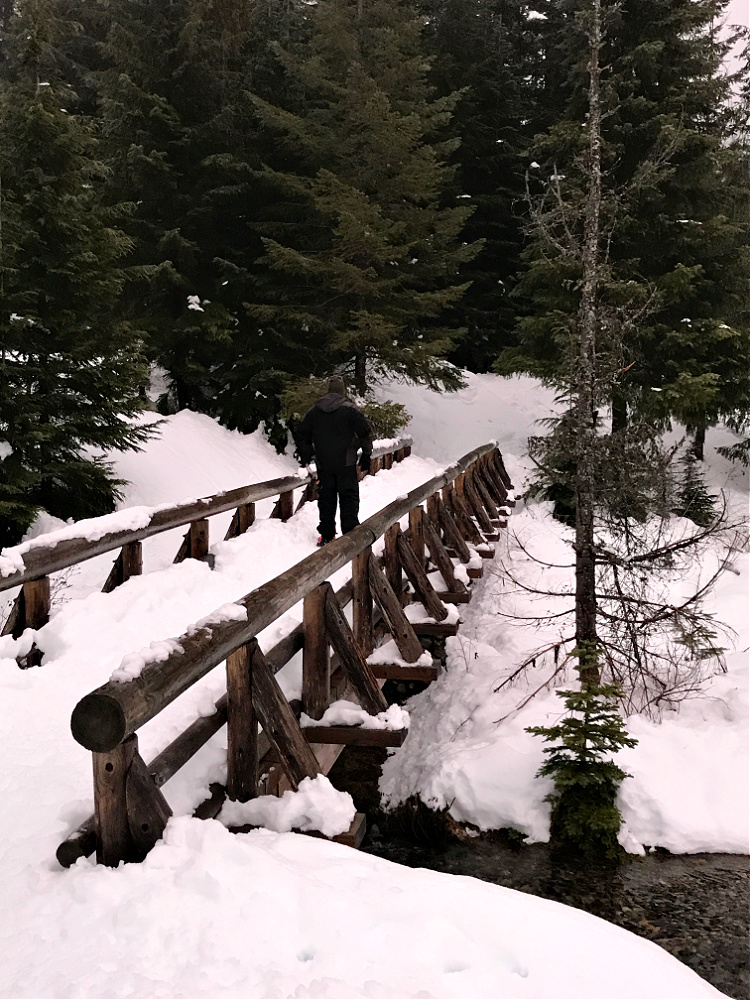
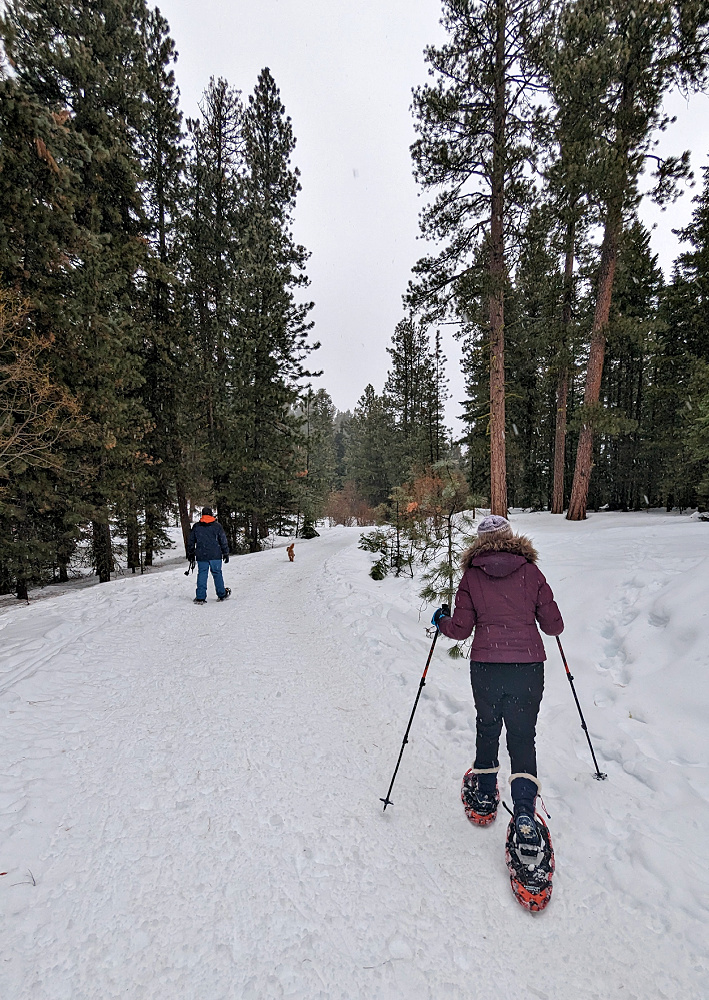
Gold Creek Pond is one of the most popular places to start your snowshoe adventure as it’s an easy, flat hike & gorgeous location up at Snoqualmie Pass. The only major negative is that everyone knows about it & many people flock to come play in the snow and walk the lake. Typically, it is quite packed down if it’s a busy weekend, that you may not need snowshoes, but it’s a great place to try them out & I always like having them for any deep pockets.
If you can come here early on a weekday or later in the day (or even a night snowshoe hike), this destination is SO worth it! It is surrounded by mountain peaks and so beautiful by the lake. You’ll encounter some small bridges, but it’s all flat & so easy to hike thru. The main issue with this hike is because of the popularity, it may be difficult to find a spot along the forest road to park, so you’ll need to time that correctly. {and be prepared for this road to be icy/snowy & difficult to drive in, so you will want to have chains/4WD, etc}.
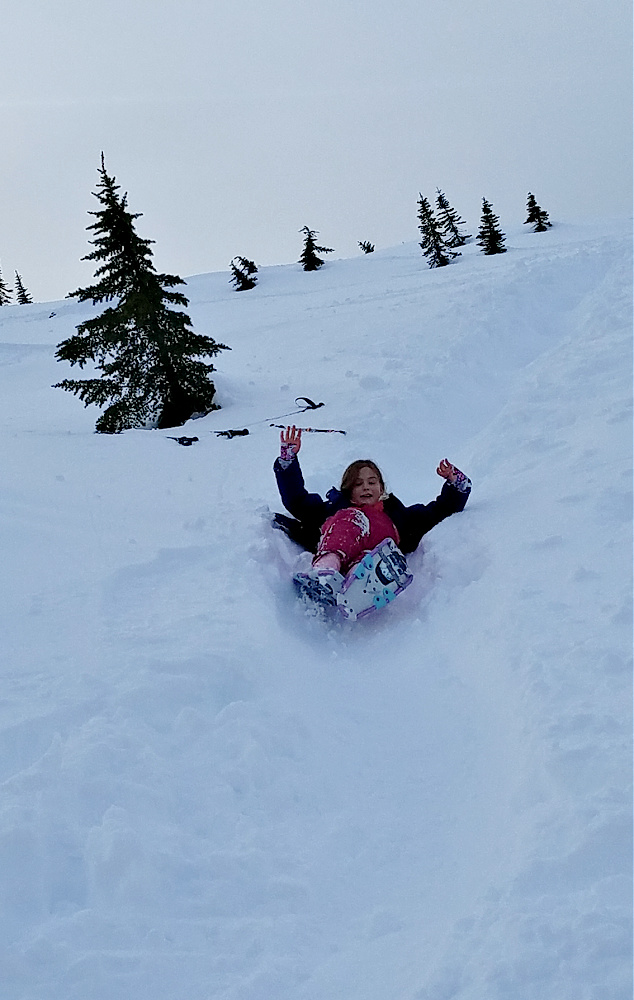
It’s also a great snowshoe hike to do first & then bring your sleds in the car & drive across the freeway over to Hyak sno-park & go sledding! (Another popular place, though, so there may be large crowds there, too, when they have to close down the parking due to no space. Late afternoon is best) Or head to Snoqualmie tubing area! You can find information for both sledding & tubing on our top places to go sledding or tubing in Washington post.
Cabin Creek Sno Park – Snoqualmie Pass
Location: Snoqualmie Pass
Miles: 2.4 miles round trip
Elevation Gain: (not sure of elevation gain, but it’s minimal – there is a spur trail if you want to take in a little view with about 200 elev gain)
Pass Needed: Sno Park pass with the special Groomed trail pass
Parking: there are 2 sno park lots, you will want to park in the 2nd/far Cabin Creek sno-park lot
Restrooms: Port-a-potties
Pet Friendly: yes
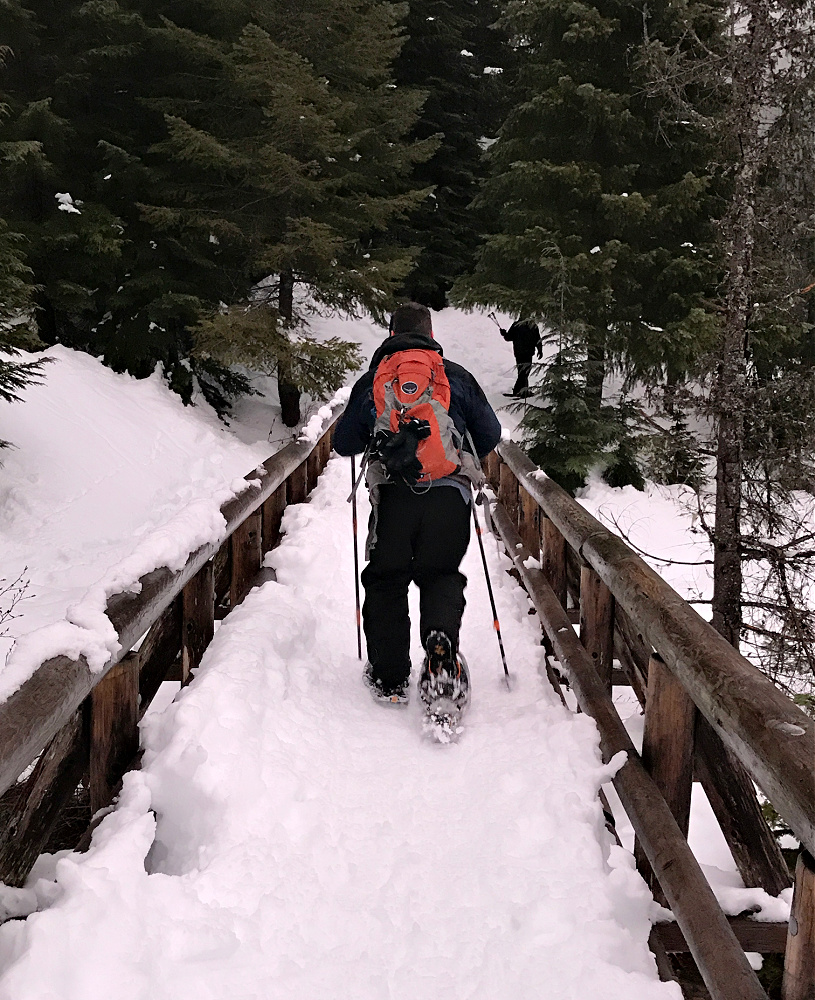
Cabin Creek is a very popular groomed sno-park for cross-country skiing & snowshoeing. This means that you will need the specific groomed sno-park pass (which is a bit more than the regular sno-park pass). The main sno park, though, is primarily for cross-country skiers & can have varied difficulty levels & elevation gains. This main groomed sno park you will park on the south side of I90 & then cross the overpass to the north side of I90 to get to the main Cabin Creek sno-parks. If you are going snowshoeing on the north trails, please make sure to only stay to the right of the trails as these are primarily used for cross-country skiers.
The better beginner option is the south loop. Make sure to pass the first sno-park parking lot & go to the second/far parking lot. The trail will start at the parking lot in the back. It is around a two mile loop and if you are a snowshoer, you need to stay outside of the groomed trails (to the left or right of the path for cross-country skiers). They do not groom the south lot as often, though, it sounds like maybe several times a month, compared to the regular grooming for the main Cabin Creek sno-park trails.
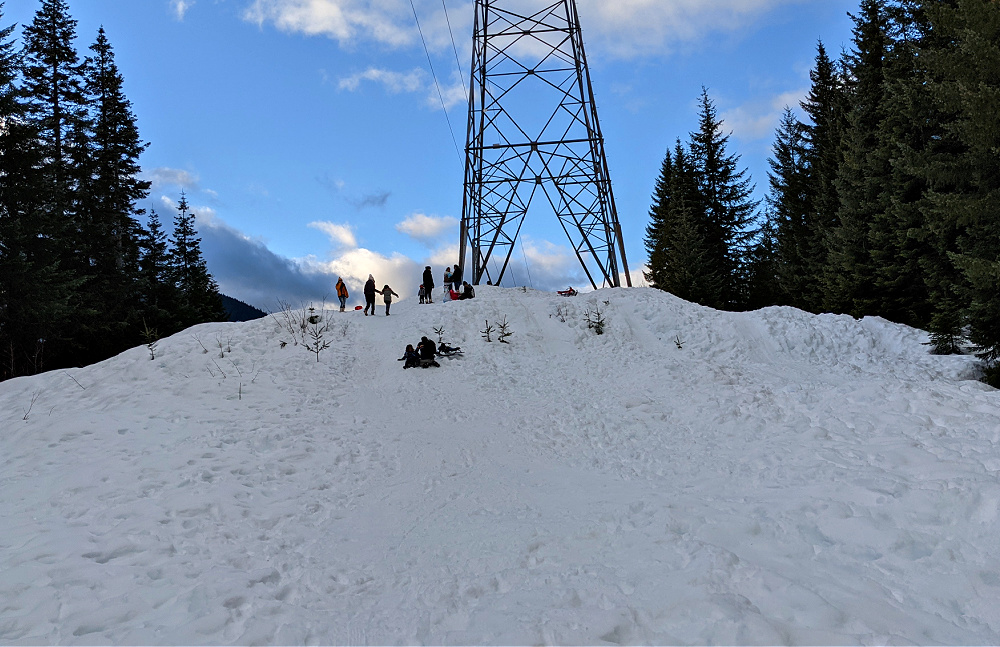
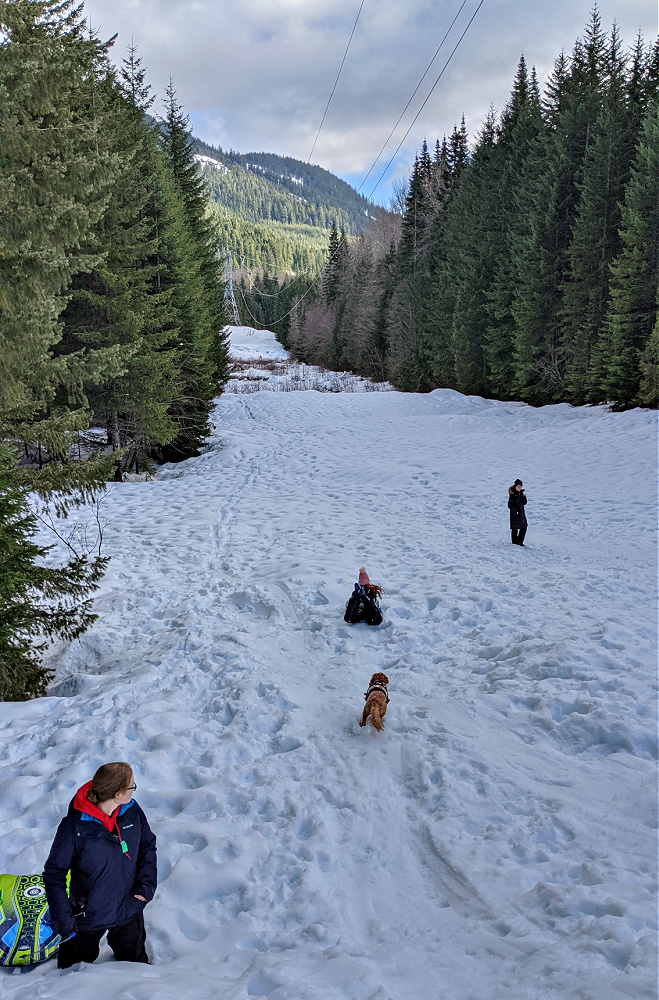
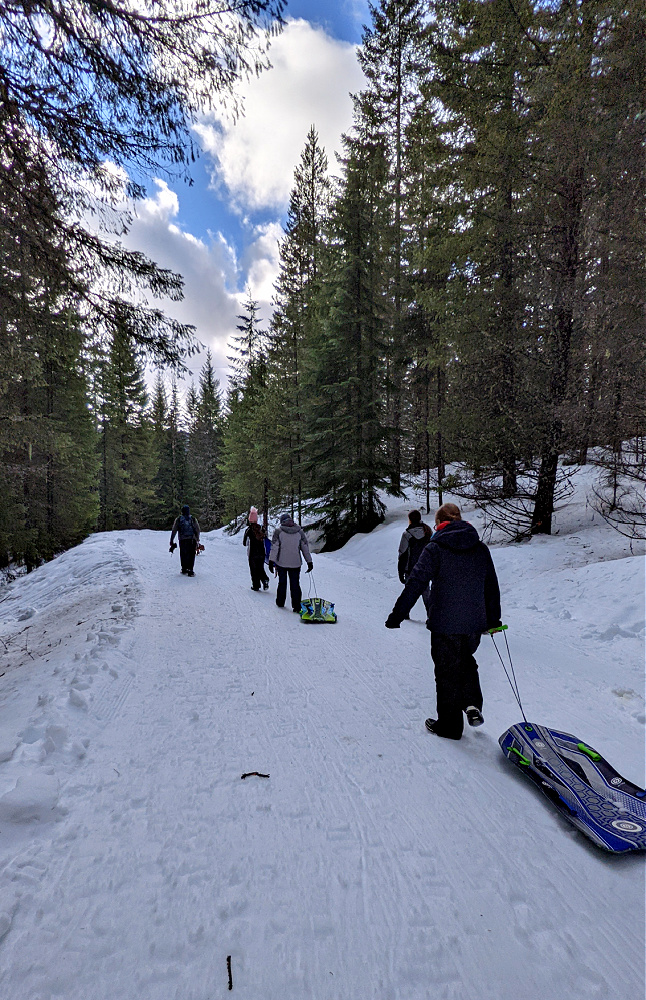
This was a mainly forested loop, so there aren’t any spectacular views, but it was a nice flat loop that we thought was perfect for beginners. You also don’t need to bring snowshoes if you prefer – you could just wear snow boots or microspikes. We actually brought our snowshoes and our sleds & found an awesome little sledding hill under the power lines about halfway thru the loop, which was the perfect break for our kids & pup to enjoy the sledding & then head back to the car. On a day when all the other sno-parks were full, we were thankful for a quieter option.
Lake Easton – Snoqualmie Pass
Location: East of Snoqualmie Pass, off I90
Miles: up to 4 miles
Elevation Gain: 450 ft
Pass Needed: Daily Sno-Park Permit or Seasonal Sno-Park Permit AND Groomed Trail Sticker
Parking: parking available in the day use areas
Restrooms: Yes (heated & with running water)
Pet Friendly: Dogs are not allowed during the winter for snowshoeing/crosscountry skiing
Lake Easton State Park is a great option for snowshoeing for beginner level as it can be less crowded than the very popular Gold Creek Pond. It’s also very quiet and you don’t have to worry about snowmobiles as it’s a non-motorized sno-park. Since it is groomed for cross-country skiing, make sure to follow the rules as a snowshoer & stay off to the side of the groomed trails.
You’ll first go thru the campground (only available in the summer) and then the trail will head out along the river. It’s a mostly forested trail & then eventually meets up with the Palouse to Cascade trail. If you want to keep the hike to 4 miles, turn around when you hit the Palouse to Cascade trail or you can make the trail longer by hiking part of that as well before you turn around to head back to your car.
This snowshoe hike is a nice, relaxed atmosphere as you snowshoe through the campgrounds or along the forested path up above the Yakima river. The only issue with this location is that there does need to be enough snow as Lake Easton does get less snow than the hikes right up close to Snoqualmie Pass like Gold Creek Pond (right at the pass) & Cabin Creek (a little past the pass). It’s just a bit further down the mountain from Cabin Creek sno-park.
If you are new to snowshoeing, Lake Easton does offer guided snowshoe hikes which would be a great way to learn how it all works! This winter, they are offering guided snowshoe hikes on select Saturdays & Sundays with 11am or 1pm departures. The 90 minute guided hikes will be up to around 2 miles long, listed as moderate terrain and family-friendly & great for beginners. They will share info about how to snowshoe, safety information as well as natural history of the area. These groups are small with a max of 10 people. They do require reservations but if they don’t fill up, you can arrive & check to see if there are openings.
Nisqually Vista Loop – Paradise, Mount Rainier
Location: Paradise Visitor Center, Mount Rainier National Park
Miles: 1.1 miles
Elevation Gain: 200 ft
Pass Needed: National Park Pass
Parking: Park in the lower Paradise Visitor Center parking lot. If no room, there is another larger parking lot at the Visitor Center about 300 yds further up the mountain
Restrooms: There are bathrooms with running water at the main visitor center lot
Pet Friendly: No pets allowed in the National Park
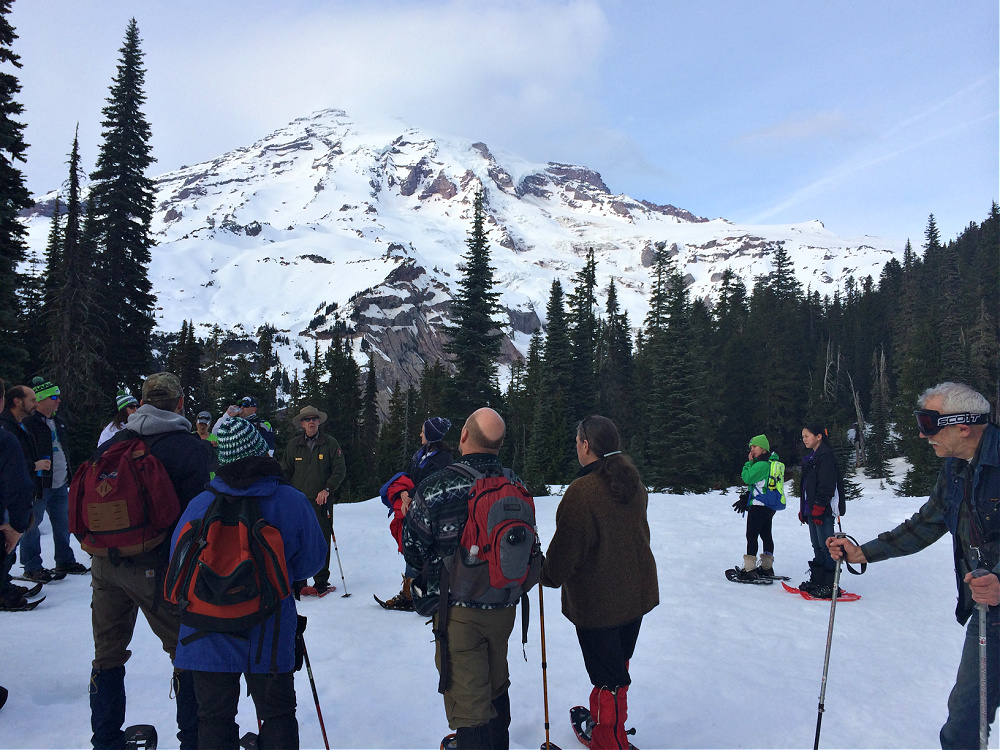
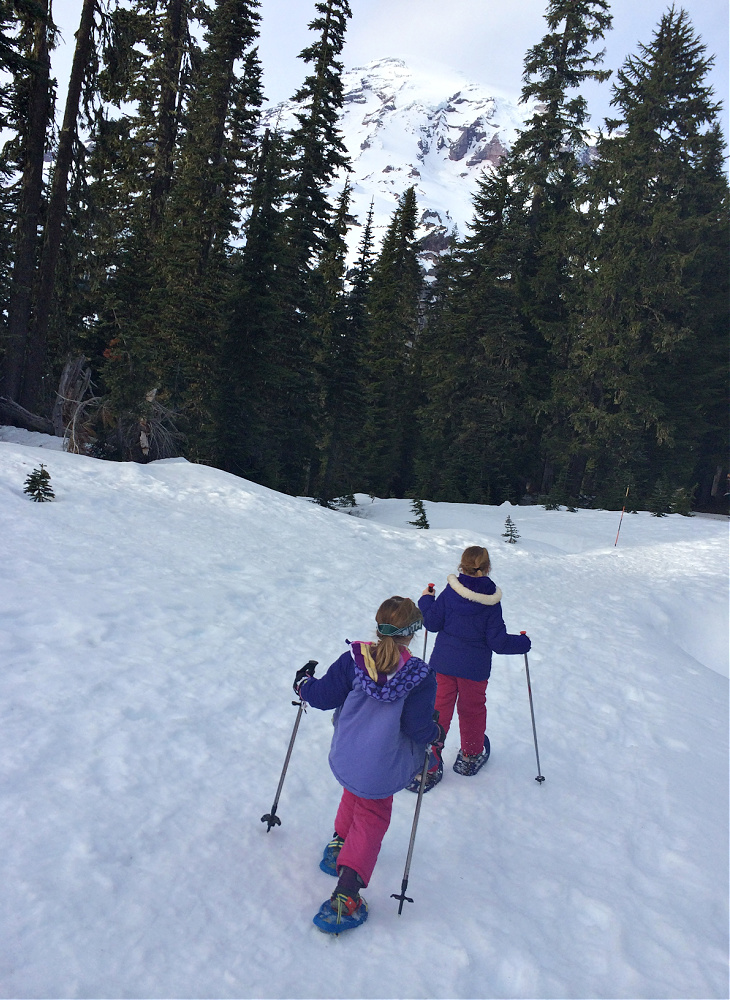
The Nisqually Vista Loop at Paradise in Mount Rainier is the perfect starter snowshoe hike if this is your first time snowshoeing. In fact, they often led guided ranger snowshoe hikes on this trail as it’s such a great place to learn. (It looks like they now meet at the Jackson Visitor Center, so it sounds like they may head a different direction for their guided snowshoe hikes at Mount Rainier now)
The trail is flat & easy to snowshoe and the reward is beautiful views of Mount Rainier when you get to the Vista and along the way! Definitely worthwhile on a beautiful day & even if it’s cloudy, it’s still a nice, easy snowshoe hike to start with for beginners. Perfect for little ones too – I think this is the very first snowshoe trail we ever did with our girls. We had wanted to do the ranger guided hike, but one of our girls was just a little too young, so we basically just followed along with their hike & then did our own thing, but it was the perfect hike for our girls for their first snowshoe trail.
Myrtle Falls – Paradise, Mount Rainier

Location: Paradise Visitor Center, Mount Rainier National Park
Miles: .8 miles
Elevation Gain: 185 feet
Pass Needed: National Park Pass
Parking: Park in the main Paradise Visitor Center lot (if that is full, you can look in the lower lot as well)
Restrooms: There are bathrooms next to the main visitor center lot
Pet Friendly: No pets allowed in the National Park
The trail to Myrtle Falls is one of my favorites to take people on when we head to Mount Rainier for snowshoeing. It just really has the big “wow” factor of the beauty of Mount Rainier & the surrounding mountains in the winter. For me, this trail (& beyond if you continue past Myrtle Falls on the Skyline Trail) has stunning views almost the whole way of Mount Rainier (especially when you get close to the falls), you’ll pass next to Paradise Inn (all snowed in) & panoramic views of the Tatoosh mountains behind you, too! It’s a very easy snowshoe hike as well, but those views are just stunners!
We have taken brand-new snowshoers (exchange students & friends over the years) & this trail is a hit every time! Even if the mountain may be hiding in the clouds when you start, keep looking as it often will come out even for just a few minutes, so you have to be watching at all times as those glimpses of all its glory could be so quick! But so worth it!
{Look for these little areas in the snow where people may have carved out some sledding hills – they are so fast to go down just in your clothes! ;) }
This trail will take you to a little turn off to the right for the falls, but you will want to make sure you feel comfortable going down that slope as it can be icy & slippery. Often, we will just do this trail for the views of the mountain & the Tatoosh mountains, but not actually go down to Myrtle Falls if we determine the trail is too slippery.
One other note – there is a bridge over the creek above the falls & this should be marked with flags by rangers but be very careful walking in this area, so that you stay on the marked path which is the snow on top of the bridge (& don’t wander off the path in that area since there is water flowing under the snow. (There should be signs & info about this, but just wanted to give you the heads up that it’s important to stay on trail especially in this area)
Salmon La Sac Sno Park
Location: Salmon La Sac (Cle Elum / Roslyn)
Miles: 4-5 miles
Elevation Gain: 500 ft
Pass Needed: Daily or seasonal Sno Park permit (non motorized)
Parking: There is a very large lot for the Salmon La Sac sno park but be prepared for it to be quite snowy to drive into
Restrooms: Yes
Pet Friendly: Yes
The Salmon La Sac sno park is quite busy with snowmobilers so it’s a large parking lot and almost all of the people we saw were snowmobilers parked alongside the road & in the parking lot. That’s because there are over 38 miles of snowmobile trails starting from this point, but there are also 4-5 miles of snowshoe / crosscountry trails as well.
The parking lot is a little harder to get into as it wasn’t plowed as well as the road, so just keep that in mind that you will want to make sure you have AWD/4WD or chains/traction tires. But there was also parking alongside the road as well. From the parking lot, you will walk back out to the road & head to the right away from the road & follow the signs for the snowshoe trail. It’s a short trail to take you first to the Cayuse Horse camp. We had fun exploring around the horse camp for a bit, before we continued on the trail.
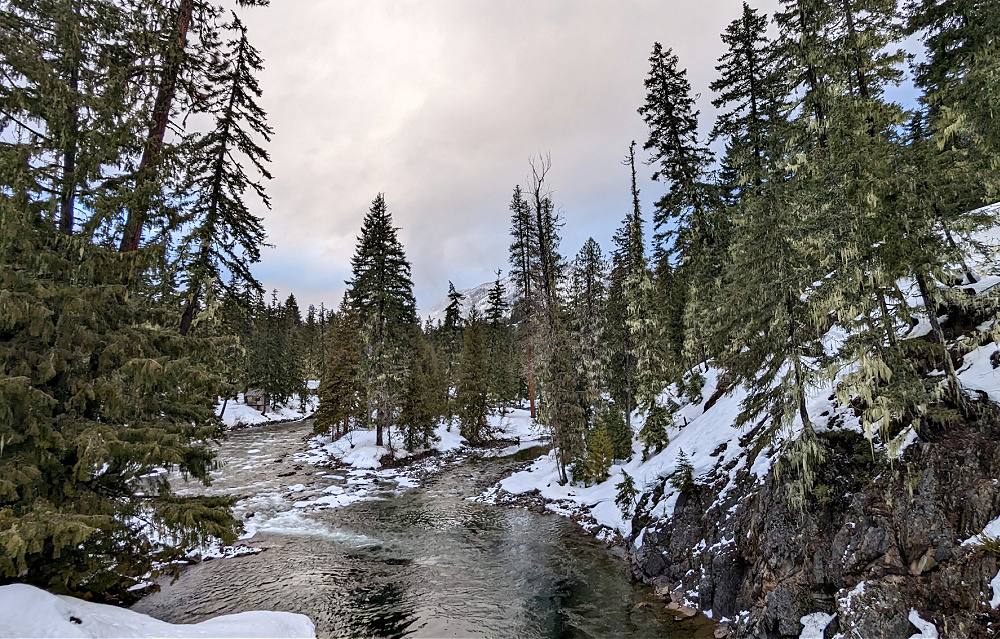
Once you leave the horse camp, you’ll meet back up with the road (that is closed to vehicles) but this is open to snowmobilers. This is where you will want to be very cautious, especially with dogs & kids & keep an eye out for snowmobilers who may come thru this area quickly. Just stay to the side of the road during this small section & then you’ll cross the road & cross the bridge across the Cle Elum river. Once you’re over the river, this is where all of the snowshoe trails will be located – in between the Cle Elum & Cooper rivers.
Once you get to the river, the trail really is so gorgeous as you have the towering mountains from the central Cascades (you are close to Snoqualmie pass area over some of the mtns) & you’ll see the crystal blue river along with the mountains which is so beautiful & so pretty to listen to. This was such an interesting trail with the unique views along the way & great exploring for my girls. We even found some sledding spots near the horse camp as my daughter brought our sled with her. Definitely a trail we want to come back & explore more as we only made it a few miles, so we’re hoping to explore more along the riverbank the next time we visit there.
Wenatchee Crest Trail (Blewett Pass)
Location: Blewett Pass
Miles: up to 6 miles
Elevation Gain: 400 ft
Pass Needed: WA Daily or Seasonal Sno Park Permit (non-motorized)
Parking: There is a small parking lot on the trail side & across the highway is a much bigger lot
Restrooms: None
Pet Friendly: Pets allowed
The Wenatchee Crest Trail at Blewett Pass is a beautiful & fairly easy trail to try on a pretty day as you will have a beautiful view from the ridgeline of the mountains & valley below. We happened to visit on quite the cloudy day, but we still really enjoyed this trail as it was a slow elevation gain and a mix of terrain, to make it interesting for us as we were hiking along.
The hike is 6 miles total, but you could do as much or as little of that as you’d like. We got a late start as we had a college visit at Central Washington University earlier in the day, so we just had a few hours at the end of the day to snowshoe & it was the perfect location to do just a few miles out to the ridgeline & back. It was just 35 minutes to the trail from Ellensburg, so it’s not too far away either, especially if you are en route to somewhere in central or eastern Washington or staying in Ellensburg, Cle Elum or Leavenworth/Wenatchee areas.
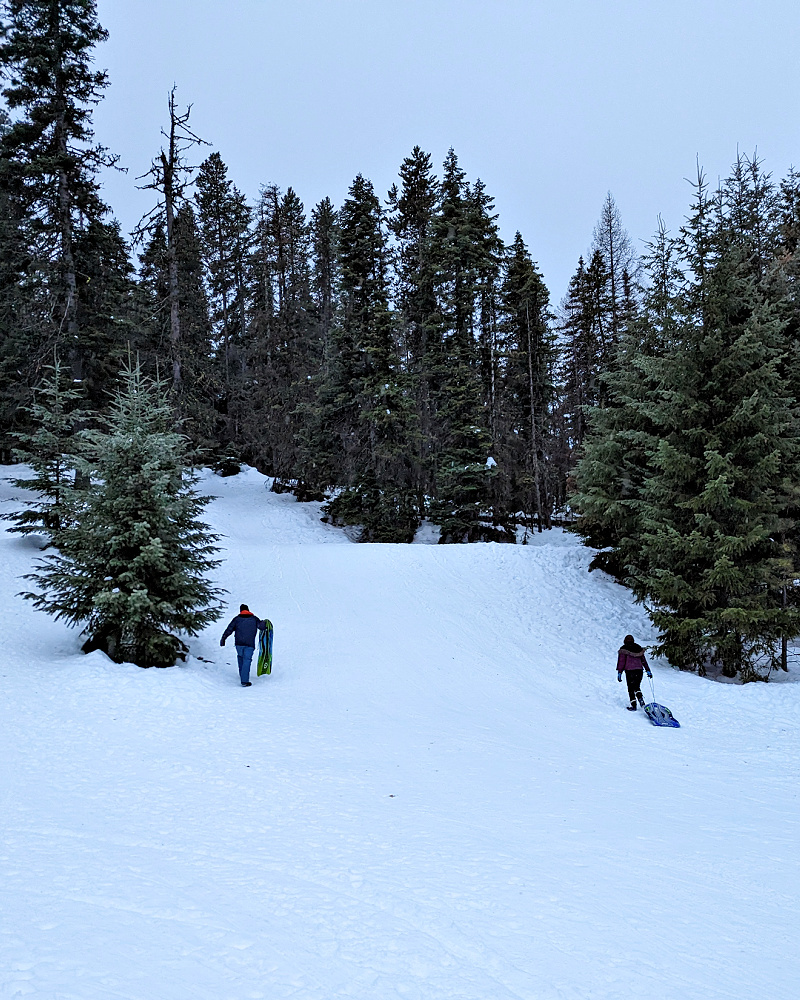
This trail actually starts right at the top of Blewett Pass – you’ll see 2 parking lots on either side of the highway at the pass. The actual parking lot for this hike is quite small (the north side), so you may need to park across the highway in the larger snowmobiling park lot. So, just be prepared that it could be busy on weekends if there are a lot of snowmobilers around. {Bonus to parking on this side – we loved the hill on the right side of the parking lot for sledding – after we came back from a few hours of snowshoeing, we brought out our sleds & enjoyed some runs all to ourselves along the side of the parking lot (don’t worry – it’s well away from the snowmobilers & far back from the highway)
When we went in early February, we really didn’t need snowshoes as my daughter decided she preferred to walk part of the way & carry her snowshoes, which was no problem. It will just depend on the snowfall, though. But overall, this was a nice, quiet snowshoe hike & we went thru forested areas as well as along the ridgeline where you’ll get more the expansive views on a beautiful day. I would love to head back to this trail on a pretty day & see those views from along the trail.
Maintenance Shed Road – White Pass
Location: White Pass
Miles: 7 miles (you can go as far as you’d like, though & then turn back around)
Elevation Gain: 400 ft
Pass Needed: None needed
Parking: Small parking lot at the start of the trail
Restrooms: None
Pet Friendly: Yes
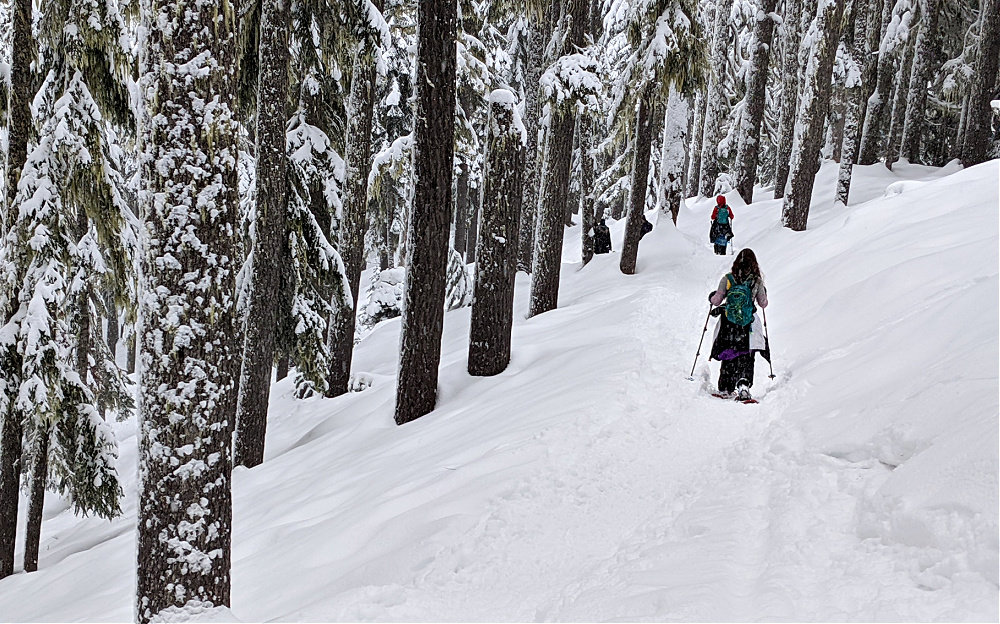
If you’re looking for a quiet & peaceful hike, Maintenance Shed Road trail is the place to go. This is one of the first places we ever went snowshoeing and we barely ran into any other people (this was a few years ago, so it could have changed, but trail reviews sound like its hit or miss with people although is used a bit more than when we went. It’s a very wide trail as it’s a US Forest Service road that’s closed during the winter, so it’s a large gravel road covered in snow. Snowmobiles are not allowed, so you’ll just find snowshoers & cross-country skiers although it’s not groomed. If you continue the entire length of the road, you’ll get to a beautiful viewpoint with views of Chimney Rock, Coyote Ridge, Goat Rocks & Mount Rainier.
If you love to go sledding/tubing, make sure to tow your sleds behind you as you’ll find an amazing HUGE sledding hill about 1/2 mile up the trail. Literally no one there when we went & it was such a long hill. Definitely worth bringing our sleds along behind us!
The parking area is right by the WSDOT snowplow facilities (hence the name of the trail) and then you’ll find the trail up to the east across from the parking lot.
Moderate/Intermediate:
Alta Vista Trail – Mount Rainier (Paradise)
Location: Paradise Visitor Center, Mount Rainier National Park
Miles: 1.8 miles
Elevation Gain: 550 ft
Pass Needed: National Park Pass
Parking: Park in the main Paradise Visitor Center lot (if that is full, you can look in the lower lot as well)
Restrooms: There are bathrooms next to the main visitor center lot
Pet Friendly: No pets allowed in the National Park
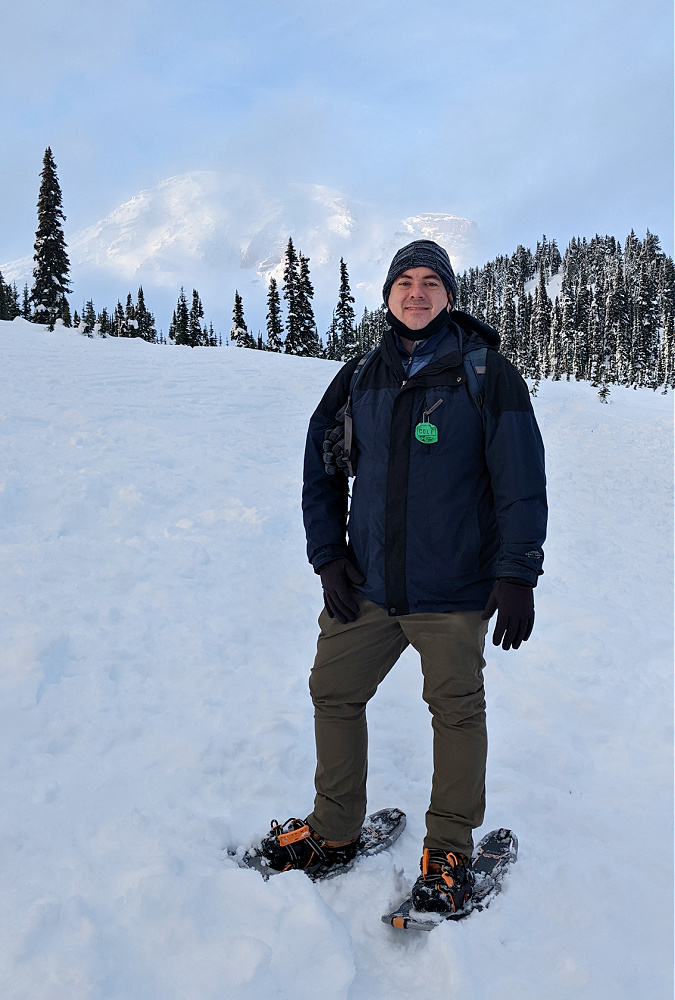
If you’d like more of a challenge but still very doable for families, the Alta Vista trail at Mount Rainier is a great hike to try. I would say it’s on the border of a beginner / intermediate hike – only because you are doing the elevation in snowshoes that I put this. as a moderate trail as it’s a short distance that you are going up 550 ft, so you’ll definitely feel it going up. But it’s so short that it’s doable if you just take breaks if you’re not used to the elevation. The views are outstanding, though, of the mountain!
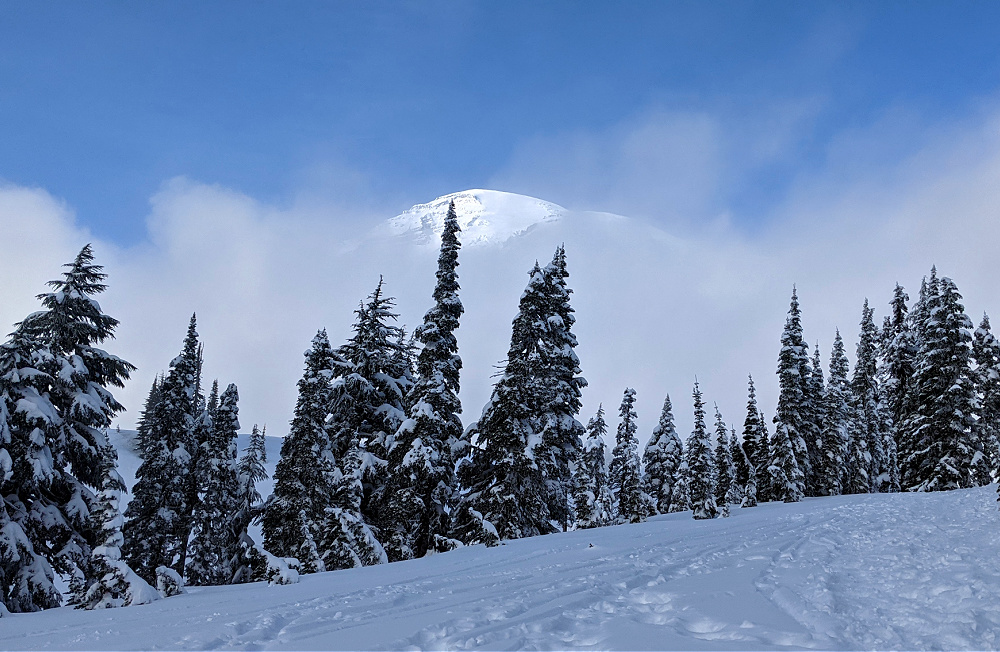
And if the mountain is hiding, just sit down & wait a few minutes. While we ate our snacks, the mountain finally peeked out for maybe 30 seconds to a minute, so quick but we saw it!
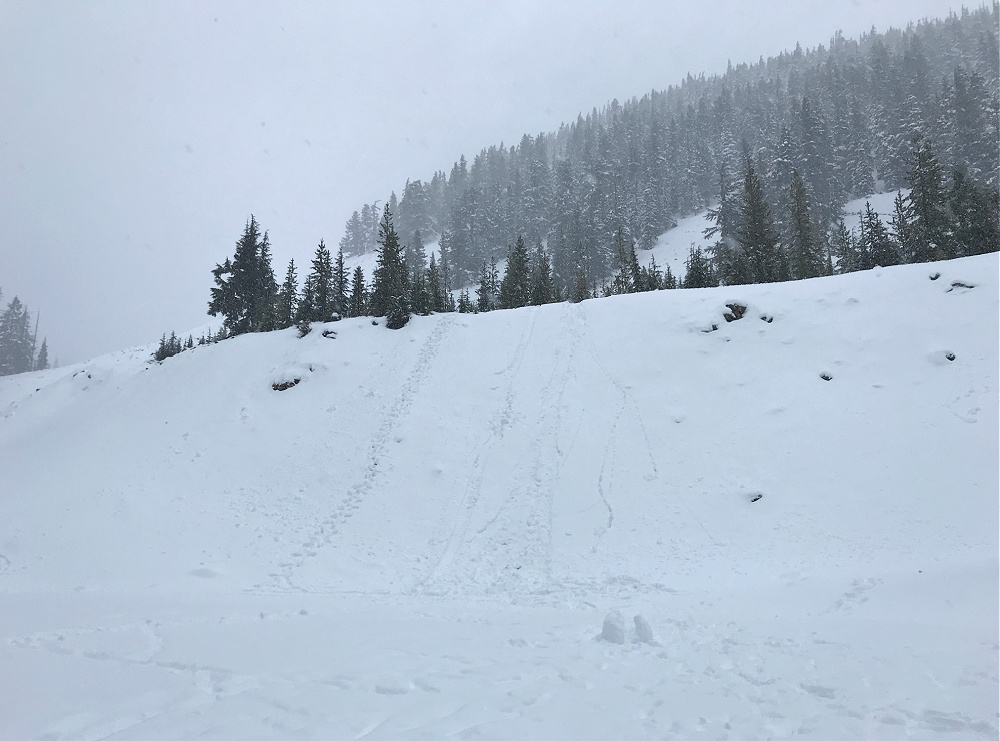
This is definitely a trail that you need to be aware of avalanche risks, though & know the exact pathway you should be taking (it can get confusing when you are on the trail, so take photos of the maps & landmarks, etc) & know which areas are avalanche dangers. Always check in with the rangers at the Ranger station & check NWAC avalanche forecasts, so you know the avalanche risks as that could determine a slightly different route for this trail depending on avalanche danger.
Franklin Falls
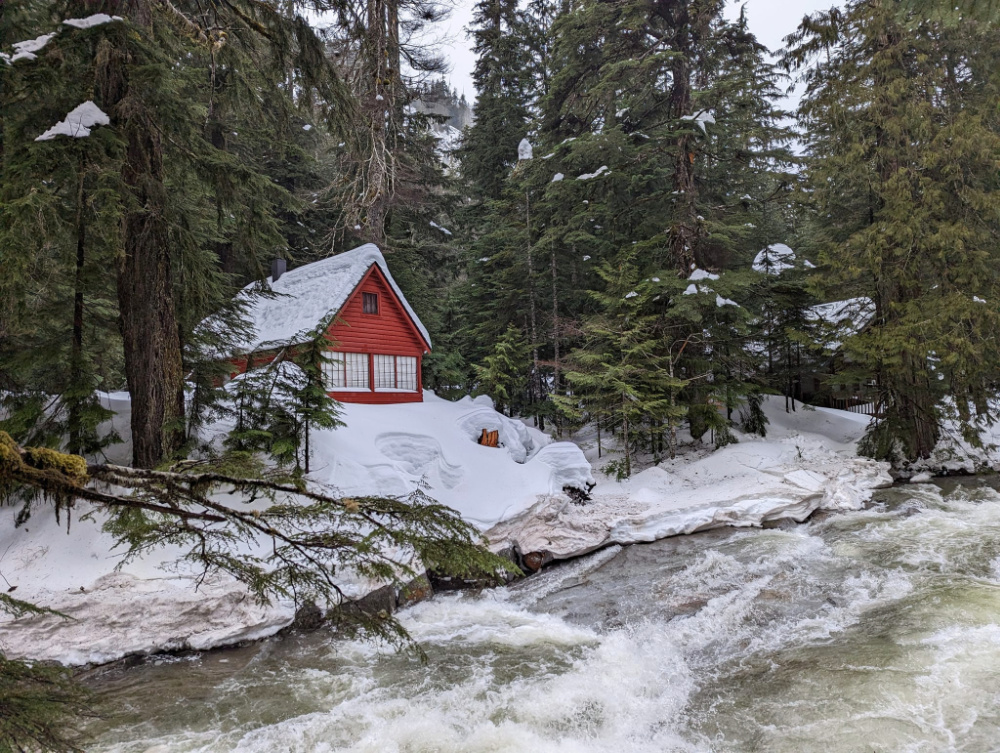
Photo Credit: My friend Heather
Location: Snoqualmie Pass
Miles: could be 4 miles – 8 miles depending on the winter route you take . The main parking lot & road for Franklin Falls is snowed in during the winter, so you’ll add 2 miles if coming down from the Pass & an extra 4 miles if walking along the road from the Denny Creek/Asahel Curtis area.
Elevation Gain: 700 ft (again this could vary depending on the route you take)
Pass Needed: Sno-Park permit is required if you park at the Asahel – Curtis Sno Park parking lot (near Denny Creek)
Parking: Park at the Asahel -Curtis Sno-Park parking lot if accessing via Denny Creek area. If coming from the Pass, take Exit 52 (coming from Seattle, Exit 53 if coming from Ellensburg) & you’ll park at the Summit Ski area parking lot or along the road, but watch carefully for the signs on where you can & can’t park
Restrooms: None during winter
Pet Friendly: Yes but it can be very icy/slippery getting down to the falls to take great caution with dogs
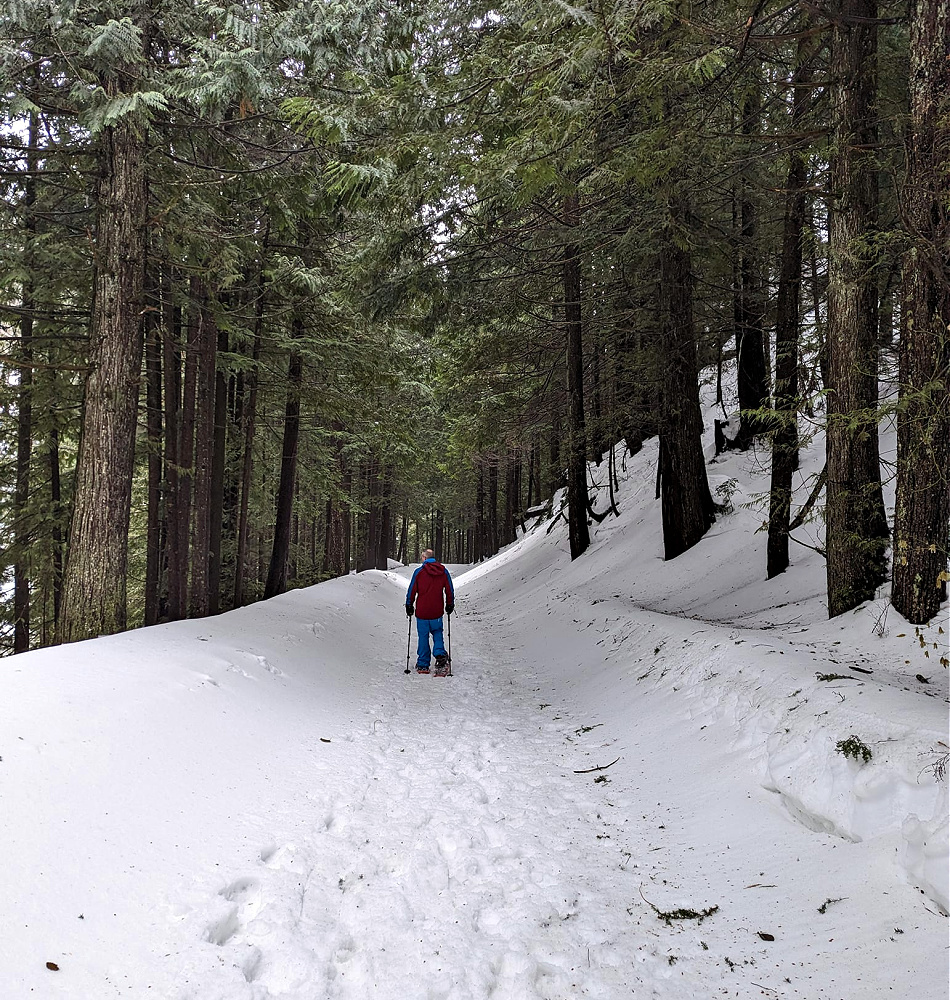
Photo Credit: My friend Heather
This is an absolutely gorgeous hike to the snowy Franklin Falls, but it does require that you have more knowledge of hiking/snowshoeing in winter conditions and that you have done some winter hikes before attempting this one. First of all, there is possible avalanche danger down near Franklin Falls, so you will always want to check avalanche conditions at the NWAC site & read the hike descriptions fully (& reviews) on the WTA & All Trails sites. There was an avalanche right over into the falls a year or two ago, so definitely need to check out that forecast to be prepared.
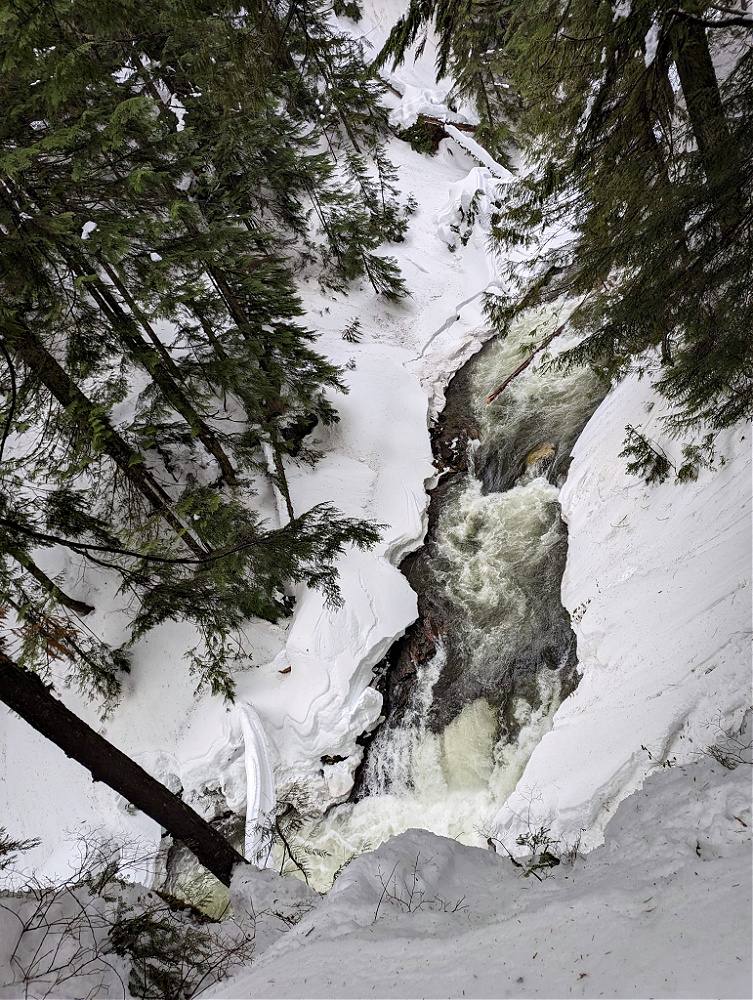
Photo Credit: My friend Heather
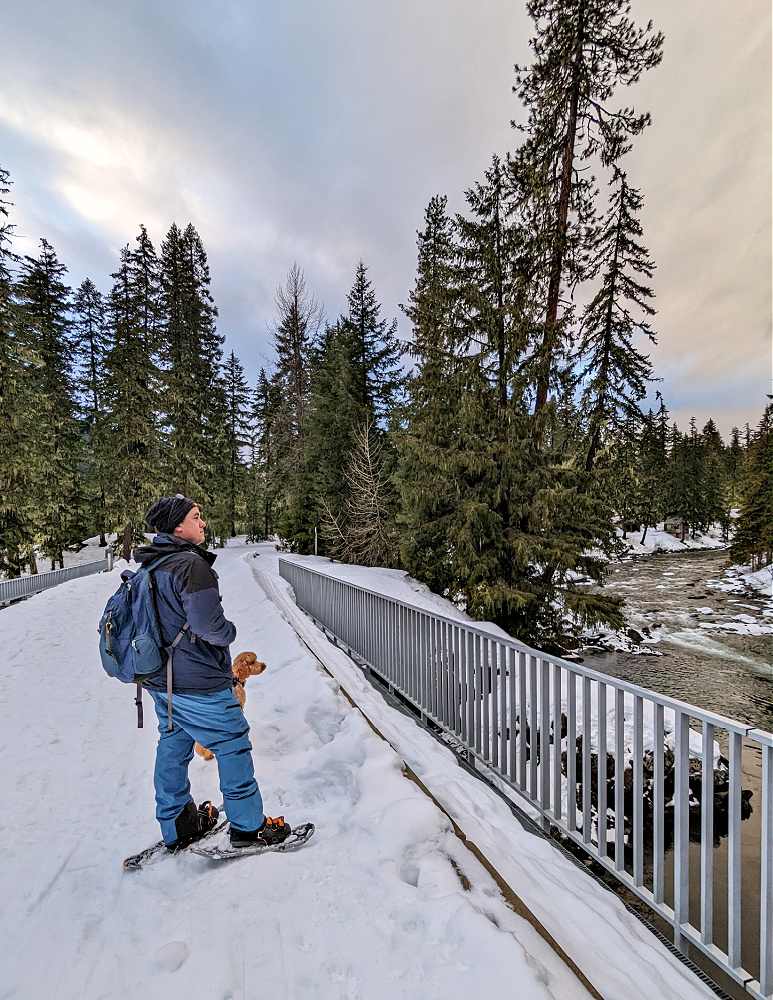
Once you get to the main Franklin Falls trail, the trail runs along the river & is so beautiful high up above the rushing river. My favorite is the little red cabin across the river tucked into the forest – so picturesque! Be careful though as there are spots where it does get close to the edge & it will be slippery. The last part of the trail down to Franklin Falls is slippery any time of year & you really have to take it slow there, but with the snow and/or ice, this could be treacherous.
My friend Heather & her husband checked it out over Christmas break & it was too slippery & icy, so they got all the way there & decided to be smart & not take the last of the trail down to the falls. While they were bummed to miss seeing the falls during winter, it was still a gorgeous hike along the river & they didn’t risk getting hurt trying to get down to the falls. Depending on the conditions, you may want to bring microspikes or YakTraks for your boots (for that section) instead of wearing snowshoes because it is so narrow & icy heading down the final section to Franklin Falls, to give you the most traction compared to the snowshoes.
Hurricane Hill – Hurricane Ridge
Location: Olympic National Park
Miles: 6 miles
Elevation Gain: 826 ft
Pass Needed: National Park Pass
Parking: Park at the Hurricane Ridge Visitor Center
Restrooms: Restrooms with running water at the Visitor Center
Pet Friendly: No pets allowed in the National Park
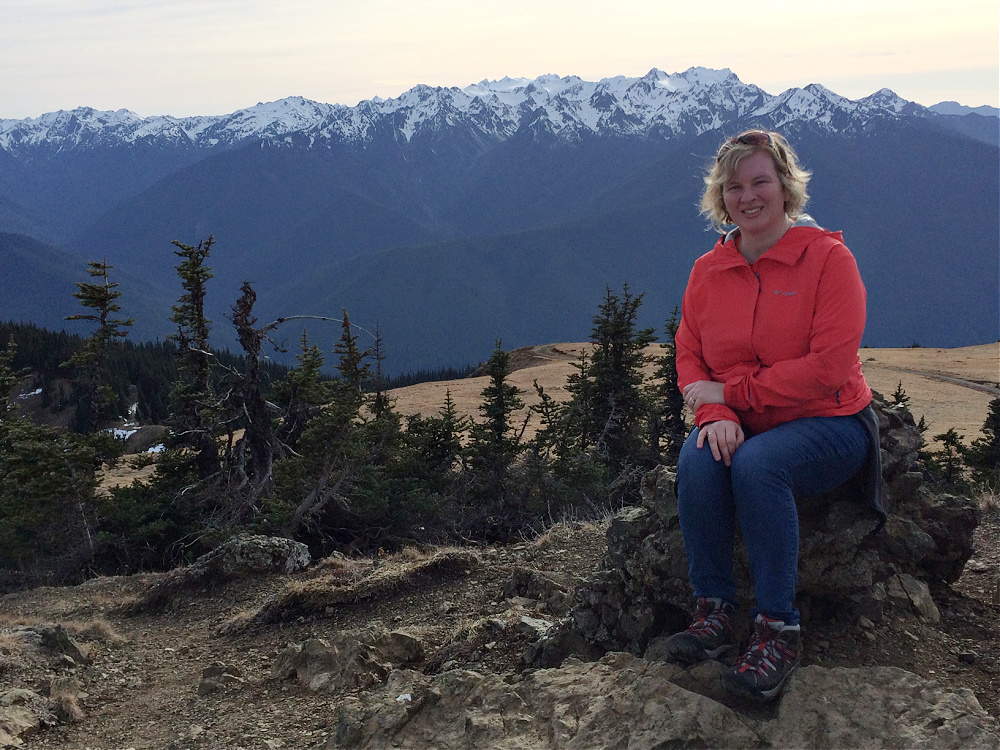
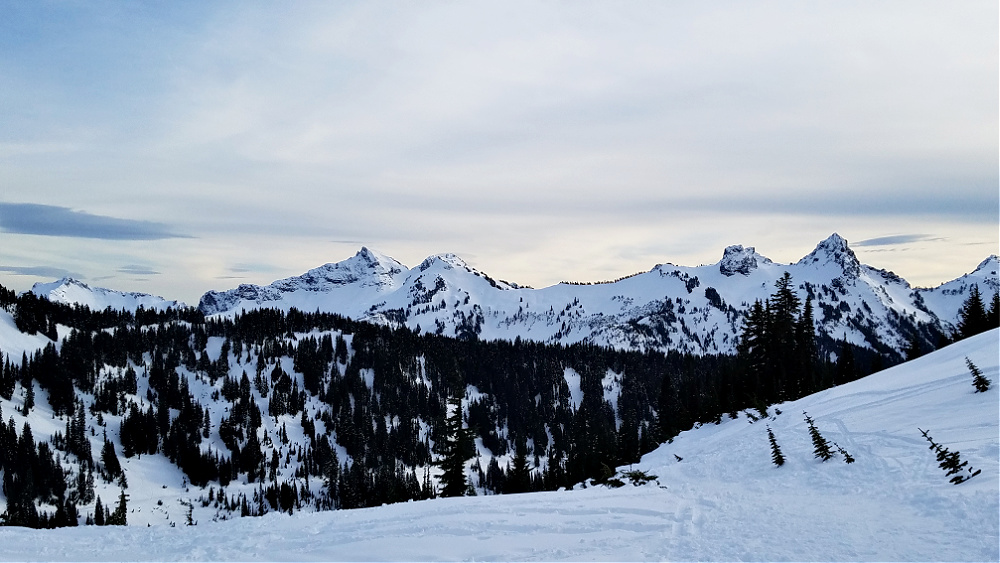
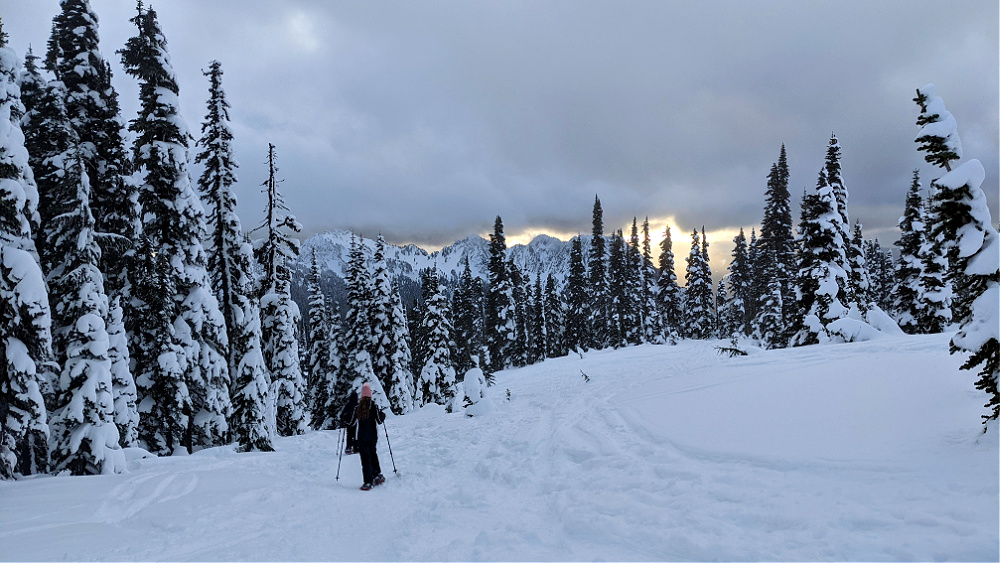
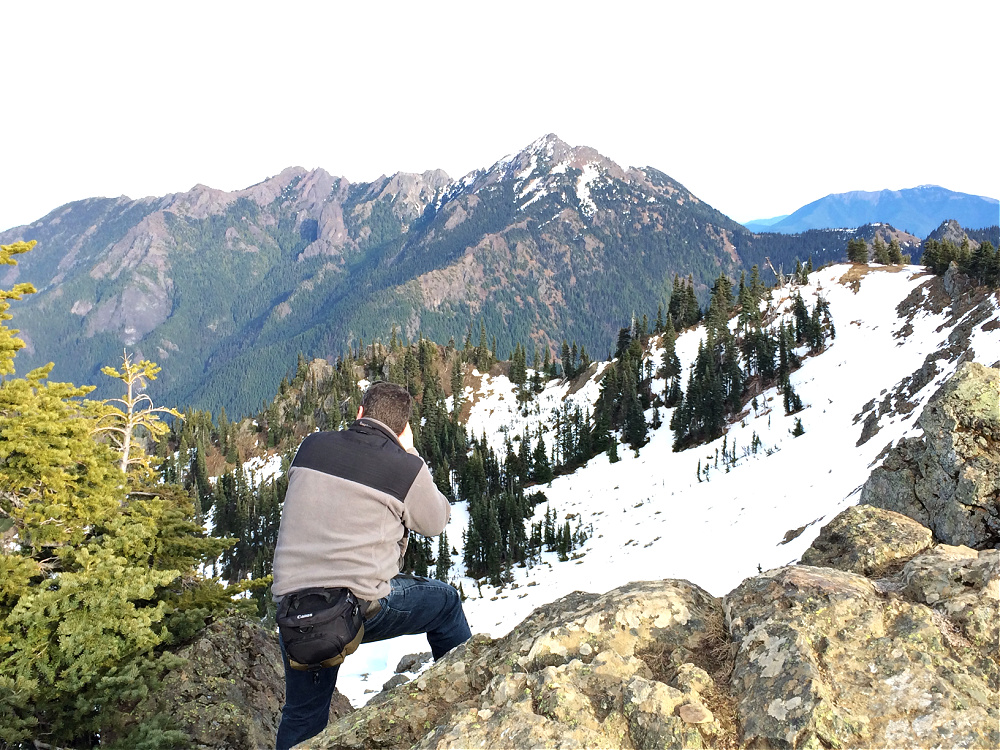
Hurricane Ridge is definitely one of the most beautiful places in the PNW to go snowshoeing due to the incredible panoramic views you’ll find with Hurricane Ridge in all its glory & all of the surrounding mountains & valleys. On a clear bluebird day, there is nothing more gorgeous than those jagged peaks viewed from the Visitor Center. If you’re a beginner snowshoer, just hiking around the lower ridge lines around the Visitor center area will give you so many pretty views to take in & that will give you much less mileage & very little elevation gain.

And if you are looking for more of a challenge, try heading up to Hurricane Hill, where on a clear day, you will have jaw-dropping views of both the Olympics & the Straits of Juan de Fuca with 360 degree panoramas once you reach the top. The hike to Hurricane Hill is the 6 miles & higher elevation gain to get to the top of the hill but the views are worth it, especially if it’s a clear day or if there are cloud breaks.
Just an FYI that there have been a few years where they don’t get nearly as much snow – during our visit to Hurricane Ridge in mid February one year, they actually had so little snow, we just wore hiking boots & no snowshoes (hence the snow in these pictures). So, always check the snow conditions before you go & make sure to check the NWAC Avalanche forecast too.
Make sure to check in with the Hurricane Ridge Visitor Center before you head out on your hike as they do ask that you sign in to let them know you will be hiking/snowshoeing there.
They do also offer ranger-led snowshoe hikes around the meadows of Hurricane Ridge Visitor Center during the winter season – this year they are offering them on Saturdays, but make sure to check out the National Park website for the latest info.
Sand & Deer Lake Trail / White Pass PCT
Location: White Pass (past the Nordic Center trails)
Miles: 5.6 miles
Elevation Gain: 900 ft
Pass Needed: None
Parking: You can park along Highway 12 near FS 498 (we looked for the brown Wenatchee National Forest Service sign as this was the entrance to the Nordic trail we needed to access the trail) or if there’s no parking there, you can park further down in the ski resort or Nordic center lots & walk down to the area you need to access
Restrooms: You’ll want to use the bathrooms at the White Pass Nordic Center or ski lodge
Pet Friendly: Yes
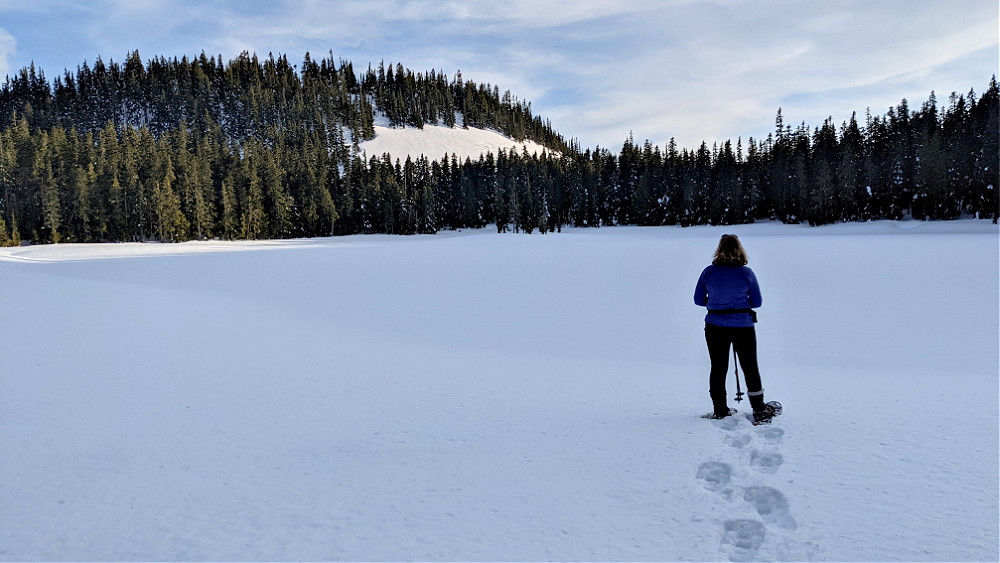
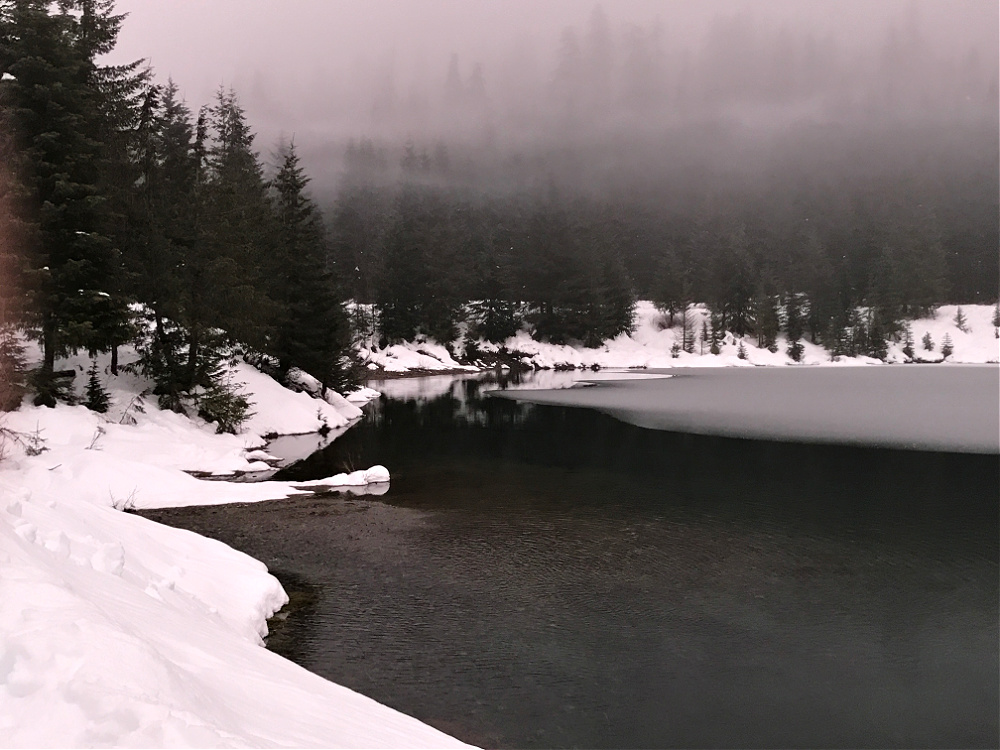
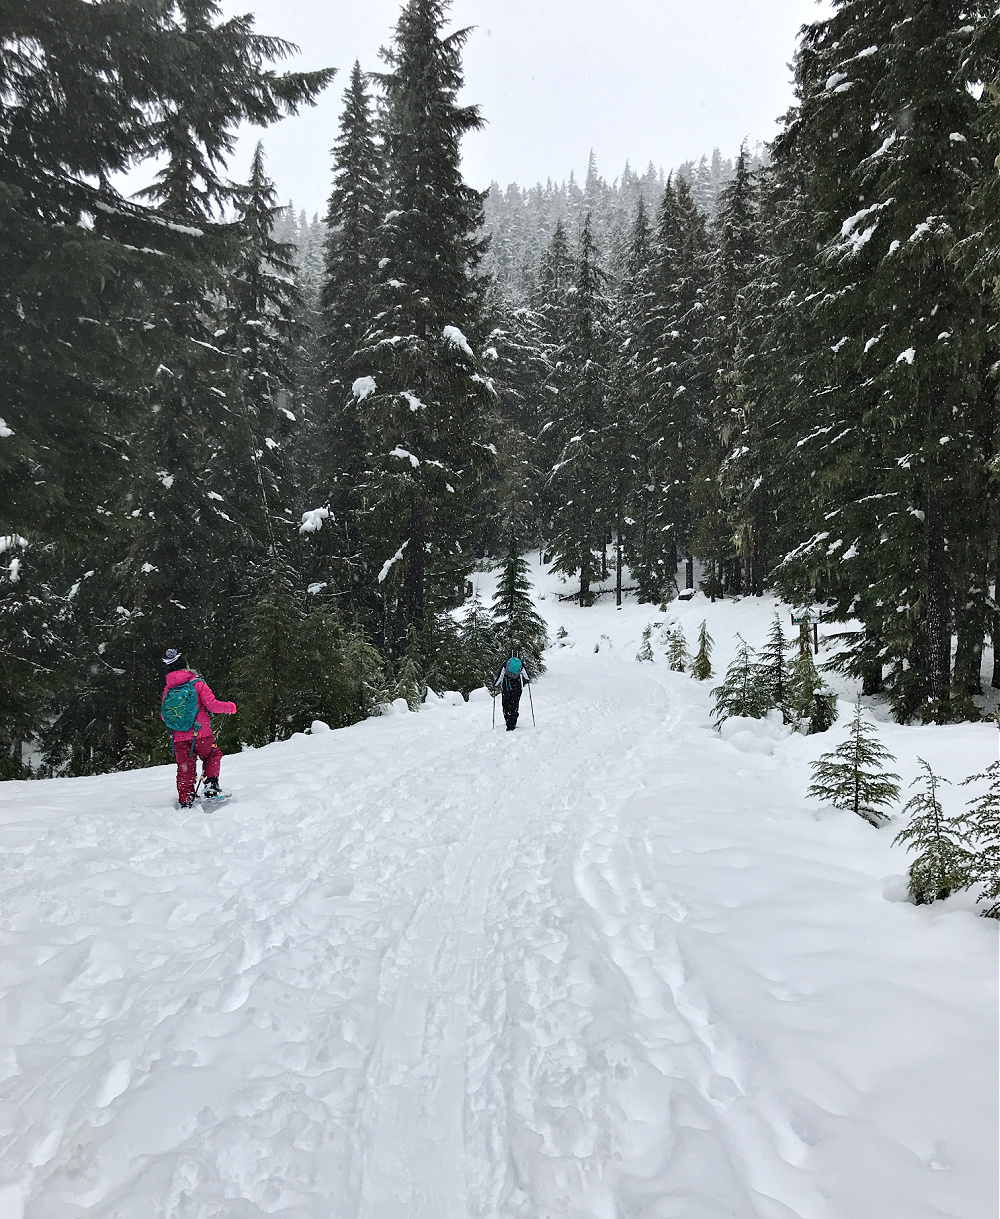
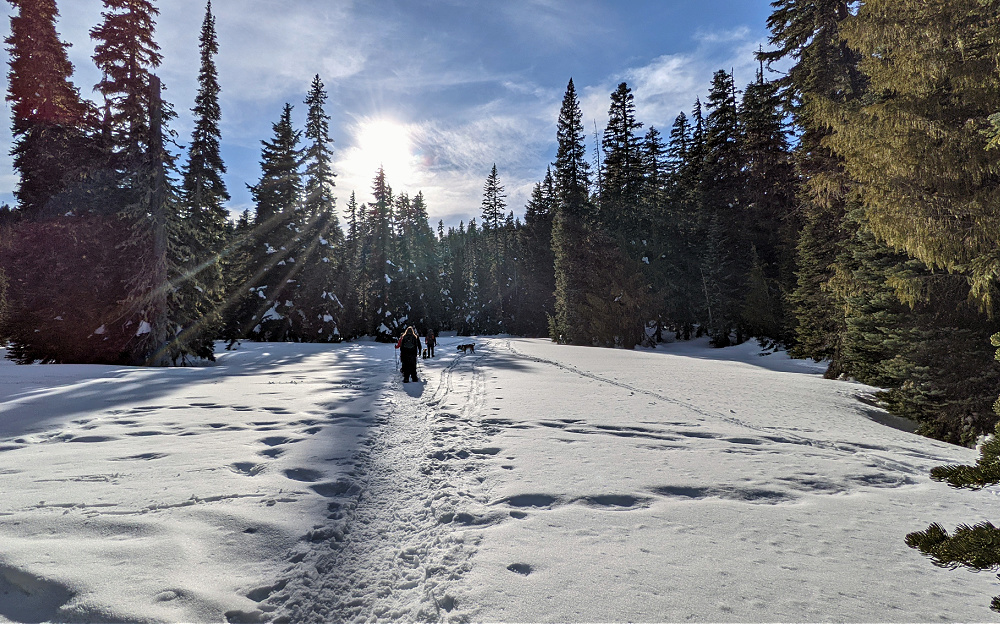
White Pass is definitely the place to go if you want solitude – we have done the Sand & Deer Lake snowshoe trail about 3 – 4 times & only run into maybe 3-4 people the whole afternoon we are there. It’s so peaceful & absolutely beautiful to hike thru the forest covered in so much snow. And it’s so convenient as you are right up there near the ski resort & Nordic center, so you can use their restrooms, warm up with hot cocoa in the lodge when you’re done & then head down to Packwood for a bite to eat when you finish your snowshoe adventure. The only downside is that White Pass is definitely much more of a trek out there for most people, depending on your location. We often meet friends from the Portland area there, though, so it’s a good meeting spot if you’re meeting people from OR.
This trail starts along the Nordic trails, so you will need to stay off to the side of the cross-country groomed trails as you follow the path for a short little bit, following the signs for the PCT (Pacific Crest Trail) trail. You’ll pass by the pretty lake & then once you see the PCT sign, you will cross over the Nordic trails & then start your hike uphill. This is where the solitude will begin & you will be trekking uphill thru the forest. It is a good amount of elevation gain, but I find it to be very doable as it’s not super steep but a gradual climb with slow switchbacks.
Once you make it up to the top, you’ll find these peaceful, pretty meadows & then you’ll find Deer Lake & then Sand Lake. We just went up to Deer Lake, but it was so beautiful up there, one of my favorite snowshoe hikes because of the peace & solitude of the forest & the snow-covered lakes.
More Winter Fun Ideas for the Pacific Northwest
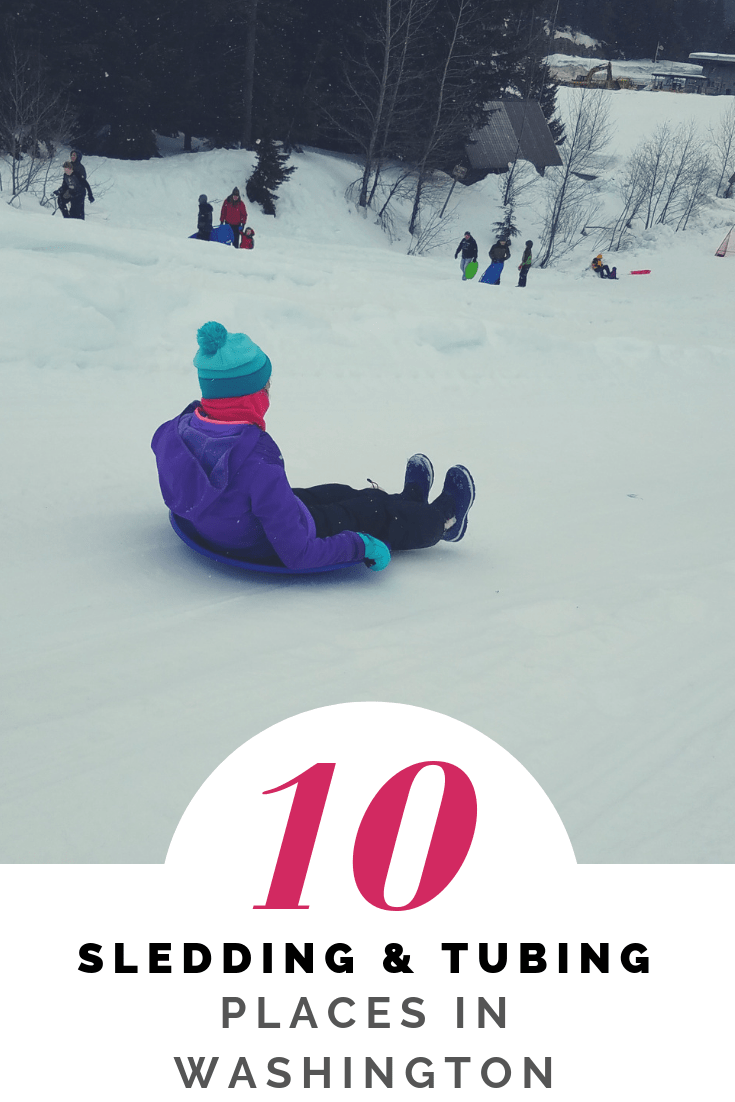
10 Top Areas for Sledding & Tubing in Washington
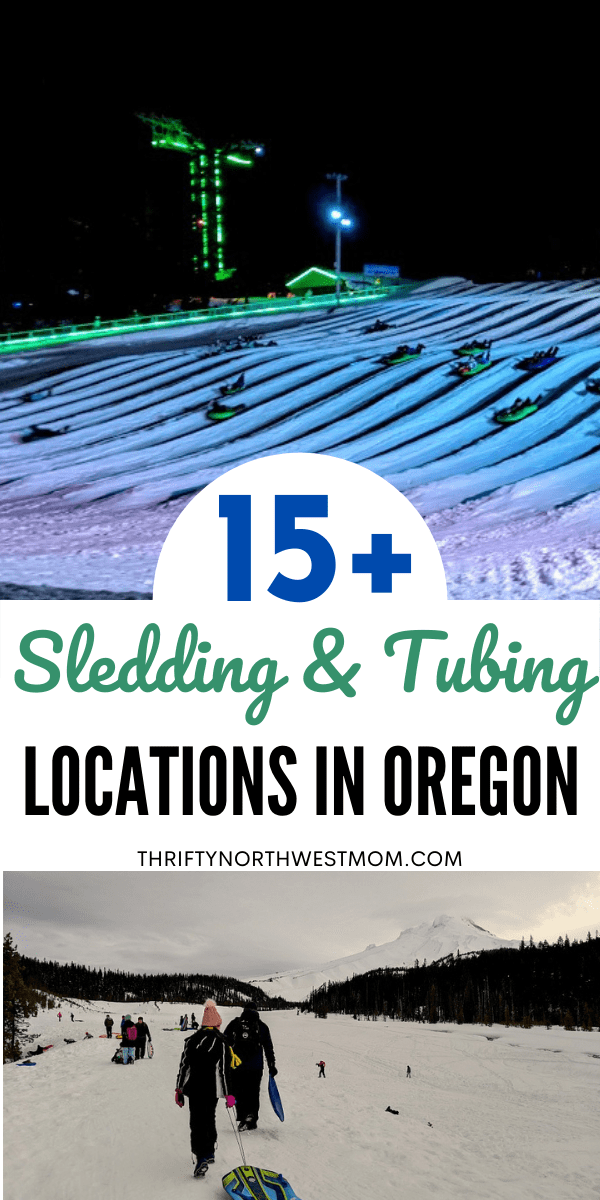
15 Places to Go Sledding & Tubing in Oregon