
Mini Succulent Christmas Tree – Made From Dollar Store Supplies!
This post may contain affiliate links and I may be compensated for this post. Please read our disclosure policy here.

Mini Succulent Christmas Tree – Made From Dollar Store Supplies!
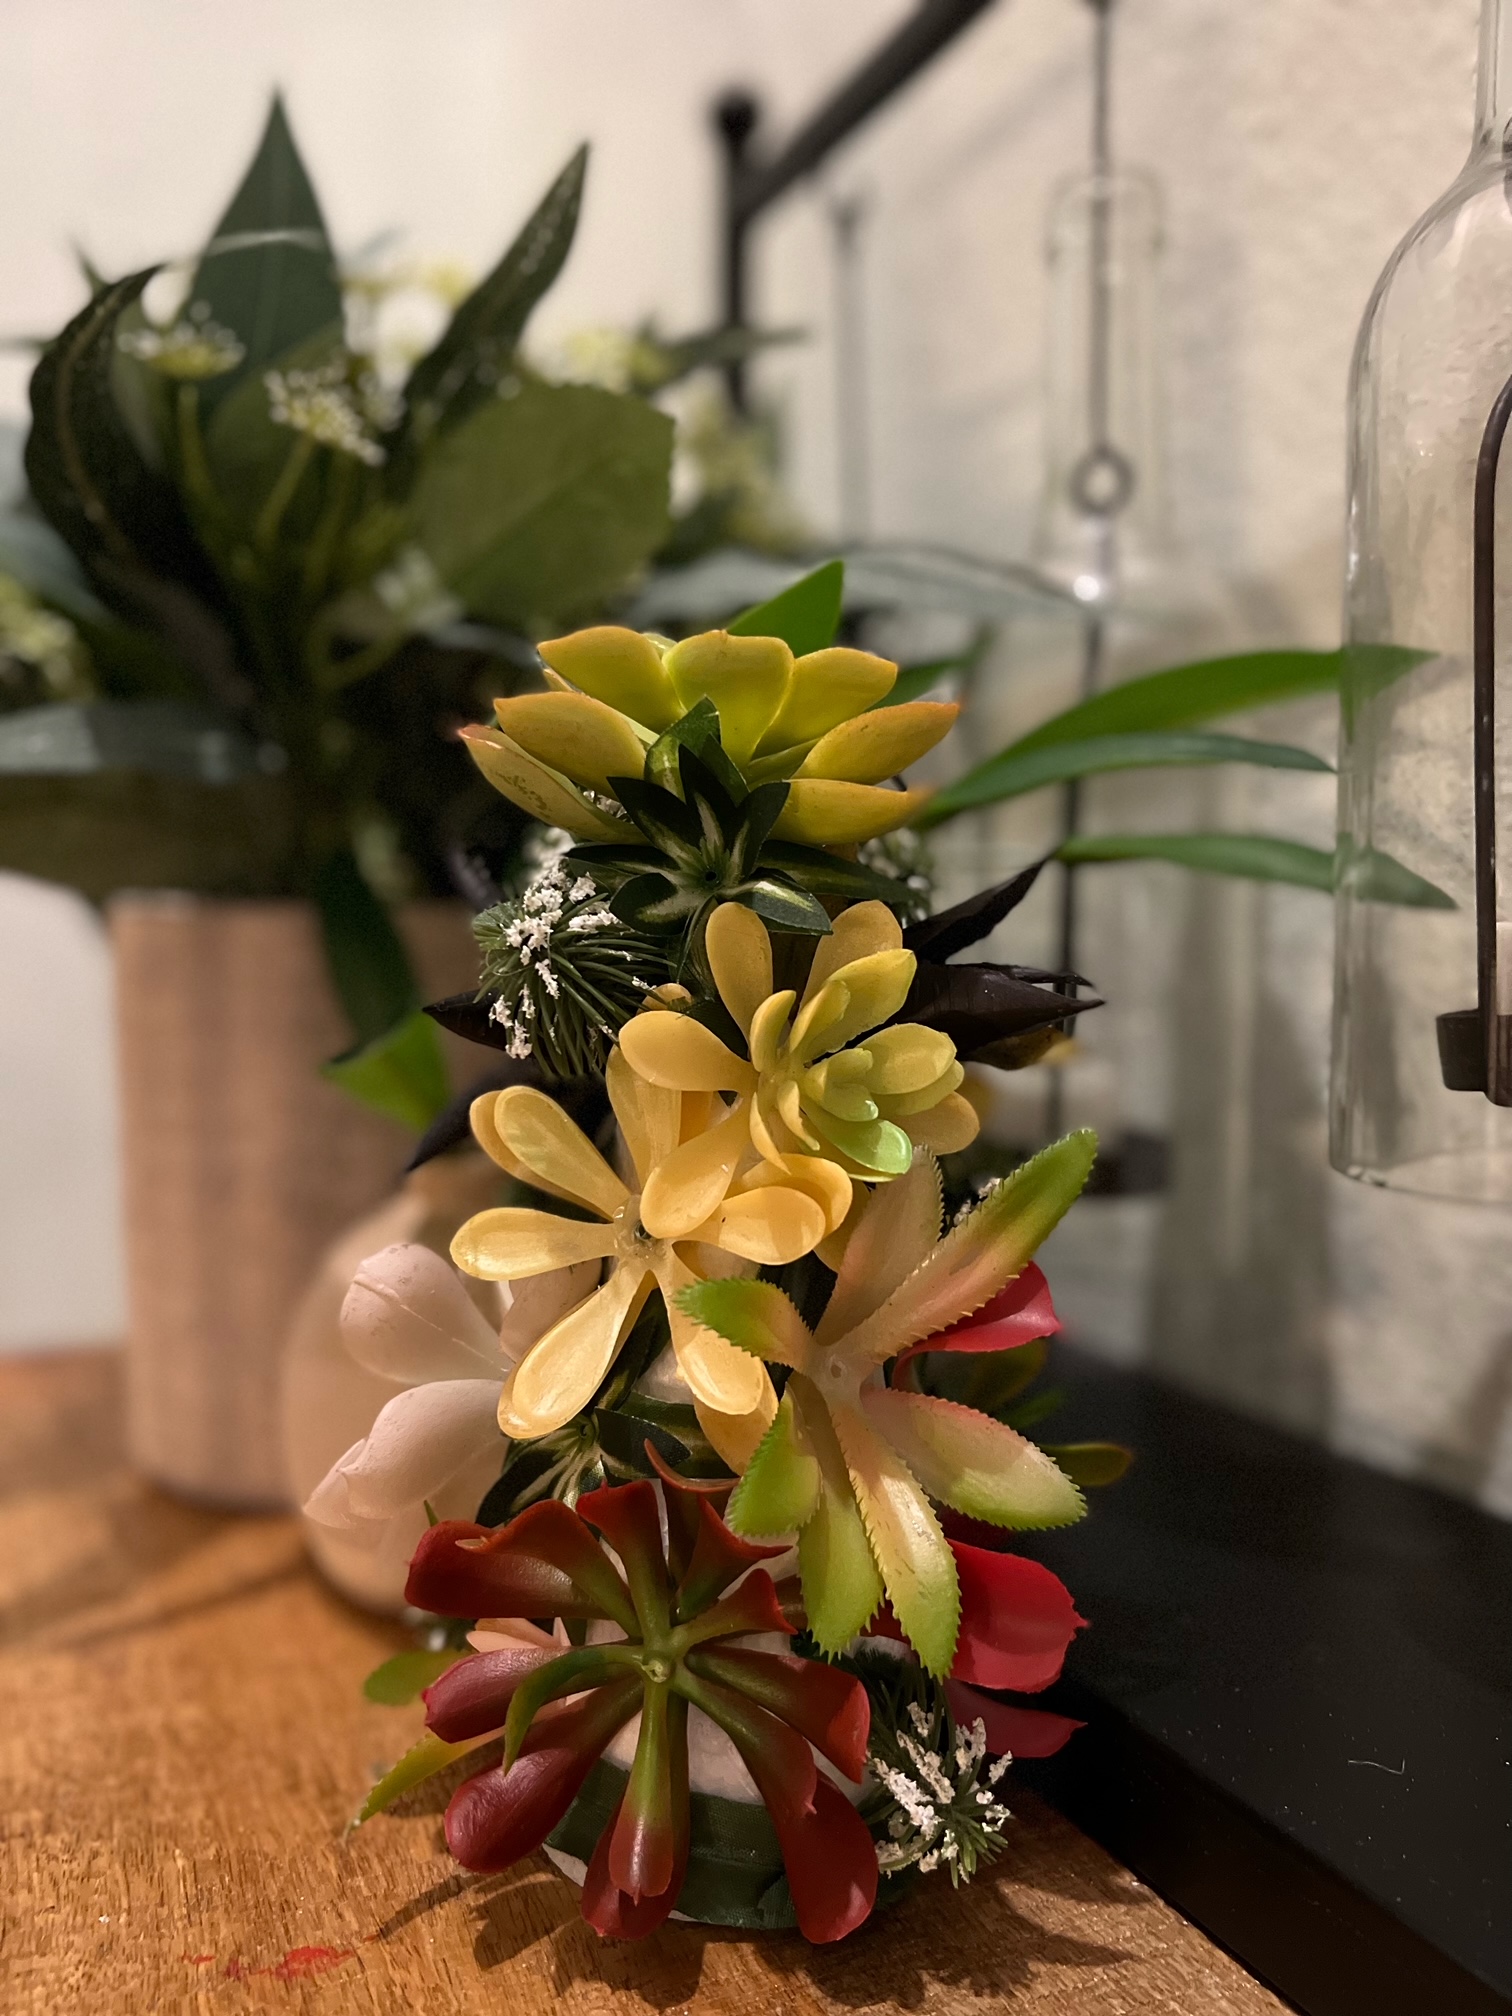
These Succulent Christmas Trees are so fun to make, and are easy enough to do with kids, but make a fun project for adults too. I love succulent trees, and these are perfect for the holidays as they require no maintenance. Because we got all of our supplies at our local dollar store, they are pretty affordable to make too. I am so happy with how my first one turned out, and cannot wait to make more to light up spaces around my home for the holidays.
Plus, check out lots more year round DIY Dollar Tree Craft Ideas too!

I was scrolling through my Facebook feed the other day, and this succulent tree popped up, and I immediately fell in love. I am a huge fan of succulents, and I was mesmerized by this one. Since it is already November, I immediately thought this would make the cutest mini succulent Christmas tree. My next thought was, I know I saw faux succulents at the Dollar Tree…I wonder if they are still there. So the very next day I ran to my local Dollar Tree, and low and behold they had Styrofoam Christmas tree forms & faux succulents, so I made my own version of the succulent Christmas Tree, and now want to show you how.
I was inspired by the mini trees they make with real succulents, but I knew that this time of the year I did not want to a) spend money on the cost of real succulents and b) have to maintain real succulents. This beautiful real succulent mini tree popped up online for me, and I was in love. I remembered they had faux succulents at my local dollar store, so thought I would run up there and give a fake version of the tree a try.
I was looking to make something along these lines, that would not cost and arm and a leg, and also would not require any maintenance over the busy holiday season. Basically I wanted a fax Succulent Christmas Tree that I could use to decorate in my house, but put it out and leave it be. Maybe this coming spring I will get ambitious and make a beautiful real one like posted above, but for now I am in love with my dollar store version for Christmas decor.
And here is how I made this one using faux succulents I found at my local Dollar Tree, along with a Styrofoam tree form, also found there.

Supplies Needed for Mini Succulent Christmas Trees:
- Styrofoam Tree Form
- Faux Succelents (I used 6 – as I pulled them apart and used each one in multiple places on the tree)
- Spider plants, and other filler plants (I used two filler plants)
- Moss (I did not use moss on the one shown above, but if I was to go back again and do it I would…I will explain more below)
- Hot Glue
- Light String (optional if you want it to light up)
- Wire cutters or strong scissors (to cut your flowers down to size)
Note, you could also use small beads to glue in the middle of the succulents. Since I pulled mine apart to make them stretch further there were holes in the middle, and if you want a more finished look then just hot glue a small bead in the middle there.
How to Make Your Own Mini Succulent Christmas Tree:
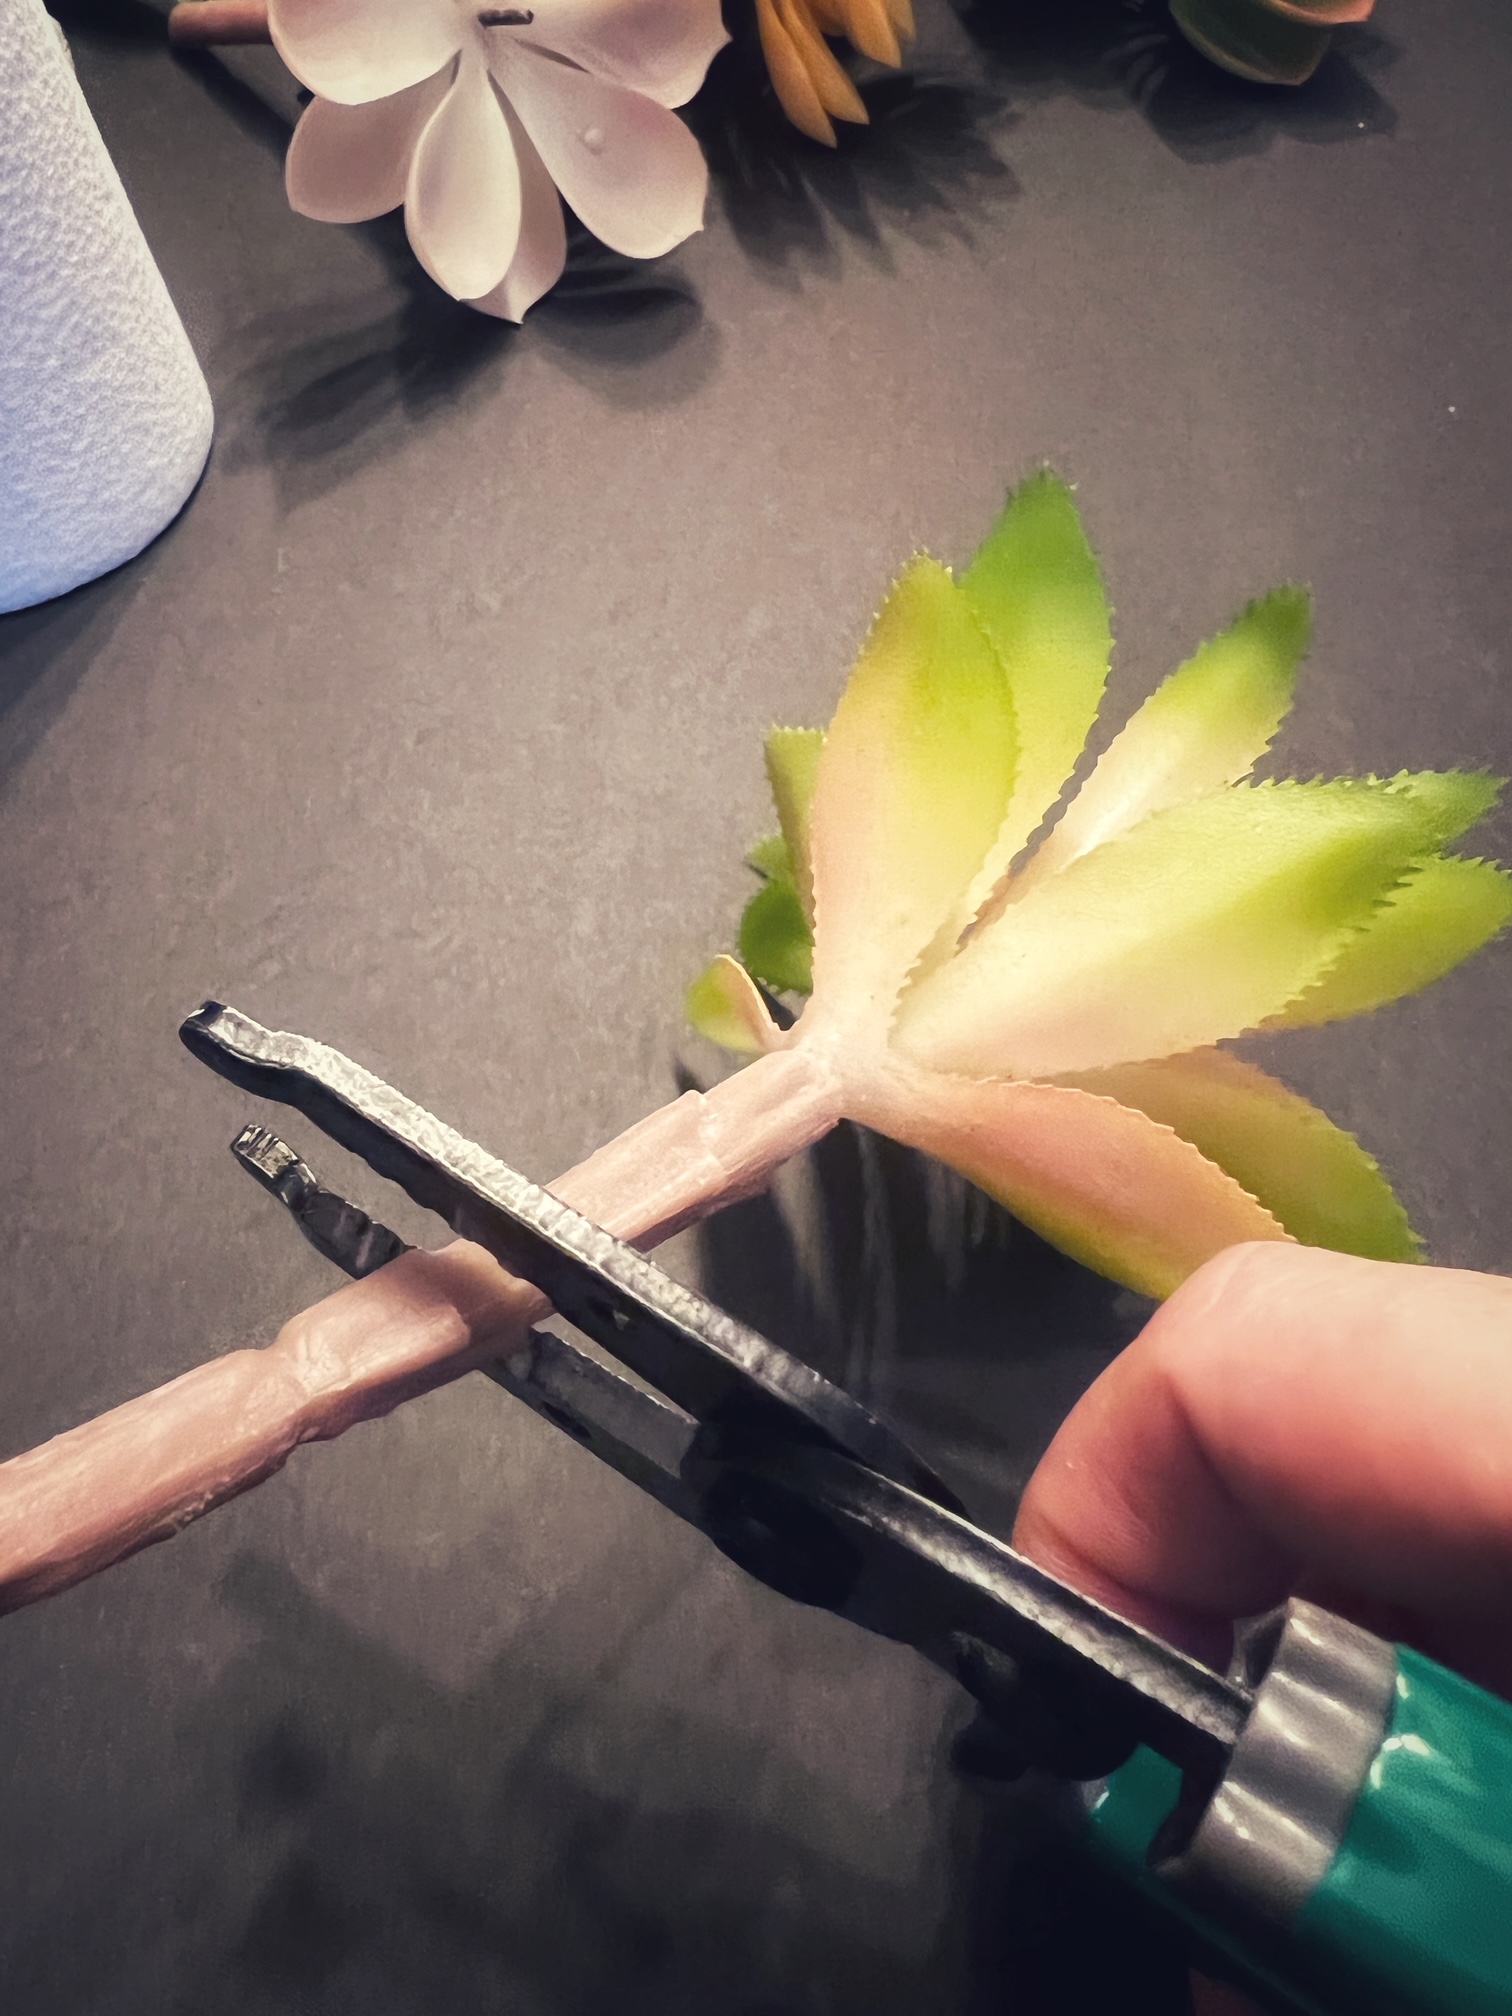
If like me, you are using faux succulents you found at the dollar store, you will want to start by cutting their stems down. I did this using wire cutters. I cut the wires down to a small size (just enough needed to put into the forms) as well as stripping the plastic off of the stems (I just wanted wire).
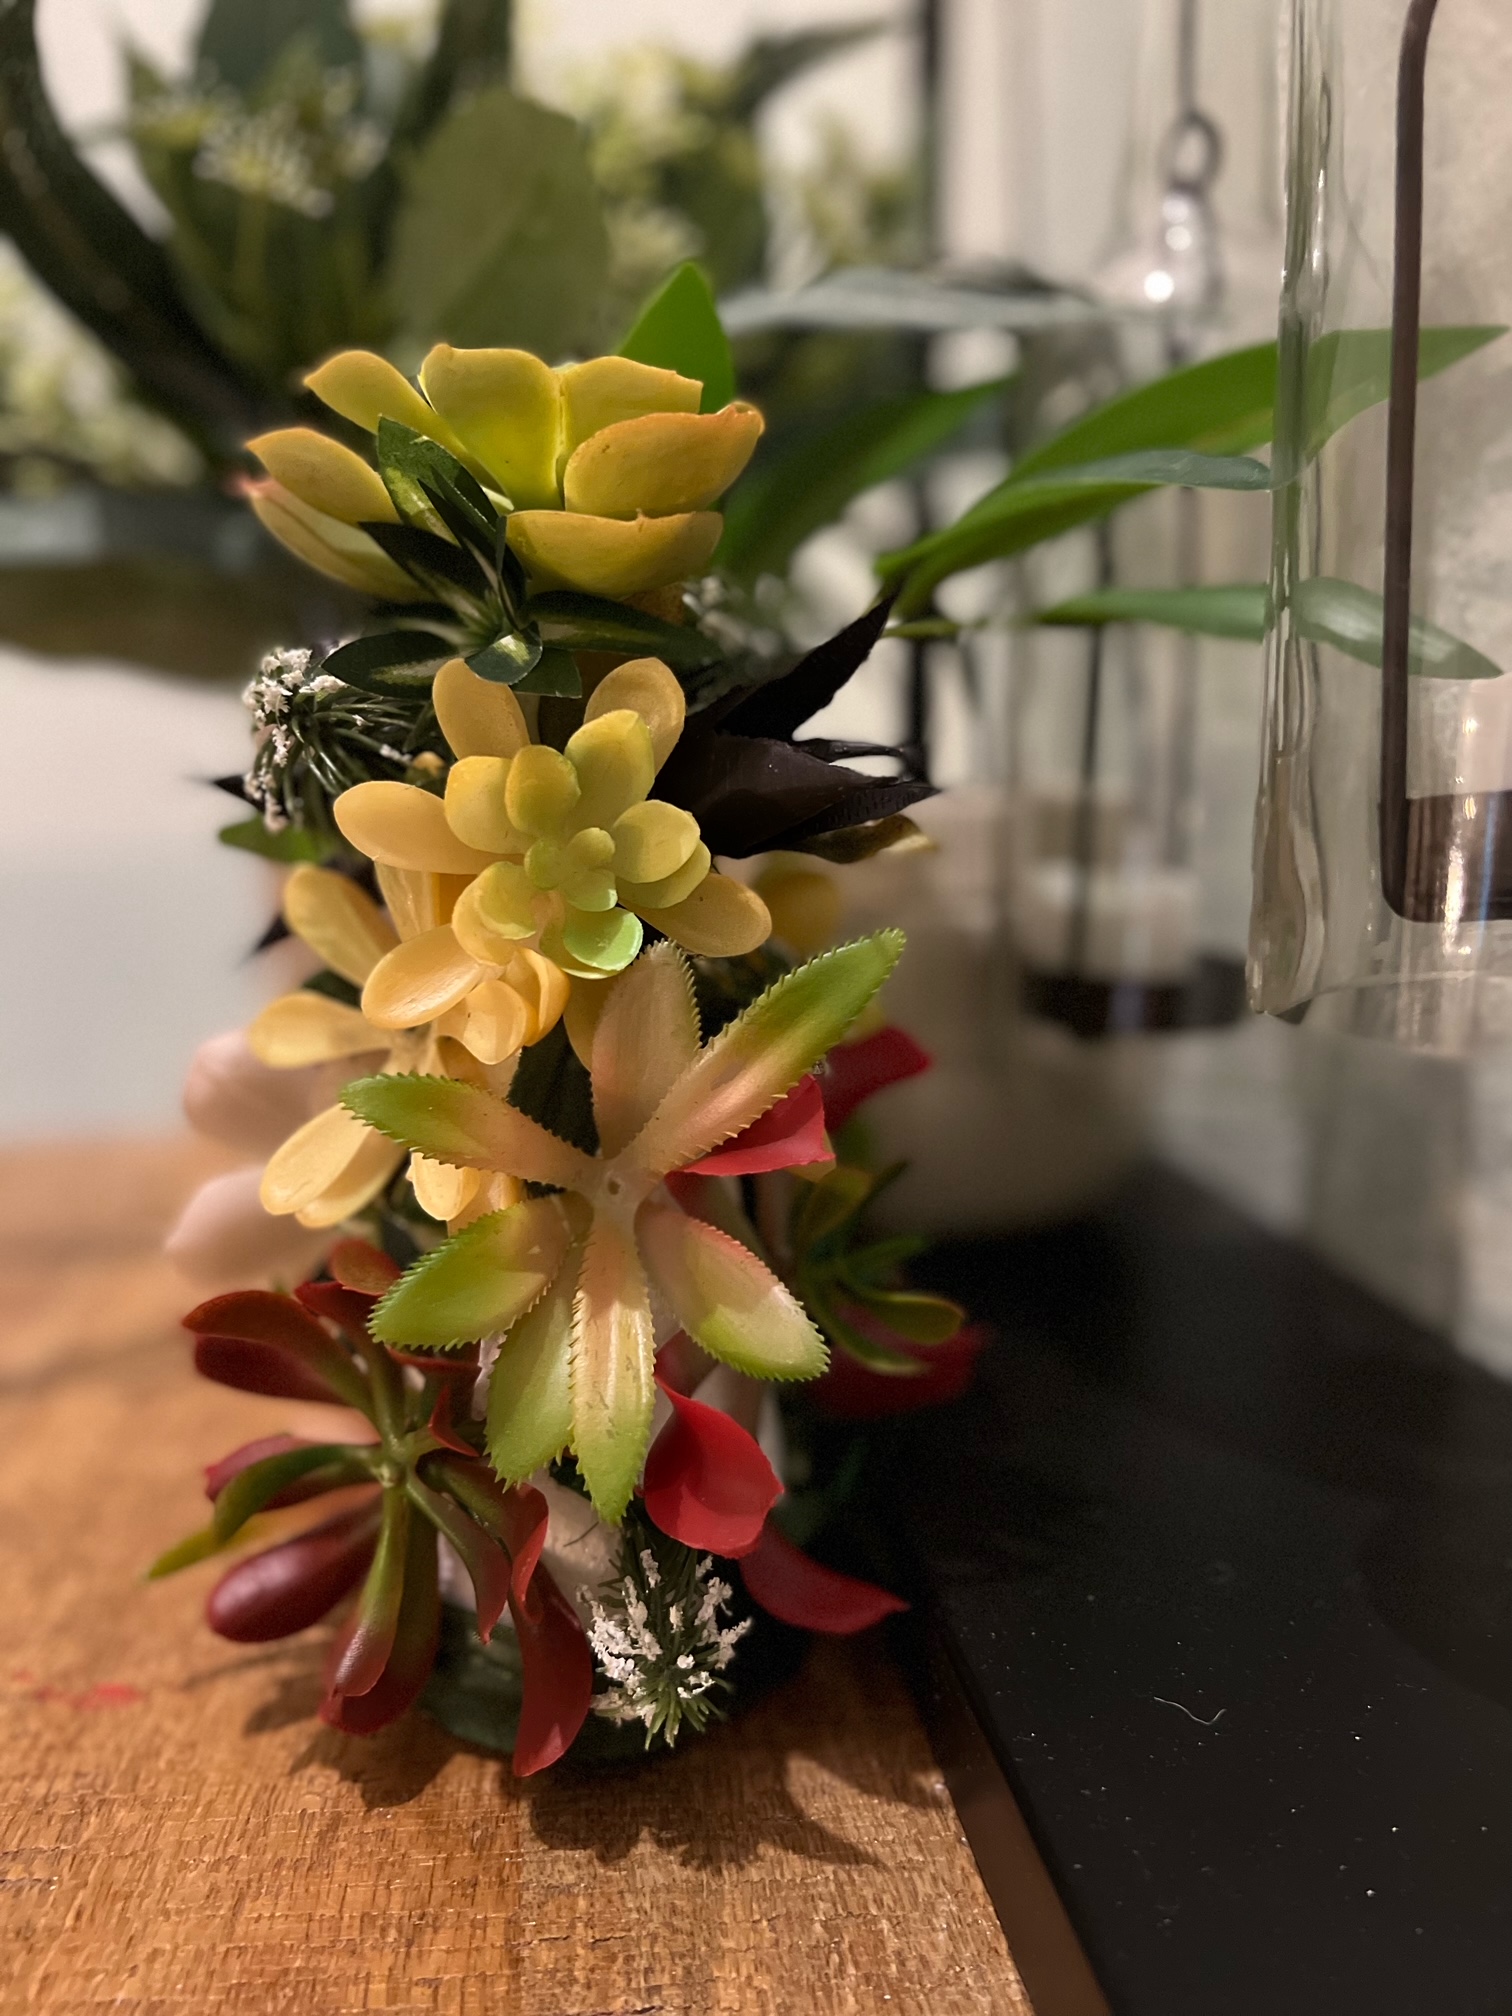
I actually found a couple of different types of faux succulents at my store. Some had long stems like the one pictured above. Others were on a clip. Both work, as you can use hot glue if you do not have a long enough stem.
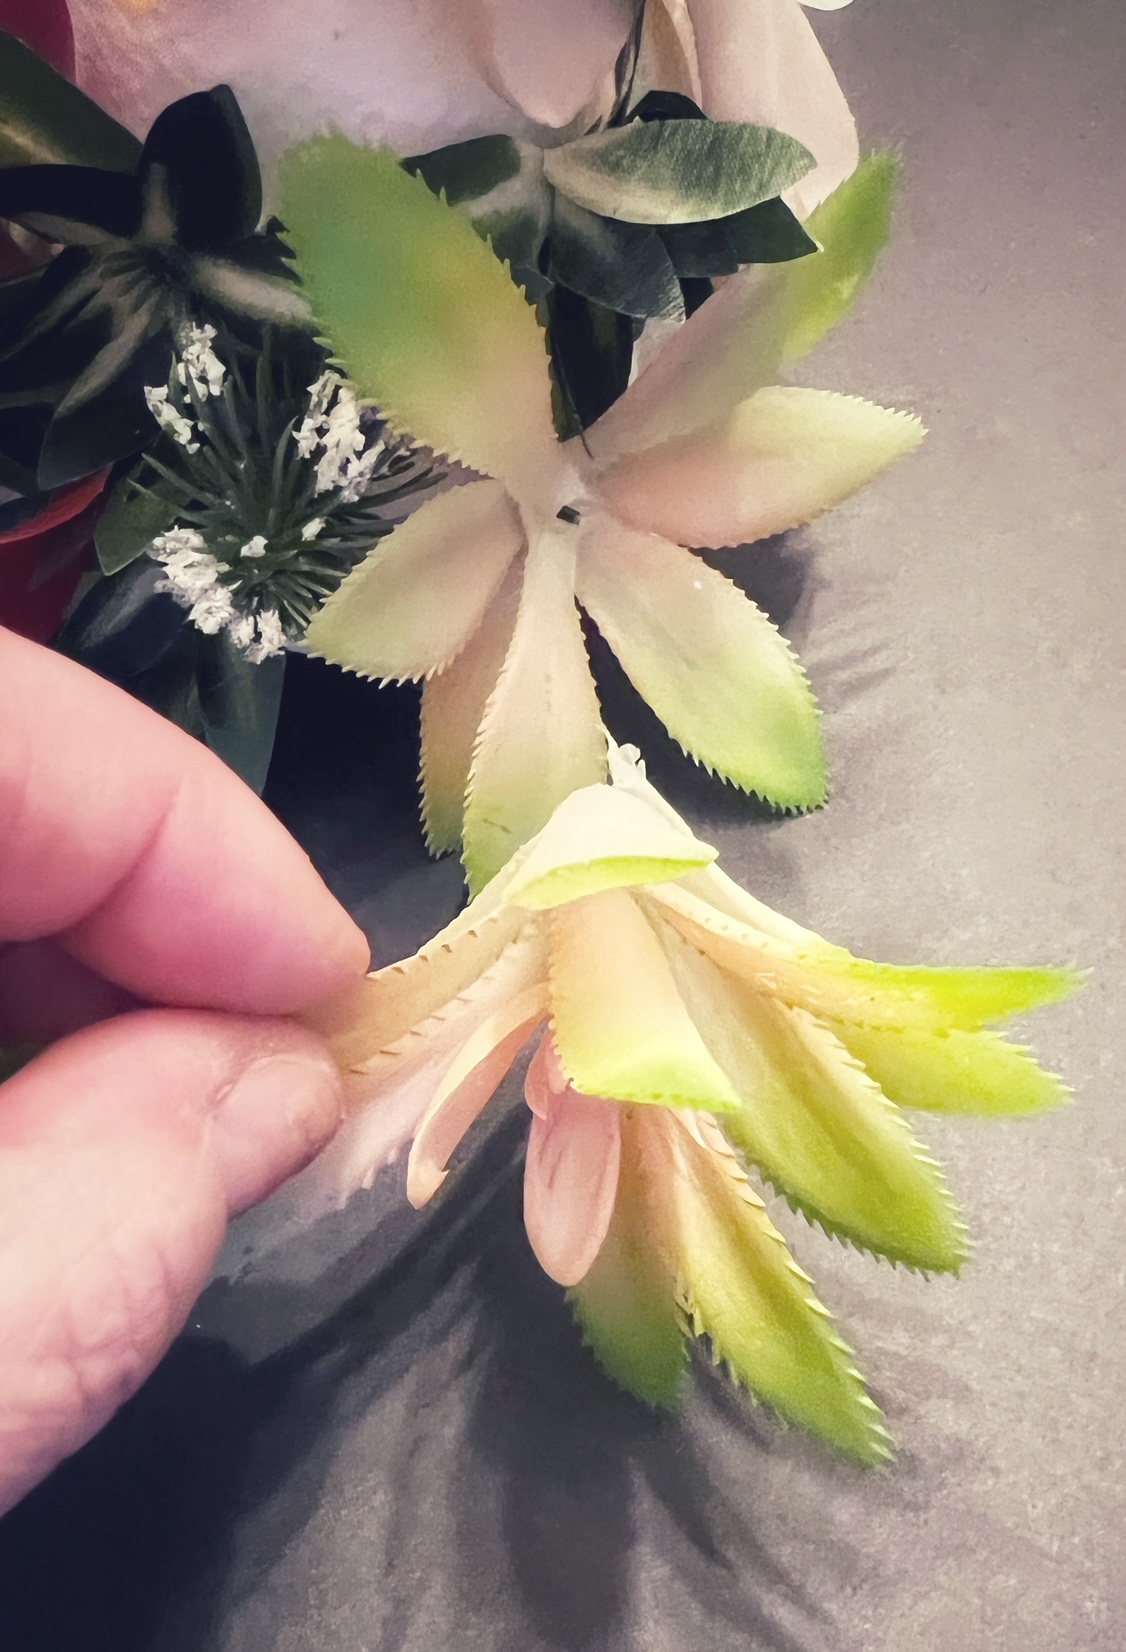
Once you have the stems stripped off, then you will want to pull the succulents apart to make multiple succulents. You can use them as is, but a) it is going to cost you three times as much to make your tree, as you will need to buy quite a few more succulents, and b) the succulents as I bought them were really too big for the forms. The proportions where much better when I separated the succulents to make 3 separate succulents from each one.
I did this by gently pulling them apart about 1/3 of the way through each flower (so I got three flowers out of each one).
There will be a hole in the bottom two (where they were attached to each other). I plugged that hole, using some of the wire from my extra flowers stems that I purchased and cut apart, but you could use a decorative bead if you want it to look nicer.

These are examples of some of the “fill flowers” I bought. The purpose of these is to fill in the spaces in between the succulents. Look for flowers that have that kind of succulent look to them. In both of these cases they came with other flowers on them, but these are the pieces I wanted to use. Because these ones come in bunches, they are more affordable than the succulents too (I got one bunch of each for my succulent Christmas tree), so a total of $2.50 for my fill flowers. I just gently pulled off the parts of the flower that I did not want to use and saved those for a future project.
This is also the place I wish I would have used some moss. I had some, and you can usually buy a packet of it in the flower section at your local dollar store for $1.25, but I just forgot to use mine. If I were to do it again. I would start by hot gluing moss all over my tree form. This way it will be much easier to fill in your form, and not worry about any white space showing. So do not make the mistake I made….and skip this step! I had to work harder than needed to make sure none of the white part of my form was showing because I forgot to cover my form with moss first.
Note – look for plants that are named Spider plants. They make a great filler item!
Start by covering your foam tree form with the faux moss using hot glue. I did not do this with my tree, but wished I had so none of the white spots show through. You can see them in the pictures, but I do not notice them on the tree I have up in my house, so if you skip this step it is not the end of the world, but you will end up with a more finished product if you do it.
Once you have covered your form with faux moss (like I forgot to do), the next step is to start placing your succulents around the tree.
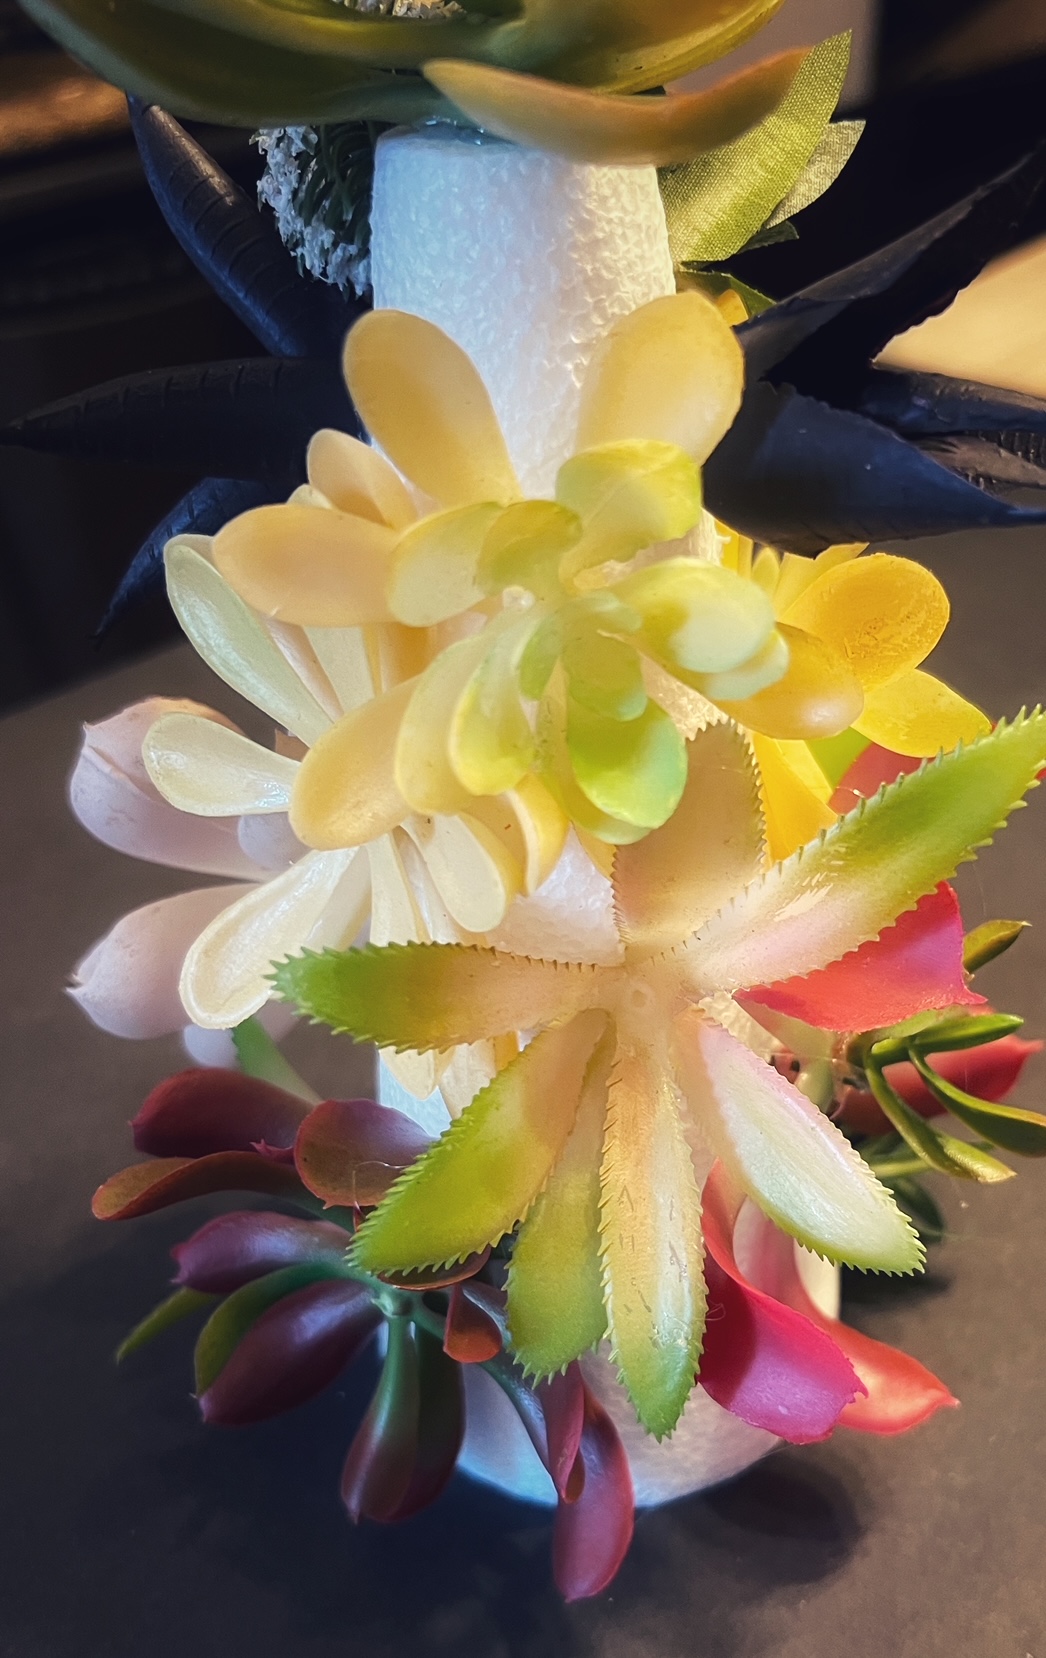
The tree forms from the dollar tree have a flat spot at the top of them (they do not go up to a full point). As a result I started by taking one of my smaller succulents and hot gluing it to the very top of the tree.
From there I started with some of the larger succulents, and placing them around the bottom of the form.
Next begin to place the rest around your tree, until you are happy with the look (by just poking them into your form).
Once you are happy with the look, take a minute to hot glue each piece into place too, for added strength.
Once you are happy with your succulent placement it is time to start filling in the gaps with your filler plants (like the spider plant). Do the same thing you did with the succulents and gently push them into the Styrofoam initially.
Once you are sure you like the look, you can go back and hot glue them all into place for added stability.
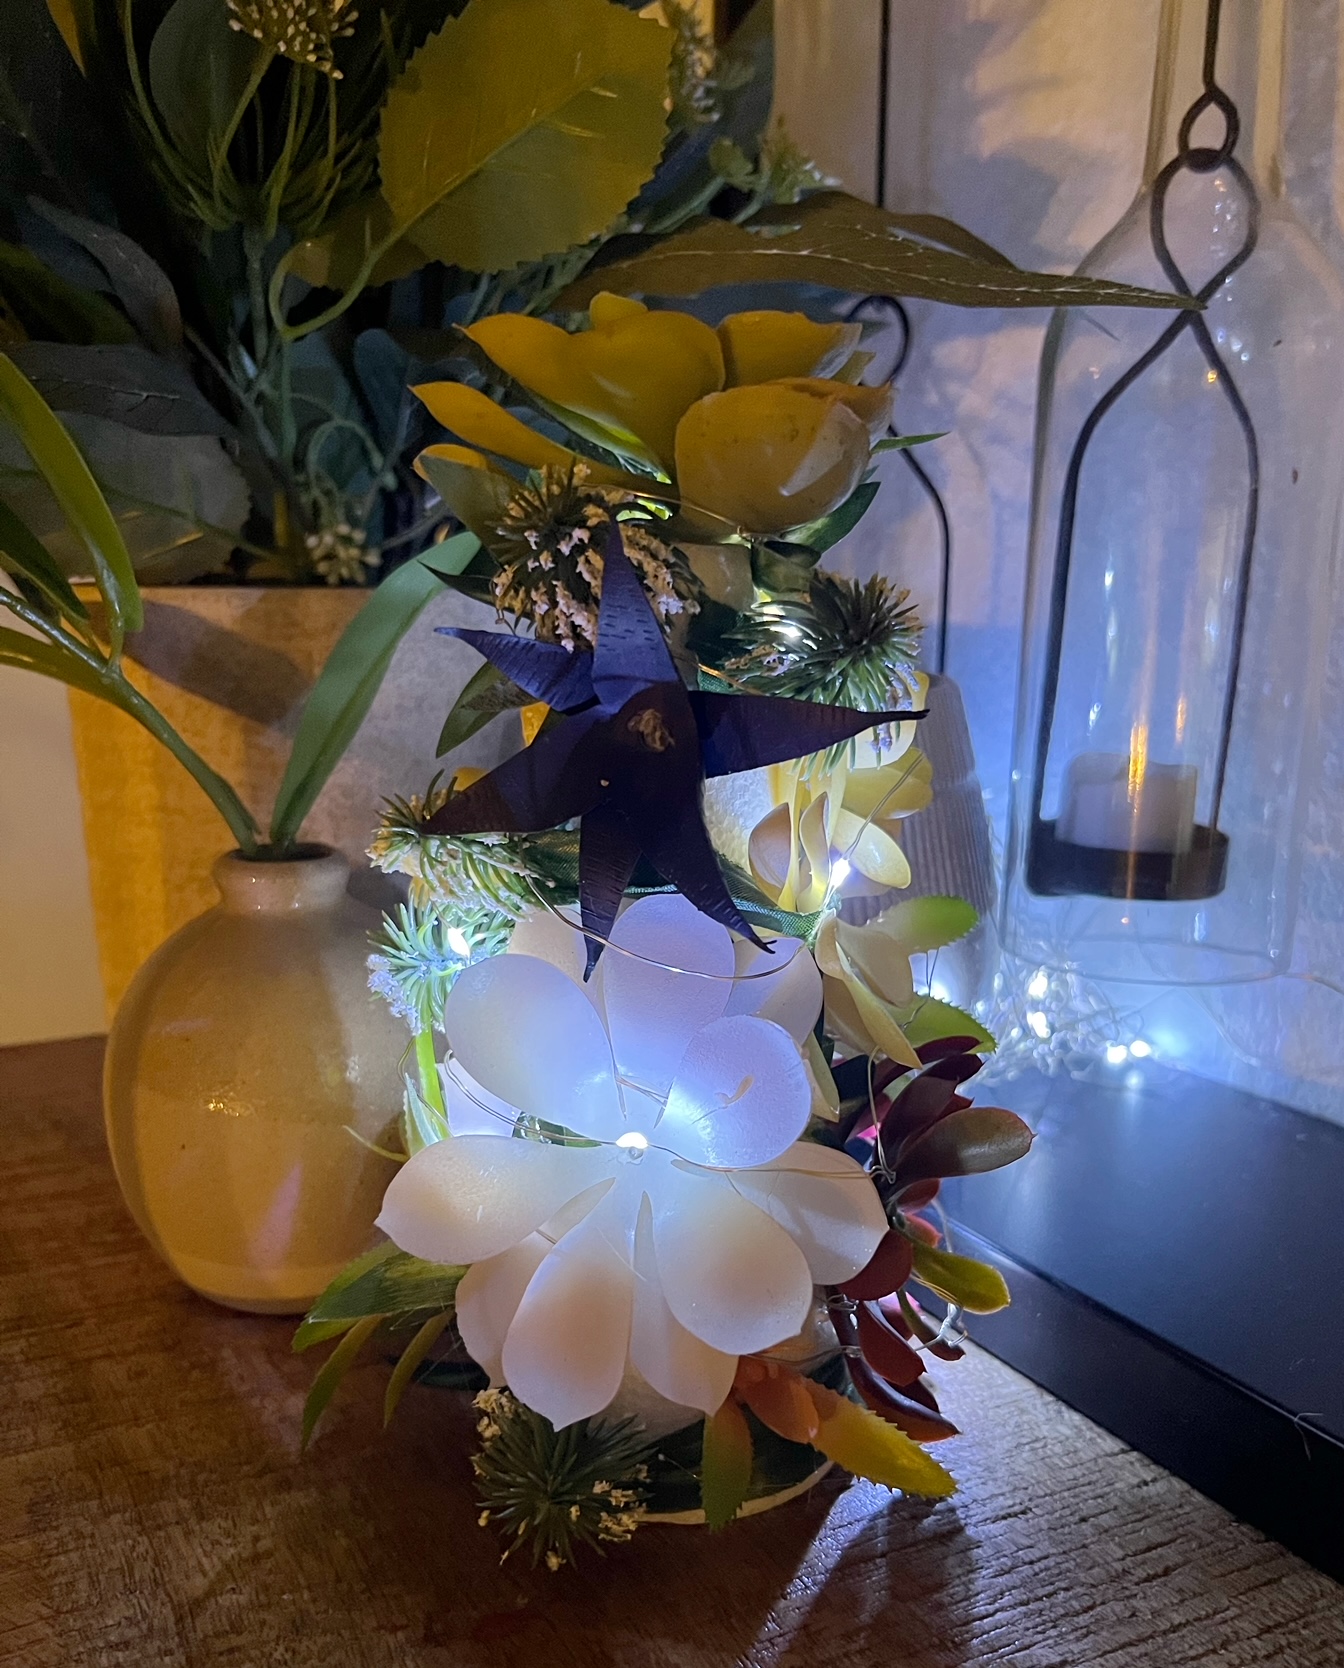
If you want to light it up, I used these mini fairy lights. The light size and string is just perfect for a small tree like this. The string is much longer than you need, but I just tucked the excess behind another flower pot so you do not see all of that.
More Articles You Might Be Interested In:
- Christmas Tree Cones
- Succulent Subscription Deal!
