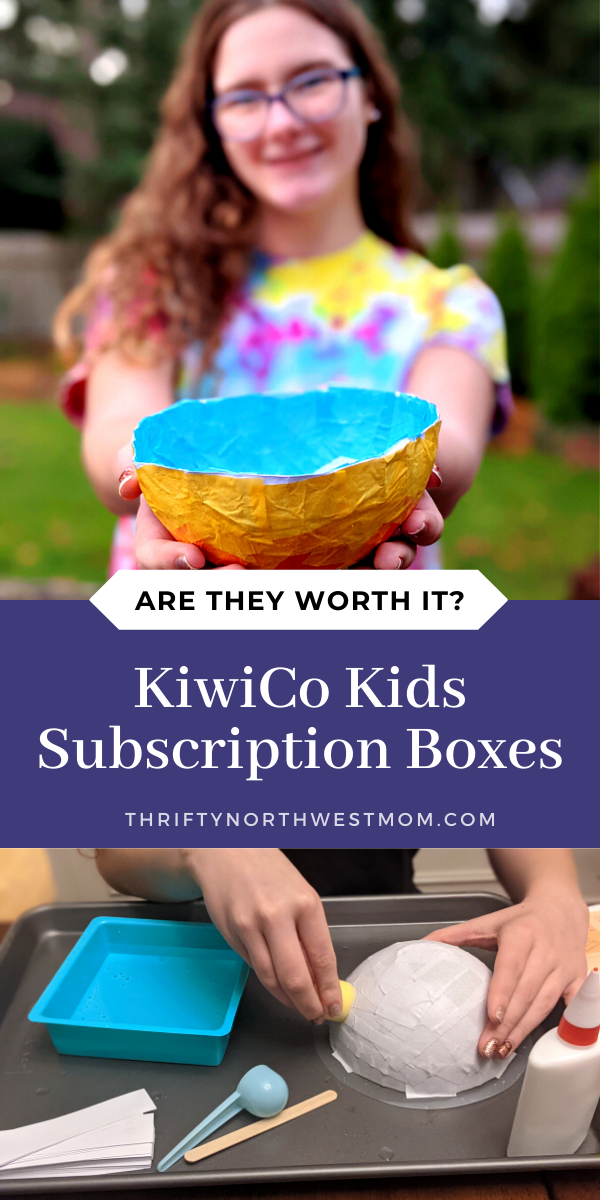
3 Fall STEAM Activities for Tweens & Teens
This post may contain affiliate links and I may be compensated for this post. Please read our disclosure policy here.
Disclosure: This post was sponsored by KiwiCo. All opinions are 100% my own. Find our disclosure policy here for more information.
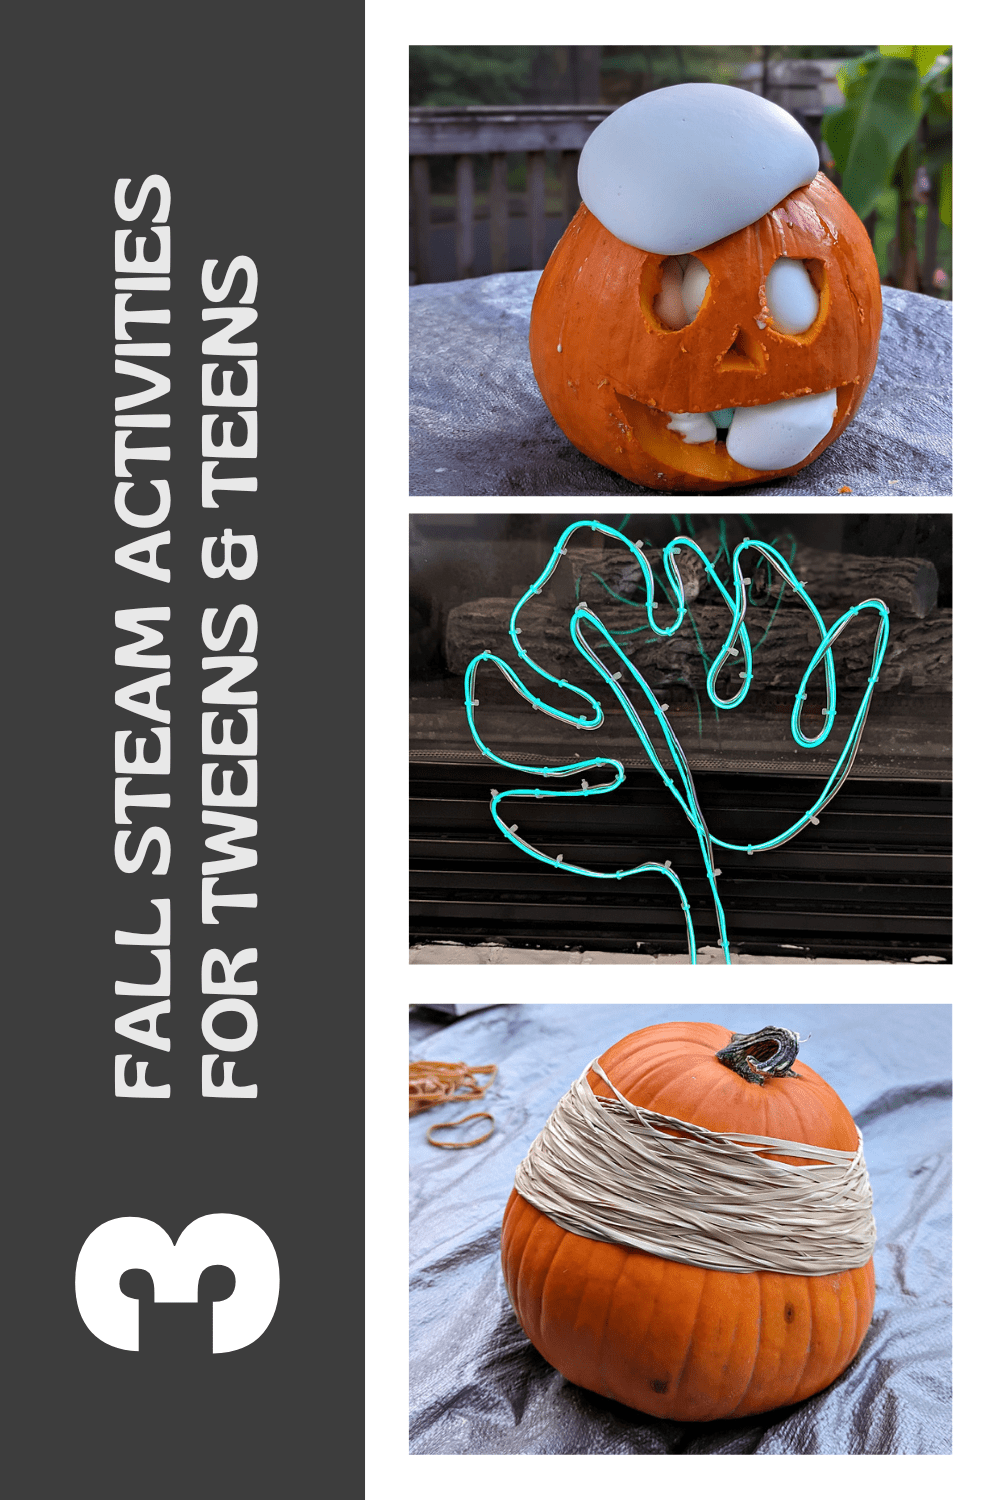
3 Fall STEAM Activities for Tweens & Teens
We love fall around here & love getting out to local pumpkin patches, corn mazes & to see the salmon spawning as a few of our favorite fall activities. However, fall in the Pacific Northwest also usually means rain, am I right?! That means we need some fun, indoor activities to keep our kids & teens engaged on evenings & weekends.
It is much harder as kids get older to find interesting activities to do at home that are screen-free & hands – on. So, we wanted to share a few fall or Halloween themed STEAM activities for you to try with your tween & teens at home this fall to keep them learning & engaged while also interested & maybe find a new activity they would enjoy continuing or trying in new ways with new projects.
Tweens & teens love some excitement, so these activities are sure to be exciting enough to keep their interest & make them think about more ways they could try different variations of these projects! Let us know if you try any of these, we’d love to hear how it works for you!
Exploding Pumpkin
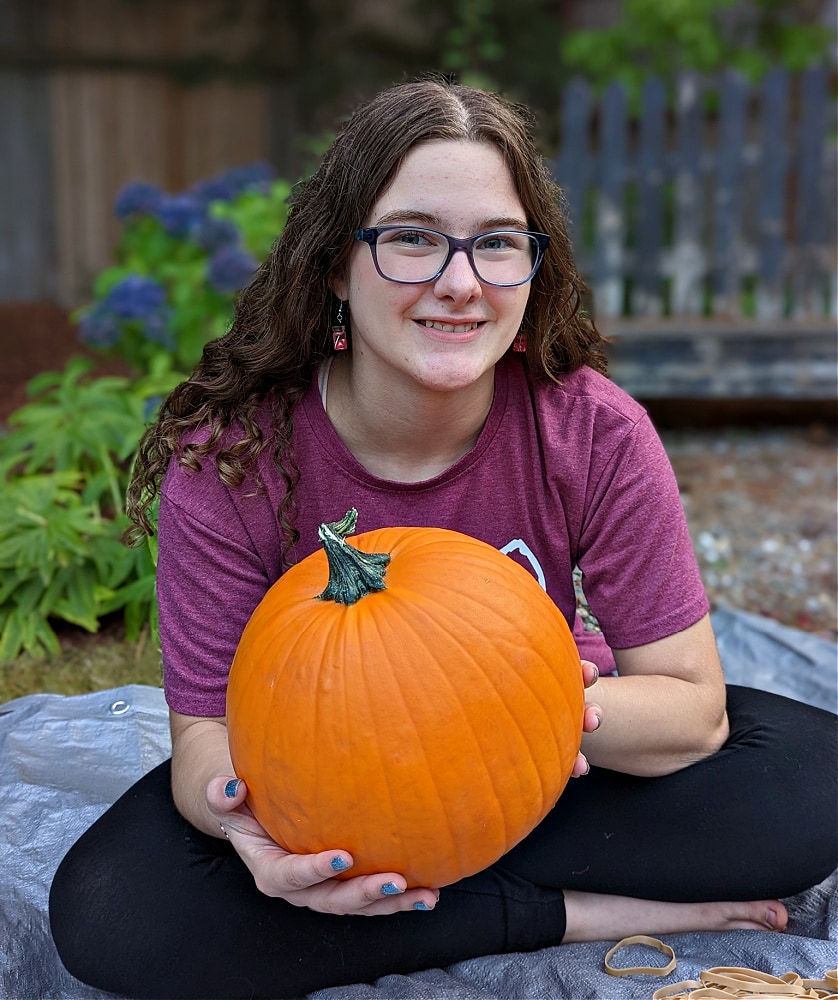
If you’re looking for an easy STEM project for tweens & teens – this is the perfect project as all you need is a pumpkin and a bunch of rubber bands. This was a total hit with my teens, too – they love projects where things explode, so it’s perfect for this age group! :) You could turn this into a contest, too, to see who in the family will have the closest guess to see how many rubber bands are required to make a pumpkin explode.

As you can see, we just grabbed a medium sized pumpkin and we got a bag of rubber bands with over 400 rubber bands (we bought this pack from Amazon which has over four hundred 3 1/2″ x 1/4″ rubber bands for under $5 when I bought it. We weren’t quite sure how many it would take so I’m glad we bought the extra big package to have enough.
We also grabbed a tarp from the garage to contain the mess as we had no idea how messy it would be when the pumpkin exploded!
We set up our phone with a tripod to record the experiment in time-lapse video mode (so we could speed it up), but I totally thought there would be more signs that it was getting ready to explode, like cracking, etc, so I was planning to start recording in slo-mo with another phone when we started getting close. Unfortunately it totally caught me off guard so I didn’t catch it on slo-mo & our time-lapse was too fast & totally missed the actual exploding event on camera. Bummer! It’s definitely something that’s fun to record – I’m sure your tween or teen will love rewatching the videos you take of the event.
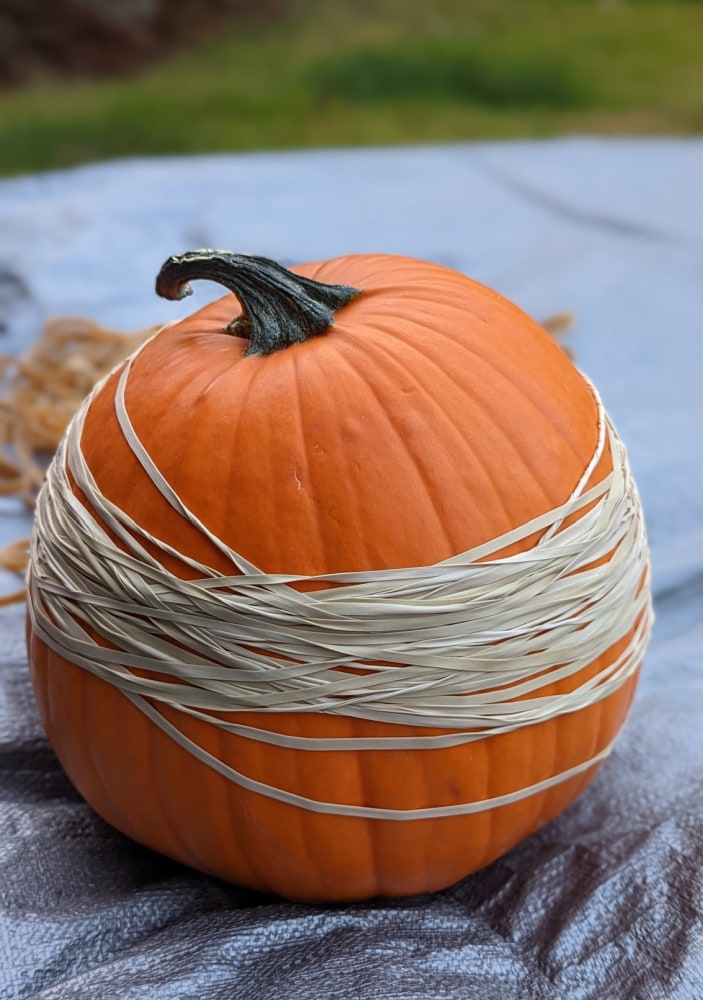
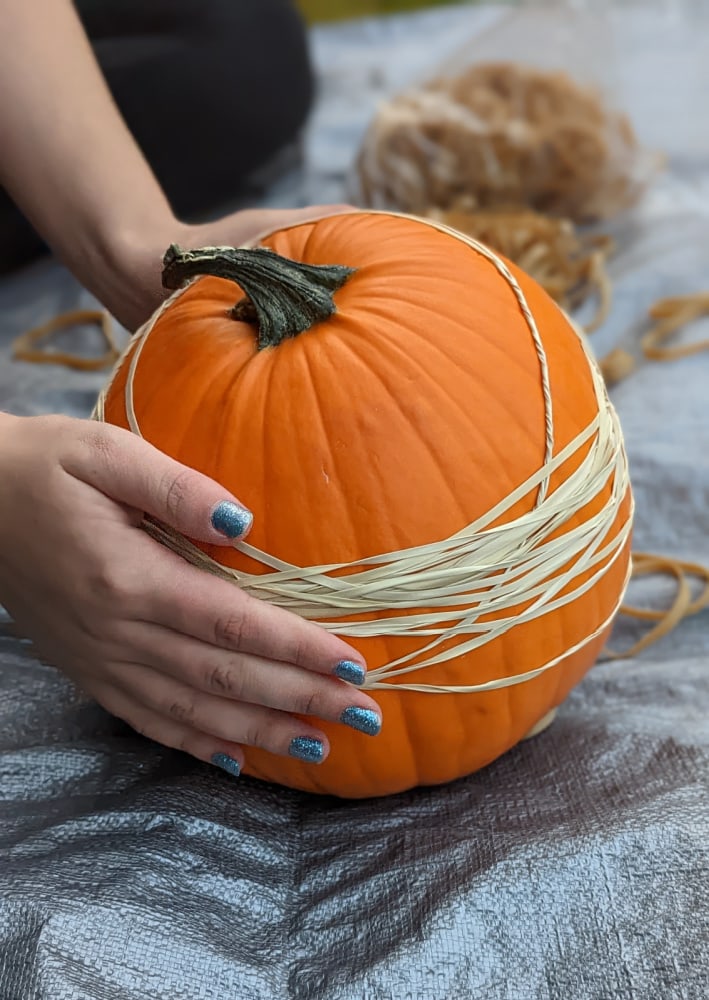
You can see that we started with a nice, round pumpkin. This is in the beginning of adding rubber bands. You want to make sure that the size of the rubber bands is pretty tight so it’s a stretch to put them around the pumpkin. The goal is to get them as close to the center & on top of each other as you can, too. This puts more pressure on the pumpkin to have as many as possible in the smallest area.
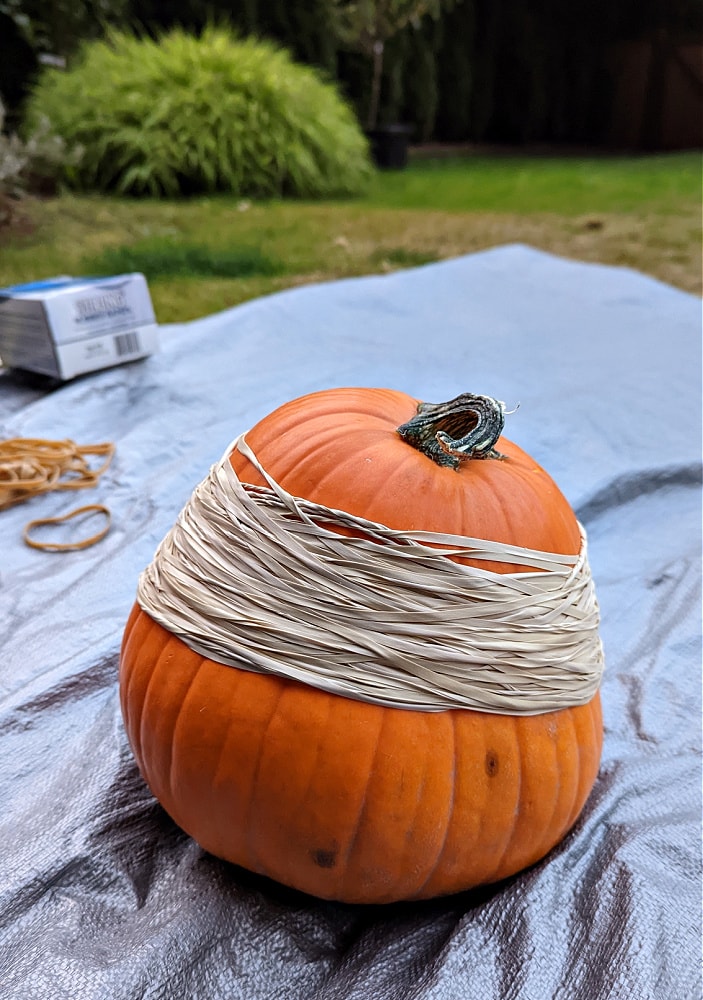
I took this photo just a minute or two before it exploded – I had checked out a few videos & in those videos, people had showed where there started to be cracks showing all around on top. Our pumpkin had no cracks & the only clue to us that it was actually working was looking at the shape – this pumpkin was no longer round, but was misshapen by the rubber bands.
The only other clue we had was that we noticed a few drops of liquid rolling down the bottom of the pumpkin. And there were a few little brown spots that had appeared. But we never saw any cracks at all, other than those few clues.
When you start noticing that there are changes in the pumpkin, make sure you move a bit further away. You don’t want to sit too close as you can see – the top of the pumpkin flew about a foot away from the base – took us totally by surprise as we thought it wasn’t quite close enough. I was just getting the other phone set up for slo-mo when it flew off!
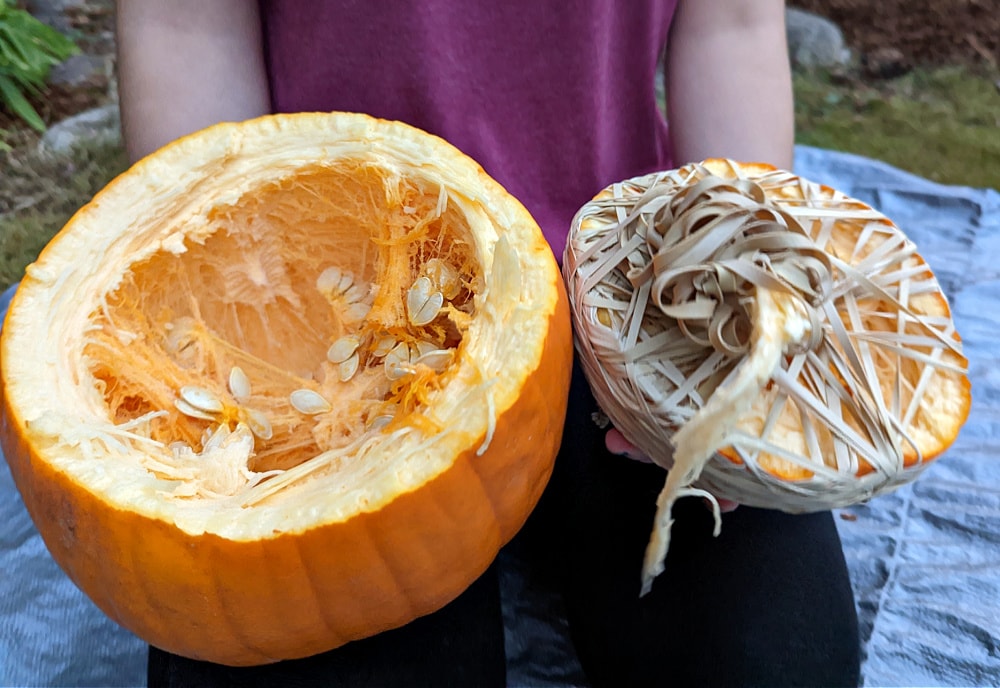
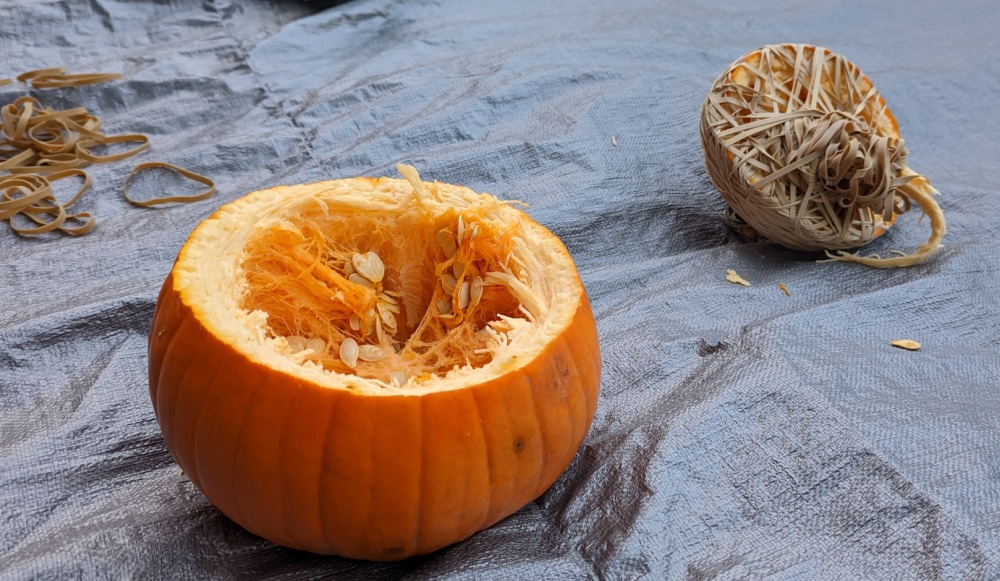
And here’s what the inside looked like – you can see the mess of rubber bands! And it was almost a clean break, perfectly shaped when it flew off. I totally thought it would be messier than that! But it was such a clean cut & concise!
We did not actually count the number of rubber bands, but we had pulled out about half the bag (of 425) and we still had a handful of them left when it exploded. So we are estimating that we used about 175-190 rubber bands. It will all depend on the size of your pumpkin, the size of the rubber bands & probably some chance, too, though, as to how many rubber bands your pumpkin will need to explode. This is where the contest could come in – have everyone give an exact number of rubber bands they think it will require to explode the pumpkin to see who guesses the closest.
Elephant Toothpaste with Jack o’ Lantern (Puking Pumpkin!)
Have you heard of the fun elephant toothpaste experiment? I helped in a STEM class last year once a week & we did so many fun projects & one of them was an elephant toothpaste experiment. It’s a fun chemistry experiment to see how the combination of several chemicals can cause this cool reaction!
We found this idea on the KiwiCo blog (so many awesome Halloween & fall themed DIY ideas here) & we thought it was an awesome idea to use a Jack o’ Lantern for a fun fall /Halloween theme for this exciting experiment & make your pumpkin “puke”. It’s very simple to do, but you do need to make sure to get the right supplies to see the full effect in maximum force! With the right supplies, you’ll get a very foamy explosion when the ingredients are combined & it will fill your pumpkin up & out every direction!
Supplies for Elephant Toothpaste::
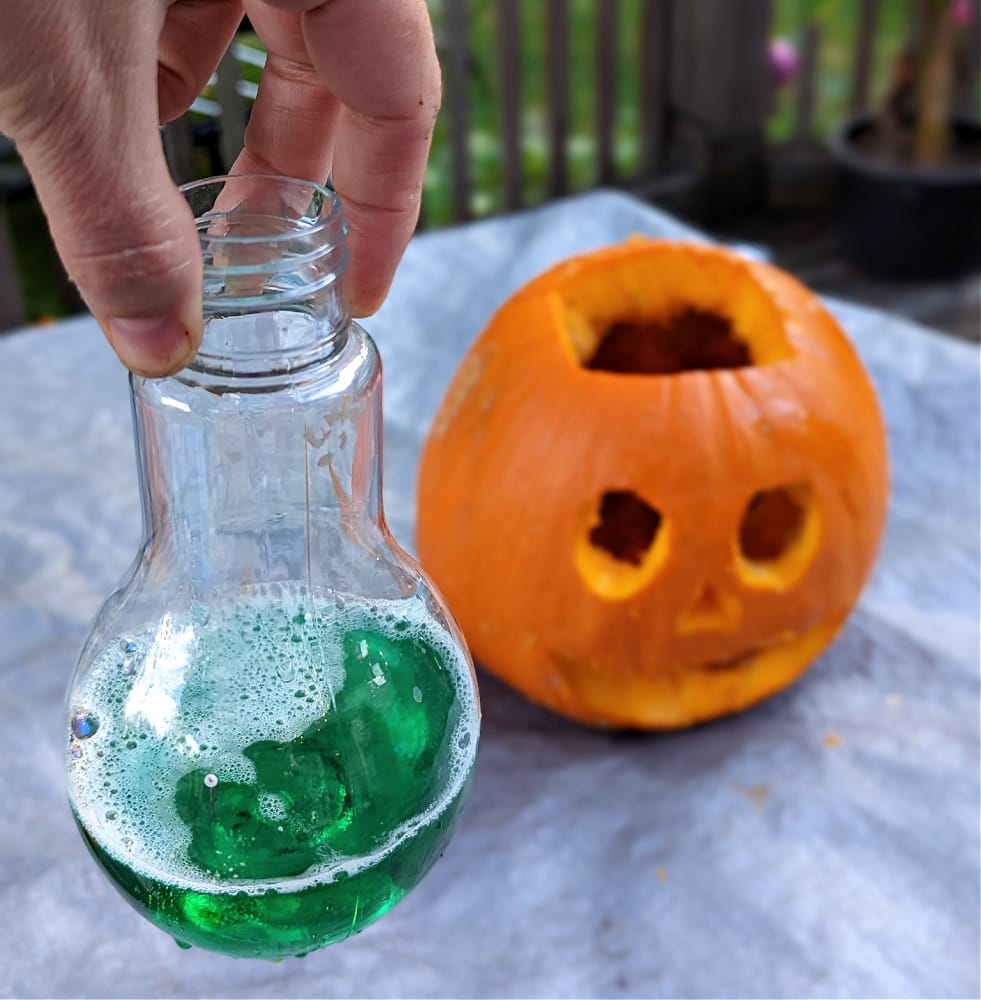
- Container to hold liquid in pumpkin – cup, bottle, etc. (I got creative & used a old bottle from a light-up boba drink I saved from a fair, so that it would be more narrow & tall to make sure the foam made it up & over into the pumpkin
- Safety goggles – always good to keep safety goggles on with the strong hydrogen peroxide
- Funnel – this helps especially if you have a narrow container to pour the liquid
- 1 cup of Hydrogen Peroxide – for max effect, make sure you get 40 volume hydrogen peroxide (not your normal stuff). We went to our local beauty supply & it’s actually called a hair developer, but that’s what the store told us was the option with the larger amount of hydrogen peroxide. And that was perfect as it really got so foamy!
- 2 packets of yeast (this needs to be a dry powder – I used an instant yeast)
- 2 tablespoons of dish soap – any brand
- 6 tablespoons of warm water
- Food coloring – we chose green, but you could pick any color (we definitely did not add enough drops of food coloring, we’ll add a lot more next time)
- Pumpkin – we chose a medium sized pumpkin, but you could really use any size pumpkin – just know that if it’s a larger pumpkin, you may want to double this recipe
Instructions for Puking Pumpkin
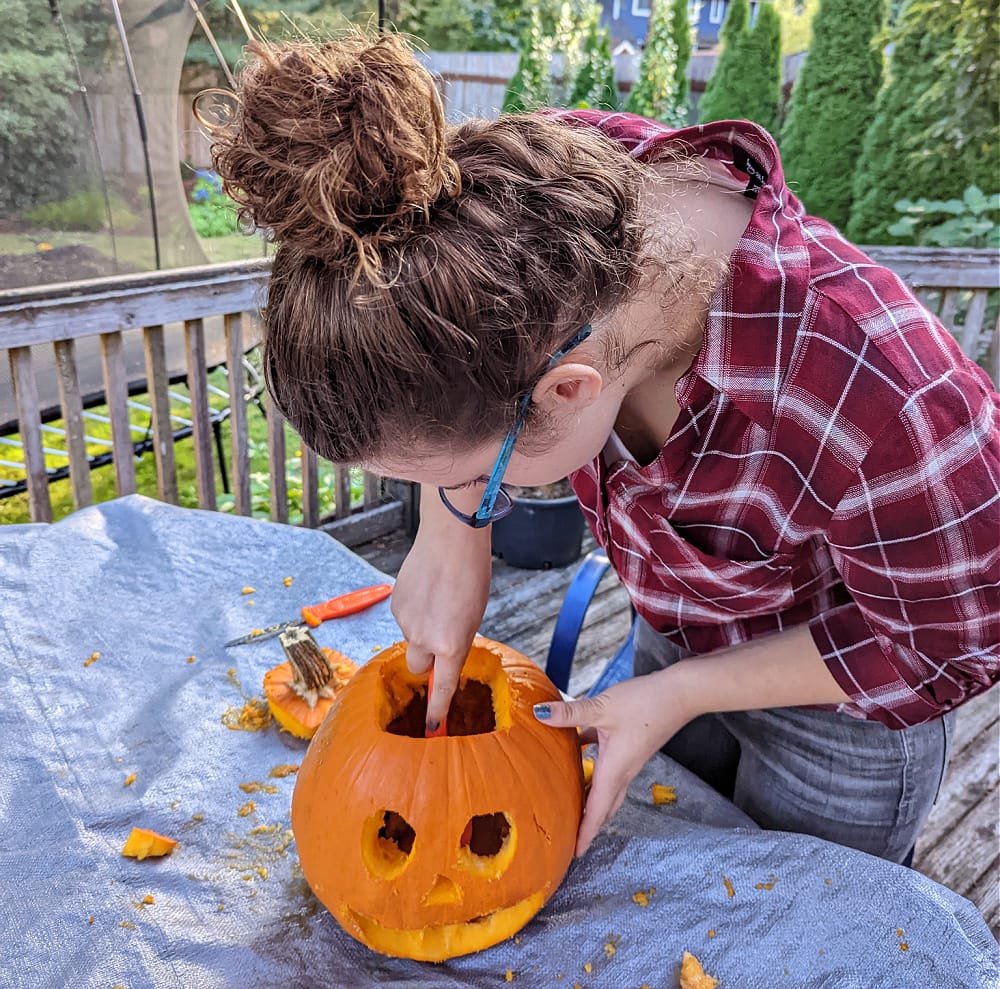
Make sure to carve your pumpkin first. We stuck with just a basic Jack o’ Lantern design, but you could create any shape you’d like, especially if you want to come up with something funny to have the foam coming out of.
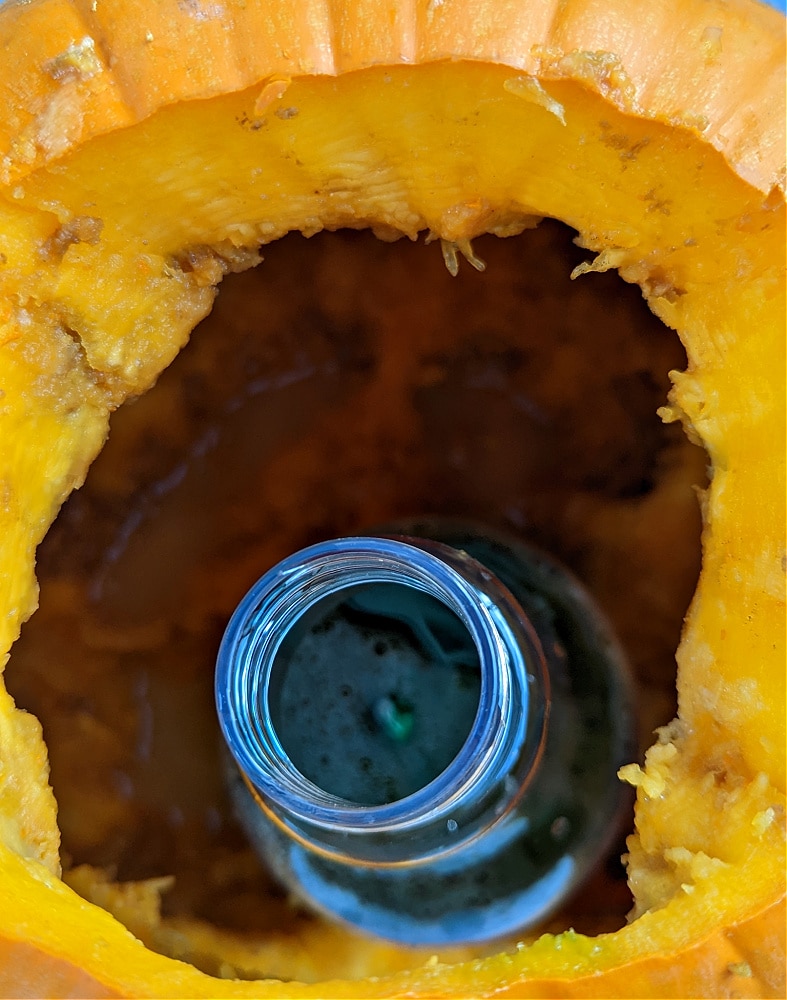
Once you have carved the pumpkin, place the container into the pumpkin. Then you’ll start combining the ingredients.
Pour 1 cup of hydrogen peroxide into the container/cyclinder. (This chemical can burn/irritate the skin, so you may want your tween/teen to wear gloves for this step. This is where you can also use a funnel to keep it all inside the container).
Add 2 tablespoons of dish soap to the container.
Add food coloring – we added 5-6 drops & it barely made a hint of color, so I’d at least double or triple that amount next time (if you are ok with using that much of your food coloring)
Get a bowl & mix the 2 packets of yeast with the 6 tablespoons of water. Use a fork to stir well for 30 seconds.
Now is the time to combine the yeast with the other ingredients – you may want to use a funnel to pour the yeast into the container. It should take effect immediately & check out the step by step results below!!
It’s slowly starting – the foam rose to the top of the container & then quickly started filling the inside of the pumpkin!
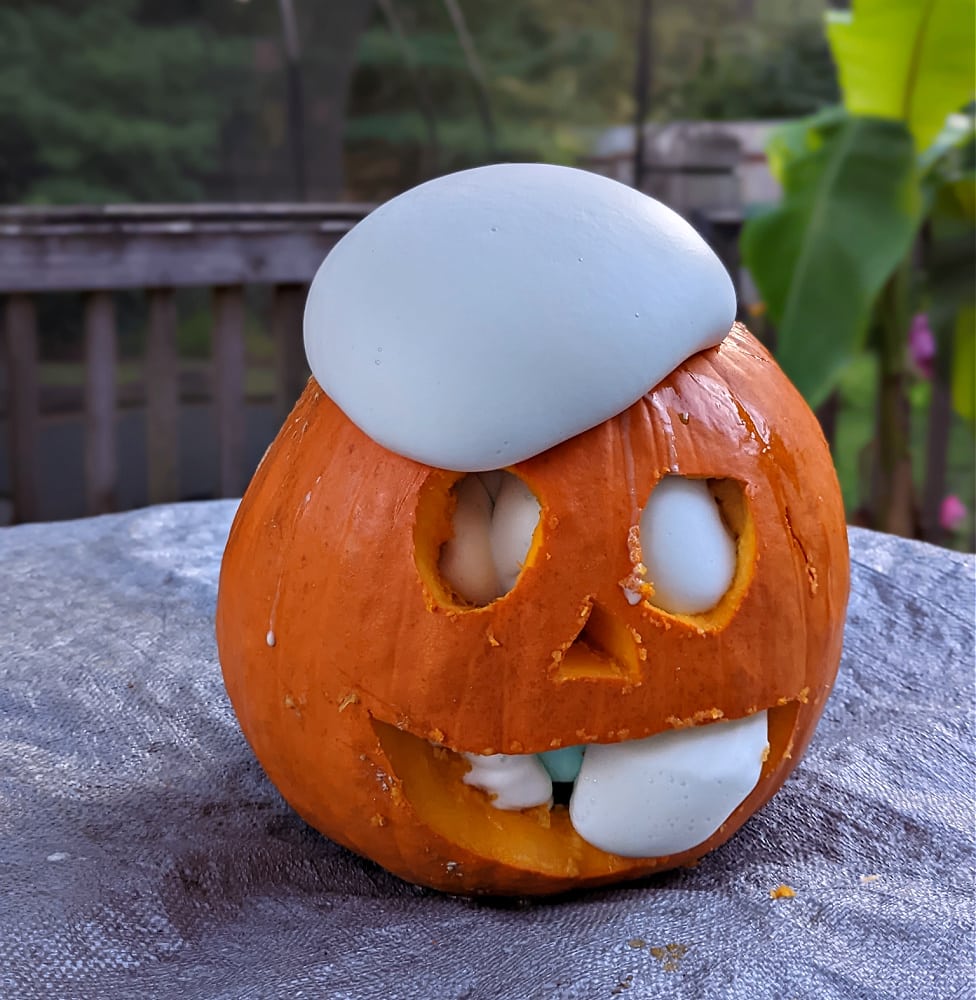
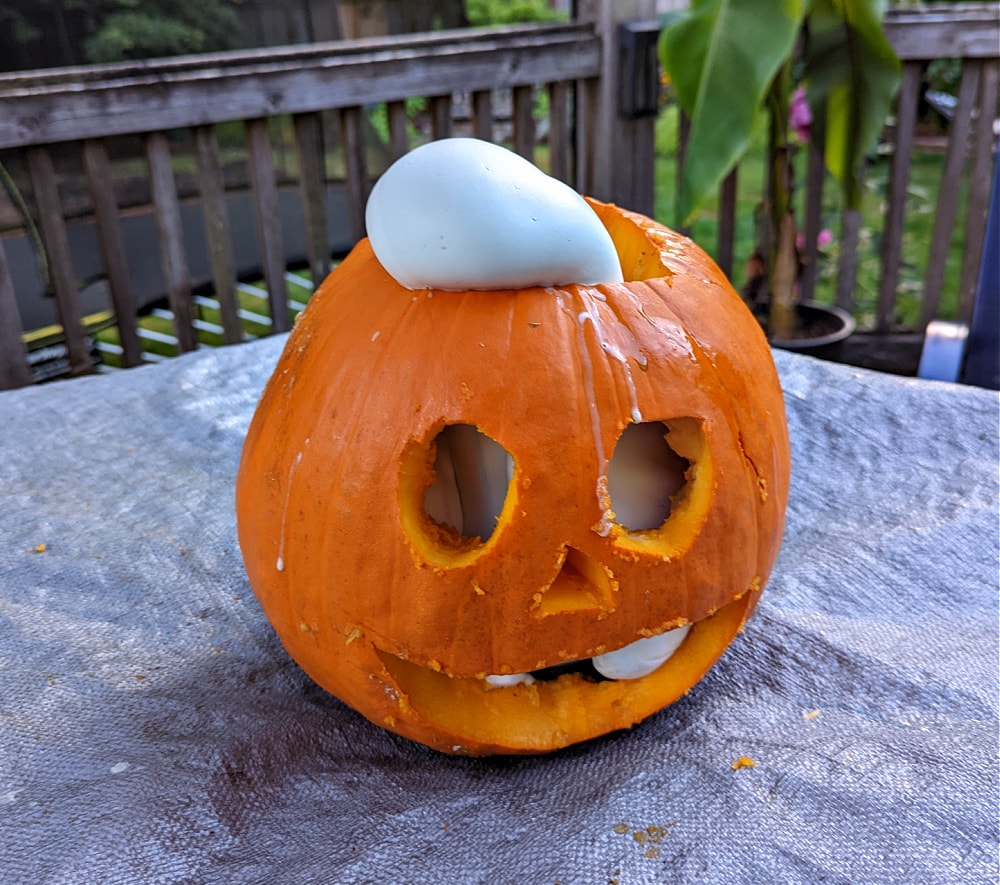
The foam is definitely filling the whole pumpkin & starting to come out the mouth & really coming out the top of the pumpkin now! We made the container tall to make sure the foam would escape out the top as well as the mouth of the pumpkin….and boy , did it go out the top! We probably didn’t need it quite that tall! Ha!
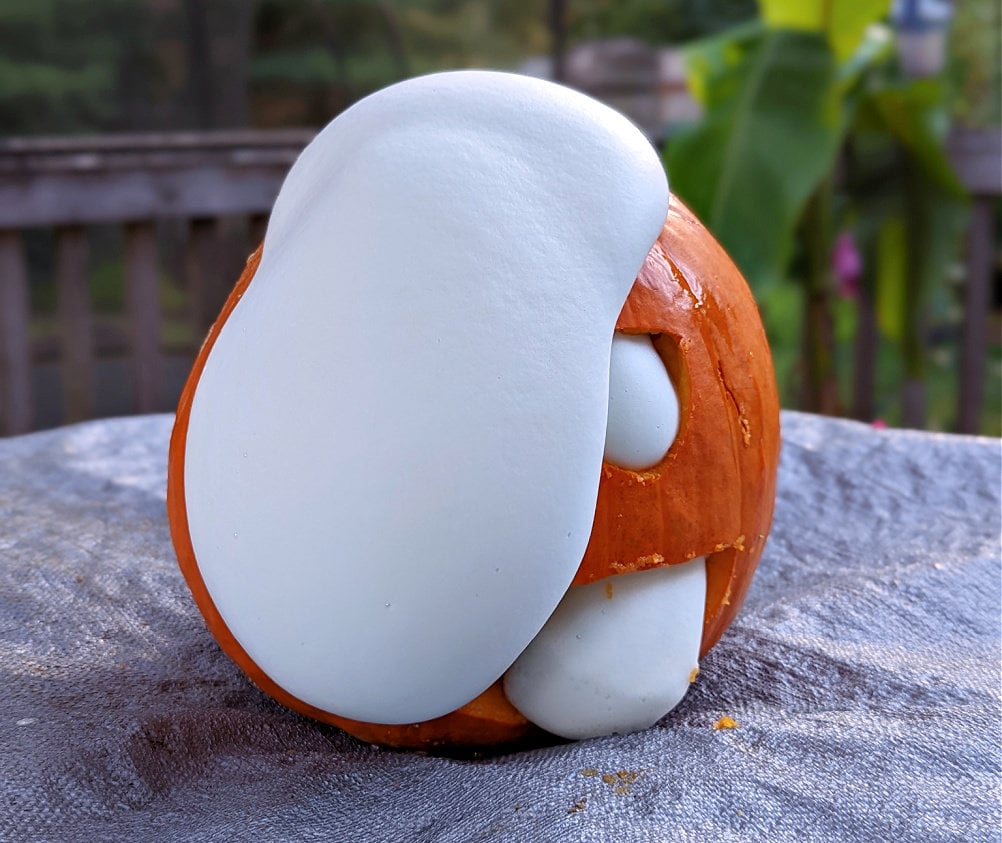
And there it goes – out the top & all the way down the front of the pumpkin! So much ooey-gooey, slimey foamy mess! The tweens & teens will love it! This could definitely be a hit at a Halloween party if you want to have your kids show this experiment to their friends! It’s definitely a crowd pleaser!
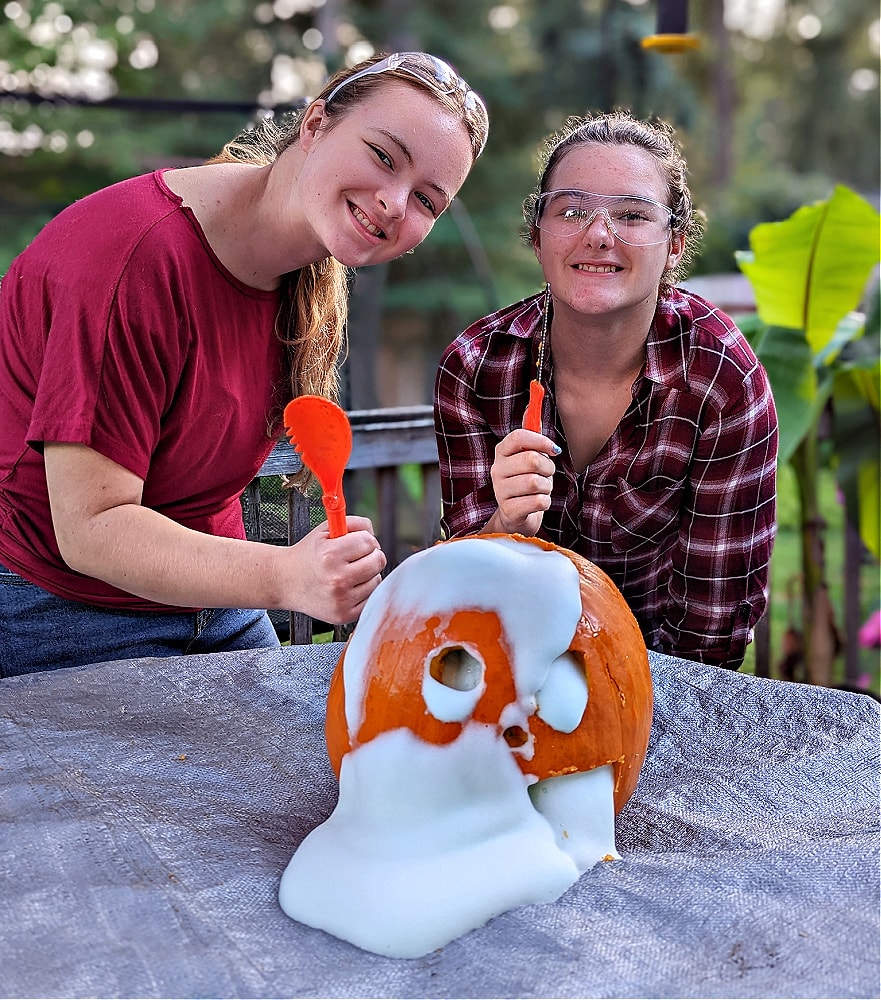
These girls were dying to touch the foam, but you won’t want to touch it, especially when it’s oozing out, as it could be hot to the touch in the first few minutes. You also want to be extra careful because of the hydrogen peroxide as your skin could be sensitive to it. But they used our pumpkin carvers/spoons to have some fun with it for a few minutes, before we disposed of it. (We made sure to wash it all away very well as we have a pup who would be too interested in checking it out if any remained on the ground or the tarp, etc).
Let us know if you try this fun experiment – it was definitely a favorite of our girls & they are now trying to think of more ways to use this elephant toothpaste project or more fun ways to carve the pumpkin for an awesome special effect! :)
Fall or Halloween Themed KiwiCo Crates
I absolutely love the KiwiCo STEAM subscription boxes as they do all the hard work for you in putting together the supplies! They have all the supplies needed in the box (or minimal supplies you need to add) so it’s very little work for the parents or kids to set it up. Plus, they always seem to come up with the coolest, most unique & clever project ideas that I could have never come up with myself.
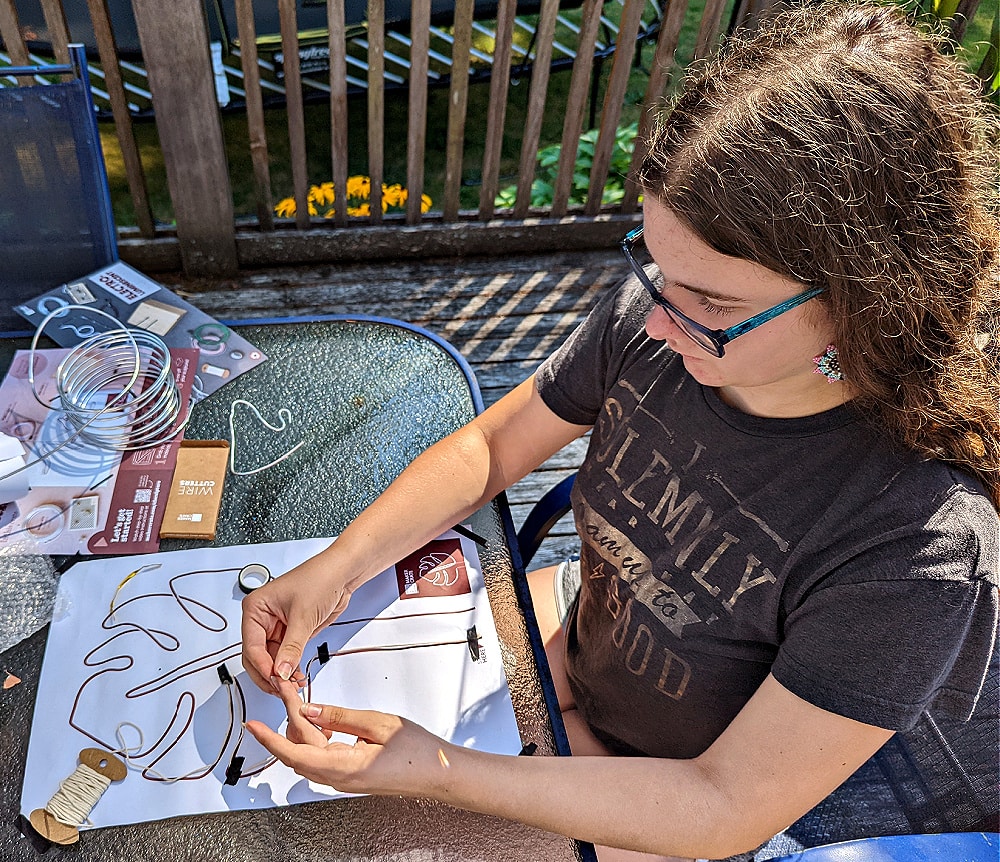
We loved this fall-themed Maker Crate that my daughter tried this month – it was learning how to make electroluminescent sculptures out of wires & in this case, they shaped the aluminum wire into a fall leaf. Once you learn this skill, you could shape the wires into any shape you want & it’s fun to try shapes for different seasons or holidays.
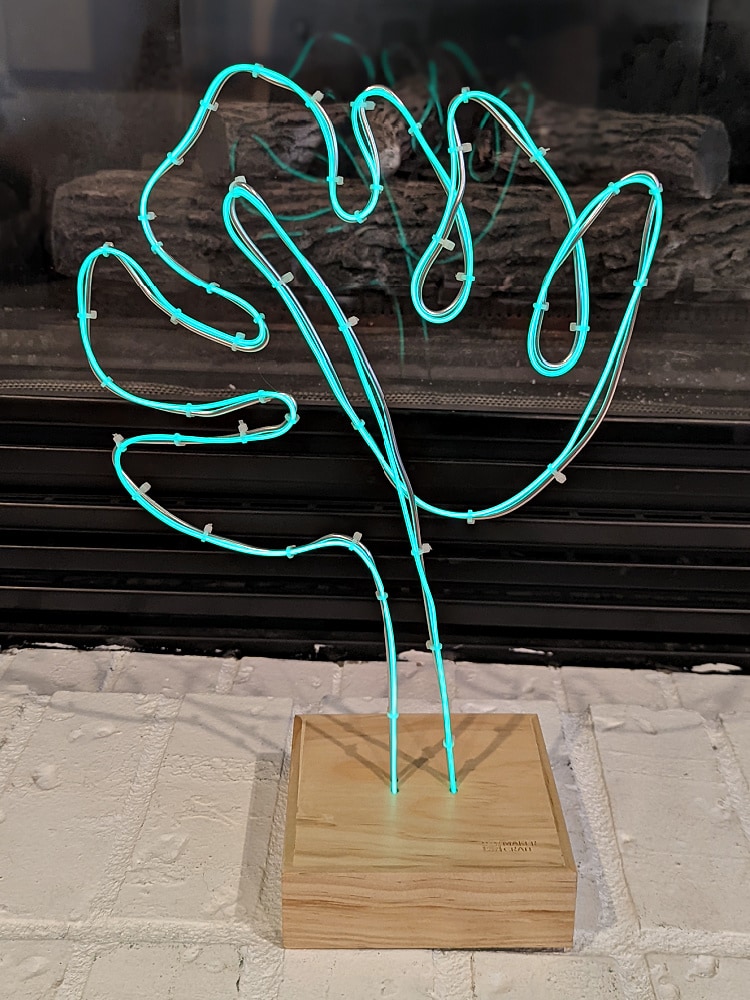
They then added the electroluminescent wire to make it glow & blink “green”, which is so fun to put in my daughter’s room & light up the room at night for a fun fall scene. Definitely a piece of unique autumn decor in her room!
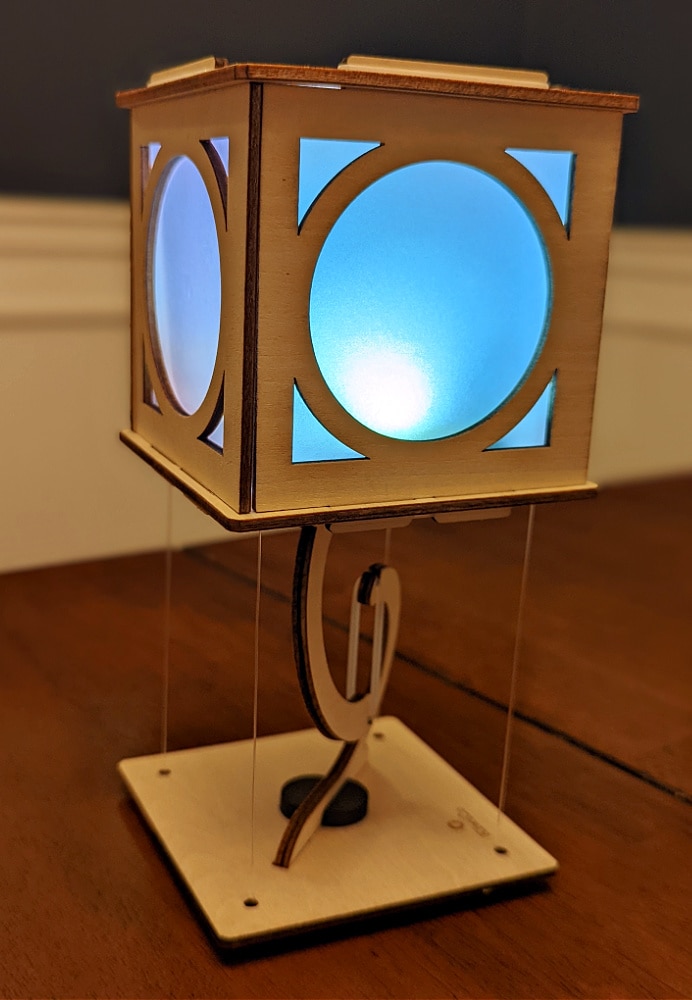
Another example of a KiwiCo STEAM kit that could be adapted for Halloween decor once you finish is the Levitating Lantern from the Kiwi Crate subscription box. This was a nice project to put together with easy steps to follow & once you finish, you have a cool, light-up lantern that looks like it’s suspended in air, which is definitely spooky. Add some different colored papers on the sides like orange & black & you’ll definitely have a spooky decor item for your room or for Halloween party decor.
Not only does KiwiCo have subscription boxes that you can sign up for, you can also purchase DIY & STEAM kits on their website, where you get to choose the craft or STEAM project for your child or teen to try. If you are looking for fall or Halloween themed, we found quite a few different options of fun kits to buy.
You can save 50% off your first box when you use the promo code: KIWIPARTNER at checkout. This brings the price down to as low as $11.98 for the first month (depending on which crate you order).
Here are some of the options we found::
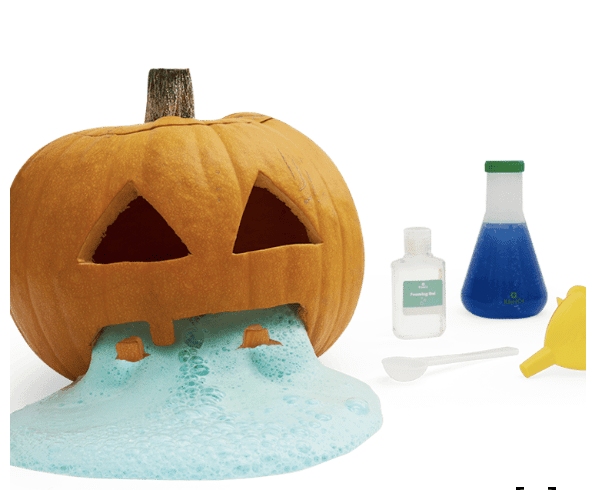
Puking Pumpkin Science – $12.95 (Reg $14.95)
This is very similar to our Pumpkin Elephant Toothpaste experiment, except it uses some different ingredients. It uses baking soda, foaming gel, and liquid colors. Pour the mixture into a carved pumpkin from home, add water and citric acid, then sit back as the chemicals react and make your pumpkin “puke”! The best part is that you don’t have to go around & find all of the supplies (like I now have a big bottle of hair developer I won’t need, ha!)- you’ve got it all sent to you with everything you need, except the pumpkin!

Spooky Halloween Science – $21.95 (reg $24.95)
This is a kit with 3 experiments featuring static electricity. Raise paper ghosts from the grave with a static-charged wand. Make a mini jack o’lantern spark & flash with the help of a balloon. Send eyeballs rolling across a charged sheet & then make them scoot away from your hand – all without touching them.
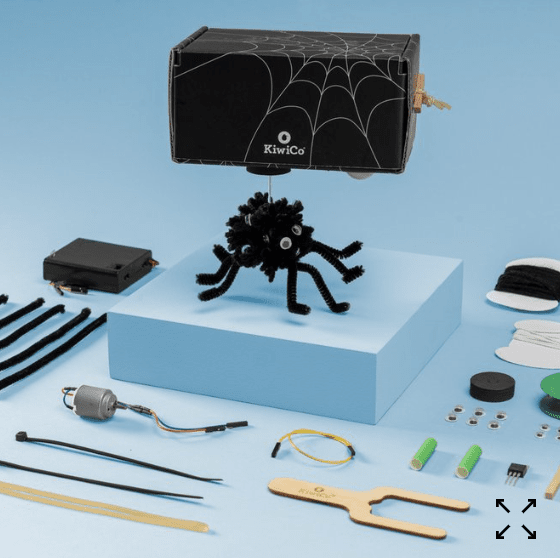
Motion Sensing Spider – $27.95
Get ready for some seriously spooky fun — with a surprise spider that senses motion! Rig up an electric circuit with a motor and a motion-detecting sensor, then watch as your creepy critter contraption drops on unsuspecting victims, er, friends. This is one trick that’s a treat to build!
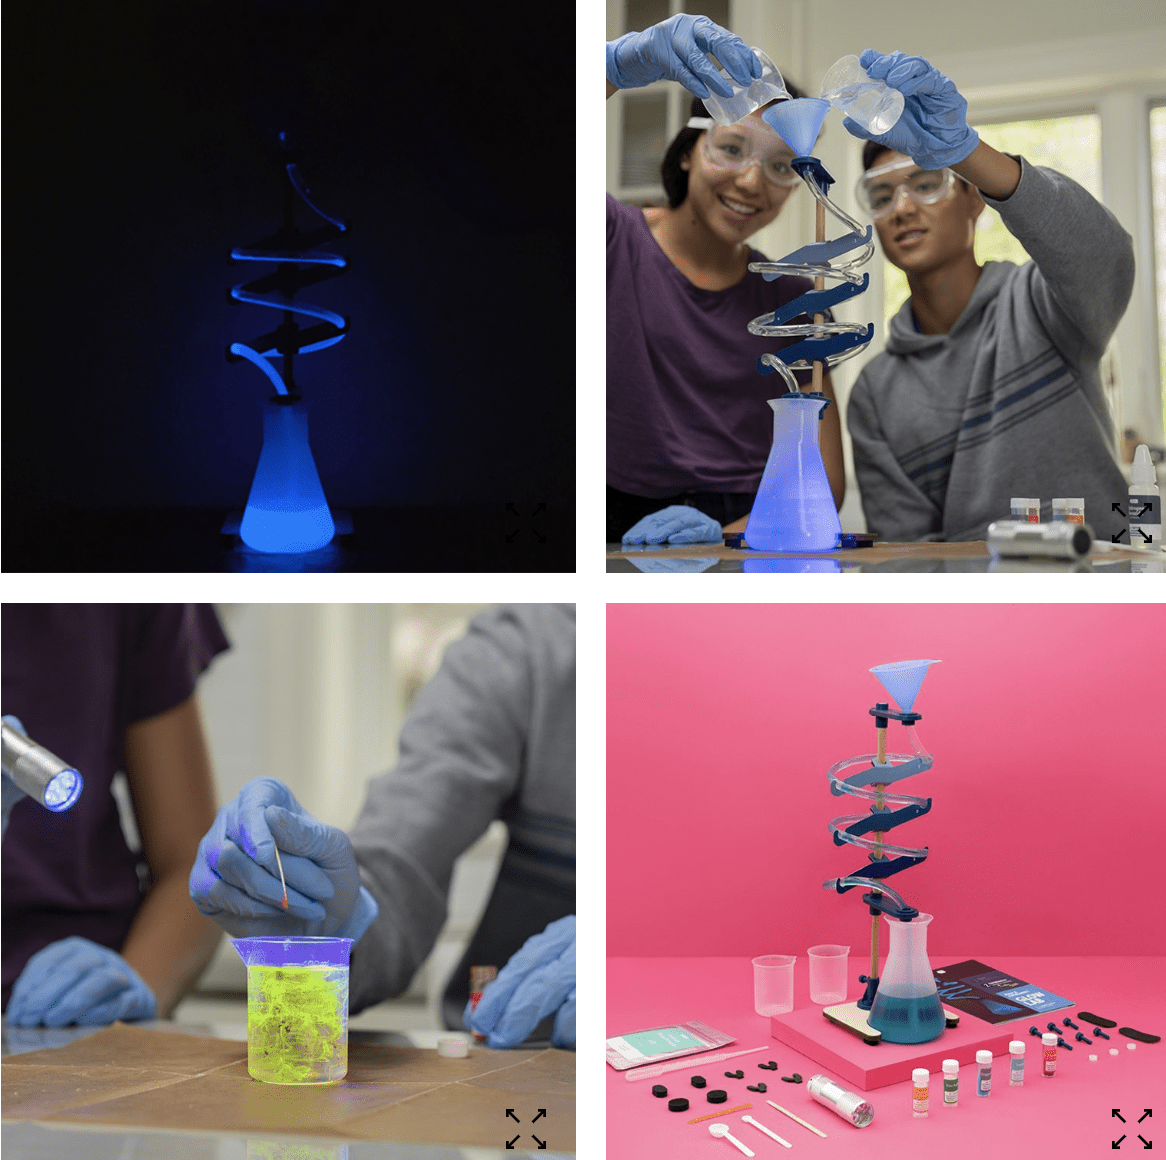
Glow Lab – $49.95
Mix up chemical solutions that glow in the dark! Contains everything you need to try 3 chemistry experiments exploring the science of fluorescence, phosphorescence, and chemiluminescence. With a UV light and a spiral stand to help mix up your solutions, you’re good to glow! Recommended for Ages 14+.
Find more fall or Halloween themed STEAM kits here!
More STEAM Kits:
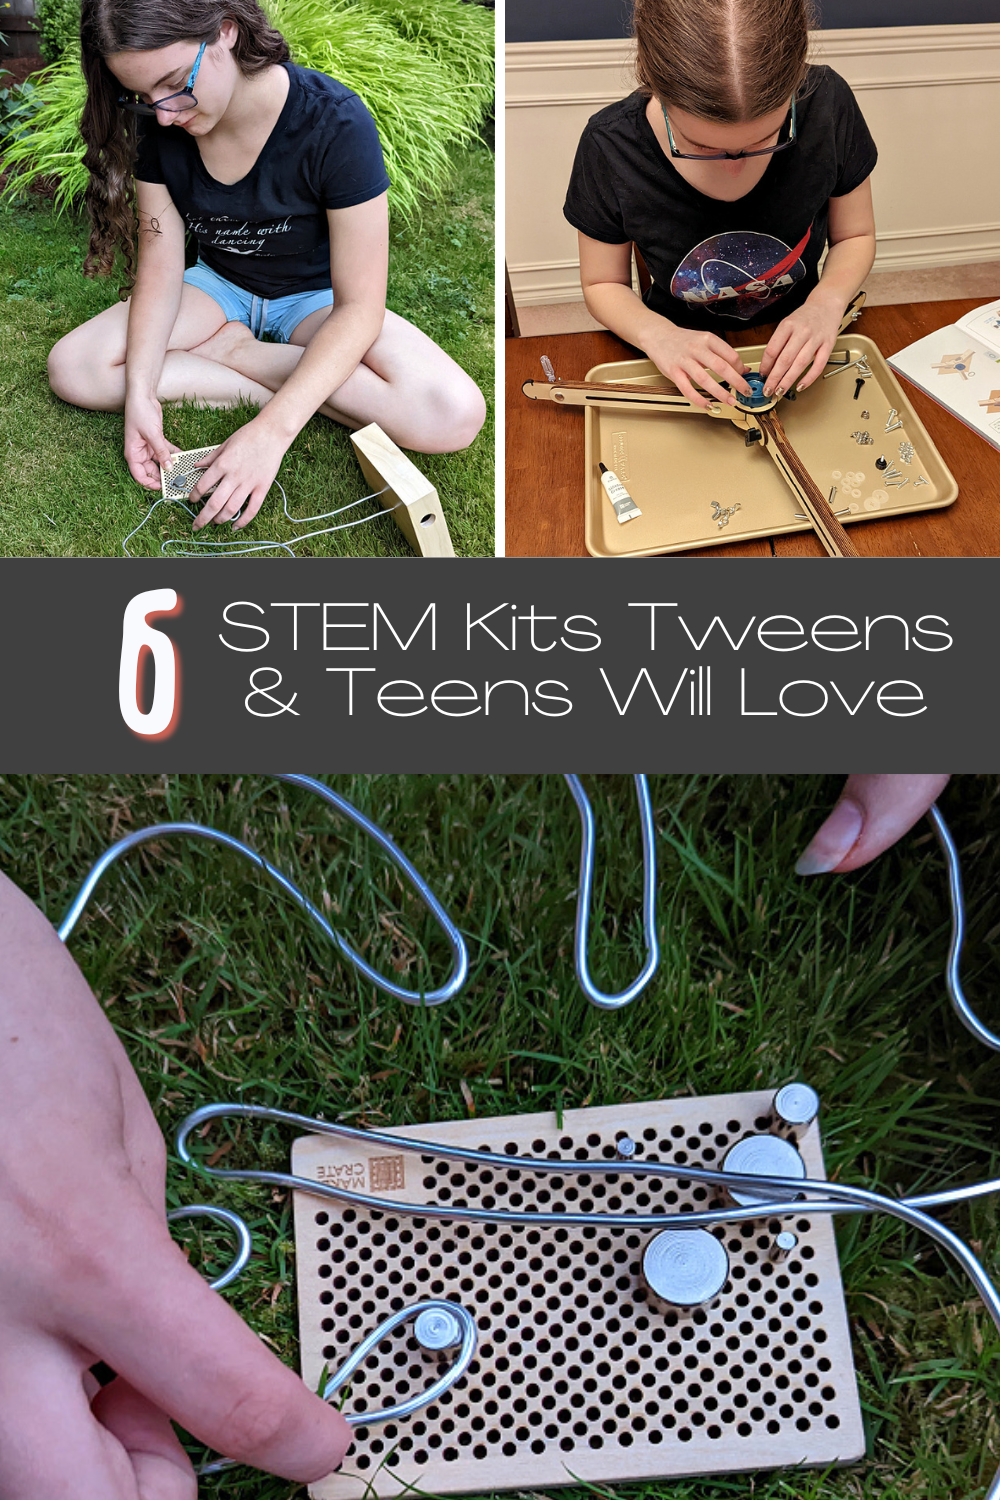
6 STEM Kits Tweens & Teens Will Love
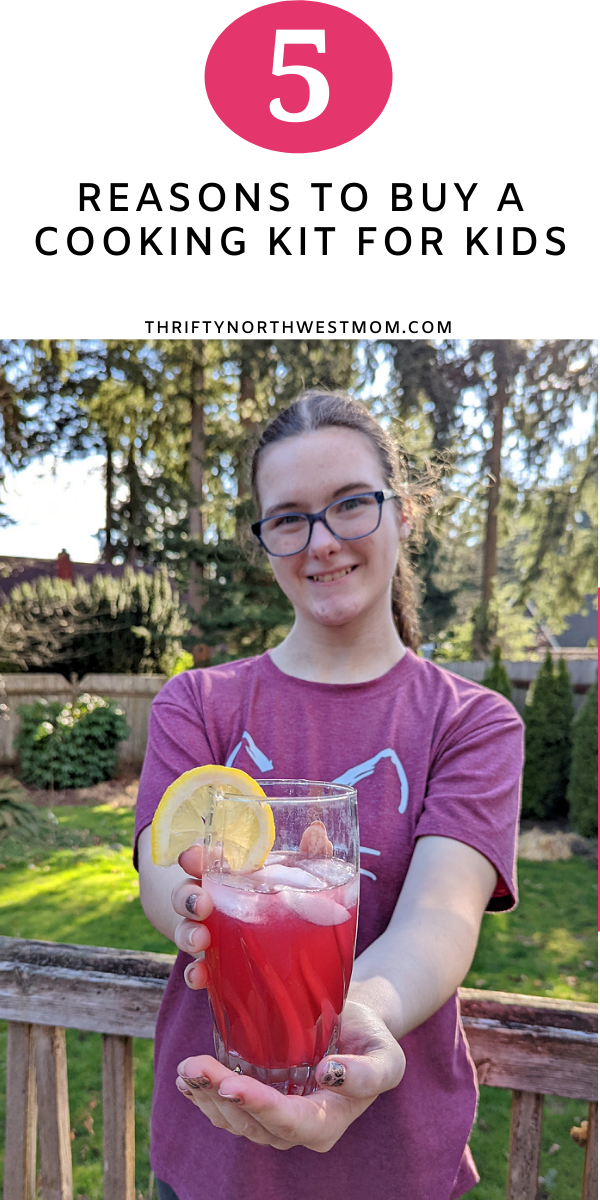
5 Reasons to Buy Cooking Kits for Kids