
Make A DIY Headboard with Lights + Win $250 Home Depot Gift Card
This post may contain affiliate links and I may be compensated for this post. Please read our disclosure policy here.
Find out how we made this DIY Headboard with Lights with a few affordable materials from Home Depot.
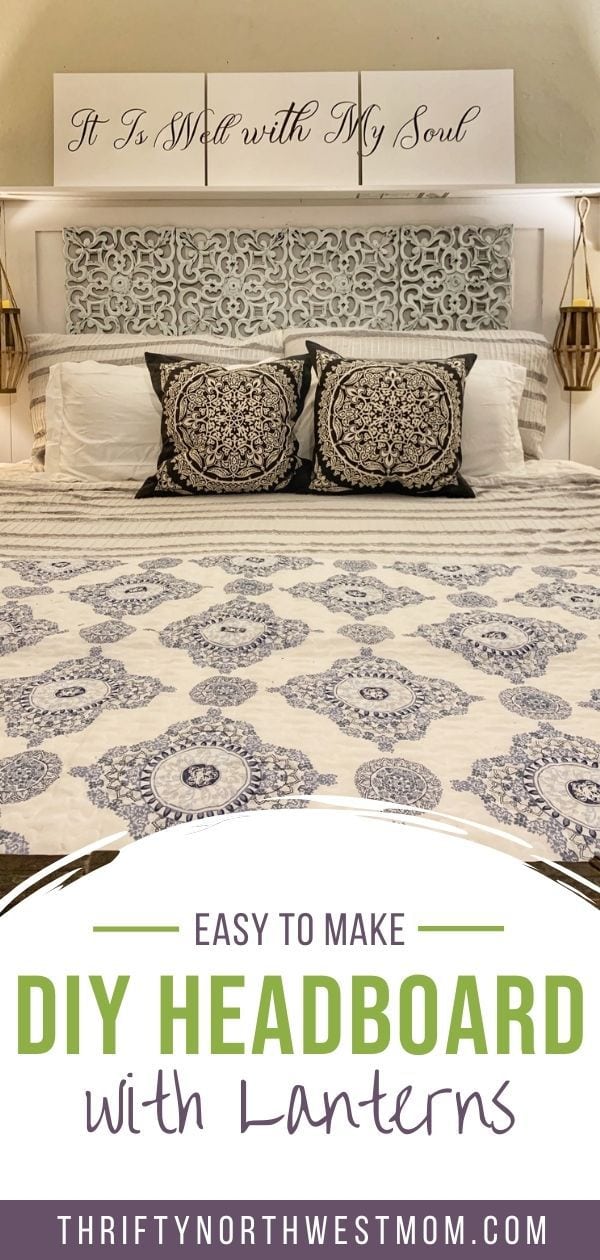
Make A DIY Headboard with Lights

As we inch closer to fall & winter, I wanted a cozy comfortable master bedroom I could relax in each evening. I have always spent time and effort getting my kids rooms cozy, but the master bedroom has been the room that all the leftovers from the rest of the house ended up in. I did not have a huge budget, but I knew with a few key pieces from Home Depot, I could pull all of these things that landed in my room, into one cohesive look, and make it a place I could relax at the end of the night, and enjoy a soothing evening. So I set out to make my own DIY Headboard with lights for some ambiance.
The main piece in the master bedroom that I needed to create, and on a budget, was a headboard. I new this would be the focal point of the room. I also new I did not have the budget to buy the carved wood looking headboard I wanted for my room, so I set out to make my own. By using a few affordable supplies from Home Depot, and some creativity, I was able to make a Headboard I loved for our room for a fraction of the cost it would have been to buy one pre-made!

To make your own DIY headboard with lights, you will need:
You will need to first decide what size of headboard you will be making, then take your own measurements to make sure it fits inside your home perfectly. I made one for my King size bed, out of a large piece of MDF I was gifted. You should be able to use these $33 MDF Panels to achieve a similar look though – and what a great price for the base of your DIY Headboard!
Here are some standard measurements, for most mattress, to help guide you. You will probably want to go out an inch or two on each side, to give you an idea of what you will need (but I highly advise measuring on your own bed, to make sure it fits perfectly!).
(Remember, these are estimated sizes of mattresses for these beds, measure your own, and add an inch or two to each side so it comes out beyond the mattress a little bit).
- King Size – 76” x 80”
- California King – 72” x 84”
- Queen Size – 60” x 80”
- Full Size – 54” x 75”
- Twin Size – 38” x 75”
Supplies Needed:
- One MDF Panel (the standard 4 ft by 8 ft should work for most size beds, as you can cut down to size, or add a few extra boards on each size to lengthen for a king size).
Note – you could use plywood or any other wood of choice here, but MDF is usually the most affordable, and since I painted mine, it was the perfect option.

I used the $9.27 ones in the picture above, but they start at as low as $1.57, so you can make a more affordable choice if you want.
One idea is to use 2 of the $1.57 corbels per side of the bed (so 4 total), so you get extra depth, but a great price!

- 1x5x8 primed MDF board for shelf top

I found some of these for just over $5 each in the clearance section. They are damaged, so you will need to make sure that you can either cut off the damaged part, or paint over it to use these pieces.
If you want the most convenient option, just buy them ready to go. These have a laminate white coating, so you will not even have to paint them – just install!
- Paint
I used this white chalkboard paint, but you can use any paint you choose.
I also used a dark brown to distress the carved wood pieces I added, to give them a more rustic look.
- Drill, Screws & white wood putty or calking (to fill screw holes)
- Saw to cut wood down to size if you are doing a smaller size then the King bead (or have them cut it in the store)
** Optional – two 1×5 wood panels to add to the ends of the headboard, if you want to extend it, or add some dimension.
Ideas for Items for Decorative Middle of this DIY Headboard with Lights:
Here there are a few things you can use, depending on the look you want to create, and the size of your bed frame. I used 12×12 squares of carved wood decorative pieces (4 total), but here are some ideas for your unique headboard:

You can use Ornamental Appliques to create a look you like. We used these on our fireplace surround we built out of plywood (pictured here), to show you how they look on. This is a really affordable way to add some depth to your headboard, but do it more subtly.

Carved Wood Designs. I used 4 12×12 pieces (just butted them up next to each other and screwed them on, to make it look more like one piece). Here is an example of a set of 4 12×12 pieces you could use.

This carved MDF decorative piece might work nice for a full size bed!

If you like a more geometric or modern design, you can also use something like this (and it is really affordable)!
To Make Your DIY Headboard:
This first step in this process, is to measure and cut down your MDF Panel, if needed (this will depend on the size of the headboard you are making – I did not cut mine down for the King Size headboard).

Depending on the size of headboard you are making (King, Queen, Full or Twin) you may either need to extend the size of your headboard, or cut it down. I added some 1×5 pieces of MDF molding to each side off my headboard (to extend it as I was doing a King Size frame, and wanted it to come out a bit on each side off the bed). This step is completely optional, and it is a little tougher to join these pieces, so if you want to keep it really simple skip this step.
You can use a Kreg Pocket Jig Tool to make this step much easier if you are doing it (it helps you make those diagonal holes needed to join pieces in furniture making).
Once you have your MDF Panel the size you want it, paint it up. It is always best to prime MDF, as it will make the painting process much easier. This panel will act as the base of your headboard, so once it is painted and dry, you are ready to assemble the rest.

The next step is to attach your carved wood pieces. If they need to be painted do this first. Start by figuring out what you want your design to look like, and once you have it all laid out, screw them to the main MDF panel piece.

Screw Your Corbels Into the ends of each side of your headboard. I just used two screws to go in at a diagonal, for each side, then filled with some white wood putty when done (to cover the screws).
If you are using two or the $1.57 corbels mentioned above, you will want to glue together with wood glue, and let it dry overnight, before screwing to your headboard.

Now, you can run your 1x5x8 piece of molding across the top of your bed frame, from one corbel to the other. I then screwed it into each corbel, as well as the actual bed frame every few feet too. Fill with more of the wood putty, to cover screws. Lightly sand, and you are ready to paint.

How to add really simple lighting to your DIY headboard:
To add lighting, I found hanging candle lanterns, and simply attached with a Command Hook, and added a battery lit candle. I used one that I could turn on and off with a remote control, so that I can easily light up the headboard at night and turn it off when I want to go to sleep.
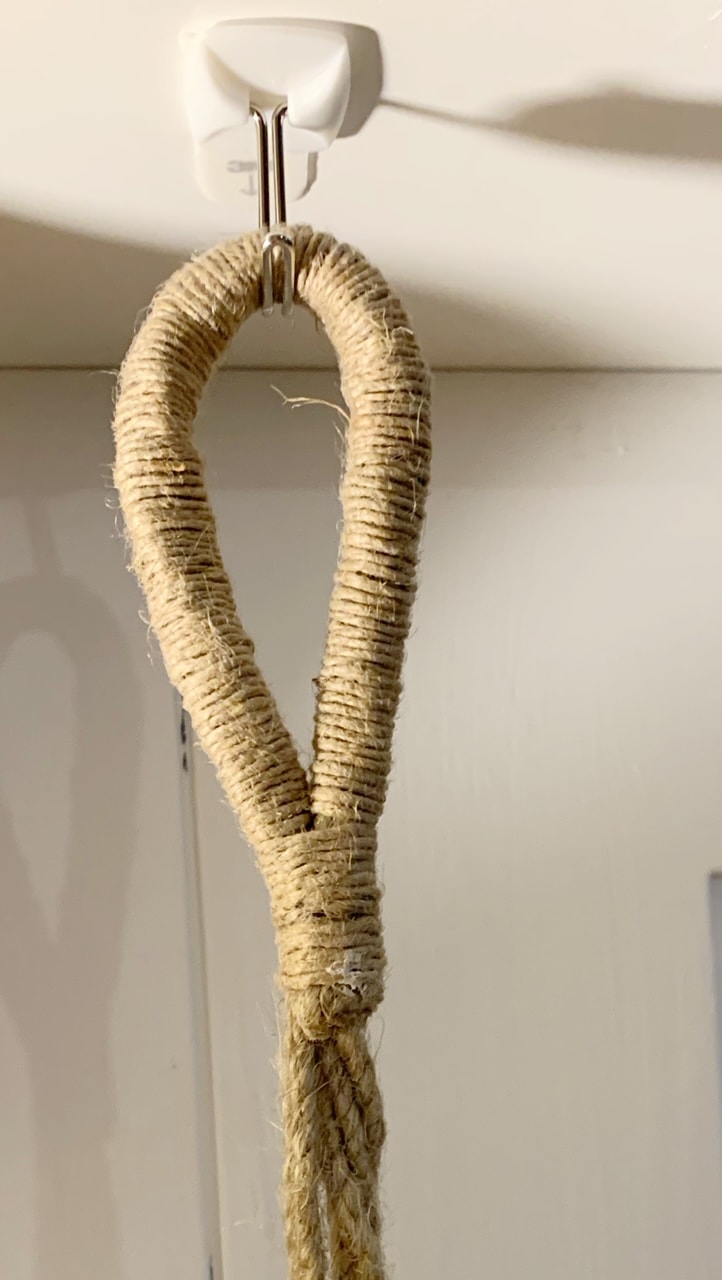
It was the easiest lighting project I have ever done, and it required no electrical work at all.
This is the style of command hooks I used to hang my lanterns from the bedframe (depending on the lanterns you use, you might need to go up a size).
I found my hanging lanterns in the store, but here is a really affordable option from Home Depot online, that could work great too.

The last step is to attach it to the wall behind your bed, and make your bed up. It cost me less then $100, to make this headboard. The inspiration piece I saw that inspired this one, was hundreds of dollars, so this is a nice way to save big on your own DIY headboard with lights.
Find more DIY Home Improvement Projects here as well.
