
Baby Animal Painted Pots for Easter for Candy Dish, Easter Decor or Mini Easter Baskets
This post may contain affiliate links and I may be compensated for this post. Please read our disclosure policy here.
Baby Animal Painted Pots for Easter
My girls love to create new arts & crafts projects and show off those projects for friends & family that come to our house. One way we do that is by creating crafts for the different holidays & then using those crafts to help decorate our house for that holiday. It’s so fun to pull out those special pieces my girls have created year after year when we bring out our holiday decor. So, we decided to come up with a fun Easter craft to showcase year after year with all of our Easter decor.
I am all about frugal, so I thought it would be perfect to use the terracotta flower pots to decorate & use for our Easter decor. You can find these so inexpensively – and may even have some extras in your garage or garden shed. We thought it would be fun to create some cute little Easter animals out of the pots, but you could also decorate them with polka dots in fun spring colors or paint little flowers all over them, too, for a fun Spring theme that would work for your Easter decor & Spring decor.
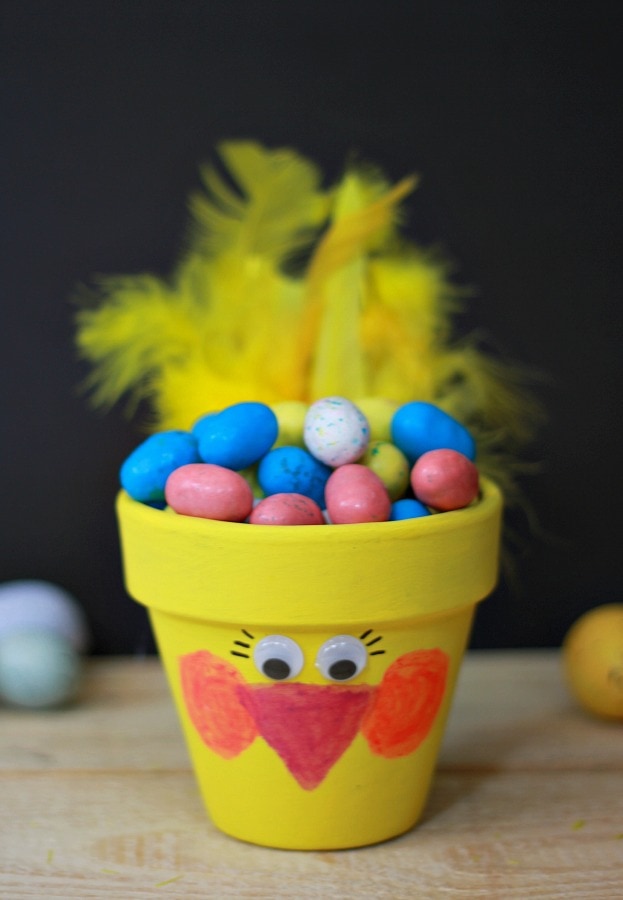
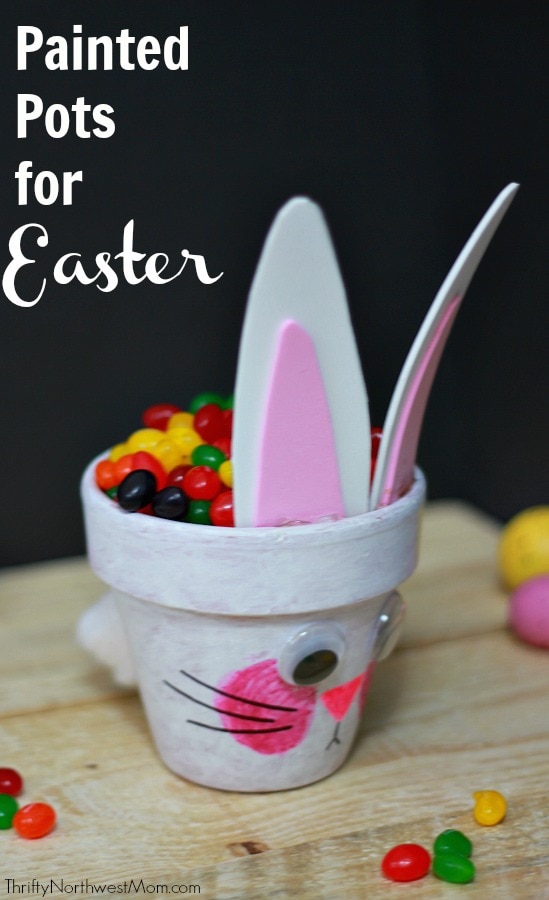
My girls are all about baby animals, so we thought we’d create cute bunnies & baby chicks from our pots. It’s really a simple design that’s not hard for kids to make & if you have younger kids, you can help them with the more detailed aspects. These pots make darling Easter decorations – you can put these on your Easter table or out around your house filled with candy for a little candy jar. Or add sweet spring flowers for a cute painted Easter flower pot!
Another idea is to have your kids make these in place of mini Easter baskets – you can fill them up with some candies or treats. So many fun ways to use these pots or how to decorate them for spring!
Painted Pots for Easter
Materials Needed:
- Terracotta Pots
- Paint – we used Kwik Stix mess-free paint sticks for fast drying paint for the bunny & regular paint for the baby chick
- Googly Eyes
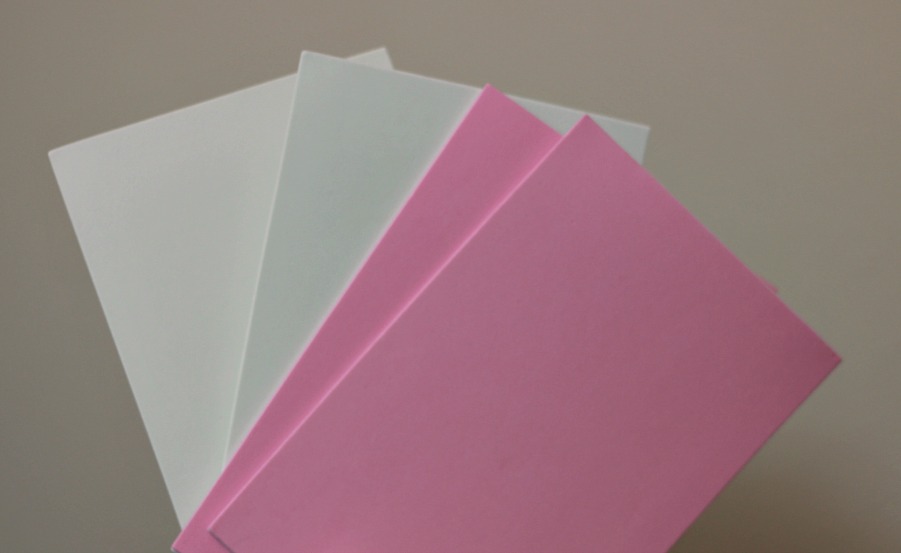
- Foam Sheets
- Cotton ball (for bunny tail)
- Feathers (for baby chick) or
- Hot Glue Gun
Directions:
Wipe the pots down first with a wet paper towel to make sure there is no dust from sitting at the store.
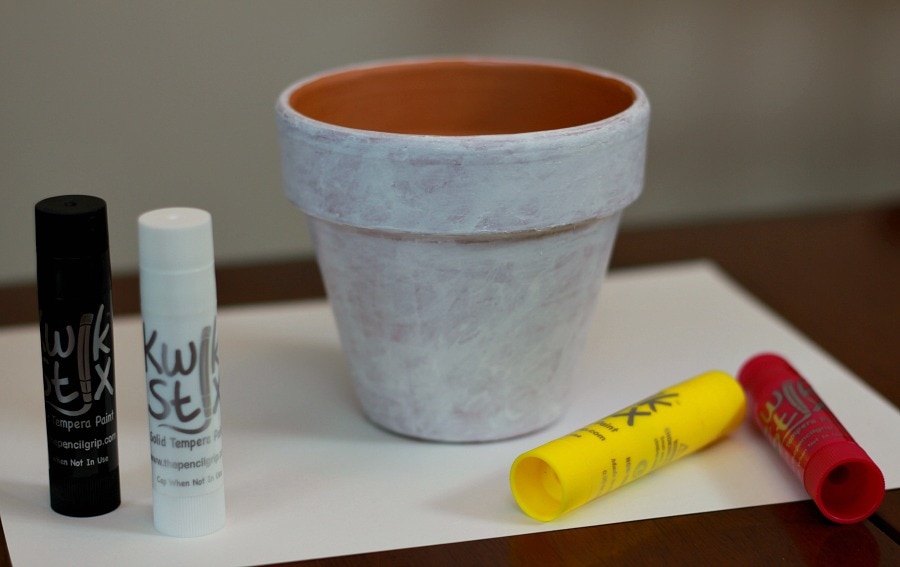
Paint the pots a base color.
For the bunny, we used a white Kwik Stix paint stick (we loved how fast it dried, dry within 90 seconds). For the chick, we used yellow paint.
You may need to do an extra coat or fill in areas that need additional painting.
Once your base layer of paint is completely dry, then you will add the face & extras for the 2 animals:
For the bunny:
- Add cheeks with pink paint
- Add in a nose with the same or darker pink paint
- Wait for it to dry
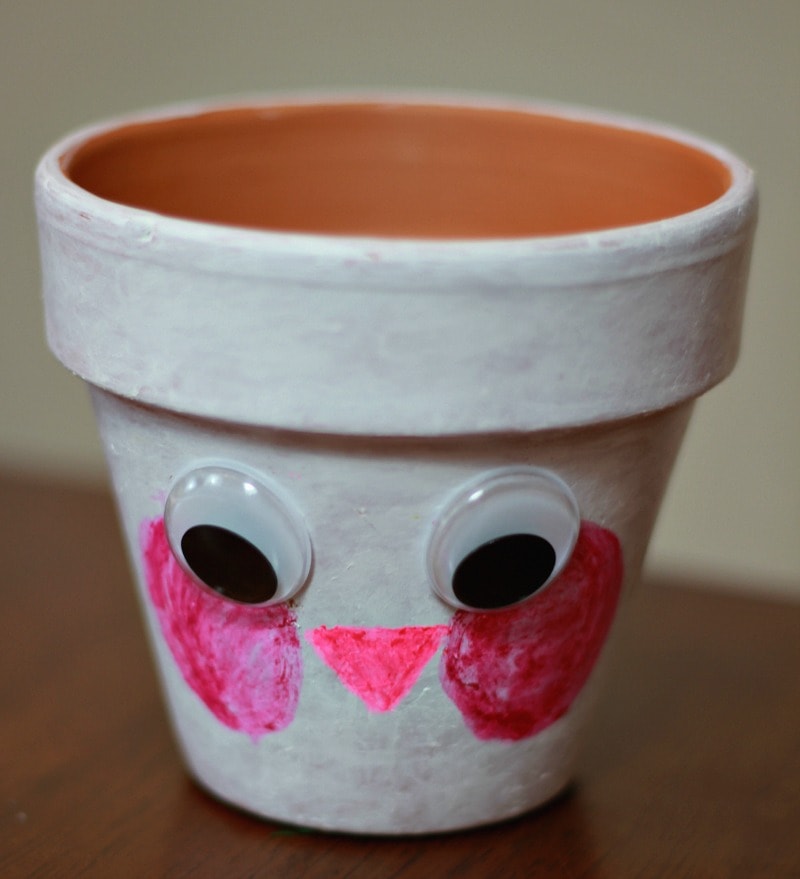
- Add googly eyes
- Draw the rest of the nose & whiskers
- Cut out ears from pink & white foam sheets (I made the white ears a bit larger than the pink ears)
- Use a hot glue gun to attach the bunny ears to the inside of the pot
- Grab your cotton ball & use your glue gun to attach it to the back of the pot
- Fill with your favorite candies or plant a pretty flower

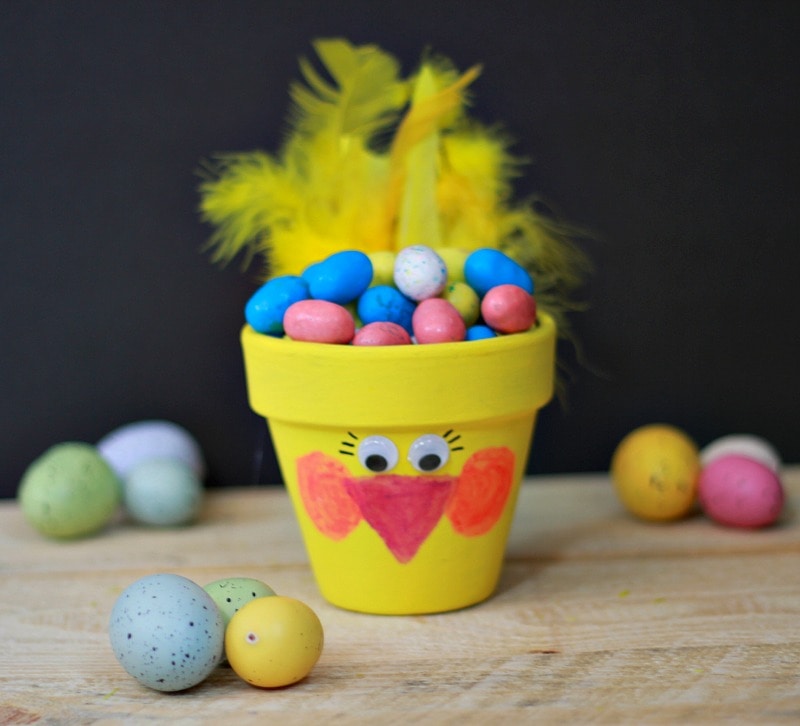
For the Chick:
- Add cheeks with pink paint
- Add a nose with the same or different color pink paint
- Make sure it’s totally dry
- Add googly eyes
- Use yellow feathers or pipe cleaners to shape into chick wings for the back & possibly the side if you’d like (I just did the back feathers)
- Use your glue gun to attach the feathers or pipe cleaners to the inside of the pot for the back feathers & then attach the side feathers to the side of the pot in the back
More Easter Crafts/Treats:

We’d love to hear your favorite Easter crafts with your kids?

2 Comments