5 Simple Meal Prep Tips To Eat Healthier
This post may contain affiliate links and I may be compensated for this post. Please read our disclosure policy here.
Disclosure: This post was sponsored by Amazon and LTK. All opinions are 100% my own. Find our disclosure policy here for more information.

Some of the container options we share below in one easy roundup. You can just click on the image above, and it will take you to where you can find them on Amazon. Or follow us on our LTK shop here, and you can see when we share more or new ideas too.
5 Simple Meal Prep Tips To Eat Healthier
As a mom of active teenagers, I am always looking for ideas on ways to make meal and snack options that are healthy for them, taste good so they will eat them, and can be prepped ahead to make life easy on me during busy weeks. As much as I enjoy cooking, it is just not practical for me to spend each day cooking every single meal with my work schedule, and that is where some of these meal prepping ideas go a long. Prepping healthy food options, and having them ready to go has been one of the biggest game changers in helping my family to eat better. Just buying the food and having it in the house, was not translating into it always getting eaten, so I started with these simple tricks, and it helped! They are simple ideas to start with, and ways I use to make sure my kids still get healthy and satisfying food in them. With a little bit of planning, a little bit of prep work, and the right supplies, it makes the rest of the week goes more smoothly for us.
Half the battle for my kids in terms of making healthier food choices is just the ease of grabbing and eating something without having to cook or prep something when they are hungry. When I have some of these healthier options cleaned and prepped (ready to eat), the kids will grab them over prepackaged snacks in the cupboard most of the time. But if I do not have them set up to be easily grabbed, they will default to prepackaged items that are not my first choice for them. In fact, since we started investing in some meal prep dishes/containers and using some of these tricks, I buy much less prepackaged food, as it was not getting eaten. And I did not have to tell the kids not to eat it, I just provided better, and easily accessible options, and they made the choices themselves.
I love to grab many of these containers from Amazon, as there are always so many options that it is easy to find something that fits our needs and at a price point I am willing to pay. I share some of the @amazonhome finds that I use to help make healthy meal and snack prep easier, in the hopes that it might inspire you to find things that might work for your household too.
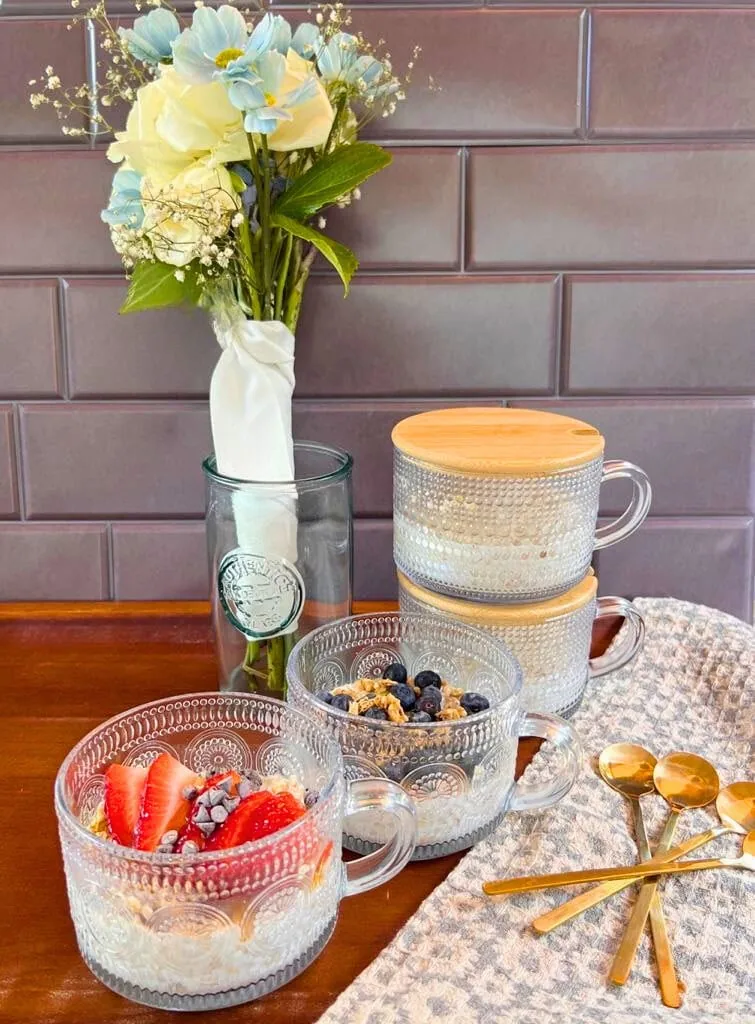
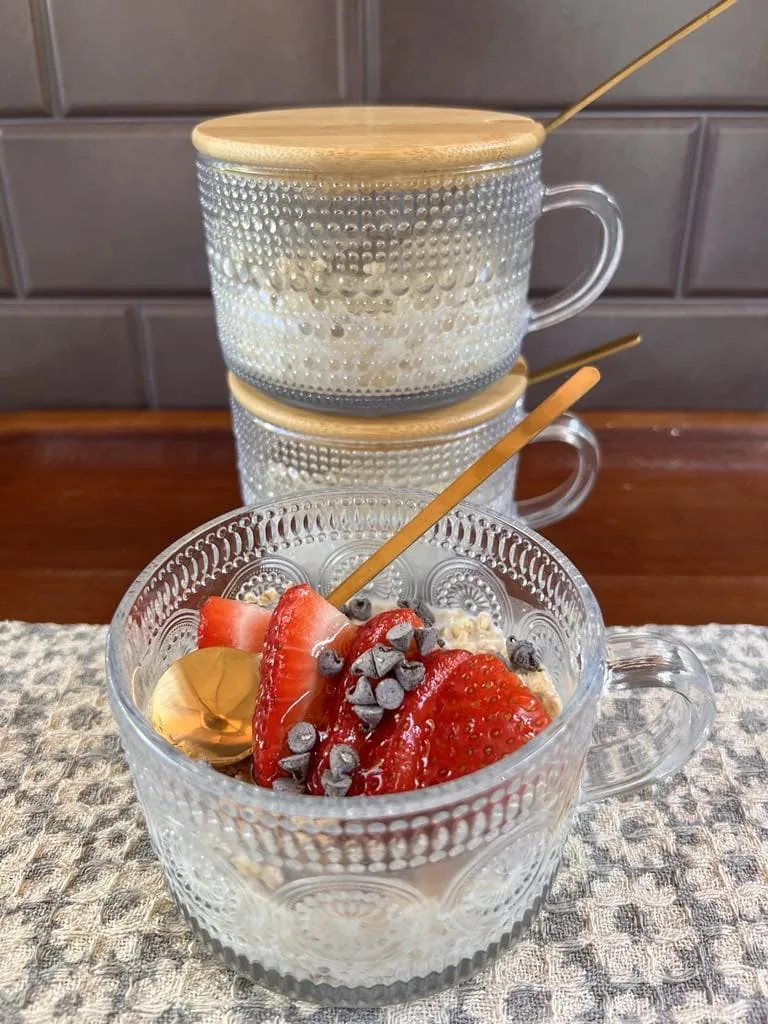
I love this set of vintage-style coffee mugs with spoons for making overnight oats with! They are so pretty, have wooden covers and my kids love to eat overnight oats out of them!
Prep Overnight Oats For Your Crew, To Keep Breakfast Simple
Overnight Oats are one of the quickest and easiest ways to get a healthy breakfast on the table that everyone can customize to their taste, on busy mornings. And that is why it is one of my favorite food prep items for breakfast, as well as a simple place to start.
I love them because I can put together a base overnight oats recipe from memory (it is so easy), and then have different toppings ready for them to customize them the way they like them in the morning. That makes it a breakfast favorite for everyone in my family, and it is so easy.
I just use a base recipe of 1 part oats to 1 part milk. The thing that is nice about this is that you can use this basic recipe and build off of it.
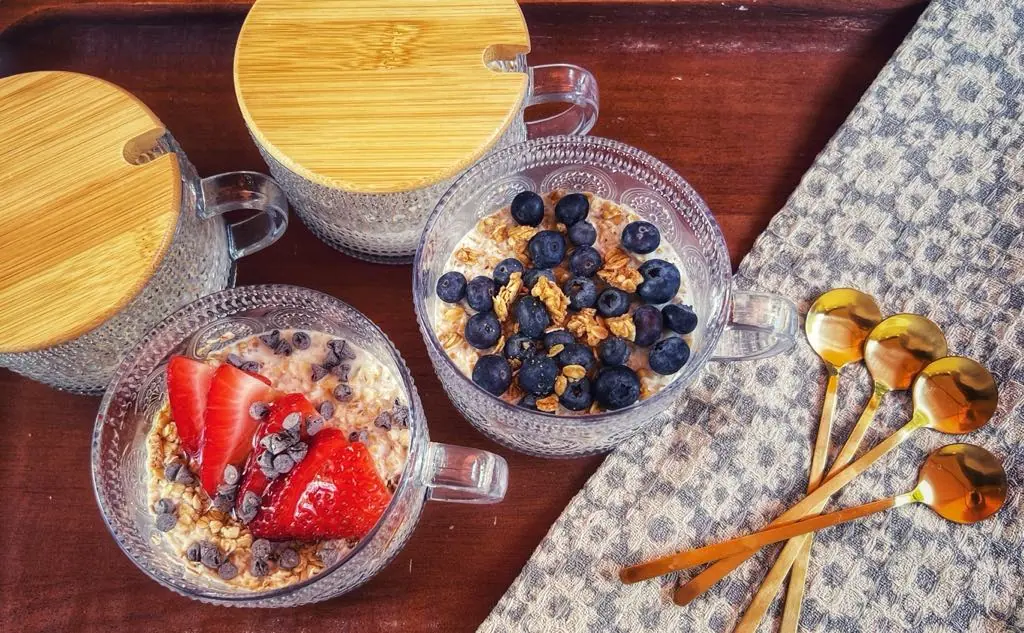
One of the keys for me was finding these pretty vintage-style mugs with lids that I can make them in. I say this was key, because with my kids being teens, they seem to like eating them in something pretty. We were using mason jars before, which is still a great option, and they store well, but one of the advantages of using a container like these vintage mugs is that they are wider, making it easier for my kids to stir in all of their favorite toppings. So they are practical and pretty! They are not air-tight, but I put saran wrap over them, then cover with the lid, and they work perfectly for us.
Berries are my kids’ favorite things to add. We use blueberries, sliced strawberries, and raspberries often. I like to prep the berries on the weekend, wash them up, and add them to a food storage container, then make the simple overnight oats recipe. Then, all the kids have to do is grab the container in the morning and scoop whatever toppings they want into their oats.
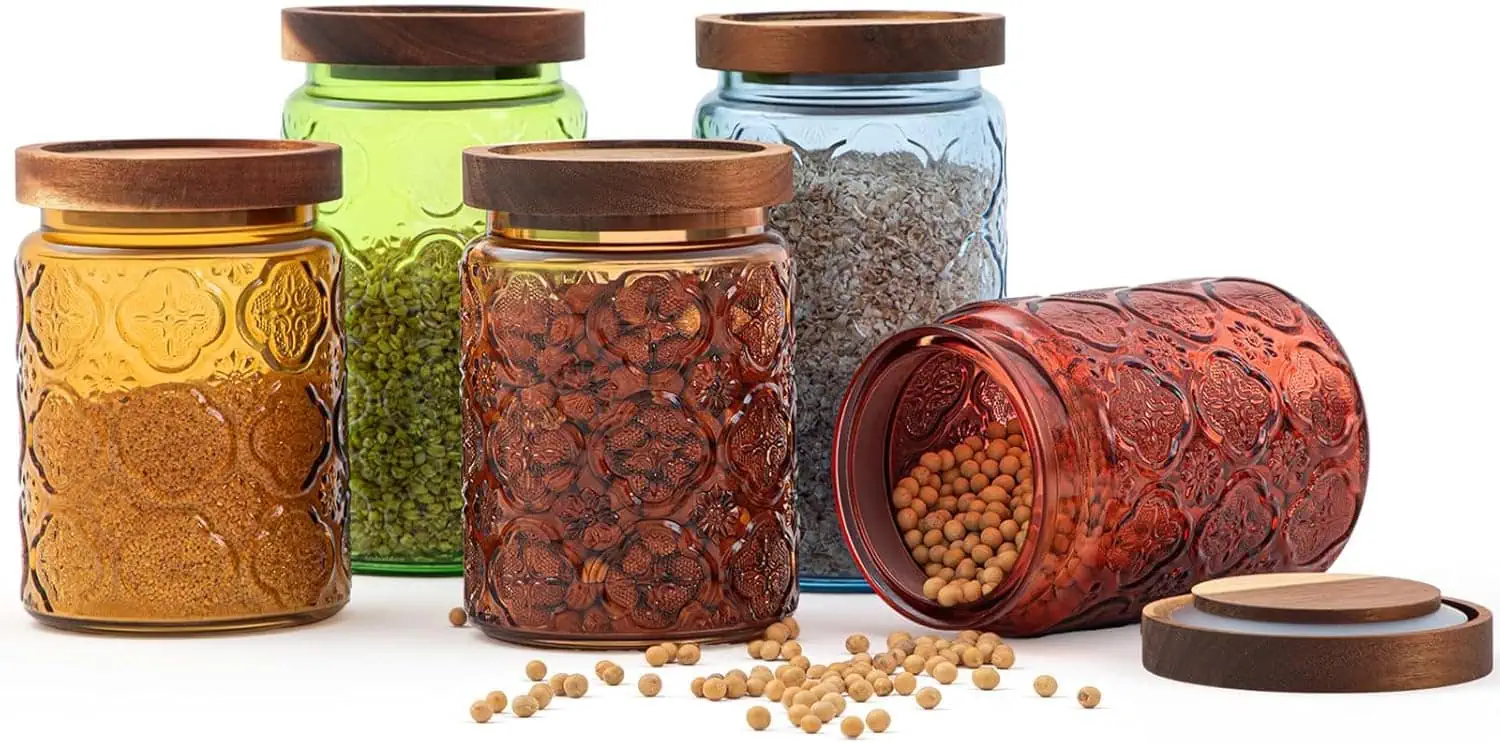
You can also find these beautiful jewel tone vintage glass container options, and they come in two different heights.
My kids are student athletes, so oatmeal is a go-to breakfast for them during their sports seasons, and here are some of their favorite toppings to add in:
- Greek Yogurt (to add extra protein). Choose your favorite flavor, or use plain and drizzle some honey over it
- Fruit, especially berries like blueberries, raspberries, and strawberries
- Chia Seeds for fiber (add these while making them if you want to use them – I use 1 tsp of chia each)
- If you want sweeteners other than fruit, real maple syrup or raw honey make good options
- Chopped nuts or granola, if you want to add crunch
- Mini chocolate chips, if you want them to feel more decadent

You can use them as a healthier idea for dessert, too!
This S’mores Overnight Oats Recipe, for example, could work perfectly for breakfast or for dessert!
You will want an air-tight container to make your oats in, but if you are using them for dessert, we love to make them in beautiful stemless wine glasses, that you can cover tightly with saran wrap and refrigerate for a couple of hours until they are set and ready to enjoy.
I love the sturdy flat bottoms on these beautifully colored ones we show above, if you will be using them as dessert cups (plus they have a 15% coupon right now)!
Prepping Simple Snacks To Have on Hand for Grab & Go Options, Or Enjoy Already Prepped At Home
Here are some quick and easy things I like to do (usually over the weekend) that make it easier to make food choices we enjoy more, and that are better for our bodies, during the week. If I do not have these prepped, all I hear from the kids is there is no food in the house – ha! But if I have these ready to grab and enjoy, then they do that. Plus, with my kids getting older, I get them involved in the prepping stages now, so when they go off to college, they have healthy eating habits they can take with them.
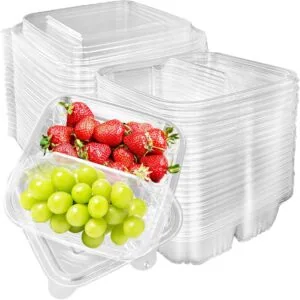
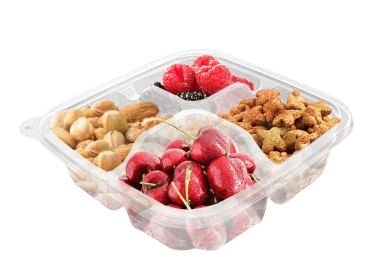
Find both the 2-compartment to-go snack containers (wth a 10% off coupon) and 4-compartment containers here.
If you have kids who are on the go, snack-size bento containers are perfect for that. I will use the snack-size containers to make up healthy snack options that the kids can literally grab while they are running out of the house, or pick up and eat while doing homework. The point is they do not have to think much about it, just choose what they want. The idea is to fill them with the things that your kids like, and that you are comfortable with them eating. This will vary by household, but here are some ideas of things we do to make snacking easier and healthier throughout the week:
- You can get the 4-compartment ones, and add in some Greek yogurt, granola, and fruits, and they can mix it all together when they want a yogurt parfait.
- Or use them to prep your toppings for the overnight oats, so they can easily grab and top them with.
- Other ideas for these would be adding nuts or trail mix in the different compartments, for healthy snacks. I like to make my own trail mix as sometimes it can taste a little stale when you buy the premade ones, and these are perfect for doing that. I often buy a different assortment of nuts and seeds, some dried fruit, and dark chocolate chips, and then the kids can each pick what they want in their trail mix. I add it to an airtight container, and they will grab it throughout the week to snack on. Again, much better than reaching for the chips.
- Both of my kids love specialty cheeses, and one of my girls loves nice salamis or sliced prosciutto, so I will make mini charcuterie boards in them (sometimes add olives, and pickles in their own containers, then some cheeses and meats. The crackers will get soggy, so I keep those separate, but with everything else prepped, it is easy to grab and pair with crackers.
- My kids also love salsas and dips. Sometimes I will make up a pack with some red salsa, green salsa, corn salsa, and pica de gallo. They can grab this and some tortilla chips as a snack. I like this because it lets my kids get a small chip fix when they feel like they are missing it, but pair it with some fresh veggies.
- Greek platters are fun to make, too. I like to make up some tzaki and hummus, and cut up some feta into small blocks, and then add sliced cucumber or pita or pita chips to the 4 compartments.
- Veggies and dip are also a great option. Veggie trays can be pricey, but making up mini ones with your kid’s favorite sliced vegetables and dips makes them easier to make and more likely to get finished off.
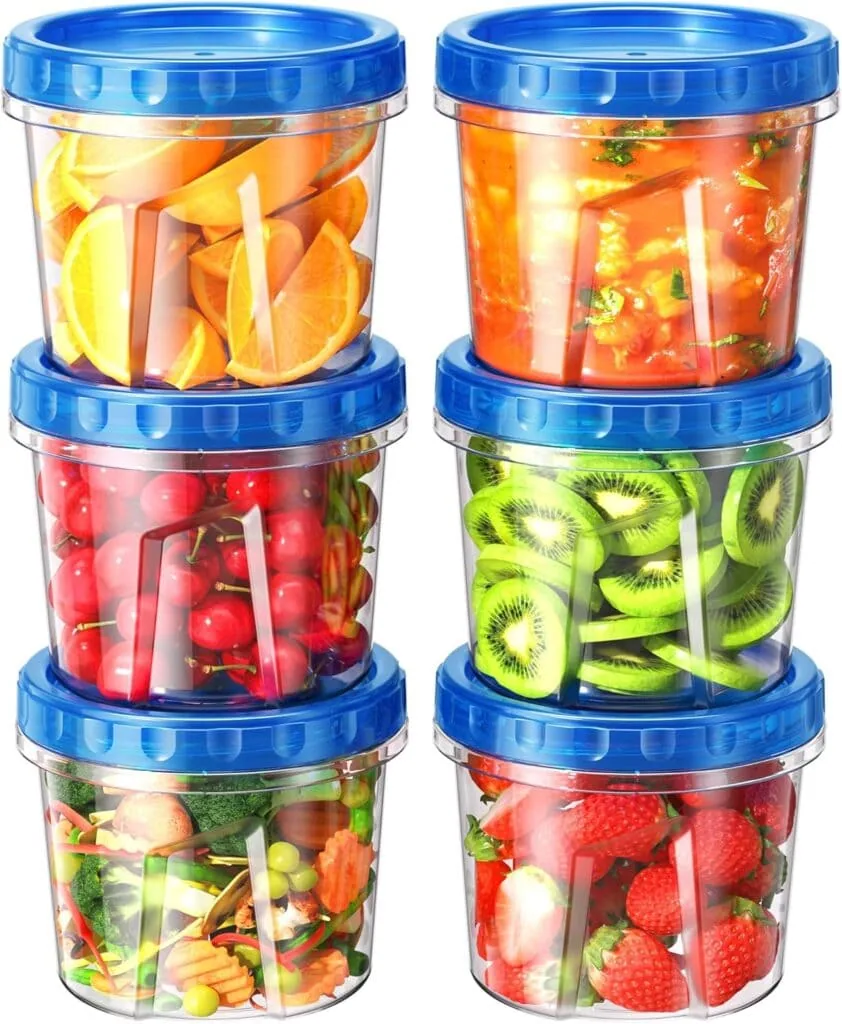
Find this set of freezer containers for under $10 here.
Freezing Food For Healthy & Homemade Meal Options Later
Freezing food is a great way to store meals for later when you are making them the first time around. The best thing about this is that you can start with some small things. You do not have to jump head first in right away. Here are three simple ways to start prepping a couple of things you can throw into the freezer for easy meals.
- You can also use something like these freezer containers to put smoothie mixes in, so they can just add to the blender with some liquid to whip up a quick smoothie. Frozen berries can be expensive, so I like to grab bigger containers of fresh berries and can use some for breakfast, as well as add some to the freezer containers as smoothie mixes. Or you can grab the frozen berrie mixes too. For some reason my kids are more likely to make a smoothie when I have these “smoothie packs” prepped and ready to dump and blend.
- Other things I like these freezer containers for are to put homemade soups into for quick lunches or dinners. Find lots of soup recipes here to try. Take them out of the freezer and run a little bit of warm water over them, and dump into a pan to warm back up.
- Prep some cut-up veggies for easy stir-fry mixes. Freeze and dump into a pan with your favorite teriyaki or stir fry sauce for an easy and healthy meal later. This idea is also great for leftover veggies. If you need half and onion for a recipe, cut up the whole onion and add half to one of these containers, do the same with some peppers, and you you have a great Fajita mix ready to go for later.
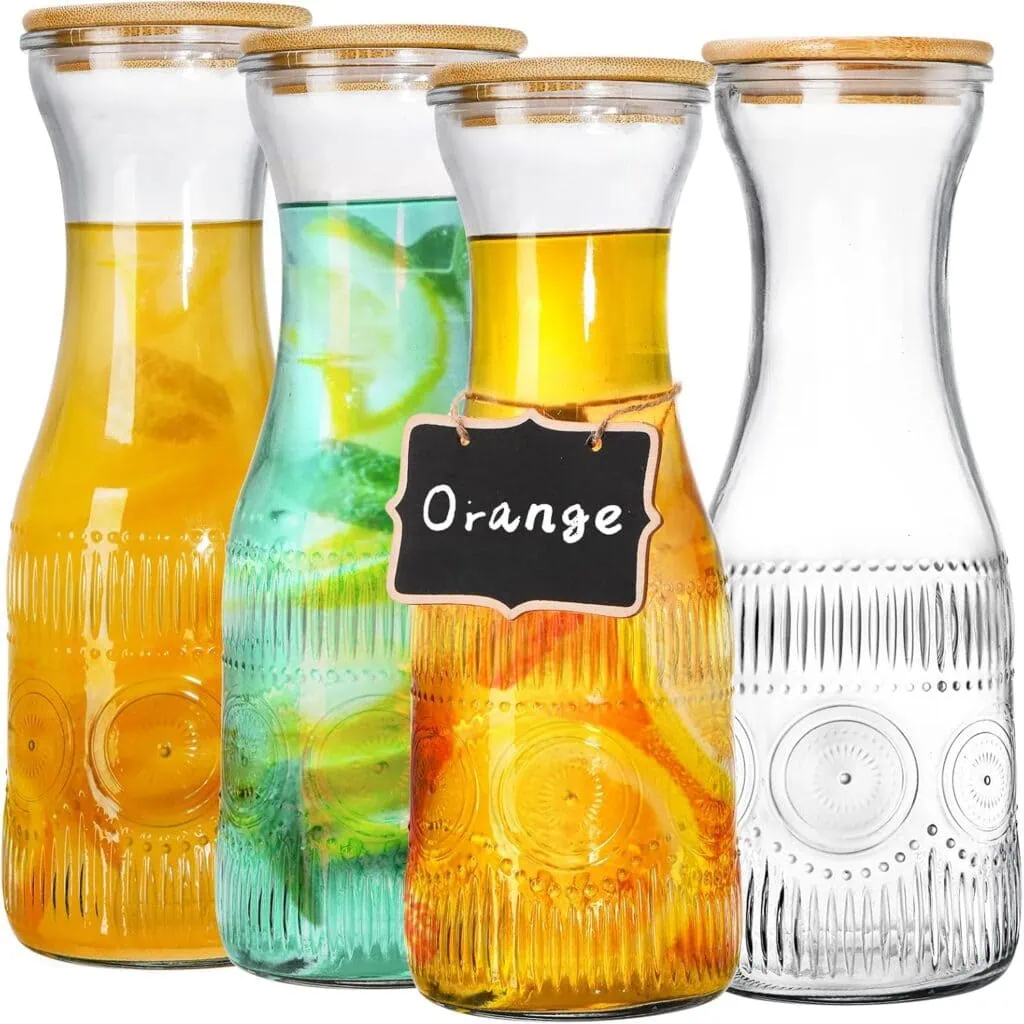
This 4-pack works out to about $6 per carafe after the coupon.
Making Fun Flavored Drinks That Are Not Full of Sugar
And a simple idea for beverages is to use something like these carafes with lids to make infused waters, or unsweetened iced teas. I also keep one in my fridge with iced coffee that I make a couple of times a week. That way, I have some fun drinks to choose from that are not full of sugar but feel like they are special to drink.
Some of my favorite combos for infused water are:
- Add lemon or lime (or both to one carafe
- Add sliced cucumbers, or do cucumbers + honeydew + mint
- Add orange slices + ginger slices
- Add sliced strawberries or raspberries, plus a few lemon slices and mint or basil leaves
For iced tea, some ideas are:
- Lemon slices
- Your favorite berries
- Mango slices
For iced coffee I make this Mexican Mocha Creamer that the kids can add to the iced coffee in the morning.
Those are just a few of my personal favorites, but there are so many options based on your taste preferences.
Involve Your Family In The Planning Process
This may sound obvious, but I found that I was buying things based on what I used to know about what my family liked, and I was limiting us by doing that. As I was making healthier items more accessible, their tastes were changing, and they were open to trying more things than I gave them credit for. Weekly, I just ask them to text me a couple of things they would like to try that week that are healthy. It may sound crazy to ask them to “text” me, but for us, that gave them time to think about it and look around, and took the pressure off of them to think of something on the spot – and I was getting more ideas out of them that way. Including them in the planning process, not only makes it more likely I get more items they will eat, but it also sets them up to do it on their own as they launch into their own lives.
Asking my kids for feedback on what they liked, or did not, or what they would like to try has really helped me to get healthy options into the house that actually get eaten. This was not just about the food options, but also about how I was storing them (or packaging them) too. For example, I have some older containers that I have always used to store my leftovers in. They are opaque and not really very see-through, so the kids could not easily see what was in them, and the reality is that whatever I put in those containers usually stayed in them, unless I pulled it out. By getting clear containers that the kids can see through, and know what is in each one, it really increases the odds that they will grab it and eat it.
That is why almost all of the container ideas I share here are clear. The jewel-toned vintage glass ones were too pretty not to share, and if you are storing the same food in those over and over, they will come to know what it is. But in general, being able to easily see your food in the fridge makes it more likely it will get used, in my experience. My kids will go through phases where they eat a lot of one thing for awhile, and then stop for awhile, and some foods are better seasonally (like certain fruits and vegetables), so it also allows me to pay attention to what is getting finished off, and what seems to be sticking around longer in the fridge, so I can alter my shopping based on this.
And remember…
The best way to be successful with this, in my experience, is to start small. Pick one or two ideas you like, and implement those. You can add on from there and modify things as you see what is working or not working for your family.
Be sure to follow us on LTK for more ideas, and find all of the ones we shared here!