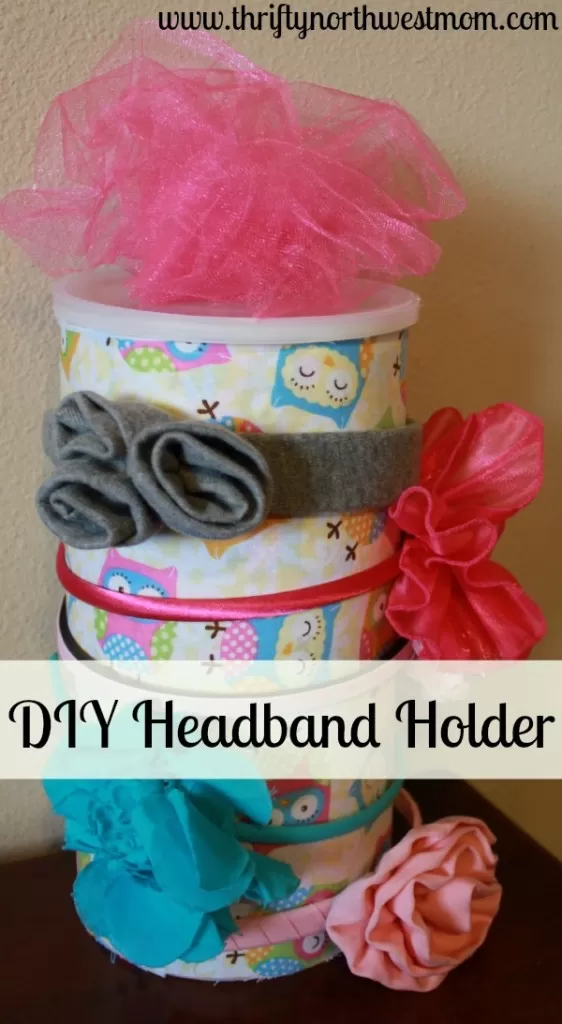
DIY Headband Holder using Oatmeal Container
This post may contain affiliate links and I may be compensated for this post. Please read our disclosure policy here.
I am not a DIY or crafty person at all – but we had learned how to make a cute headband holder at our MOPS group last year and I finally got brave enough to try it. Believe me, if I can do this, you can too! It was so easy and very inexpensive, too!
This was a great addition to my daughters’ bedroom when I did a Girls Bedroom makeover & reorganized their bedroom on a small budget. Make sure to also check out my DIY Hair Bow Holder, too.
Supplies needed:
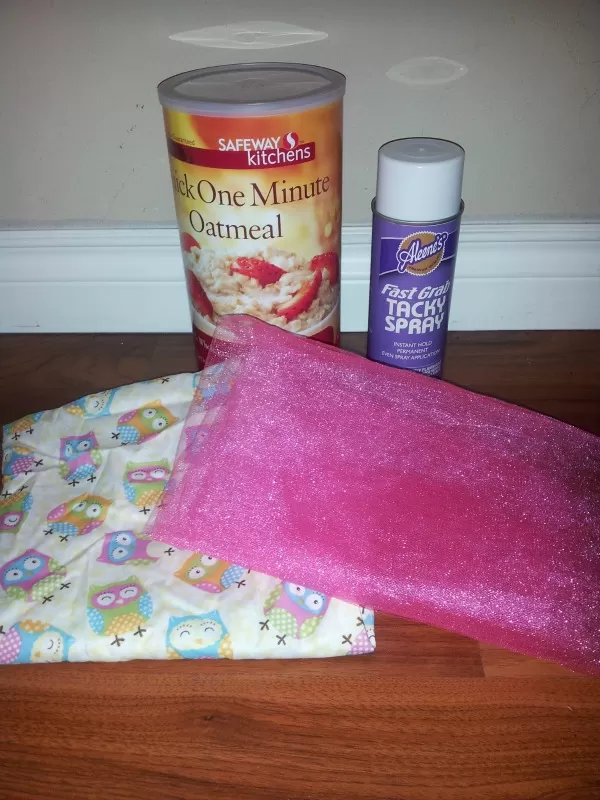
- Empty oatmeal container – I paid $2.50 for a container of generic oats from Safeway (you could get this cheaper with coupons & sales)
- Fabric of your choosing – use fabric you already have or buy fabric at Joann or Michael’s using one of their regular 40% off coupons
- OR use pretty 12″ x 12″ scrapbook paper – this would be even cheaper and so many fun options to try!
- Spray Adhesive – you need a good spray glue to hold the fabric – the clerk at Joann’s recommended Alene’s Tacky Spray to me or you could just use a glue gun, too.
- Tulle for top (optional)
- Cool candlestick base (optional) – I was looking for weeks for a cool wooden, wide candle holder but haven’t found anything yet, but when I do, I’ll use E-6000 to add it to the bottom to make it a little fancier looking.
Instructions:
1. Empty oatmeal container & clean it out
2. Measure the fabric or scrapbook paper to fit the size of the oatmeal container all the way around.
3. Use the spray adhesive to spray one end of the fabric (or use your glue gun & put the glue on the end of the fabric). Place the fabric on the oatmeal container & make sure it is in the right place & straight.
4. Then use spray adhesive or glue gun to go all the way around the oatmeal container and wrap the paper or fabric all the way around the container. Trim off any excess.
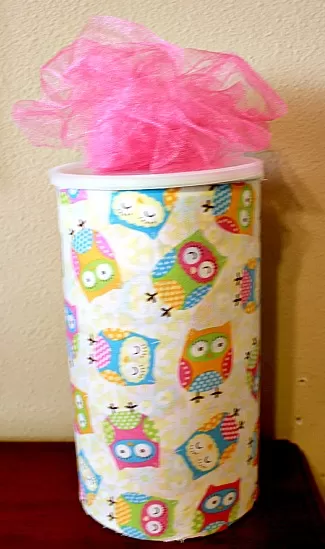
3. Let it dry & voila – you are done! It’s as simple as that!
Optional:
- Add tulle or a big flower to the top of the container lid for a little more pizazz (the tulle is a bit harder to work with – I tried using a glue gun to attach & it made quite a mess with the tulle, so just be careful to only get the glue on the bottom of the tulle)
- Use a glass candlestick base (find these at the Dollar Store) or find a wood candlestick base to make this look a little fancier.
Let us know if you make a DIY Headband Holder – we’d love to share pictures of what your headband holder looks like to give folks even more inspiration!


